
Abaca, a natural fiber harvested from a relative of the banana plant native to the Philippines, offers scrapbookers an exquisite, textured medium to elevate their memory books. Incorporating this durable, organic material into your layouts adds tactile depth and a rustic, tropical elegance that standard cardstock cannot replicate. Whether you are using delicate, translucent abaca paper sheets or raw, earthy fibers, mastering a few basic preparation, cutting, and adhesive techniques will ensure your handmade layouts remain beautiful and intact for years to come.
As a beginner, working with handmade natural fibers can feel intimidating compared to using uniform, machine-made papers. However, understanding the unique physical properties of abaca allows you to work with its natural characteristics rather than fighting against them. By selecting the right tools, choosing compatible adhesives, and applying thoughtful design principles, you can seamlessly blend this traditional material into modern scrapbooking projects.
Identifying the Right Abaca Materials for Your Layout
Before purchasing materials, it is essential to understand the different forms of abaca available to crafters. Processed abaca paper is typically sold in sheets, rolls, or pre-cut shapes, ranging from tissue-thin, translucent webs to thick, heavy-textured boards. Raw abaca fiber, on the other hand, is usually found as loose strands, woven mesh, or twisted twine. Matching the material form to your specific layout goals prevents unnecessary bulk and ensures your design remains cohesive.
Products mentioned in this guide
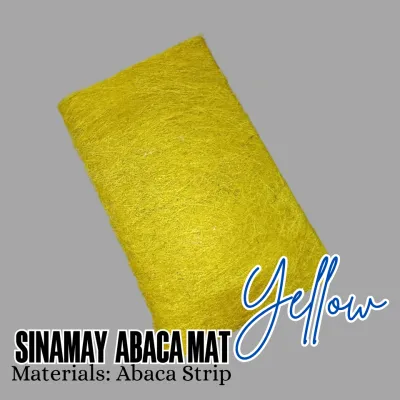
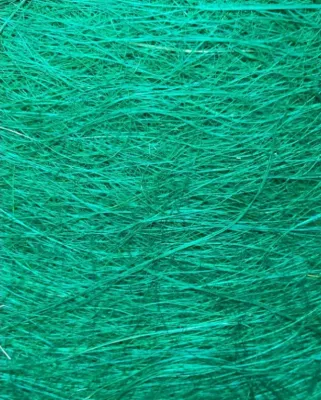
Prices are valid at publication and may change. Please refer to the product page for the latest price.
When planning your scrapbook pages, always consider the physical constraints of your album binding and page protectors. Thick, heavily textured abaca sheets or bulky woven meshes can add significant depth to a page, making it difficult to slide into standard plastic sleeves. If you use top-loading page protectors, opt for lightweight abaca paper sheets or flat, pressed die-cuts that provide texture without excessive height. For traditional post-bound or ring-bound albums without plastic sleeves, you have more freedom to use thicker fibers, though you must still ensure the album can close flat without warping the adjacent pages.
Handmade abaca sheets possess distinct physical characteristics that vary from batch to batch. Before making any cuts, hold the paper up to the light to observe its natural color variations, thickness inconsistencies, and organic inclusions, such as visible bark fragments or raw fiber clumps. These irregularities are not defects; rather, they are the defining features of authentic handmade paper. Planning your layout around these unique spots can highlight the organic beauty of the material, such as positioning a photo mat over a slightly thinner section to let a colored background peek through.
Choosing Tools and Adhesives for Textured Fibers
Working with highly textured, porous materials like abaca requires a specialized approach to adhesives. Standard glue runners and light double-sided tapes, which work perfectly on smooth cardstock, often fail to grip the uneven surface of fibrous paper. For lightweight abaca sheets, a high-quality, acid-free liquid craft glue applied sparingly with a precision tip or a sponge brush provides a secure bond. For heavier abaca fibers, woven meshes, or thick twine, a strong double-sided tape with a heavy-duty adhesive backing or a specialized multi-purpose craft glue is necessary to keep the elements from lifting over time.

Cutting abaca cleanly requires sharp, high-quality tools to prevent the tough, resilient fibers from fraying or tearing. Standard household scissors often crush or chew through the fibers rather than slicing them, leaving messy, ragged edges. Invest in a pair of specialized micro-tip scissors with hardened steel blades for detailed work, or use a fresh, sharp blade in your utility or craft knife. When using a craft knife, always work on a self-healing cutting mat, apply firm, even downward pressure, and make multiple light passes along a metal ruler rather than trying to force the blade through the tough fibers in a single stroke.
Because thin or highly textured abaca sheets can be delicate and semi-translucent, they often benefit from a stabilizing backing before being mounted onto your main layout. Adhering a fragile piece of abaca paper to a sheet of sturdy, acid-free cardstock of a coordinating color provides structural support and prevents the adhesive from seeping through the open pores of the fiber. This backing technique also enhances the visibility of the abaca’s texture, as the solid background color behind the translucent fibers makes the intricate patterns of the handmade paper stand out.
Practical Techniques for Adding Abaca to Your Pages
Integrating abaca into your scrapbook layouts can be done in several creative ways, depending on whether you want a subtle background texture or a bold, three-dimensional embellishment. By experimenting with different manipulation techniques, you can discover how this versatile fiber responds to shaping, tearing, and layering.
Layering and Matting
Using abaca paper as a textured background or photo mat is one of the simplest ways to introduce the material to your pages. Cut a piece of abaca paper slightly larger than your focal photograph or journaling block, and layer it directly underneath. The organic, fibrous border creates a striking visual contrast against the smooth, glossy surface of a photo or the clean lines of printed text. To prevent the photo from warping due to the uneven texture of the abaca, mount the photo onto a thin piece of cardstock first, then adhere that cardstock mat to the abaca layer.
Tearing and Distressing
Instead of cutting clean, straight lines, try tearing the edges of your abaca paper by hand to highlight its long, resilient internal fibers. To achieve a controlled, rustic deckled edge, lightly wet the paper along your desired tear line using a fine-tipped water brush or a damp cotton swab. Let the water soak in for a few seconds to soften the fibers, then gently pull the paper apart. This technique exposes the beautiful, feathery abaca strands, creating a soft, organic frame that adds immediate visual interest and a handmade feel to your layout.
Embellishing with Fiber
Raw abaca twine and loose strands offer endless possibilities for three-dimensional embellishments. You can wrap earthy abaca twine around the spine of a booklet insert, tie simple knots or bows to anchor tag elements, or weave loose strands through die-cuts and paper punches. For a more structured look, try shaping abaca twine into spirals or geometric patterns on your page, securing them with tiny dots of clear-drying liquid glue. The natural stiffness of the fiber allows it to hold its shape well, providing a durable 3D effect that resists flattening.
Best Practices for Writing and Journaling on Abaca
Adding handwritten stories or stamped designs directly onto abaca paper requires careful preparation due to the material’s high porosity and uneven surface. Because handmade papers absorb liquids differently than standard stationery, direct application of ink can lead to unexpected bleeding, feathering, or fading.
Before writing or stamping on your layout, always perform a test on a scrap piece of the exact same abaca paper. Use the same pens, markers, or stamping inks you plan to use on the final page, and observe how the ink behaves. Note whether the ink spreads along the fibers (feathering), how long it takes to dry completely, and whether the color remains vibrant or becomes dull as it sinks into the paper. This simple trial prevents ruined layouts and helps you select the most compatible writing instruments.
If you find that liquid inks or standard dye-based stamp pads bleed excessively into the porous abaca fibers, switch to pigment-based ink pads or archival pigment pens. Pigment inks contain solid color particles that sit on top of the paper fibers rather than soaking deep into them, resulting in sharper lines, minimal feathering, and richer color retention. When stamping on textured abaca, apply firm, even pressure without rocking the stamp, and allow extra drying time, as pigment inks dry slower on textured surfaces.
For highly textured or very thin abaca sheets where direct writing is impractical or illegible, write your journaling on a separate piece of smooth cardstock, vellum, or kraft paper. Once the ink is dry, cut or tear the smooth paper and mount it over the abaca sheet. This layered approach ensures your handwritten memories remain perfectly legible while still allowing the beautiful texture of the abaca to frame and highlight your words.
Troubleshooting Common Crafting Mistakes
Working with natural, handmade materials often involves a learning curve, but most common mistakes are easily avoided or corrected with a few simple adjustments.
One of the most frequent errors beginners make is applying excessive liquid glue to adhere abaca paper. Because handmade paper is highly absorbent and lacks the synthetic binders of commercial cardstock, excess moisture can cause the paper to warp, wrinkle, or develop unsightly wet spots that remain visible even after drying. To prevent this, apply liquid glue in thin, even lines or dots, or use a dry adhesive like double-sided tape or a glue runner designed for delicate papers.
Another common issue is frayed or loose fibrous edges catching on plastic page protectors when sliding the layout into an album. Over time, this friction can pull the fibers loose or damage the edges of your design. To prevent this, keep highly fibrous or loose elements slightly away from the outer edges of your page, or seal the edges of the abaca lightly with a matte medium or a thin layer of clear-drying craft glue to bind the loose strands together before inserting the page.
Finally, always step back and assess your layout as you work to ensure the heavy texture of the abaca does not overpower your main focal points. The primary goal of scrapbooking is to preserve and highlight your photographs and memories, not to bury them under heavy embellishments. If you find that the coarse texture of the abaca is distracting from a delicate photo, scale back the size of the abaca elements, use a smoother grade of paper, or add a solid cardstock border to separate the photo from the textured background.
Frequently Asked Questions (FAQ)
Does abaca paper require special storage conditions?
Yes, because abaca is a natural, organic fiber, it is more sensitive to environmental changes than synthetic or highly processed papers. To preserve your scrapbooks, store them in a cool, dry environment with stable humidity levels. Excess moisture in tropical climates can weaken the natural fibers, cause the paper to warp, or promote the growth of mold and mildew. Additionally, keep your albums away from prolonged exposure to direct sunlight, as UV rays can cause natural dyes and raw fibers to fade, yellow, or become brittle over time.
Can I combine physical abaca with printed digital layouts?
Absolutely. Combining physical abaca with digitally designed and printed scrapbook pages is an excellent way to create hybrid layouts. You can design and print your base page, photos, and journaling on standard, smooth cardstock using your home printer, then layer physical abaca paper scraps, twine, or woven mesh on top to add tactile, three-dimensional interest. Alternatively, you can scan physical abaca sheets at a high resolution to create digital texture overlays for your digital designs, ensuring the intricate fiber details are visible even when printed flat on standard photo paper.
Community discussion
Share your experience or ask a question. Comments are reviewed before publication.