
Setting up your first Midori Traveler’s Notebook can feel overwhelming due to the sheer variety of sizes, paper types, and accessories available. To build the ideal setup, you must first select a cover size that matches your daily mobility, choose paper inserts tailored to your writing instruments, and connect them securely using elastic bands without straining the leather spine. This modular system allows you to carry a planner, a sketchbook, and a journal all in one compact package, adapting dynamically to your changing routine. By understanding how the components interact, you can create a highly personalized, functional tool that lasts for years.
What size and cover style should you choose for your daily planning needs?
You should choose between the Regular and Passport sizes based on whether you prioritize maximum writing space or pocket-sized portability. The Regular size is ideal for detailed daily planning and desk work, while the Passport size excels as a quick on-the-go companion.
The Regular size cover measures approximately 220 mm by 120 mm, designed to fit standard slim inserts of 210 mm by 110 mm. This format provides ample vertical space for weekly schedules, long-form journaling, and detailed task lists. It fits comfortably in a backpack, messenger bag, or tote, making it highly suitable for professionals and students in the Philippines who commute with a bag and need a substantial writing surface.
Products mentioned in this guide
18 Lazada user ratings
Arrived earlier as expected, clean and without damage. Thank you seller for shipping early and packaging it well!
Quality: amazing Design: basic and utilitarian Price: high but worth it if on sale
great qualityy! so happy I finally have my midori note yahoo
legit. nicely packed, very secured.
Prices are valid at publication and may change. Please refer to the product page for the latest price.
The Passport size cover measures approximately 134 mm by 105 mm, holding compact inserts of 124 mm by 89 mm. This pocket-sized option is perfect for quick checklists, travel logs, and capturing immediate thoughts while on the move. It slips easily into a jacket pocket or a small clutch, taking up minimal space on crowded cafe tables or during quick transits.
Both sizes feature raw, vegetable-tanned leather covers that exhibit unique natural markings. Initially, the leather may feel somewhat stiff and show light scuffs or a matte finish. Over time, the cover undergoes a natural break-in process, absorbing oils from your hands, developing a rich patina, and softening to mold around the thickness of your chosen inserts. This aging process is a key characteristic of the notebook, turning every scuff and scratch into a personal record of your journeys.
Which paper types and insert formats work best for your specific planning style?
Selecting the right paper types and insert formats depends on whether you prefer structured layouts for scheduling or open spaces for free-form sketching and note-taking. Matching your writing tools, such as fountain pens or gel pens, to the correct paper weight ensures a smooth writing experience without ink bleeding through the pages.

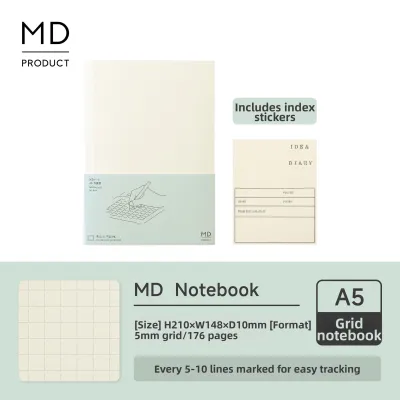
For general writing and sketching, you can choose from several ruling styles. Grid paper, typically featuring a 5 mm grid, and dot grid paper are excellent for bullet journaling, drawing diagrams, and keeping your handwriting aligned. Lined paper is best for traditional journaling and structured text entry, while blank paper offers complete freedom for sketching, mind mapping, and unconstrained brainstorming.
When selecting planner formats, consider your scheduling density. Monthly inserts offer a broad overview of deadlines and events, which is ideal if you have a low volume of daily appointments. Weekly layouts, available in horizontal or vertical formats, work well for time-blocking and tracking weekly goals. Daily inserts provide the maximum space possible, giving you a full page for detailed task lists, hourly tracking, and daily reflections.
Midori notebooks typically feature high-quality MD Paper, known for its smooth texture and ink resistance. However, because ink formulations and pen nib sizes vary, you should perform an observable trial test on a back page of your insert. Check for feathering, where the ink spreads along the paper fibers, and bleed-through, where the ink soaks completely to the other side. Also observe ghosting, which is the shadow of the writing visible on the reverse side, to ensure the paper weight matches your preferred fountain pens or gel pens.
How do you physically install and connect multiple inserts without damaging the spine?
To install multiple inserts safely, you thread the first booklet through the notebook’s built-in central elastic band and link additional booklets together using separate connecting bands. This method distributes tension evenly, preventing the leather spine from warping or the elastics from snapping.
To install a single insert, open the booklet to its center page where the staples or threads are visible. Slide the booklet under the main elastic band attached to the leather cover until the band rests snugly in the center fold. This keeps the booklet centered and secure within the leather cover.
To connect two inserts, you will need a separate connecting band, which is a thin, durable elastic loop. Open both booklets to their center pages and place them side-by-side. Wrap the connecting band vertically around the adjacent halves of both booklets so they are joined at their spines. Next, slide one of the connected booklets under the main cover elastic. The tension of the main elastic will hold both booklets securely in place against the spine.
To connect three inserts, place the first booklet directly under the main cover elastic as you would for a single setup. Take the second and third booklets, open them to their centers, and join them together with a connecting band. Slide this joined pair behind the first booklet, threading them through the main elastic so that the band holds the entire bundle balanced.
Avoid packing four or more standard inserts into a single cover. Doing so causes “alligator mouthing,” where the cover cannot close properly, exposing the edges of your paper inserts to wear and tear. It also puts excessive stress on the spine and stretches the elastic bands permanently. Limiting your setup to three standard inserts maintains a balanced, protective cover.
What accessories and brass clips actually improve your notebook's functionality?
Useful accessories like brass clips, zipper cases, and pen holders improve your notebook’s functionality by keeping pages flat, storing loose items, and keeping your writing instrument close at hand. Selecting lightweight, durable add-ons prevents your notebook from becoming overly bulky or difficult to carry.
Brass clips are designed to clamp onto the edge of the leather cover and the paper pages, holding the notebook flat on your desk. Because raw leather and thick inserts tend to spring closed, a sturdy clip is highly practical for hands-free writing. When choosing a clip, ensure it has smooth, rounded edges to avoid tearing or leaving permanent indentations on delicate paper.
Storage inserts expand the utility of your notebook beyond simple writing. Vinyl zipper cases slide into the cover like a regular insert, providing secure storage for receipts, business cards, stamps, or small stationery items. Kraft paper pocket folders offer quick-access slots for tickets, loose notes, and stickers, keeping your loose papers organized without adding significant weight.
Pen holders clip onto the side of the leather cover, keeping your writing instrument securely attached to your notebook. Verify that the loop size matches the diameter of your preferred pen, as some loops are designed for slim pencils while others accommodate thick fountain pens. You can also thread decorative charms onto the bottom of the spine elastic, but keep these embellishments lightweight to avoid throwing off the balance of the notebook or scratching the leather when packed in a bag.
How should you organize your layout and sections for a seamless daily workflow?
Organizing your layout logically involves placing your high-frequency planning inserts at the front of the notebook and your long-term reference or sketching inserts toward the back. This sequence minimizes the time spent flipping through pages and creates a natural transition from daily tasks to creative reflection.
For a highly functional daily workflow, arrange your inserts in a logical sequence. Place your monthly or weekly calendar insert at the very front so that your immediate schedule and task lists are instantly accessible when you open the cover. Position your daily logs, meeting notes, or active project trackers in the middle, and place blank or grid inserts for sketching, brainstorming, or long-term journaling at the back.
Since modular inserts do not have pre-printed page numbers, you can create a simple index on the first page of each booklet. Use removable sticky flags or color-coded tabs along the outer margins to mark active projects, monthly overviews, or specific reference sections. This allows you to jump directly to the page you need without disrupting your workflow or searching through multiple booklets.
As an insert fills up, remove it from the elastic system, label the cover with the date range, and archive it on a shelf. Replace it with a fresh insert, transferring only essential ongoing tasks or reference lists. This regular rotation keeps your daily carry light, focused, and perfectly aligned with your current projects.
Community discussion
Share your experience or ask a question. Comments are reviewed before publication.