
Quick Answer: Which Marker Type Fits Your Project?
Choosing the right coloring materials set depends on your artistic goals, your preferred paper, and your working environment. If your primary goal is to create professional-grade illustrations, seamless color gradients, and vibrant, streak-free layers, alcohol-based markers are the ideal choice. Their quick-drying ink allows you to blend colors smoothly, though they require thick, bleed-resistant paper to perform at their best.
Conversely, if you are looking for a versatile option for bullet journaling, adult coloring books, calligraphy, or children’s school projects, water-based markers are highly recommended. They do not bleed through standard paper, are virtually odorless, and can even be blended with water to create beautiful watercolor-like washes. By identifying your project type and skill level first, you can select a coloring materials set that matches your creative workflow and budget.
Core Differences: Ink Formulation and Paper Interaction
To understand why these two marker types behave so differently, you must look at their underlying ink chemistry. Every marker consists of colorants (either dyes or pigments) suspended in a liquid solvent. The type of solvent used determines how the ink flows, how fast it dries, and how it interacts with the fibers of your paper.
Products mentioned in this guide

Prices are valid at publication and may change. Please refer to the product page for the latest price.

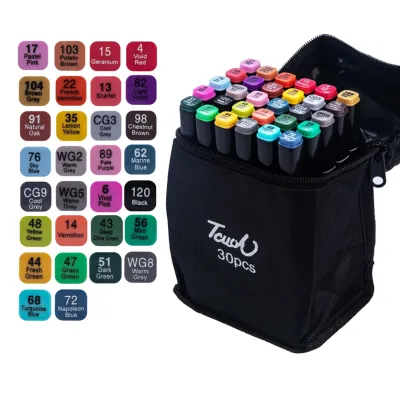
Alcohol-based markers utilize an isopropyl or ethanol solvent. This alcohol carrier evaporates incredibly fast once applied to a surface. Because of this rapid evaporation, the ink dries almost instantly, which minimizes the risk of smudging. However, in warm or tropical climates where indoor humidity can fluctuate, this fast drying time means you must work efficiently when blending colors before the solvent completely evaporates. Chemically, alcohol is an organic solvent that easily penetrates paper sizing and sinks deep into the paper fibers. This deep penetration is what causes the ink to bleed through to the back of the sheet, requiring specialized paper to contain it.
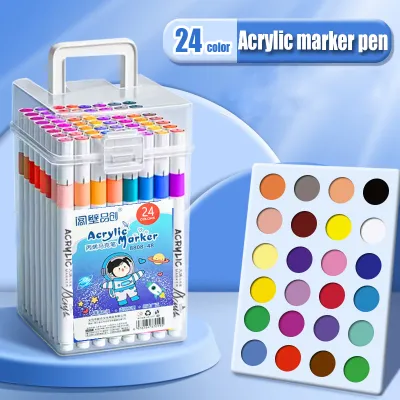
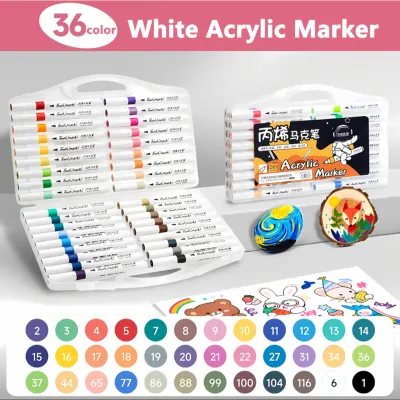
Water-based markers, on the other hand, use water as their primary solvent, often combined with a small amount of glycerin to keep the tips from drying out too quickly. Water takes significantly longer to evaporate than alcohol. In highly humid environments, this drying process slows down even further, leaving the paper wet for a longer period. Instead of sinking deep into the fibers and bleeding through, water-based ink tends to sit closer to the surface of the paper. However, because water naturally softens cellulose fibers, overworking an area with multiple layers of water-based ink will cause the paper to warp, stretch, or “pill”—a frustrating phenomenon where the surface of the paper breaks down into tiny, fuzzy paper balls.
Because of these distinct physical behaviors, each marker type requires a specific paper pairing to achieve optimal results:
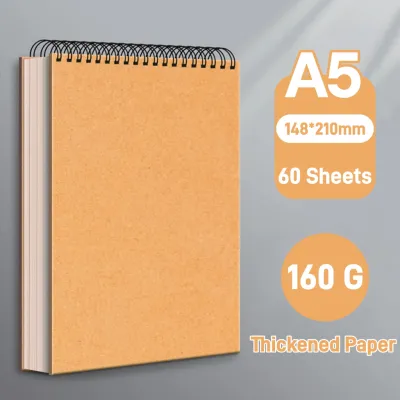
- Alcohol Marker Paper: Requires a smooth, heavy cardstock (typically 200 GSM or higher) or specialized bleed-proof marker paper. Bleed-proof paper features a ultra-thin plastic or chemical coating on the back of the sheet that prevents the alcohol solvent from passing through, keeping your desk clean and preserving the ink on the page.
- Water-Based Marker Paper: Works well on standard notebook paper, mixed-media paper, or heavy watercolor paper. If you plan to use water-based markers for blending or watercolor effects, a textured watercolor paper (around 300 GSM) is ideal, as it is designed to absorb water without warping or pilling.
Blending and Layering Capabilities
For many artists and hobbyists, the ability to blend colors and create smooth gradients is the single most important factor when choosing a coloring materials set. The two marker types handle color mixing in fundamentally different ways, dictating the style of art you can produce.
Alcohol markers are celebrated for their superior blending capabilities. When you apply an alcohol marker to paper, the solvent temporarily wets the paper fibers. If you apply a second color adjacent to or over the first color while the paper is still damp, the alcohol solvent reactivates the first layer of ink. This allows the dye particles from both markers to physical mix and flow together, creating a perfectly seamless, streak-free gradient. You can also use a colorless blender—a marker filled with pure alcohol solvent and no color—to push pigment around, soften harsh edges, or fade colors out to a clean white. This makes alcohol markers highly effective for rendering realistic skin tones, smooth skies, and dimensional shading.
Water-based markers do not blend seamlessly on their own. Because the water solvent does not reactivate dry ink in the same fluid manner, laying down overlapping strokes of water-based markers typically results in distinct, hard edges and visible streak lines. If you try to blend two water-based colors by coloring over them repeatedly, you risk oversaturating the paper, which leads to immediate paper tearing and pilling rather than a smooth color transition. However, water-based markers offer a unique alternative: they are highly water-soluble. You can scribble the ink onto a non-porous plastic palette, mix it with a damp paintbrush, and apply it to your paper just like traditional watercolors. This allows for beautiful, loose washes and soft background gradients, though it lacks the precise, controlled blending of alcohol-based alternatives.
To determine the limits of your specific coloring materials set, you can perform a simple, observable trial on your chosen paper before starting a project:
- The Gradient Test: Draw a solid block of color, then immediately attempt to blend a lighter shade into it. Observe how quickly the colors merge and whether the boundary line disappears.
- The Layering Limit Test: Draw a small square and continuously layer the same color over it up to five times. Watch for signs of paper distress, such as surface pilling, warping, or severe feathering (where the ink spreads outward along the paper fibers like tiny spiderwebs).
Project Suitability: What Each Marker Type Does Best
To get the most value out of your coloring materials set, it is helpful to match the chemical strengths of each marker type to the specific creative projects you plan to undertake.
Best Uses for Alcohol-Based Markers
Alcohol-based markers are the industry standard for professional illustration, character design, manga and comic book art, fashion illustration, and industrial design. Their ability to lay down large areas of flat, streak-free color makes them perfect for rendering clean, polished graphics that look as if they were printed digitally.
Because of their fast drying times and permanent ink, they are also excellent for coloring on non-porous surfaces such as plastics, metal, shrink film, and coated sticker paper. However, because the ink is highly prone to bleeding through paper, you must establish a dedicated workspace. Always place a silicone protective mat, a plastic sheet, or several sheets of scrap cardstock underneath your coloring page to protect your tabletop from permanent ink stains.
Best Uses for Water-Based Markers
Water-based markers excel in everyday organization, journaling, and light crafting. They are the preferred choice for bullet journaling (bujo) and planner decoration because they do not bleed through to the opposite side of the page, allowing you to utilize every single sheet of your notebook.
They are also highly popular for modern calligraphy, hand lettering, and card making. Many water-based sets feature flexible nylon brush tips that behave like real paintbrushes, allowing you to create beautiful thick and thin strokes by varying your hand pressure. Because the ink is water-soluble, easy to clean off skin and furniture, and entirely odorless, water-based sets are also the safest and most practical option for children’s school projects, family crafting sessions, and casual coloring books.
Practical Considerations: Odor, Maintenance, and Longevity
Beyond artistic performance, everyday usability factors like smell, maintenance routines, and storage requirements will heavily impact your overall experience with your coloring materials set.
Odor and ventilation are major differentiators. Because alcohol markers rely on chemical solvents, they emit a distinct, sharp alcohol smell during use. If you are working in a small, enclosed room—especially an air-conditioned room during a hot afternoon—the fumes can quickly become overpowering. It is highly recommended to use alcohol markers in a well-ventilated space or near an open window. Water-based markers are virtually odorless and non-toxic, making them comfortable to use for hours at a time in any indoor environment without needing special ventilation.
Proper maintenance is essential to prevent your investment from drying out prematurely. Alcohol markers are incredibly sensitive to air exposure; leaving a cap off for even ten to fifteen minutes can dry out the nib completely. When you finish using an alcohol marker, always push the cap on firmly until you hear a distinct “click” sound, indicating an airtight seal. Water-based markers are slightly more forgiving if left uncapped briefly, but they still require secure capping to preserve their lifespan.
Storage orientation is another critical factor, particularly for dual-tip markers. Many modern coloring sets feature a dual-tip design, such as a fine bullet tip on one end and a broad chisel or brush tip on the other. To maintain consistent ink flow, you should always store dual-tip markers horizontally. If you store them vertically in a cup, gravity will pull the ink down to the bottom tip, leaving the top tip dry and scratchy while the bottom tip becomes oversaturated, bloated, and prone to leaking or blotting when you first touch it to paper.
Side-by-Side Comparison of Marker Features
To help you quickly weigh your options, the table below summarizes the key performance dimensions of alcohol-based and water-based marker sets.
| Feature | Alcohol-Based Markers | Water-Based Markers |
|---|---|---|
| Primary Solvent | Isopropyl or Ethanol Alcohol | Water (often with Glycerin) |
| Blendability | Seamless, streak-free gradients | Hard edges; blends best with water brush |
| Bleed-Through Risk | Very High (requires backing sheet) | Very Low (safe for double-sided pages) |
| Odor Level | Moderate to High (requires ventilation) | Low to None (safe for small spaces) |
| Drying Time | Near-instantaneous | Slow (affected by local humidity) |
| Paper Requirements | Heavy cardstock, bleed-proof paper | Standard notebook paper, watercolor paper |
| Ideal User Level | Intermediate to Professional artists | Beginners, journalers, and children |
| Water Resistance | Permanent once dry | Water-soluble (can be reactivated with water) |
How to Choose Your Coloring Materials Set (Decision Framework)
To finalize your purchasing decision, evaluate your creative goals against these clear, actionable criteria.
Choose an alcohol-based marker set if:
- Your primary projects involve detailed character illustrations, manga, or realistic blending.
- You are willing to invest in specialized bleed-proof marker pads or heavy cardstock.
- You have a dedicated, well-ventilated creative workspace where chemical odors are not an issue.
- You want a permanent ink that can write on non-paper surfaces like plastic or wood.
Choose a water-based marker set if:
- You plan to use them for bullet journaling, planners, or double-sided coloring books.
- You are interested in hand lettering, modern calligraphy, or watercolor-style painting.
- You need a low-odor, non-toxic set that is safe for children or shared family spaces.
- You prefer a budget-friendly option that works beautifully on standard notebook paper.
Verify these factors before purchasing your set:
- Tip Type: Check if the set features brush tips, chisel tips, or fine bullet tips. Brush tips are highly versatile for blending and calligraphy, while chisel tips are excellent for filling in large areas quickly.
- Refillability: Verify if the manufacturer sells individual ink refills and replacement nibs. High-quality alcohol marker sets often allow you to refill the ink and replace worn-out tips, saving you money in the long run compared to buying entirely new sets.
- Color Range: Ensure the set includes a good selection of light, mid-tone, and dark shades within the same color families. Effective blending requires gradual steps between values, so a set with too many highly saturated, contrasting colors will be difficult to blend smoothly.
Frequently Asked Questions (FAQ)
Can you use alcohol and water-based markers together?
Yes, you can combine both marker types in a single project, but you must follow a specific layering order to protect your artwork and your tools. The general rule is to apply your water-based markers first, let the paper dry completely, and then layer your alcohol-based markers on top.
If you attempt to do the reverse—applying water-based ink over a fresh layer of alcohol ink—the water-based marker’s tip can react unpredictably with the alcohol dyes, leading to smudging or color lifting. Furthermore, drawing with a water-based felt or nylon tip over heavy alcohol ink can strip the wax or binder from the paper, clogging and permanently damaging the delicate tip of your water-based marker.
Do alcohol markers bleed through standard notebook paper?
Yes, alcohol markers will almost always bleed through standard notebook paper, copy paper, or thin planner pages (typically 70 to 100 GSM). Because the alcohol solvent is designed to penetrate paper fibers rapidly to distribute the dye evenly, it easily saturated thin sheets and marks the pages underneath.
To mitigate this issue, you can use specialized bleed-proof marker paper, which features a protective barrier coating on the reverse side. If you must work in a standard sketchbook, always place a thick sheet of scrap cardstock, a plastic writing board, or a silicone protective sheet directly behind the page you are coloring. This simple barrier will catch any escaping ink and protect the subsequent pages of your notebook from being ruined.
Community discussion
Share your experience or ask a question. Comments are reviewed before publication.