
Starting your art journey on a drawing board does not require expensive, professional-grade materials. With a strict budget of ₱500, you can easily assemble a highly functional starter kit that allows you to practice shading, form, and perspective effectively. The key to success lies in smart allocation: prioritizing a decent paper surface and a few essential drawing tools over large, redundant pencil sets. By understanding how different materials interact and how to verify their quality, you can avoid common beginner pitfalls and get the most value out of every peso.
When practicing on a drawing board, your paper, pencils, and accessories must work as a unified system. A board provides a stable, angled surface that changes how you apply pressure, making paper stability and pencil lead durability critical. This guide will help you navigate the selection process, manage your budget on local ecommerce platforms, and build a reliable kit tailored to the humid tropical climate of the Philippines.
Setting Your ₱500 Budget Priorities for Drawing Board Practice
To make the most of a ₱500 budget, you must allocate your funds based on what directly impacts your learning. A common mistake is spending ₱300 on a massive 24-piece pencil set, leaving only ₱200 for low-quality paper and no budget for fixing tools. Instead, aim for a balanced ratio: allocate approximately 40% (₱200) to your paper or sketchbook, 40% (₱200) to your core drawing tools like graphite and charcoal, and the remaining 20% (₱100) to essential accessories like erasers and board clips.
Products mentioned in this guide
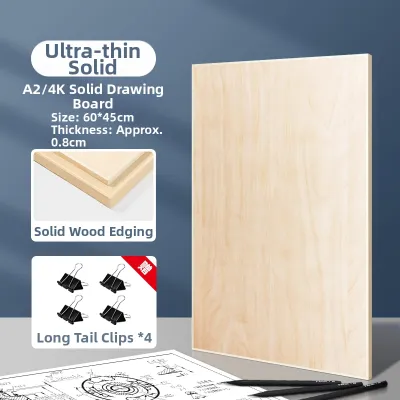
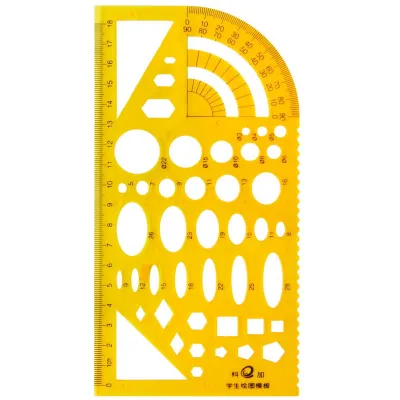
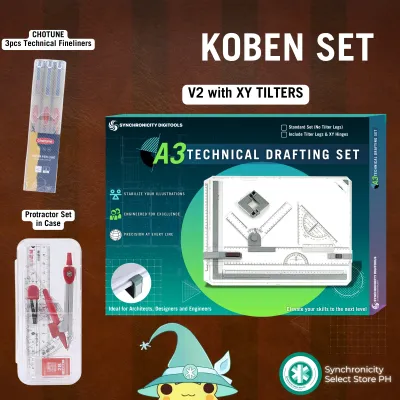
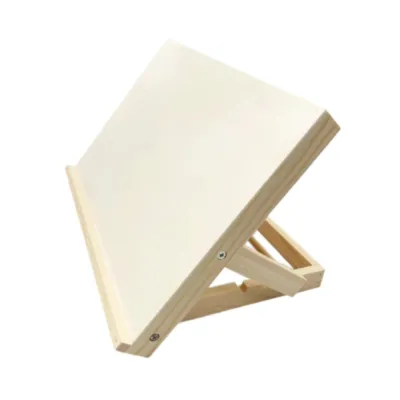
Prices are valid at publication and may change. Please refer to the product page for the latest price.
Your paper is the foundation of your work; if it is too thin or smooth, it will not hold charcoal dust or multiple layers of graphite, regardless of how expensive your pencils are. For drawing board practice, prioritize a minimum paper weight of 100 to 120 grams per square meter (GSM). For your drawing tools, a minimal range of graphite hardness—such as a 2B, 4B, and 6B pencil—is entirely sufficient for foundational shading. This small selection covers light sketching, mid-tones, and deep shadows without the unnecessary cost of a full professional set.
If your initial online shopping cart exceeds the ₱500 limit, look for areas where you can compromise or substitute. For instance, you can delay buying a dedicated blending stump and use cotton swabs or clean tissue paper instead. If a spiral-bound sketchbook is too expensive, look for loose-leaf drawing paper packs or glue-bound pads, which often offer more sheets for a lower price. Keeping your cart flexible allows you to adjust for shipping fees while maintaining the quality of your core materials.
Choosing the Right Sketchbook or Paper for Your Drawing Board
Selecting the right paper format is crucial for a seamless drawing board experience. Your paper must physically fit your board with enough clearance around the edges for mounting. Standard drawing boards in local art classes often accommodate A4 (210 x 297 mm) or A3 (297 x 420 mm) sizes, as well as 9×12 inch pads. Before purchasing, measure your drawing board’s usable area and ensure your chosen paper leaves at least an inch of space on all sides so you can easily secure it with clips or tape.

The tropical climate in the Philippines introduces unique challenges for paper storage and usability. High relative humidity can make thin paper absorb moisture rapidly, causing it to sag, warp, or buckle when attached to a drawing board. To combat this, look for paper with a weight of at least 120 GSM, which offers better structural integrity under humid conditions. Additionally, pay close attention to the paper’s “tooth” or surface texture. A medium-tooth paper is ideal because it provides enough friction to grab and hold loose charcoal particles and graphite layers, whereas ultra-smooth paper will cause graphite to slide and create an undesirable metallic shine.
Binding type also plays a major role in how comfortably your paper rests on the board. Spiral-bound sketchbooks are excellent because they fold back completely flat, but the metal coils can sometimes interfere with the board’s built-in clips or edge clamps. Glue-bound pads allow you to tear sheets out cleanly, giving you a perfectly flat piece of paper to tape directly to the board. If you prefer keeping your work together, a top-bound spiral sketchbook is often the most practical compromise, as the coils remain at the top of the board, completely out of the way of your drawing hand.
Selecting Sketch Pencils and Charcoal Within Budget
You do not need a vast array of pencils to learn how to draw. A highly effective starter set consists of just three graphite pencils: a 2B for initial light sketching and layout lines, a 4B for mid-tones and general shading, and a 6B or 8B for deep, rich shadows. This limited range forces you to master pressure control, which is a fundamental skill for any artist. When shopping on budget-friendly online marketplaces, look for small, curated three-to-four-piece sets or purchase individual open-stock pencils from reputable student-grade brands to keep costs low.
Introducing charcoal to your kit adds a completely different dimension to your drawing board practice. Charcoal allows for rapid tonal coverage and deep, matte blacks that graphite cannot achieve. For beginners, a single medium-grade charcoal pencil offers the best balance of control and cleanliness, minimizing the mess of loose dust. If you want to practice expressive, loose gestures, a small pack of natural vine charcoal sticks is highly affordable and easy to erase, though it requires a textured paper to adhere properly. Compressed charcoal sticks provide intense darks but are harder to erase, so they are best introduced once you are comfortable with basic values.
When browsing budget drawing supplies, be vigilant against common red flags that indicate low-quality manufacturing. Unbranded pencil sets in generic tin boxes often feature off-center graphite cores, which lead to constant breakage during sharpening. If the product description does not clearly state the hardness grades or uses vague terms like “extra dark” without standard scale markings (such as HB, 2B, or 4B), it is best to avoid them. Brittle leads and rough, scratchy wood casings will frustrate your practice and quickly waste your budget as you repeatedly sharpen away broken tips.
Essential Accessories and Hidden Costs to Verify Before Checkout
Securing your paper to the drawing board is essential to prevent shifting while you work. Standard metal binder clips are highly durable and inexpensive, making them a favorite for drawing board beginners. However, ensure the clips have a wide enough jaw capacity to clamp onto both your board and paper pad without leaving deep, permanent dents in the wood or acrylic surface. Alternatively, a roll of low-tack paper masking tape is an excellent, budget-friendly choice; it holds the paper edges flat and peels away cleanly without tearing your drawing, provided you remove it slowly at an angle.
Erasing and blending tools are just as important as the pencils themselves. A standard plastic eraser is great for clean, hard edges, but a kneaded eraser is indispensable for charcoal and graphite work. Kneaded erasers can be molded into custom shapes to lift highlights from tight areas, and they absorb charcoal dust without leaving messy crumbs on your board. For blending, instead of buying expensive paper stumps, you can easily use cotton pads, makeup sponges, or even your fingertips—though the natural oils on your skin can sometimes make graphite harder to erase, so clean paper tissues are generally preferred.
Before finalizing your order on any ecommerce platform, carefully calculate the total cost including shipping fees. Shipping costs in the Philippines can vary significantly depending on your location and whether the items are coming from a single seller or multiple warehouses. To stay strictly under ₱500, try to purchase your sketchbook, pencils, and eraser from the same online storefront to consolidate shipping. Look out for minimum spend vouchers, shop-specific discounts, and free shipping promotions, which can easily save you ₱50 to ₱100—money that can be reinvested into a slightly better grade of paper.
Building and Adjusting Your Starter Kit Strategy
To help you visualize how to assemble your cart, here is a baseline kit template designed to maximize value while staying under the ₱500 limit. Start with a 120 GSM A4 sketchpad (approximately ₱150 to ₱180), a small set of three student-grade graphite pencils in 2B, 4B, and 6B (around ₱90 to ₱120), a single medium charcoal pencil (around ₱40 to ₱60), a kneaded eraser (around ₱30 to ₱50), and a small roll of masking tape or two medium binder clips (around ₱30 to ₱50). This combination provides a complete, highly compatible system for drawing board practice.
If you find that shipping costs or price fluctuations push your total over ₱500, apply simple downgrade rules to bring the cost back down. Your first adjustment should be switching from a spiral-bound sketchbook to a pack of loose-leaf drawing paper or a simple glue-bound pad, which instantly lowers the price without sacrificing paper quality. You can also opt to buy just two pencils—a 2B and a 6B—instead of three, as you can easily achieve mid-tone values with the 6B by using a lighter touch. Never compromise on the paper weight; dropping below 100 GSM to save a few pesos will result in tearing and frustration.
Before clicking the checkout button, perform a final verification of your cart. Check the seller’s ratings and read recent customer reviews to ensure they package items securely, as sketchbooks can easily get bent corners during transit. Verify that the paper dimensions match your drawing board and that the pencil grades are clearly specified in your order. By taking a few minutes to double-check these details, you can confidently secure a high-quality, budget-friendly starter kit that will support your artistic growth.
Frequently Asked Questions (FAQ)
Can I use regular printer paper on a drawing board for charcoal practice?
Regular printer paper is not suitable for charcoal practice because it lacks the necessary surface texture, or tooth, to hold loose charcoal particles. The smooth surface causes charcoal dust to slide off easily, resulting in faint, smudged drawings that do not retain detail. Additionally, printer paper is typically very thin (around 70 to 80 GSM), making it highly susceptible to tearing when you use an eraser or try to blend your work.
Do I need a specific type of drawing board for these beginner supplies?
You do not need an expensive, specialized drawing board to start practicing. A simple, smooth piece of medium-density fiberboard (MDF), plywood, or acrylic sheet works perfectly. The most important factor is ensuring the board’s surface is completely flat and free of texture that could transfer onto your paper. Additionally, check that the board’s edges are thin enough to accommodate standard binder clips or that the surface is compatible with masking tape.
How do I prevent charcoal from smudging in a budget sketchbook?
When fixative sprays are outside your budget, you can prevent smudging by placing a sheet of smooth tracing paper, greaseproof baking paper, or glassine paper between the pages of your sketchbook. This protective layer acts as a barrier, preventing the charcoal from transferring to the opposite page when the book is closed. Additionally, store your sketchbook flat in a dry place, and avoid sliding the pages against each other when transporting your drawing board kit.
Community discussion
Share your experience or ask a question. Comments are reviewed before publication.