
A complete perler beads set kit for beginners must contain five essential components: midi-sized (5mm) fuse beads in a diverse color selection, reusable and heat-resistant pegboards, non-stick translucent ironing paper, fine-tip precision tweezers, and a set of clear visual patterns. Having these specific items ensures that anyone starting out can seamlessly transition from arranging the beads to safely fusing them with a household iron.
Selecting the right starter kit is the difference between a relaxing, creative afternoon and a frustrating mess of spilled plastic. While many packages on the market boast high bead counts, the quality of the tools and the distribution of colors determine how usable the kit actually is. Evaluating these components beforehand saves time and prevents common crafting mishaps.
Quick Answer: What a Beginner Perler Beads Kit Must Include
To ensure a frustration-free introduction to the craft, a beginner perler beads set kit needs to function as a self-contained ecosystem. The absolute baseline setup requires midi-sized fuse beads, at least one durable pegboard, heat-resistant ironing paper, precision tweezers, and simple pattern templates. Without any one of these five elements, the crafting process halts, forcing you to make secondary purchases before you can complete your very first design.
Products mentioned in this guide
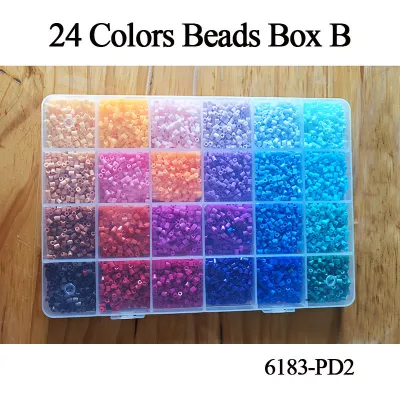
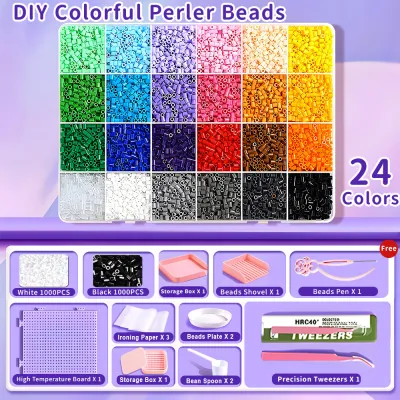
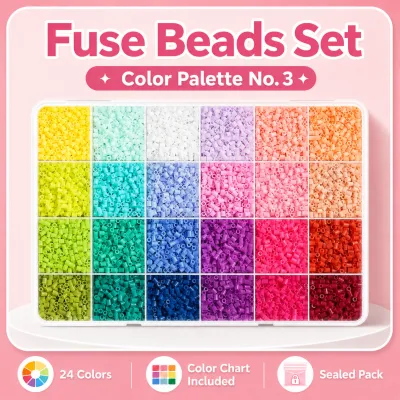
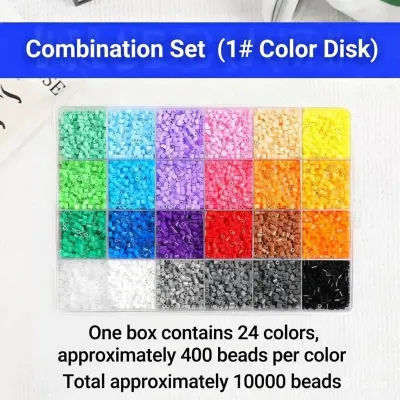
Prices are valid at publication and may change. Please refer to the product page for the latest price.
Beyond merely checking off these items on a list, the proportions within the kit matter immensely. A high-quality starter kit balances its total bead count with a wide and practical color distribution. Beware of kits that advertise tens of thousands of beads but only supply three or four basic colors, or worse, pack all the colors together in a single unsorted tub. A well-designed kit provides pre-sorted compartments with a generous selection of primary, secondary, and neutral shades, allowing you to build recognizable figures immediately.
Component Checklist: How to Evaluate Kit Quality Before Buying
Before purchasing a kit from an online marketplace or local craft store, examining the specifications of each individual component is crucial. Low-quality plastics and fragile tools can lead to uneven melting, warped pegboards, and dropped beads. Understanding what to look for in each accessory ensures your investment leads to successful, durable creations.

Fuse Beads (Size, Material, and Color Distribution)
For general beginners, midi beads measuring approximately 5mm in diameter are the industry standard. This size is large enough to handle easily with basic tweezers or fingers, yet small enough to allow for relatively detailed designs. Avoid mini beads (2.5mm) for your first kit, as they require advanced fine motor skills and extreme patience, while maxi beads (10mm) are generally reserved for toddlers developing basic coordination.
The material of the beads dictates how safely and evenly they melt. High-quality fuse beads are manufactured from food-grade Low-Density Polyethylene (LDPE) or Polyethylene (PE). These materials are non-toxic, acid-free, and melt consistently at medium household iron temperatures without releasing harsh, acrid chemical odors. In the humid tropical climate of the Philippines, low-grade plastics can degrade or become slightly sticky if exposed to ambient moisture over time, making durable PE beads the superior choice for long-term storage.
Color distribution is another critical quality marker. A misleading tactic among budget kits is advertising a massive volume, such as “15,000 beads,” while filling 80% of the container with cheap white, black, or grey filler beads. A functional beginner kit should offer a balanced palette of at least 12 to 24 distinct colors, with equal proportions of each. Furthermore, look for kits that present these colors in pre-sorted, partitioned trays; sorting thousands of mixed beads by hand before you can even begin crafting is a tedious chore that quickly dampens enthusiasm.
Pegboards (Shapes, Reusability, and Interlocking Features)
The pegboard serves as the foundation for your bead designs, holding each piece in place before heat is applied. Beginners should look for kits that include at least one standard square pegboard and one geometric or fun shape, such as a heart, star, or hexagon. Square boards are highly versatile because they accommodate grid-based pixel art, which comprises the vast majority of online beginner patterns.
Durability and heat resistance are paramount when evaluating pegboards. During the ironing process, heat transfers through the beads to the board below. Cheap, thin plastic pegboards will warp or melt after just one or two uses, bending the pegs and rendering the board useless. Opt for pegboards made from thick, rigid, heat-resistant plastics like polycarbonate. Clear or transparent pegboards are especially helpful for beginners, as they allow you to slide a printed pattern directly underneath the board and simply place the matching beads over the corresponding colors.
As your skills progress, you will naturally want to attempt larger, more complex designs. This is where interlocking pegboards become invaluable. These boards feature small tabs and slots along their edges, allowing you to connect multiple square boards together to create a massive crafting surface. Choosing a kit with interlocking boards ensures your tools can grow alongside your capabilities, saving you from buying entirely new sets later.
Ironing Paper and Tweezers (Safety and Precision Tools)
Ironing paper is the protective barrier placed between the plastic beads and your hot iron. The paper included in a good kit must be highly heat-resistant, non-stick, and translucent. Translucency is vital because it allows you to observe the melting process in real-time; you can see the beads fuse and close their center holes without having to lift the paper and risk disturbing the warm plastic. Standard kits include precut sheets of silicone-coated paper or specialized reusable ironing sheets, which can be used dozens of times before losing their non-stick properties.
Precision tweezers are the primary tool used to pick up and position individual beads onto the pegboard pegs. While some budget kits include cheap, blunt plastic tweezers, these often lack the grip tension required to hold a 5mm bead securely, leading to dropped pieces that knock over adjacent beads. Look for kits that supply stainless steel tweezers with fine, angled tips. The angled tip allows for a comfortable hand position and provides the surgical precision needed to correct a misplaced bead deep inside a crowded design without disrupting the surrounding work.
Some premium starter kits also feature helpful bonus tools, such as bead dispensers, scoop pens, or specialized pressing boards. A pressing board or heavy flattening pad is particularly useful; placing it over the hot, newly ironed design helps weight it down evenly as it cools, preventing the edges from curling upward due to temperature changes in air-conditioned rooms.
Recommended Kit Configurations for Different Crafting Goals
Not all beginners approach the hobby with the same goals or budget. Some wish to test the waters with a quick afternoon project, while others want a comprehensive creative outlet for the whole family. Understanding the three primary kit configurations helps you match your purchase to your specific crafting intentions.
| Kit Configuration | Estimated Bead Count | Pegboard Variety | Ideal User Profile | Primary Limitation |
|---|---|---|---|---|
| Basic Starter Kit | 1,000 to 3,000 beads | 1 to 2 small standard boards | Absolute beginners testing the hobby on a budget | Limited color volume; runs out of beads quickly |
| Themed Project Kit | 1,500 to 4,000 beads | 1 shaped board (e.g., animal, vehicle) | Younger crafters who prefer structured, guided steps | Low replay value once specific designs are finished |
| High-Volume Assortment | 5,000 to 10,000+ beads | Multiple interlocking square boards | Dedicated hobbyists and family crafting sessions | Higher initial cost; requires dedicated storage space |
The Basic Starter Kit (Focus on Learning the Technique)
The Basic Starter Kit is designed for individuals who want to experience the mechanics of perler beading without a significant financial commitment. Typically priced between ₱250 and ₱500, these kits provide just enough material to complete three to five small projects. They generally contain a modest assortment of mixed or semi-sorted beads, one small square pegboard, a pair of tweezers, and a few sheets of ironing paper.
The primary advantage of this configuration is its low upfront cost and minimal storage footprint. It allows you to practice the basic placement and ironing techniques without worrying about wasting expensive materials. However, the obvious drawback is the limited design complexity; you will quickly run out of popular colors like black, white, or red, requiring you to purchase replacement bead packs almost immediately if you decide to continue the hobby.
The Themed Project Kit (Focus on Guided Crafts)
Themed Project Kits are highly structured packages centered around a specific subject, such as cartoon characters, animals, holiday ornaments, or keychains. These kits provide pre-sorted bags containing the exact number of beads required to complete the featured designs, along with specialized shaped pegboards and step-by-step visual guides. Many also include accessory hardware like keychain rings, lanyard clips, or adhesive magnets.
This configuration is excellent for younger crafters or individuals who find open-ended design intimidating. The clear instructions and guaranteed color matching ensure satisfying, highly recognizable results with minimal frustration. The trade-off is a lack of creative freedom; once the specified projects are assembled, the unique pegboards and exact bead counts offer very little replay value for original, freeform crafting.
The High-Volume Assortment Kit (Focus on Freeplay and Gifting)
For those who are certain they want to dive deep into the hobby, or for households looking for a shared creative activity, the High-Volume Assortment Kit is the gold standard. These kits feature anywhere from 5,000 to over 10,000 beads organized in a sturdy plastic storage case with individual, adjustable dividers. They also include multiple interlocking pegboards, high-quality metal tweezers, a stack of reusable ironing sheets, and a comprehensive pattern booklet.
While the initial cost is higher—often ranging from ₱800 to ₱1,500—the value per bead is significantly better than smaller kits. The built-in storage container keeps the colors pristine and separated, which is vital for maintaining an organized workspace. The main limitation is the physical space required to store the large organizer box, alongside the necessity of keeping it flat to prevent beads from slipping between compartment dividers if the box is shaken.
Ironing Safety and Fusing Guidelines for Beginners
The fusing process is the most critical step in perler beading, as it permanently bonds the plastic beads together. Because this step requires a hot household iron, safety must always be the top priority. Ironing should always be performed by an adult, or under direct, close adult supervision if younger teenagers are learning the technique.
To achieve a perfect, even melt, follow these step-by-step guidelines:
- Prepare the Iron: Set your household iron to a medium heat setting. Ensure the steam function is turned completely off, and empty any water remaining in the reservoir. Steam introduces moisture into the beads, which can cause uneven melting, bubbling, and trapped water spots that ruin the plastic's structural integrity.
- Position the Paper: Place your design on a flat, stable, heat-resistant work surface. Carefully lay a sheet of translucent ironing paper flat over the beads, ensuring all edges of the design are covered. Avoid shifting the paper horizontally, which can knock the beads off their pegs.
- Apply Heat Gently: Place the warm iron flat onto the paper-covered design. Using light, even pressure, move the iron in continuous, slow circular motions. Do not hold the iron stationary in one spot, as this will quickly overheat the plastic, melting the beads into a flat puddle and damaging the underlying pegboard pegs.
- Monitor the Melt: Watch the design through the translucent paper. As the beads heat up, they will begin to melt slightly and adhere to the paper, becoming clearly visible through the sheet. For a standard melt, stop when the center holes of the beads begin to close but remain visible. For a "flat melt," continue until the holes are completely sealed.
- Cool Under Weight: Carefully peel the ironing paper away while the design is still warm. To prevent the hot plastic from warping or curling as it cools—a common issue in humid environments—immediately place a heavy, flat object, such as a thick textbook or a heavy cutting board, directly onto the fused design. Leave it weighted down for at least 5 to 10 minutes until the plastic is completely cool to the touch.
Red Flags: What to Avoid When Shopping for Your First Kit
When browsing online marketplaces, many budget-friendly perler bead kits appear identical on the surface. However, several common red flags indicate a low-quality product that will likely lead to a disappointing experience. Recognizing these warning signs saves you from wasting money on unusable materials.
First, avoid any kit that recommends using standard household wax paper instead of proper silicone-coated ironing paper. Wax paper has a very low melting point; the wax coating will melt directly onto your iron’s soleplate and transfer onto the beads, leaving a sticky, ruined mess that is incredibly difficult to clean. Genuine kits will always supply high-quality parchment or silicone-treated sheets.
Second, steer clear of “jumbo” or “mega” kits that do not include a partitioned storage solution. Receiving a bag of 10,000 completely mixed beads might seem like a bargain, but sorting them by color is an exhausting process that takes hours. Without a divided container, you will spend more time searching for specific colors than actually designing, which quickly drains the fun out of the craft.
Third, verify that the pegboards included in the kit are standard sizes and configurations. Some off-brand kits feature proprietary peg spacing or oddly shaped pegs that are incompatible with standard 5mm replacement beads from major brands. This limitation locks you into buying their specific, often inferior, replacement supplies. Stick to kits that explicitly state compatibility with standard 5mm midi beads to ensure you can easily expand your collection later.
Finally, be cautious of kits featuring highly intricate, massive patterns that are marketed as “beginner-friendly.” True beginner patterns should fit comfortably on a single 14×14 or 29×29 pegboard. Complex designs that require joining multiple boards together or using advanced shading techniques are best saved for when you have mastered basic heat control and placement speed.
Frequently Asked Questions (FAQ)
Can I use regular baking parchment instead of the included ironing paper?
Yes, standard household baking parchment paper is an excellent and safe alternative if you run out of the ironing paper provided in your kit. Ensure the parchment paper is plain and completely uncoated (do not use wax paper). Baking parchment is highly heat-resistant and non-stick, allowing you to fuse the beads smoothly. However, because it is often thicker and less translucent than specialized craft paper, you will need to lift the iron occasionally to check the progress of the melt.
What is the difference between mini, midi, and maxi beads?
These terms refer to the physical diameter of the fuse beads, each catering to different age groups and skill levels. Maxi beads are the largest, measuring around 10mm, and are designed for toddlers to develop basic motor skills without a choking hazard. Midi beads are the standard 5mm size, offering the perfect balance of detail and ease of handling for general beginners. Mini beads measure 2.5mm and are intended for advanced, detailed adult pixel art, requiring steady hands and fine tweezers.
Do I need a special craft iron to melt the beads?
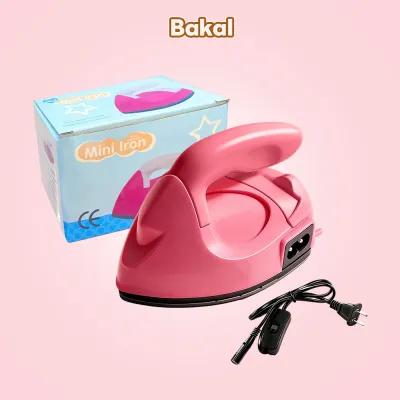
No, you do not need to purchase a specialized craft iron to enjoy perler beading. A standard household clothes iron works perfectly well. The most important factor is ensuring the iron’s steam function is turned completely off and any remaining water is emptied from the tank. Additionally, make sure the soleplate of the iron is clean and free of any burnt starch or fabric residue before you begin, as these impurities can transfer heat unevenly or stain your ironing paper.
Community discussion
Share your experience or ask a question. Comments are reviewed before publication.