
A complete beginner should start with a student-grade oil painting color set containing a limited palette of 6 to 12 essential colors, including primary mixing shades, basic earth tones, and ample white. This approach prevents the overwhelm of managing dozens of tubes, encourages the foundational skill of color mixing, and keeps initial costs manageable. Rather than chasing massive kits with unnecessary accessories, focusing on a high-quality, compact selection of core pigments provides the most effective and frustration-free entry into oil painting.
In tropical environments like the Philippines, where high humidity and warm temperatures can influence how materials behave, starting with a streamlined setup is particularly practical. Managing a smaller number of paint tubes makes it easier to keep your workspace clean, organized, and free of excess clutter that can attract dust or moisture. By focusing on a few versatile colors, you can master the unique handling characteristics of oil paint—such as its slow drying time and buttery consistency—before expanding your collection.
Why a Limited Color Palette Accelerates Learning
When first exploring oil painting, the temptation to purchase a massive wooden box filled with 24 or 36 different colors is strong. However, managing a large number of tubes introduces significant cognitive load and physical clutter to your workspace. Instead of focusing on brushwork, paint application, and value control, you find yourself searching through dozens of tubes, trying to decide which specific shade of green or purple to use. This decision paralysis can slow down your painting process and make the learning curve feel unnecessarily steep.
Products mentioned in this guide
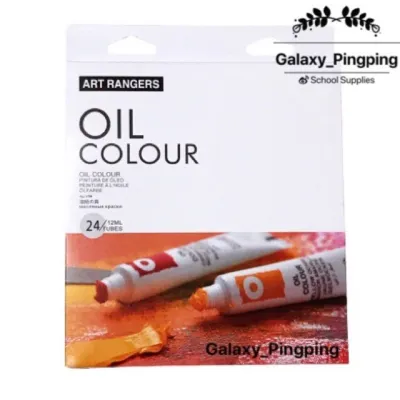
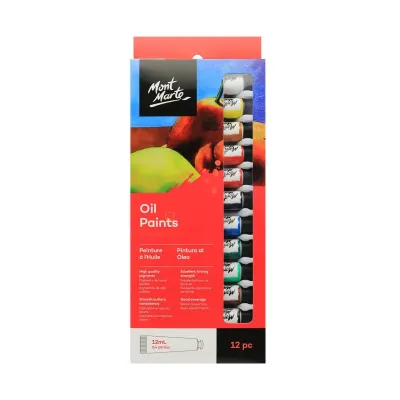
Prices are valid at publication and may change. Please refer to the product page for the latest price.
A limited palette forces you to practice the essential skill of color mixing. When you only have a warm and cool version of each primary color, you must actively think about how to create secondary and tertiary shades. For example, you will quickly learn that mixing a warm blue with a warm yellow produces a very different green than mixing a cool blue with a cool yellow. This hands-on experimentation builds a deep, intuitive understanding of color temperature, value, and chroma that you simply cannot develop if you rely on pre-mixed convenience colors.
Furthermore, a smaller color selection is highly cost-efficient and reduces paint waste. Oil paint is a premium medium, and squeezing out small dollops of 24 different colors on a palette often leads to unused paint drying out and going to waste. In warm climates, paint left on an open palette can develop a tough skin over a few days, making it unusable. By working with a compact set of 6 to 12 colors, you can squeeze out only what you need, keep your palette organized, and focus your budget on higher-quality paints rather than a high quantity of unused shades.
The Essential Color Checklist for Your First Set
A reliable starter oil painting color set does not need to be expensive, but it must contain the right foundational pigments. When evaluating different sets, look for those that utilize a split-primary system, which includes a warm and a cool version of each primary color, along with essential earth tones and neutrals. This configuration allows you to mix almost any color in the visible spectrum without creating muddy results.

The non-negotiable workhorse of any oil painting set is Titanium White. Because you will use white to tint almost every mixture and control values, you will go through it much faster than any other color. Ensure your starter set includes a generous tube of Titanium White, or consider purchasing an extra individual tube alongside your set. For dark values, a small amount of Ivory Black or Mars Black is useful, though beginners should use black sparingly to avoid making mixtures look dull or dirty.
For your primary colors, look for a set that includes the following split-primary pairs:
- Reds: A warm red (such as Cadmium Red Hue) which has yellow undertones, and a cool red (such as Alizarin Crimson Hue) which has blue undertones.
- Yellows: A warm yellow (such as Cadmium Yellow Medium Hue) and a cool yellow (such as Lemon Yellow).
- Blues: A warm blue (such as Ultramarine Blue) and a cool blue (such as Phthalo Blue or Cerulean Blue Hue).
In addition to primaries, a starter set must include key earth tones for natural shading, underpainting, and sketching. Yellow Ochre is indispensable for warm, natural tones in landscapes and portraiture. Burnt Umber is equally critical; its fast-drying properties make it the ideal choice for sketching your initial composition on the canvas and blocking in deep shadow values.
Avoid sets that are heavily padded with pre-mixed secondary colors like green, purple, or orange. While these convenience colors seem helpful, they take up space that could be occupied by essential mixing pigments. Learning to mix your own greens and oranges from your primary colors is a foundational step that will make you a much more confident painter.
Student-Grade vs. Professional-Grade: Finding the Right Balance
As a beginner, navigating the distinction between student-grade and professional-grade oil paints is crucial for balancing your budget with a functional painting experience. Professional-grade paints feature a high concentration of pure pigment suspended in a minimal amount of binder, usually refined linseed or safflower oil. This high pigment load results in intense color saturation, excellent coverage, and a rich, buttery consistency. However, professional paints are significantly more expensive, with prices varying widely depending on the rarity of the pigment used.
For those just starting out, reputable student-grade lines are the standard recommendation. These paints are formulated with lower pigment concentrations and contain organic fillers or synthetic substitutes to keep production costs down. While they may require slightly more paint to achieve the same color intensity as professional lines, they behave similarly enough to allow you to practice essential techniques like blending, glazing, and impasto. Using student-grade paint also removes the pressure of wasting expensive materials, allowing you to experiment freely on canvas boards or paper.
When selecting a student-grade set, always check the tube labels for quality indicators. Reputable manufacturers print pigment codes and lightfastness ratings directly on the packaging. Pigment codes consist of letters and numbers (such as PW6 for Titanium White or PB29 for Ultramarine Blue) that identify the exact chemical pigments used. Lightfastness ratings, often indicated by Roman numerals (I for excellent, II for very good) or ASTM standards, tell you how resistant the paint is to fading when exposed to light over time. Avoid sets that omit these details, as they are often low-quality products that may crack, fade, or discolor quickly.
Paint-Only Sets vs. All-in-One Kits: Which Should You Buy?
When shopping for your first oil painting color set, you will encounter two main options: paint-only sets and all-in-one kits that bundle paints with brushes, palettes, solvents, and small easels. While all-in-one kits appear to offer excellent value and convenience, they often involve significant quality trade-offs that can hinder your progress.
The accessories included in cheap, mass-market kits are frequently of low quality. The brushes often feature stiff, synthetic bristles that shed hairs into your wet paint or lose their shape after a single cleaning session. The included palettes are often small, flimsy plastic trays that do not provide enough surface area for proper color mixing. Furthermore, the solvents and mediums bundled in these kits may be low-grade or highly aromatic, which can be unpleasant and unsafe to use in poorly ventilated home environments.
For serious, long-term practice, a paint-only set is almost always the better investment. By purchasing a dedicated set of quality student-grade paints, you can allocate the rest of your budget toward sourcing a few reliable brushes (such as a size 4 flat and a size 6 filbert) and a proper mixing surface, such as a glass sheet or a disposable paper palette. This approach ensures that every tool you use supports your learning rather than causing frustration.
An all-in-one kit only makes sense if you are purchasing a casual gift for someone who wants to try the medium once, or if you have absolutely zero art supplies and want a quick, low-friction way to experiment. If you do choose a bundled kit, look for those produced by established art brands rather than generic toy manufacturers, as the paint quality in brand-name kits is much more reliable.
Your Online Shopping Checklist for Oil Paint Sets
E-commerce platforms and online marketplaces offer a vast selection of oil painting color sets, but they also host many low-quality or misleading products. To ensure you receive a set that is suitable for actual canvas work, use this practical verification checklist before making a purchase:
- Verify Tube Sizes: Many budget-friendly sets online feature miniature 12ml tubes. These tubes contain very little paint and will run out quickly, especially the white and primary colors. Look for sets that offer at least 21ml tubes, or ideally, standard 37ml tubes, which provide enough volume for multiple painting sessions.
- Check for Specific Pigment Names: Avoid sets that use generic color names like "Dark Blue," "Bright Red," or "Brown." Reliable sets will list specific pigment names, such as Ultramarine Blue, Cadmium Red Hue, or Burnt Sienna, indicating that the manufacturer uses standard art pigments.
- Look for Safety Warnings and Seals: Oil painting involves chemical pigments and binders. Ensure the product description or packaging images display safety certifications, such as the AP (Approved Product) non-toxic seal. This is especially important if you plan to paint in a shared living space or around family members.
- Avoid Unbranded "Toy-Grade" Sets: Suspiciously low prices are a major red flag. Unbranded sets marketed as "multi-purpose" or "all-in-one" paints often use cheap binders that do not dry properly, leading to sticky surfaces that attract dust or paint films that crack within weeks. Stick to established art supply brands with a proven track record.
- Confirm Seller Authenticity: When shopping on online marketplaces in the Philippines, purchase from official brand stores or authorized art supply distributors. This reduces the risk of buying counterfeit products, expired stock, or paints that have been stored in improper, high-heat conditions that can separate the oil binder from the pigment.
Frequently Asked Questions (FAQ)
Do I need to buy extra mediums or solvents with the set?
Yes, you will need to purchase a basic solvent and a medium separately, as most starter oil painting color sets do not include these liquids. Solvents, such as odorless mineral spirits, are essential for thinning your paint for the initial layers of your painting and for thoroughly cleaning your brushes. Mediums, such as refined linseed oil, are used to increase the fluidity, gloss, and transparency of the paint in later layers. Because these liquids are subject to strict shipping and safety regulations, they are rarely bundled in standard paint sets. Look for a small bottle of high-quality odorless mineral spirits and a basic linseed oil at a local art supply store to complete your setup.
How long does it take for student-grade oil paints to dry?
Oil paint dries through a slow chemical process called oxidation, rather than the evaporation of water. Generally, student-grade oil paints take anywhere from three days to more than a week to become dry to the touch, depending on the thickness of the paint layer and the specific pigments used. Earth tones like Burnt Umber dry very quickly, often within 24 hours, while whites and yellows dry much slower. In warm, humid tropical climates like the Philippines, high humidity can occasionally slow down the drying process, while warm ambient temperatures can accelerate it. Beginners should avoid using hair dryers or placing paintings in direct, intense sunlight to speed up drying, as excessive heat can cause the paint film to wrinkle, yellow, or crack.
Community discussion
Share your experience or ask a question. Comments are reviewed before publication.