
The best acrylic marker pens for beginners in the Philippines balance smooth paint flow, rich opacity, and easy control without a steep learning curve. For those with a flexible budget, premium valve-action water-based markers offer the most reliable, clog-free performance on diverse surfaces like canvas, wood, and plastic. For casual crafters or students looking for high-volume practice, budget-friendly water-based sets available on local online marketplaces provide an affordable entry point.
Because acrylic paint behaves differently depending on the texture and porosity of your chosen medium, selecting the right pen involves understanding nib designs and ink formulations. Whether you want to customize canvas tote bags, paint beach pebbles, or detail wooden crafts, starting with the right tools ensures your creative projects are satisfying rather than frustrating. By matching your markers to your specific project needs and practicing proper pen maintenance, you can easily master this vibrant, fast-drying medium.
What to Look for in a Beginner-Friendly Acrylic Marker
Nib Types and Control
Nib shape dictates how paint is applied to your medium, directly affecting your control over line thickness. The three most common shapes are bullet (round), chisel (flat), and brush. For beginners, fine-to-medium bullet nibs (typically ranging from 1.0mm to 3.0mm) are highly recommended. Bullet nibs distribute pressure evenly, making them behave very similarly to standard writing pens or fine-liners. This structural familiarity allows novices to maintain consistent line weight and control without needing to master the variable pressure required by brush tips or the precise angles of chisel tips.
Products mentioned in this guide

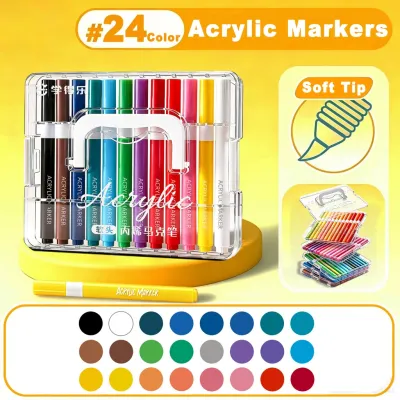
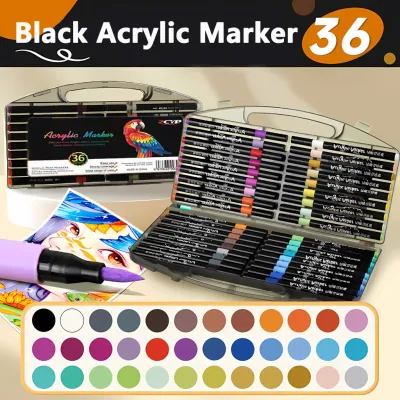
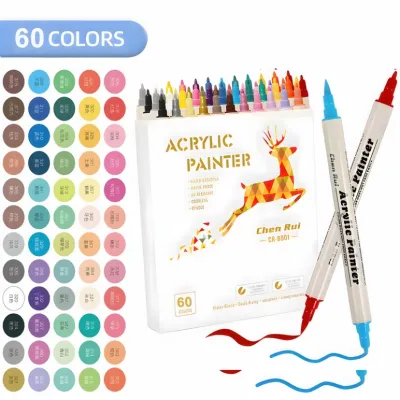
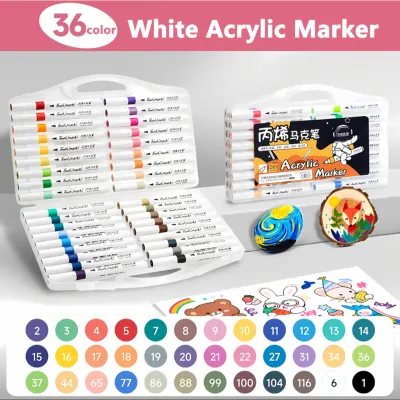

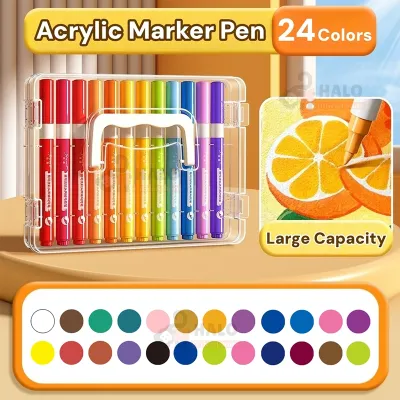
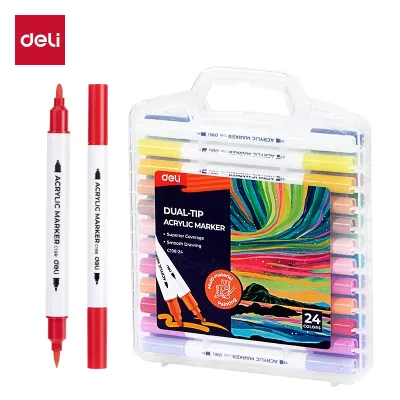
Prices are valid at publication and may change. Please refer to the product page for the latest price.
Ink Flow and Priming Mechanisms
Acrylic paint is naturally thick, which is why markers use specific internal mechanisms to keep the ink flowing smoothly. You will generally choose between valve-action (pump) markers and standard felt-tip (capillary) markers. Valve-action markers feature an internal ball bearing and a spring-loaded valve. Shaking the pen and pressing the nib down pumps paint into the tip, giving you excellent control over paint flow while preventing the ink inside the reservoir from drying out prematurely. Standard felt-tip markers rely on capillary action to pull thinner ink to the tip; while they require no priming, they are more prone to drying out and often lack the rich, thick opacity of valve-action alternatives.
Opacity and Surface Versatility
The defining characteristic of a great acrylic marker is its opacity. High-quality markers contain a high concentration of premium pigments suspended in an acrylic polymer emulsion, drying to a solid finish that can completely cover underlying colors. Beginners should prioritize highly opaque markers because they work seamlessly across multiple surfaces—including paper, canvas, wood, terracotta, glass, plastic, and metal—without requiring multiple tedious coats. A marker with poor opacity will look streaky and translucent, which can make layering colors frustrating.
Water-Based vs. Solvent-Based
Acrylic markers are formulated with either a water base or a solvent base (such as oil or alcohol). For beginners, water-based acrylic markers are the undisputed standard. They are virtually odorless, non-toxic, and incredibly easy to clean up with water while the paint is still wet. This makes them ideal for indoor use in typical Philippine homes, especially during the rainy season when keeping windows wide open for ventilation is not always practical. Solvent-based markers, while highly durable, emit strong chemical fumes, require chemical solvents for cleanup, and can easily bleed through standard paper.
Top Acrylic Marker Picks for Beginners in the Philippines
The Reliable Benchmark (Mid-to-Premium Range)
When searching for the absolute benchmark of quality in the art community, premium Japanese water-based paint markers (such as the Uni Posca series) set the standard. These markers utilize a highly sophisticated, spring-loaded valve mechanism and contain a water-based pigment ink that is completely odorless, lightfast, and water-resistant once dry. The build quality of these pens is exceptional; the barrels are tightly sealed to prevent evaporation, and the nibs are engineered from dense, durable polyester fibers that resist fraying even when used on rough surfaces like raw wood or unglazed clay.

The primary challenge for any beginner using a paint marker is controlling the paint flow. Cheap markers often suffer from “blobbing”—where a sudden surge of paint floods the paper—or dry scratching, where the nib starves for ink. Premium benchmark markers solve this through their highly precise valve delivery. The paint flows onto the surface in a smooth, continuous ribbon, allowing you to focus entirely on your hand control and shading rather than fighting a malfunctioning tool. Furthermore, the high pigment density means you get rich, solid color in a single stroke, eliminating the need to paint over the same area multiple times.
Although these premium markers represent a higher upfront investment—with individual pens typically costing between ₱150 and ₱250, and full sets ranging from ₱1,200 to over ₱3,500—they are widely accessible in the Philippines. You can easily find them in major national bookstore chains, specialty art supply stores, and reputable online storefronts. Their long-term value is bolstered by their durability; many premium lines feature reversible or replaceable nibs. If a tip becomes worn or clogged, you can simply pull it out, flip it around, or replace it entirely for a fraction of the cost of a new pen, ensuring you get to use every last drop of paint inside the barrel.
These markers are best for detailed canvas illustrations, customizing sneakers or leather bags, decorating helmets, painting intricate designs on glass, and any mixed-media art project where vibrant, professional-grade, fade-resistant colors are non-negotiable.
Budget-Friendly Alternatives for Everyday Practice
For students, casual crafters, or those who want to experiment with the medium without a significant financial commitment, budget-friendly acrylic paint markers are incredibly popular. These sets, often produced by reliable stationery brands like Arrtx, Deli, or Flysea, are widely available on local e-commerce platforms and neighborhood school supply shops. They typically come in large, multi-color sets (ranging from 12 to 80 colors) priced between ₱300 and ₱1,000. Many of these budget options have moved away from traditional valve-action mechanisms to pre-primed, cotton-core felt tips, which are ready to write immediately without shaking or pumping.
While budget markers offer incredible value, they do come with trade-offs. The ink formulation is generally thinner and contains less pigment, which means you may need to apply two or three layers to achieve complete opacity, especially on dark or highly porous surfaces. Additionally, the fiber nibs tend to wear down and fray much faster when used on rough surfaces like rocks or raw wood. Because these budget pens rarely feature replaceable nibs or refillable reservoirs, once a tip is ruined or the ink runs dry, the entire pen must be discarded. The colors may also lack lightfastness, meaning your artwork might gradually fade if exposed to direct, intense tropical sunlight over time.
When navigating budget options, the best strategy is to purchase a medium-sized set (such as 24 or 36 colors) rather than buying individual pens. This gives you a broad palette to practice color theory, blending, and background filling without worrying about the cost per stroke. Look specifically for listings that highlight “acrylic copolymer” or “water-based acrylic” to ensure you are not buying cheap watercolor or alcohol-based markers disguised as paint pens. Reading local user reviews on online marketplaces can also help you verify if a specific budget brand has a reputation for arriving dried out or leaking during transit.
These budget-friendly sets are best for school posters, rock painting (isla stones), casual DIY holiday decorations, scrapbooking, journaling, and high-volume practice where you want to freely experiment with different techniques without stressing over the cost of your materials.
Pre-Purchase Checklist: Matching Markers to Your Project
Project Surface Check
Before buying, consider the texture and porosity of the material you plan to paint. Porous surfaces like paper, cardboard, canvas, raw wood, and terracotta naturally absorb the water-based binder of the acrylic paint, creating a highly durable, mechanical bond. Non-porous surfaces like glass, glazed ceramics, plastics, metals, and polished stones do not absorb the paint. On these slick surfaces, the dried acrylic film simply sits on top and can easily be scratched, scraped, or peeled off. If your project involves non-porous items—especially those that will be handled frequently, like coffee mugs or phone cases—you must verify if the marker brand is compatible with clear protective sealants or varnishes, and plan to apply a coat once your artwork cures.
Because smoothness, bleed resistance, drying speed, and water resistance depend heavily on the exact combination of marker ink and surface material, always perform a quick swipe test on a hidden area or a scrap piece of the same material first. This allows you to observe how the ink behaves before committing to your main design.
Nib Size Matrix
Choosing the right tip size prevents hand fatigue and ensures clean results. Use this general guide to match your project needs:
- Extra-Fine (0.5mm to 1.0mm): Best for fine-line detailing, outlining, intricate mandala patterns, and writing thin text.
- Medium (1.5mm to 3.0mm): The most versatile size for beginners. Perfect for coloring medium-sized shapes, bold outlines, hand-lettering, and general crafting.
- Broad/Chisel (5.0mm to 15.0mm): Ideal for filling in large background areas, painting large wooden signs, creating window displays, or working on large-scale canvases.
Set vs. Individual Buying
If you are completely new to the medium, starting with a curated set of 12 to 24 basic colors is highly cost-effective. These sets provide a balanced spectrum of primary, secondary, and neutral colors (including essential black and white) to help you learn how to layer and contrast colors. Once you establish your style, you can transition to buying individual markers. This allows you to replace heavily used colors like white (which is frequently used for highlights and blending) or build specialized palettes featuring pastels, metallics, or earth tones without purchasing duplicate colors you rarely use.
Label Verification
Always read the product specifications and packaging labels carefully. Ensure the marker is explicitly labeled as “Water-Based Acrylic.” It is easy to accidentally purchase oil-based paint markers, which emit strong chemical odors, take hours to dry, and require mineral spirits for cleanup. Similarly, do not confuse acrylic markers with permanent alcohol-based markers; alcohol markers are translucent, bleed through standard paper, and cannot be layered opaquely on dark or non-porous surfaces.
How to Prime, Use, and Maintain Your Acrylic Markers
Proper Priming Technique
If you choose classic valve-action acrylic markers, they will arrive with dry, white polyester tips. The paint is sealed safely inside the barrel and must be “primed” before your first use. To activate your marker correctly and avoid ruining the nib, follow these steps:
- Shake: Keep the cap securely on and shake the marker vigorously for 20 to 30 seconds. You will hear the metal mixing ball rattling inside, which re-suspends the heavy paint pigments in the liquid acrylic binder.
- Position: Place a piece of scrap cardboard or thick paper on a flat, stable surface.
- Press: Remove the cap, hold the pen vertically with the nib pointing straight down, and gently press the tip into the scrap paper until the nib retracts slightly into the body of the pen. Hold it down for one to two seconds, then release.
- Repeat: Gently pump the nib up and down in a steady, rhythmic motion. Do not press too hard or pump too fast, as this can bend the nib or crack the internal valve.
- Watch: Keep a close eye on the white tip. After a few pumps, you will see the colored paint slowly creep down and saturate the fibers. Stop pumping the moment the paint reaches the very end of the tip. Test the flow with a few light strokes on your scrap paper before moving to your actual project.
Storage Best Practices
Proper storage is critical to extending the lifespan of your acrylic markers. Always store them horizontally (flat) on your desk or in a drawer. Storing them vertically tip-down can cause the heavy paint pigments to pool in the nib, leading to severe clogging or messy leaks when you next open the cap. Conversely, storing them vertically tip-up allows the pigment to settle at the bottom of the barrel, which dries out the nib and makes it difficult to re-prime. Additionally, always snap the cap on tightly immediately after use; you should hear a distinct “click” to ensure an airtight seal. Keep your marker storage container in a cool, dry place away from direct sunlight, as extreme tropical heat can cause the air inside the plastic barrels to expand, leading to leaks.
Nib Care and Cleaning
During long drawing sessions, acrylic paint can begin to dry and cure on the outer fibers of the nib, especially in warm or breezy environments. If you notice the paint flow slowing down or the tip becoming stiff, gently wipe the nib with a damp, lint-free cloth to remove any semi-cured paint buildup. If your brand features reversible nibs, you can use a pair of tweezers to gently pull the nib out, flip it around to reveal a brand-new, clean tip, and slide it back into the collar. Never use harsh chemical solvents or alcohol to clean the nibs, as this can break down the polyester fibers and ruin the flow dynamics of the pen.
Reviving a Stubborn Pen
If a valve-action marker has been left uncapped and the nib has dried rock-hard, do not throw the pen away. You can often revive it with a simple, reversible troubleshooting process. Gently pull the clogged polyester nib out of the pen casing using tweezers. Submerge the nib in a small container of warm water (not hot) and let it soak for 5 to 10 minutes. This will soften and dissolve the dried water-based acrylic paint. Gently squeeze the nib between paper towels to remove the dissolved paint and excess moisture. Once the nib is completely dry, slide it back into the marker, shake the pen thoroughly, and re-prime it on scrap paper. If the paint inside the main plastic reservoir has completely solidified due to a loose cap, the pen is unfortunately beyond saving and must be replaced.
Frequently Asked Questions (FAQ)
Can I use acrylic markers on dark surfaces?
Yes, you can easily use high-quality water-based acrylic markers on dark or black surfaces. Because acrylic paint is highly opaque and sits on top of the material rather than soaking into it, the colors will remain vibrant and clear without fading into the dark background. This is a major advantage over standard dye-based or alcohol markers, which are translucent and virtually invisible on dark paper. For the absolute best results on black paper or dark wood, look for markers with high pigment density, or apply a light second coat once the first layer has dried completely.
Are acrylic markers waterproof once dry?
Water-based acrylic markers become highly water-resistant once they are fully dry and cured, which typically takes 24 to 48 hours depending on the ambient humidity. However, because the paint film sits on the surface, it can still be scratched off or gradually worn away on non-porous materials like glass, metal, or plastic if they are frequently handled or washed. To make your artwork fully waterproof and durable against the elements, apply a coat of clear acrylic sealer, varnish, or Mod Podge over the cured paint. If you are decorating ceramic mugs or plates, check if the marker brand allows for heat-curing in a standard household oven to bake the paint into the surface.
Community discussion
Share your experience or ask a question. Comments are reviewed before publication.