
To choose the best acrylic marker pen for your crafting projects, you must match the ink’s formulation and the marker’s tip design to the specific surface you are decorating. While these markers are highly celebrated for their versatility, a smooth, non-porous surface like glass requires entirely different ink adhesion and curing methods than a porous canvas, a textured rock, or a flexible piece of fabric. Selecting the wrong marker can lead to peeling paint, frayed tips, or designs that wash away during the first clean.
Understanding how different surfaces interact with acrylic pigments allows you to select writing instruments that deliver vibrant, long-lasting results. By evaluating key technical specifications—such as tip materials, ink delivery systems, and curing requirements—you can confidently complete your projects without wasting valuable art supplies.
Quick Guide: Matching Acrylic Markers to Your Craft Surface
When working with an acrylic marker pen, the physical characteristics of your crafting surface dictate how the ink behaves. Porous surfaces like canvas and raw wood readily absorb ink, which helps with adhesion but can drain your markers quickly if the surface is not primed. Conversely, non-porous surfaces like glass and glazed ceramics offer no natural grip, meaning the ink must rely on specialized binders to adhere smoothly without pooling or streaking.
Products mentioned in this guide

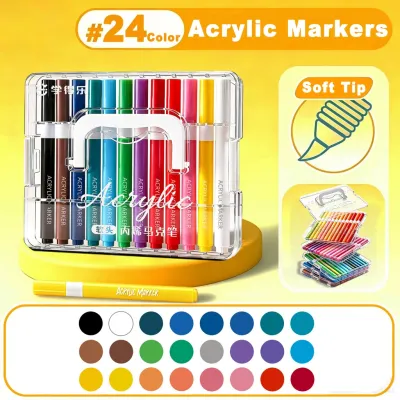
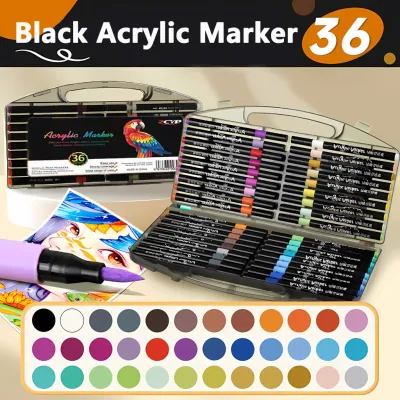
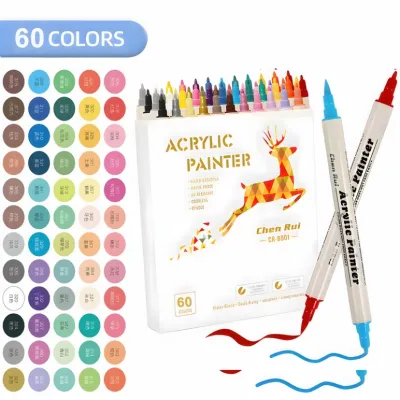
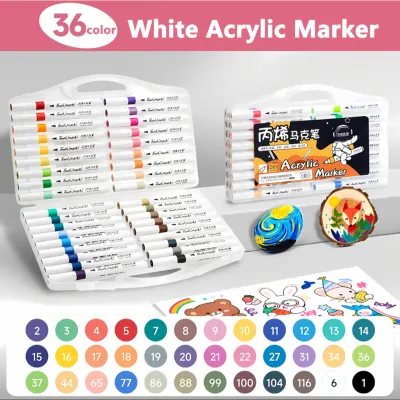

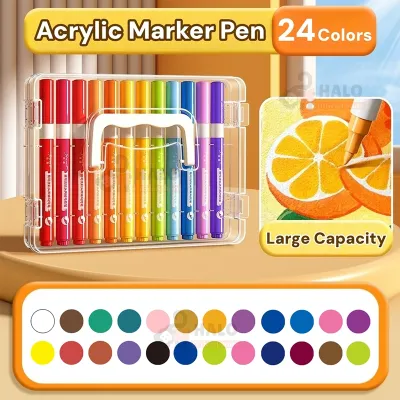
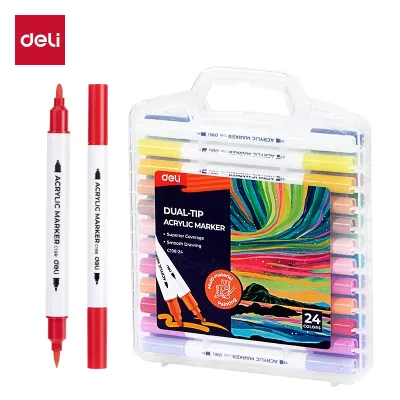
Prices are valid at publication and may change. Please refer to the product page for the latest price.
Flexibility and texture also play critical roles in your choice. Fabric projects require highly flexible, specialized ink formulations that can bend with the textile fibers without cracking or flaking over time. Textured surfaces like outdoor stones require durable, rigid tips that can withstand abrasive friction without fraying. Before purchasing a set of markers, consider these four core decision dimensions to ensure a successful match:
- Tip Durability: Rigid synthetic tips are necessary for rough surfaces, while flexible brush tips are ideal for smooth, yielding materials.
- Ink Opacity: Highly pigmented, opaque inks are essential for dark or textured backgrounds, whereas translucent inks work well for layering and glass designs.
- Ink Flexibility: Flexible acrylic binders prevent cracking on wearable textiles and stretched canvases.
- Sealing Requirements: Non-porous and outdoor surfaces require heat-curing or clear protective sealants to achieve permanent, water-resistant results.
Key Features to Check Before Buying Acrylic Marker Pens
Before purchasing any acrylic marker pen set, it is crucial to inspect the product packaging and manufacturer specifications. Not all markers are built the same, and understanding their mechanical and chemical properties will help you avoid common crafting frustrations.

Tip Types and Mechanisms
Acrylic markers generally feature either standard fiber tips or valve-action tips. Standard fiber tips work like traditional school markers, relying on capillary action to draw ink to the nib. While simple to use, they can dry out quickly during long crafting sessions.
Valve-action markers utilize an internal pump mechanism. When you shake the marker, an internal ball bearing mixes the pigment and binder. Pressing the tip down on a hard surface opens an internal valve, saturating the nib with fresh ink. This mechanism provides excellent ink flow control, which is particularly useful when working on uneven or vertical surfaces. However, in high-humidity environments like the Philippines, you must pump the tip carefully to prevent excessive ink pooling.
Tip shapes also determine your artistic capabilities:
- Bullet Tips (1mm to 3mm): The most common shape, ideal for general drawing, outlining, and filling in medium-sized areas.
- Extra-Fine Tips (0.7mm or less): Excellent for intricate detail work, fine outlines, and precise lettering.
- Chisel Tips (4mm to 8mm): Perfect for broad strokes, calligraphy, and quickly blocking in large background sections.
- Brush Tips: Flexible and responsive, allowing you to create variable line weights and smooth color gradients, similar to a traditional paintbrush.
Opacity and Pigment Load
High-quality markers feature a high pigment load, resulting in dense, opaque lines that can easily cover dark backgrounds in a single pass. Lower-tier or budget-friendly markers often have a higher water-to-pigment ratio, which can lead to translucent, watery lines that require multiple coats to look vibrant. If you plan to paint on dark river stones, black canvas, or tinted glass, look for markers explicitly labeled as “high-opacity” or “highly pigmented.”
Permanence and Lightfastness
Always verify the permanence and lightfastness ratings on the product label. Lightfastness refers to how well the ink resists fading when exposed to sunlight over time. While most acrylic inks are naturally water-resistant once fully dry, they are not automatically weatherproof, dishwasher-safe, or laundry-proof. Check the manufacturer’s instructions to see if the ink requires heat-setting, baking, or a clear topcoat to achieve permanent adhesion.
Decorating Glass: Markers for Non-Porous Surfaces
Glass is one of the most challenging surfaces for crafters because its slick, non-porous nature provides no tooth for paint to grip. When applying ink to glass, standard markers can bead up, streak, or wipe away with a simple swipe of a damp cloth.
To achieve clean, professional designs on glass jars, wine glasses, or window panes, you need highly pigmented, slow-drying acrylic ink that lays down smoothly without running. Because glass art often involves intricate mandalas, delicate lettering, or precise borders, extra-fine (0.7mm) or fine (1mm) bullet tips are highly recommended. These small tips allow you to maintain control on curved glass surfaces without accidental drips.
Curing and sealing are mandatory steps if you want your glass designs to survive regular handling. While some temporary window markers are designed to wash away easily, permanent glass decorations must be cured.
Always consult the marker manufacturer’s label for specific curing instructions. Many glass-specific acrylic markers require oven baking: placing the cold, painted glassware into a home oven, heating it to approximately 150°C (300°F) for 30 minutes, and letting it cool completely inside the oven to prevent thermal shock. For non-bakeable items, applying a clear, multi-surface acrylic spray sealant is an alternative. Always verify on the product label whether the cured paint is food-safe; as a general safety rule, keep all painted designs at least two centimeters below the rim of drinking vessels to avoid direct lip contact.
Painting Rocks: Markers for Textured and Outdoor Stones
Rock painting is a popular outdoor craft, but rough river stones, volcanic rocks, and textured garden pebbles can quickly ruin delicate art tools. The abrasive surface of an unpolished rock acts like sandpaper, shredding soft nylon brush tips after only a few strokes.
For rock painting, select markers with durable, rigid synthetic tips, such as hard polyester bullet or chisel nibs. Use medium bullet tips to apply smooth base coats of color, and reserve durable fine tips strictly for final outlines and detailed highlights. To ensure your designs stand out against dark gray, brown, or speckled stones, prioritize high-opacity markers. Metallic acrylic inks, such as gold, silver, and copper, are exceptionally vibrant on dark stone textures.
Because painted rocks are often placed in garden beds, patios, or outdoor pathways, they must withstand harsh environmental conditions. In the tropical climate of the Philippines, intense sunlight and heavy monsoon rains can quickly degrade unprotected acrylic paint.
While acrylic ink is water-resistant once dry, it is not fully weatherproof. To protect your stone art from fading, peeling, and moisture damage, apply a clear, UV-resistant outdoor polyurethane or acrylic sealer. Before spraying, ensure the paint has dried completely for at least 24 hours to prevent the sealer from smearing your design.
Customizing Fabric: Markers for Flexible and Washable Textiles
Customizing canvas tote bags, denim jackets, and cotton t-shirts is an excellent way to express personal style. However, standard acrylic paint dries into a rigid, plastic-like layer. If you use standard markers on flexible garments, the design will quickly crack, peel, and flake off as the fabric stretches and moves.
For wearable textiles, you must use markers formulated with highly flexible acrylic binders or specialized fabric-specific inks. These formulations penetrate the textile fibers, remaining pliable and soft to the touch even after drying.
To prevent common fabric-painting mistakes, follow these practical steps:
- Insert a Barrier: Always place a thick piece of cardboard, plastic, or wax paper inside the garment or tote bag before painting. This prevents the ink from bleeding through to the back layer of fabric.
- Control Ink Saturation: Avoid pressing the marker tip down repeatedly directly on the fabric, as over-saturating the fibers will cause the ink to bleed and blur along the weave. Instead, prime the marker on a scrap piece of paper first.
- Perform a Swatch Test: Always test the marker on an inconspicuous area of the fabric to observe how the ink spreads and dries before starting your main design.
Once your design is complete, let the fabric dry undisturbed for a full 24 hours. To make the design washable, you must heat-set the ink. Turn the garment inside out, or place a clean pressing cloth over the design, and run a dry iron (set to the appropriate temperature for the fabric, with no steam) over the painted area for three to five minutes. For ongoing care, wash the customized garment inside out in cold water on a gentle cycle, and avoid harsh detergents or bleach.
Creating Canvas Art: Markers for Blending and Layering
Canvas is the traditional home of acrylic paint, and using markers on stretched canvas or canvas boards offers a level of graphic precision that traditional paintbrushes cannot match. On canvas, acrylic markers behave similarly to tube-based acrylic paints, making them excellent for modern illustration, pop art, and mixed-media projects.
For canvas work, a variety of tip shapes is highly beneficial. Use broad chisel tips or wide block markers to quickly cover large background areas, and transition to flexible brush tips to create smooth color gradients, shading, and organic linework.
One of the greatest advantages of using acrylic markers on canvas is their layering capability. Once a layer of water-based acrylic ink is completely dry, it becomes highly water-resistant. This allows you to paint light colors directly over dark colors, or add sharp outlines over painted backgrounds, without reactivating or muddying the base layers.
While you can paint directly onto raw canvas, doing so will cause the porous cotton or linen fibers to absorb a massive amount of ink, draining your markers rapidly. To prevent this waste, apply one or two thin coats of acrylic gesso primer to the canvas before painting. The gesso seals the porous fibers, providing a smooth, consistent surface that maximizes ink coverage and enhances color vibrancy.
Cross-Surface Compatibility and Marker Maintenance
While many premium acrylic marker brands market their products as “multi-surface” pens, it is important to understand the balance between versatility and specialization. A high-quality multi-surface marker can perform beautifully across glass, wood, stone, and canvas, but highly demanding projects—such as garments subjected to frequent machine washing or rocks exposed to heavy outdoor rain—will always yield more durable results when paired with surface-specific prep work, curing, and protective sealants.
To protect your investment and ensure your markers last through multiple projects, proper maintenance is essential. Standard price bands for quality marker sets can range from budget-friendly options around ₱250 to professional-grade sets costing ₱1,500 or more, making proper care highly cost-effective. Use these low-risk maintenance practices to keep your markers in top condition:
- Store Horizontally: Always store your acrylic markers horizontally when not in use. Storing them vertically can cause the heavy paint pigments to settle at the bottom of the barrel, clogging the valve, or cause the pigment to drain away from the tip, leaving it dry.
- Cap Tightly: Always listen for a distinct click when capping your markers to ensure an airtight seal. This prevents the acrylic binder from drying out inside the fiber nib.
- Avoid Extreme Heat: Keep your markers stored in a cool, dry place away from direct tropical sunlight. Excessive heat can cause the air inside the marker barrel to expand, leading to leaks or explosive ink drops when you remove the cap.
Frequently Asked Questions (FAQ)
Do acrylic markers wash off glass?
Standard water-based acrylic markers will easily wash off glass with warm water, soap, and a non-abrasive sponge. This temporary adhesion makes them excellent for seasonal window displays, holiday decorations, and temporary mirror art. However, if you want your designs to be permanent on glassware, mugs, or vases, you must use markers specifically formulated for glass and glazed ceramics, and follow the manufacturer’s baking or chemical curing instructions. Even after proper heat-curing, hand-washing is highly recommended over automatic dishwashers to preserve the design’s longevity.
How do you revive a dried-out acrylic marker?
If a valve-action acrylic marker stops flowing, it is often because the paint has dried and clogged the nib, rather than the marker running out of ink. To revive it, first ensure the cap is securely fastened, then shake the marker vigorously for 30 seconds to remix the pigment and binder. Next, gently press the tip down repeatedly on a piece of scrap paper to pump fresh ink into the nib. If the tip remains stiff and clogged with dried paint, carefully pull the removable nib out of the marker and soak it in warm water for five to ten minutes. Once the dried paint has softened, rinse the nib, dry it thoroughly with a paper towel, reinsert it into the marker, and pump it again to restore smooth ink flow. Avoid using harsh chemical solvents or alcohol to clean the nib, as these can permanently ruin the internal plastic valve mechanism.
Community discussion
Share your experience or ask a question. Comments are reviewed before publication.