
Managing a classroom involves balancing lesson planning, student engagement, and an overwhelming volume of paperwork. From grading daily worksheets to tracking permission slips, teachers constantly face repetitive writing tasks that consume valuable hours. Utilizing the right stamps for teachers can recover this lost time, transforming tedious administrative chores into quick, clear, and visually engaging feedback.
Selecting the best stamps requires looking beyond cute designs. You must evaluate how different stamp mechanisms, ink formulations, and layouts fit your specific grading volume, paper types, and classroom routines. By matching the right tool to each task, you can streamline your workflow while maintaining high-quality communication with your students and their parents.
Quick Guide: Matching Stamps to Teaching Tasks
To build an efficient classroom toolkit, it helps to categorize stamps by their primary function. Most educational stamps fall into three main categories: grading, encouragement, and organizational stamps. Each category serves a distinct purpose in your daily workflow and requires different design features to be truly effective.
Products mentioned in this guide
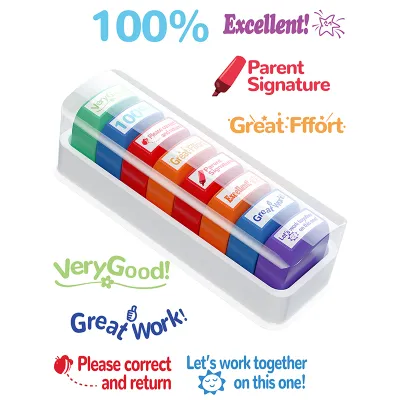
![[DKI ENTERPRISES] 8pcs/Set [TEACHER SET 1 or SET 2] Stamp with Stamp Pad for Kids](https://img.lazcdn.com/g/p/b4b49abdd8e988606c1df3230615785a.jpg_400x400q80.jpg_.webp)
Prices are valid at publication and may change. Please refer to the product page for the latest price.
Grading stamps focus on evaluation and structured feedback, often featuring rubrics, checklists, or common correction prompts. Encouragement stamps are designed to motivate students, utilizing bright visuals, positive phrases, and interactive elements to celebrate progress. Organizational stamps streamline administrative tasks, helping you track dates, document submissions, parent signatures, and classroom property.
Before purchasing, consider three core decision factors: daily impression volume, ink drying time, and desk storage space. If you stamp dozens of worksheets in a single sitting, a rapid-action mechanism is essential. If you teach in a warm, humid environment, ink selection is critical to prevent smudging. Finally, if desk space is limited, compact or stackable designs will help keep your workspace tidy.
While stamps are incredibly effective for reducing repetitive writing, they are not a complete replacement for personalized feedback. Use them to handle standard, repetitive comments so you can reserve your handwritten notes for complex assignments that require deeper, individualized guidance.
Choosing the Right Stamp Mechanism for Daily Use
Selecting the physical mechanism of your stamp is just as important as choosing the message it carries. The physical design dictates how quickly you can work, how crisp the final image will be, and how much maintenance the tool requires over its lifespan.

Self-Inking Stamps
Self-inking stamps feature an internal spring mechanism that holds the rubber die against a built-in ink pad. When you press down, the die rotates 180 degrees to make contact with the paper, then flips back up against the pad when released. This self-contained design makes them the ideal choice for high-volume, rapid-fire grading tasks, such as checking homework completion for a class of 40 students.
These stamps are exceptionally easy to use and keep your hands clean since the ink pad is housed entirely inside the plastic casing. However, they tend to be bulkier than other options and take up more vertical space on your desk or in your drawer. The mechanical parts can also wear down over years of heavy use, though the internal ink pads are easily replaceable or re-inkable when the impressions begin to fade.
Pre-Inked Stamps
Pre-Inked stamps use a microporous gel or polymer membrane that holds oil-based ink directly within the stamp die itself. Because there are no moving parts or internal flipping mechanisms, every press is smooth, quiet, and incredibly precise. These stamps produce the crispest, highest-resolution impressions available, making them perfect for intricate custom designs, small text, or detailed school logos.
While they offer superior image quality and can produce thousands of impressions before fading, they require a brief recovery time between stamps. If you press a pre-inked stamp repeatedly in rapid succession, the ink may not have enough time to flow back to the surface, resulting in faint impressions. They also tend to carry a higher initial price point, though their longevity often justifies the investment.
Traditional Wood-Handle Stamps
Traditional wood-handle stamps represent the classic, time-tested approach to stamping. These stamps consist of a carved rubber die mounted on a wooden block with a handle, requiring a separate ink pad to function. Their simplicity is their greatest strength; with no moving parts to break and no internal reservoirs to clog, a high-quality wood stamp can last for decades.
The primary benefit of wood-handle stamps is their unmatched versatility. By using a single stamp with different ink pads, you can switch colors instantly or transition from standard paper ink to fabric-safe ink. The trade-off is speed and convenience. Stamping requires a two-step process—pressing the pad, then pressing the paper—which can slow you down during heavy grading sessions. They also require more desk space to accommodate both the stamps and the separate ink pads.
Clear Photopolymer Stamps
Clear photopolymer stamps are made from a transparent, flexible plastic that temporarily clings to a reusable clear acrylic block. Because both the stamp and the block are completely see-through, you can look directly through the tool to align the image perfectly on the page. This makes them highly useful for stamping precise lines in student notebooks, filling out pre-printed grading rubrics, or placing icons inside small planner grids.
To use clear stamps, you must press them onto a separate ink pad, much like a traditional wood stamp. While they offer unparalleled placement accuracy, they require a bit more setup and cleanup. You must peel the stamps off the acrylic block, wash them with mild soap and water to maintain their clinginess, and store them on flat plastic sheets to prevent warping.
Best Stamps for Grading and Constructive Feedback
Grading stamps are designed to make your evaluation process more consistent and less time-consuming. By standardizing common comments, you can provide clear, actionable feedback to students without spending hours writing the same phrases on dozens of papers.
Rubric and Checklist Stamps
For routine assignments, homework checks, or short quizzes, rubric and checklist stamps are incredibly efficient. These stamps feature a pre-formatted grid or list of criteria, such as “Grammar,” “Spelling,” “Content,” and “Neatness,” alongside blank spaces or check boxes. With a single press, you can place a complete grading matrix on a student’s paper, allowing you to quickly circle scores or check off completed requirements.
Using a rubric stamp ensures that students understand exactly why they received a specific grade. It also helps maintain grading consistency across different class sections, as you are guided by the same visual criteria for every paper you evaluate.
Customizable Text Stamps
While pre-made stamps cover basic phrases like “Good Job” or “Late,” custom text stamps allow you to address the specific, recurring issues you observe in your classroom. Multi-line adjustable stamps or custom-ordered polymer stamps let you create targeted prompts such as “Please show your complete mathematical steps,” “Check your spelling and punctuation,” or “Please have a parent sign and return this by Friday.”
When ordering custom text stamps, always verify the manufacturer’s maximum character limit per line and the physical size of the text. Text that is too small can bleed together and become illegible, especially on cheap, absorbent school paper. Aim for clean, sans-serif fonts that are easy for young readers to decipher.
Multi-Color Grading Stamps
Color-coding your feedback is a powerful way to help students visually process their evaluations. Multi-color stamps—either self-inking stamps with split ink pads or traditional stamps used with multi-colored ink pads—allow you to highlight different types of feedback instantly.
For example, you might use green ink for positive achievements, blue for general instructions, and orange or purple for corrections. This visual distinction prevents students from feeling overwhelmed by a sea of red ink, reframing corrections as helpful steps in the learning process rather than simple punishments.
Limitations & Best Practices
While grading stamps are excellent productivity tools, they should supplement, not replace, personalized written feedback. A stamp is perfect for acknowledging that a student completed their homework or made common spelling errors, but complex essays, creative writing, and advanced science projects still require your handwritten thoughts. Use stamps to handle the repetitive, administrative aspects of grading so you can dedicate your writing time to deep, meaningful student interactions.
Top Encouragement Stamps for Student Motivation
Encouragement stamps play a vital role in building a positive classroom culture. By celebrating effort, growth, and creativity, these stamps help boost student self-esteem and foster a love of learning across all age groups.
Visual and Character Stamps
For early childhood and elementary school students, visual feedback is often more powerful than written words. Bright, recognizable imagery—such as smiling stars, thumbs-up icons, cute animals, or friendly cartoon characters—provides instant visual rewards that young children can easily understand.
These visual cues create an immediate sense of accomplishment. When a young student sees a cheerful, brightly colored animal stamp on their worksheet, they associate their hard work with a positive emotional response, reinforcing good learning habits.
Growth Mindset Phrases
As students grow older, simple cartoon characters may lose their appeal. For upper elementary, middle school, and high school students, transition to text-based stamps that focus on effort, persistence, and the learning process rather than just the final correct answer.
Stamps featuring phrases like “Great persistence on this tough problem!”, “Excellent critical thinking!”, or “I love how you tried a different strategy!” promote a growth mindset. These messages teach students that intelligence and skill are developed through hard work and determination, encouraging them to tackle challenging tasks without fear of failure.
Sensory and Interactive Stamps
To add an extra layer of excitement for younger learners, consider sensory or interactive stamps. Scented stamps, which release a pleasant aroma (like grape, cherry, or mint) when pressed onto paper, turn grading into a multi-sensory experience that students eagerly look forward to.
Another interactive approach is pairing your stamps with colorful stickers or washi tape. For example, you can apply a strip of patterned washi tape to frame a student’s best work, then place an encouragement stamp directly over it. This creative combination makes the feedback feel like a personalized award, transforming a standard notebook page into a cherished keepsake.
Inclusivity and Appropriateness
Before purchasing pre-made encouragement stamps, carefully review the imagery, language, and cultural references to ensure they are age-appropriate and inclusive for your specific classroom demographic. Avoid stamps with overly complex idioms that English language learners might struggle to understand, and select designs that reflect and respect the diverse backgrounds of all your students.
Essential Organizational Stamps for Classroom Management
Classroom management involves a mountain of administrative tasks that can quickly become disorganized. Organizational stamps help you establish clear systems for tracking paperwork, managing shared resources, and maintaining classroom discipline.
Tracking and Verification Stamps
Keeping track of when assignments were submitted, which papers have been graded, and which forms require parent signatures is a constant logistical challenge. Tracking stamps featuring phrases like “Received,” “Checked,” “Late,” or “Parent Signature Required” allow you to document the status of any document in a fraction of a second.
Using a “Name and Date” stamp is particularly helpful for younger students who frequently forget to write their names on their worksheets. Stamping a blank name and date template at the top of their papers provides a highly visible cue that prompts them to complete these essential details before handing in their work.
Custom Address and Return Stamps
Teachers invest significant personal resources into building classroom libraries, purchasing shared art supplies, and organizing educational games. To prevent these items from wandering off, use a custom return stamp to clearly mark your property.
A durable stamp reading “Property of Teacher [Name] – Please Return to Room [Number]” can be applied to the inside covers of classroom library books, the backs of flashcards, and the labels of storage bins. This simple step ensures that borrowed or misplaced items can easily find their way back to your classroom, saving you the cost of replacing lost supplies.
Behavior and Reward System Stamps
Stamps are excellent tools for managing classroom economy systems, reading challenges, or behavior tracking charts. Instead of printing expensive, single-use paper handouts, you can create reusable punch-cards or tracking sheets for your students.
By using a small, unique icon stamp (such as a tiny star, apple, or book), you can mark a student’s progress on their card whenever they demonstrate positive behavior or complete a reading milestone. Once they collect a set number of stamps, they can redeem the card for a small reward. Because the stamp design is unique to you, it prevents students from easily replicating the marks, maintaining the integrity of your reward system.
Durability Considerations
Organizational stamps are often used on varied, non-porous surfaces such as laminated folders, plastic storage bins, glossy book covers, or synthetic labels. Standard water-based classroom ink will easily smudge, smear, or wipe off these materials. To ensure your organizational markings are permanent, verify that you are using a solvent-based or quick-drying ink specifically formulated to adhere to non-porous surfaces.
Matching Ink Types to Paper and Humid Climates
Even the best stamp design will fail if the ink smudges, bleeds through the page, or takes forever to dry. Understanding how different ink formulations interact with paper and local climate conditions is essential for achieving clean, professional results.
Water-Based vs. Solvent-Based Inks
Water-based inks are the most common choice for school environments. They are formulated to dry primarily by absorbing into the fibers of porous materials like standard copy paper, construction paper, and notebook pages. Because they do not bleed heavily through thin sheets, they are ideal for double-sided worksheets and student notebooks. However, they will smudge easily on glossy surfaces like laminated charts or plastic folders because the water cannot evaporate or absorb into the non-porous material.
Solvent-based (or oil-based) inks dry through rapid chemical evaporation, allowing them to adhere permanently to almost any surface, including plastic, metal, glass, and glossy paper. While they are incredibly durable and water-resistant, they have a strong tendency to bleed through standard, thin notebook paper. If you use a solvent-based ink on a student’s worksheet, the image will likely show through clearly on the reverse side, potentially ruining other written work.
Archival and Fade-Resistant Inks
If you are stamping permanent student records, official portfolios, graduation certificates, or classroom archives, standard dye-based inks may fade over time when exposed to light and air. For these applications, opt for pigment-based archival inks. These inks contain solid microscopic pigment particles that sit on top of the paper fibers rather than soaking in, providing exceptional resistance to fading, water damage, and chemical degradation over many years.
Climate Considerations
In tropical climates like the Philippines, high relative humidity (often exceeding 80%) significantly impacts ink performance. Because the air is already saturated with moisture, water-based inks dry much slower than they would in dry climates. If a student closes their notebook immediately after you stamp it, the wet ink can easily transfer to the opposite page, creating an illegible smudge.
To combat slow drying times in humid weather, conduct a quick trial stamp on a scrap piece of the same paper you plan to use. Observe how long it takes for the ink to become dry to the touch. If smudging is an issue, you can use a sheet of scrap blotting paper between notebook pages, choose a faster-drying hybrid ink, or simply wait a few extra seconds before closing the books.
Storage and Maintenance
High tropical heat and humidity can also accelerate the degradation of your stamp pads. If left exposed to the air, ink pads can quickly dry out, collect dust, or even grow mold in damp conditions. To maximize the lifespan of your stamps, follow these simple maintenance steps:
- Store all stamps and ink pads in airtight plastic containers when not in use.
- Keep your stamping supplies in a cool, dry cabinet away from direct sunlight and extreme heat sources.
- Store ink pads upside down so that the ink gravity-feeds to the surface of the pad, ensuring it is always ready for a crisp impression.
- Periodically wipe down the rubber dies with a damp, lint-free cloth to remove paper fibers and dried ink buildup.
Frequently Asked Questions (FAQ)
How do I clean and maintain self-inking stamps?
To clean a self-inking stamp, press the mechanism down slightly to expose the rubber or polymer die, then lock it into place using the buttons on the side of the housing. Gently wipe the die with a damp, lint-free microfiber cloth or a specialized, water-based stamp cleaner to remove paper fibers and dried ink buildup. Avoid using harsh solvents, alcohol, or acetone, as these chemicals can dry out and crack the rubber die, dissolve adhesive backings, and permanently damage the internal plastic mechanism.
Can I use fabric ink on paper stamps for classroom tote bags?
Yes, but only if you are using traditional wood-handle or clear acrylic stamps. Wood-handle and clear stamps can be pressed onto a specialized fabric ink pad, stamped onto the tote bag, and heat-set with an iron according to the ink manufacturer’s instructions. Do not use fabric ink with self-inking or pre-inked stamps; these mechanisms are pre-loaded with thin, paper-specific inks, and introducing thick, sticky, or solvent-based fabric inks will clog the internal reservoirs and permanently ruin the stamp.
How long does a pre-inked stamp typically last before needing a refill?
Pre-inked stamps are highly efficient, typically yielding between 10,000 and 50,000 impressions before requiring a refill, compared to the 5,000 to 10,000 impressions offered by standard self-inking stamps. You will know your stamp needs re-inking when the impressions become faint, patchy, or uneven. When refilling, always check the product label and use the exact type of refill ink recommended by the manufacturer, as mixing oil-based pre-inked formulas with water-based self-inking inks will cause the ink to coagulate and ruin the stamp’s microporous membrane.
Community discussion
Share your experience or ask a question. Comments are reviewed before publication.