
To find the best water pen for calligraphy and hand lettering, you must look for a tool that balances responsive tip flexibility with a consistent, controllable flow of water-based ink. The ideal pen depends on your current skill level and your preferred lettering style, whether that involves dramatic thick-to-thin brush strokes or structured, monoline details. For most lettering artists, a water-based brush pen with a resilient nylon or felt tip offers the most versatile performance, allowing you to execute elegant swells and hairline transitions on the page.
In the tropical climate of the Philippines, environmental factors like high relative humidity can significantly influence how water-based inks behave on paper. High humidity naturally slows down ink drying times, which can lead to accidental smudging if you are not careful, but it also extends the window for beautiful color blending and watercolor-style gradients. Understanding how different tip shapes, ink flow rates, and paper types interact is the key to selecting a setup that elevates your lettering practice.
Key Features to Look for in a Calligraphy Water Pen
When evaluating water pens for calligraphy and hand lettering, it is essential to distinguish between standard coloring markers and dedicated lettering instruments. The primary defining characteristic of a high-quality lettering water pen is its water-based ink formulation combined with a highly responsive, flexible nib. Unlike oil-based or alcohol markers, water-based inks sit slightly longer on the paper fibers, allowing for smoother transitions and the potential for water-blending techniques.
Products mentioned in this guide
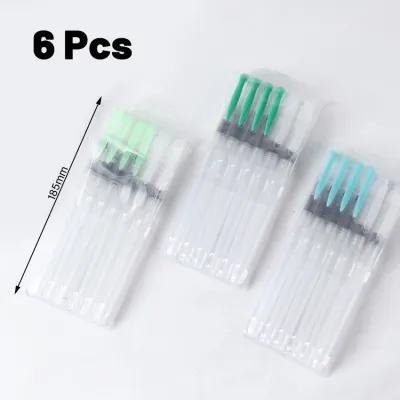
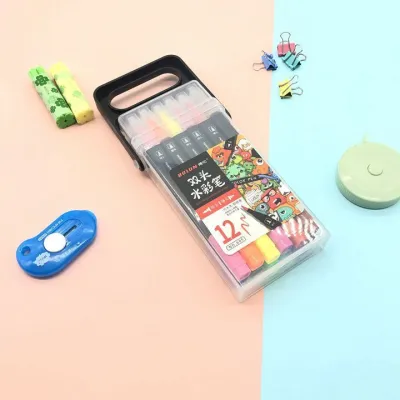
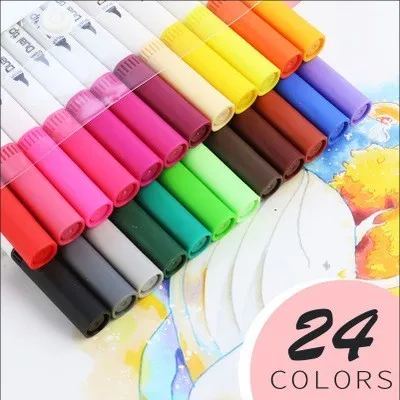
Prices are valid at publication and may change. Please refer to the product page for the latest price.
The performance of a brush-style water pen hinges on tip flexibility and “snap-back.” Snap-back refers to how quickly and reliably the tip returns to its original pointed shape after you release downward pressure. A pen with poor snap-back will quickly become deformed or frayed, making it nearly impossible to execute clean, thin upstrokes after a heavy downstroke. Look for tips made from high-grade nylon fibers or specially formulated synthetic felt, as these materials offer the structural memory required for repetitive flexing.
Barrel ergonomics and grip design are equally critical, especially during long practice sessions. A barrel that is too thin can cause your hand to cramp as you pinch to maintain control, while an overly thick or slick barrel can lead to hand fatigue. Opt for pens with a moderate barrel diameter and a matte or slightly textured grip area. A comfortable, balanced grip allows you to apply precise pressure changes smoothly, which is the foundational physical skill behind beautiful hand lettering.
Matching Pen Tips to Your Lettering Style
Choosing the right pen tip is not just about personal preference; it directly dictates the visual weight, scale, and style of your lettering. Different tip geometries produce distinct stroke characteristics, meaning a pen that excels at large, dramatic brush script will struggle with tiny, intricate journal entries. Matching your tool to your specific aesthetic goals ensures cleaner lines and a much more satisfying writing experience.

Brush Tips for Dynamic Strokes
Brush tips are the quintessential tool for modern calligraphy, designed specifically to produce the classic contrast between heavy downstrokes and delicate upstrokes. These tips are generally divided into soft and hard categories, each serving a different stage of artistic development. Soft brush tips, often made of individual nylon bristles or highly pliable synthetic materials, require a light touch and precise control. They are ideal for advanced calligraphers who want to execute dramatic flourishes, wide swells, and expressive, large-scale lettering.
Conversely, hard brush tips offer more physical resistance when pressed against the paper. This resistance provides a helpful buffer for beginners who are still training their muscle memory to transition smoothly between heavy and light pressure. The firm tip prevents the pen from splaying unexpectedly, giving you greater control over line consistency. When selecting a brush pen, verify the tip material and stiffness rating, as a firmer tip is generally more forgiving for daily practice and structured script.
Fine and Bullet Tips for Detail Work
While brush tips dominate expressive lettering, fine and bullet tips are indispensable for precision tasks, monoline styles, and decorative embellishments. A bullet tip features a rounded, symmetrical point that maintains a consistent line width regardless of the angle at which you hold the pen. This consistency makes them excellent for “faux calligraphy,” a technique where you manually draw the parallel downstrokes of letters and fill them in.
Fine tips, often ranging from 0.3mm to 0.8mm in width, allow you to add intricate details that elevate a basic lettering piece. You can use these precise tips to draw drop shadows, add fine highlights, write small-scale subheaders, or create delicate botanical illustrations around your main calligraphy design. Because they do not rely on pressure variations to change line weight, they offer a highly stable and predictable writing experience on almost any paper surface.
Chisel and Broad Tips for Headers
For bold, structural lettering and large-scale layouts, chisel and broad tips are the preferred choice. A chisel tip features a flat, angled edge that naturally creates sharp geometric angles and distinct thick-and-thin variations depending on the direction of your stroke. When pulled downward along the flat edge, it produces a very wide, solid block of color; when moved sideways along the pointed corner, it draws a crisp, thin line.
These characteristics make chisel tips ideal for traditional calligraphy styles like Gothic, Italic, and Uncial scripts, as well as modern, blocky display headers. They are also highly efficient for filling in large background spaces or creating solid decorative borders. Because of their wide surface area, broad tips deliver a larger volume of ink to the page, making it especially important to pair them with heavy, high-quality paper to prevent saturation.
Ink Flow, Drying Time, and Paper Pairing
The interaction between water-based ink and your paper choice can make or break your lettering project. Water-based inks are highly sensitive to the texture, weight, and coating of the writing surface. On standard, uncoated paper, the water in the ink is quickly absorbed by the loose fibers, causing the edges of your letters to spread outward—a frustrating phenomenon known as feathering. It can also cause the ink to bleed through to the reverse side of the sheet, ruining subsequent pages.
To prevent these issues, always check the paper’s weight, measured in grams per square meter (GSM), and look for specific surface finishes. For daily lettering practice, a smooth, heavy paper of at least 100 GSM is highly recommended. Look for labels indicating “marker-friendly,” “bleed-proof,” or “mixed-media” compatibility. Coated papers, such as ultra-smooth bristol board or specialized calligraphy practice pads, prevent the ink from sinking in too quickly, preserving your sharp line edges and protecting your delicate brush tips from premature fraying caused by rough paper textures.
Ink drying time presents a practical trade-off that you must navigate based on your writing style and dominant hand. Fast-drying water-based inks are highly beneficial for left-handed writers, as they significantly reduce the risk of smudging your work as your hand moves across the page. However, fast-drying formulas leave very little time for artistic techniques. Slow-drying inks, on the other hand, remain wet on the paper surface for several seconds, providing a valuable window for blending different colors together, creating seamless ombré transitions, or softening edges with a water brush.
In the humid climate of the Philippines, you should expect all water-based inks to dry slightly slower than they would in arid environments. This natural humidity can be an advantage for blending techniques, but it requires extra patience to avoid smearing finished sections. If you are working on a multi-layered piece, allow ample time between layers or use a low-heat craft tool to gently set the ink before adding details.
Recommended Water Pen Profiles for Every Skill Level
Navigating the vast array of stationery options can be overwhelming, especially with price points ranging from budget-friendly local finds to premium imported brands. In the Philippine market, water pens generally fall into broad price bands: budget-friendly options under ₱100 per pen, mid-range selections between ₱100 and ₱250, and premium professional-grade markers exceeding ₱250. Selecting the right specifications for your current skill level ensures you do not overspend on features you cannot yet utilize, or struggle with tools that hinder your progress.
Best Setup for Beginners
If you are just starting your hand lettering journey, your primary goal is to build muscle memory without destroying your tools. Beginners tend to apply excessive, uneven pressure, which can quickly ruin delicate tips. Look for a mid-range water-based pen featuring a firm, hard synthetic brush tip. These tips are highly resilient, resisting fraying even when subjected to heavy-handed practice.
Your beginner setup should also feature a moderate, highly consistent ink flow that dries relatively quickly to minimize mess. A medium-sized, round barrel that closely mimics the feel of a standard pen or pencil will feel most natural in your hand, easing the transition into specialized lettering movements. Budget-friendly or mid-range packs (typically priced around ₱80 to ₱150 per pen) are ideal at this stage, allowing you to practice freely without worrying about the cost of depleting your ink supply.
Best Setup for Detailed and Small Lettering
For artists focusing on intricate layouts, pocket journals, or small-scale decorative script, precision is the absolute priority. For this style, look for extra-firm, micro-brush tips or high-quality fine bullet tips. Micro-brush tips provide the tiny, precise line variations needed for letters under one centimeter in height, while maintaining the structural stiffness required for clean execution.
In addition to tip shape, pay close attention to ink opacity and saturation. If you plan to layer light-colored lettering over darker backgrounds, or work on toned paper, you will need a highly opaque water-based ink formulation. A controlled, slightly dry ink flow is beneficial here, as it prevents excess ink from pooling in the tiny loops of small letters, ensuring your text remains crisp and highly legible.
Best Setup for Advanced Flourishes and Blending
Advanced lettering artists who want to push the boundaries of color and form require a highly responsive, professional-grade setup. For this level of work, select a premium pen featuring a highly flexible, soft nylon brush tip with exceptional snap-back. These tips allow you to transition effortlessly from hairline loops to broad, dramatic strokes, giving your flourishes a dynamic, organic flow.
The ideal ink for advanced work is a highly saturated, slow-drying water-based formula. This characteristic allows you to perform advanced blending techniques, such as touching the tips of two different colored pens together to create a temporary gradient, or using a separate water brush pen to dilute and bleed colors directly on the page. Look for refillable options or pens with replaceable nibs to protect your investment, as professional-grade tools in the ₱250+ range are designed for long-term, sustainable use.
Quick Tips for Testing and Maintaining Your Pens
To get the most out of your water pens and ensure they deliver consistent performance over time, proper maintenance and initial verification are essential. Whenever you purchase a new pen, always perform a quick test on a scrap piece of the exact paper you plan to use. Check for smooth ink flow, verify that the tip does not drag or skip, and observe how long the ink takes to dry in your current workspace humidity. This simple step prevents you from ruining a final piece due to unexpected bleeding or slow drying.
Proper storage is the single most effective way to extend the lifespan of your lettering pens. As a general rule, water-based brush pens and markers should be stored horizontally. Storing them vertically tip-up can cause the ink to drain away from the nib, leading to dry, scratchy strokes; storing them vertically tip-down can cause ink to pool in the cap, resulting in leaks and oversaturation. Keeping them flat ensures an even distribution of ink throughout the internal reservoir.
If your pen’s barrel or grip becomes soiled with ink, a simple, reversible cleaning step is to wipe it down with a damp, lint-free microfiber cloth. Always check the manufacturer’s care instructions and product labels before attempting to clean or revive a pen. If a water-based pen begins to dry out, check if the manufacturer offers a specific revival method or matching ink refills. Never use harsh household solvents, alcohol, or unapproved cleaning agents on the nib, as these chemicals can permanently break down the synthetic fibers and chemically alter the water-based ink formulation, rendering the pen unusable.
Frequently Asked Questions (FAQ)
Can I use water pens on regular printer paper?
While you can technically use water pens on standard copy or printer paper for quick, low-stakes practice sketches, it is not recommended for serious lettering projects. Standard printer paper is thin (usually around 70 to 80 GSM) and highly porous, lacking the specialized sizing or coating found on calligraphy-grade paper. As a result, the water-based ink will rapidly soak into the fibers, causing severe feathering along the edges of your letters and heavy bleed-through to the back of the page. Furthermore, the rough texture of standard copy paper acts like sandpaper on delicate synthetic brush tips, causing them to fray prematurely. For final pieces, gifts, or satisfying practice sessions, it is always best to upgrade to a smoother, heavier paper designed to handle wet media.
How do I fix a dry water pen?
If a water-based pen starts writing dry, the safest and most effective first step is to store the pen vertically tip-down in a cup or holder for 24 to 48 hours. This allows gravity to naturally pull the remaining ink back into the nib fibers. If the tip remains dry, check the manufacturer’s website or packaging for safe cleaning and troubleshooting guidelines. Some brands design their nibs to be gently removed and flipped or rinsed under a slow stream of lukewarm tap water to clear dried ink clogs. However, you must avoid soaking the entire pen in water or using harsh household chemicals, as these can dilute the ink’s pigment concentration or permanently damage the synthetic binder holding the nib fibers together.
Community discussion
Share your experience or ask a question. Comments are reviewed before publication.