
A reliable marking tool is essential for preventing costly cutting errors in any DIY or construction project. Choosing between a carpenter pencil and a regular pencil depends on your working environment, surface texture, and the level of precision your task requires.
Choose a carpenter pencil if you are working on rough, porous surfaces like raw timber, concrete hollow blocks, or drywall. Its flat design ensures it will not roll off sloped workbenches or roofs, and its wide lead produces highly visible marks that withstand dusty conditions.
Choose a regular round pencil if you are marking smooth, finished surfaces, paper blueprints, or painted walls. The narrow, cylindrical lead provides the fine, precise lines needed for exact measurements and clean erasure.
Products mentioned in this guide
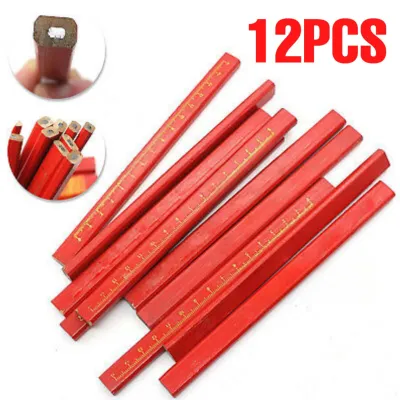
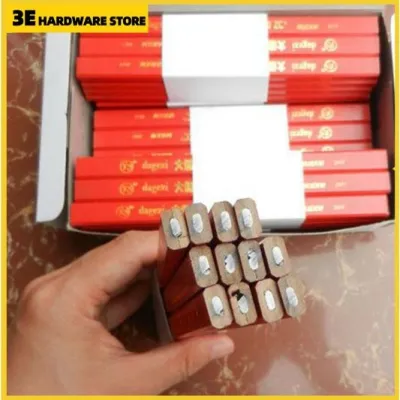
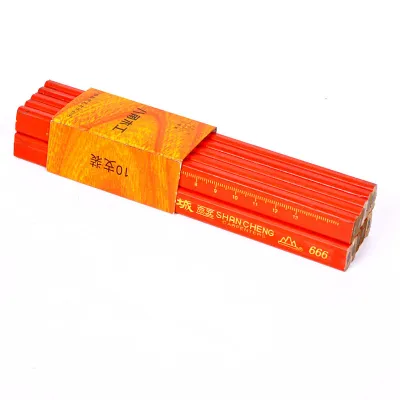
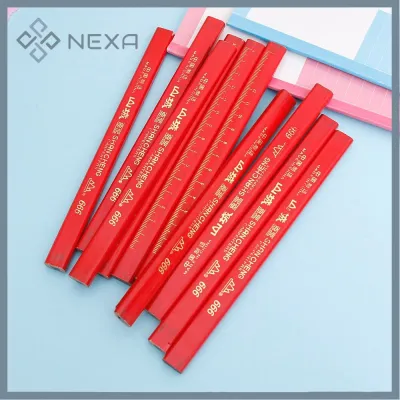
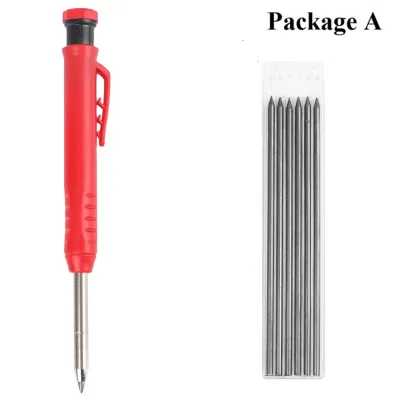
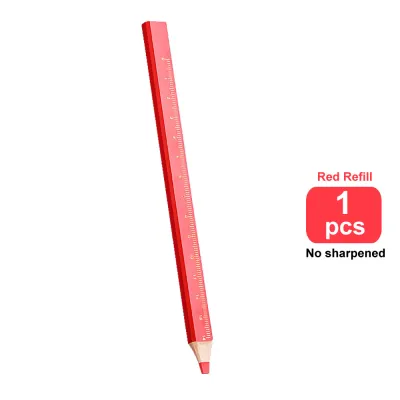
Prices are valid at publication and may change. Please refer to the product page for the latest price.
Verify first if your working environment has high humidity, which is highly common in tropical regions like the Philippines. High humidity softens certain paper mediums and affects how graphite adheres to wood fibers, making it essential to check surface moisture before laying down permanent guidelines.
Design and Lead Differences That Affect Your Marking
Understanding the physical anatomy of these two marking tools reveals why they cannot be used interchangeably without affecting your workflow. From the outer wooden casing to the core graphite mixture, every design element is engineered for a specific environment.
Shape, Grip, and Roll Prevention
The most striking difference is the cross-section: a standard pencil features a round or hexagonal body, whereas a carpenter pencil is flat, rectangular, or heavily elliptical. This flat profile is not an aesthetic choice; it serves as a built-in safety and convenience feature on active job sites. When set down on a sloped roof, a scaffold, or an uneven sawhorse, a round pencil immediately rolls away, often falling to the ground and breaking its inner lead. A flat carpenter pencil stays exactly where you place it, even on steep inclines.
Grip mechanics also differ significantly between the two designs. The wide, flat sides of a carpenter pencil provide a substantial surface area that is easy to grasp, even when wearing thick, heavy-duty work gloves. It allows you to exert downward force without the pencil twisting in your hand. Conversely, a standard round or hexagonal pencil is built for a traditional, precise pinch grip. This allows your fingers to make micro-adjustments for fine writing or detailed drafting, but it quickly becomes fatiguing when you try to apply heavy pressure on rough, vertical surfaces.
When planning your workspace, consider your typical working posture. If you find yourself frequently climbing ladders, working on rooftops, or reaching into tight, angled spaces, the anti-roll benefit of the flat design becomes a major safety and efficiency factor.
Lead Hardness and Line Thickness
The lead core itself represents two entirely different approaches to marking. A carpenter pencil contains a wide, rectangular ribbon of graphite (typically 5 mm wide by 2 mm thick) rather than a thin cylinder. This broad core is designed to lay down thick, dark, and highly visible lines that can be easily spotted from a distance, through a layer of sawdust, or in low-light environments. By rotating the pencil, you can use the flat edge of the lead to draw broad strokes, or use the sharp corner to create relatively thin lines.
Standard pencils utilize a thin, cylindrical lead core, typically 2 mm or thinner. This design is optimized for consistent, ultra-thin lines that are critical for exact measurements, detailed joinery, and paper-based drafting. A fraction of a millimeter can alter the fit of a fine joint, making the thin, sharp point of a regular pencil indispensable for precision cabinet making or indoor finish carpentry.
Lead hardness also plays a critical role in how the mark behaves. While standard office pencils are famously graded as HB (or No. 2), carpenter pencils also come in various hardness levels, though they are rarely labeled with the standard office scale. Instead, they are often categorized broadly as soft, medium, or hard. Softer leads leave darker, thicker marks but wear down quickly and smudge easily, especially in humid conditions. Harder leads retain their point longer and resist smudging, but they can scratch delicate surfaces. Always test the pencil on a scrap piece of your project material to verify both line visibility and smudge resistance before marking your final workpieces.
Surface Compatibility: Matching the Pencil to the Material
Selecting the right pencil requires analyzing the physical properties of the material you intend to mark. The texture, porosity, and finish of the surface dictate how the graphite will adhere and whether the mark can be safely removed later.

Rough, Porous, and Uneven Surfaces
For heavy-duty construction materials, the carpenter pencil is the undisputed standard. Surfaces such as raw Philippine hardwoods (like tangile or yakal), rough-sawn lumber, plywood, concrete blocks, brick, and unpainted drywall present microscopic pits, splinters, and deep grain patterns. A fine, cylindrical pencil lead will catch on these irregularities, causing the tip to snap repeatedly or skip over gaps, leaving faint, unreadable dotted lines.
The mechanics of the carpenter pencil solve this issue through its broad, sturdy lead. The wider surface area of the graphite bridges the gaps in rough timber and fills in the porous cavities of concrete or brick. This ensures a continuous, highly visible line without the risk of the lead fracturing under the pressure required to mark rough textures.
When working in humid environments, wood fibers naturally swell and retain moisture, which can prevent dry graphite from adhering smoothly. To overcome this, press firmly and trace over your line twice. This action compresses the damp wood fibers slightly and forces the graphite deeper into the grain, ensuring the mark remains visible even if the wood is exposed to light rain or high humidity on the job site.
Smooth, Painted, and Delicate Surfaces
When your project moves indoors to finished surfaces, the rugged strengths of the carpenter pencil quickly become liabilities. On finished cabinetry, painted drywall, ceramic tiles, or polished wood, a carpenter pencil can cause permanent damage. The wide, soft graphite core smudges with the slightest touch, spreading dark grey dust across pristine surfaces. Furthermore, if you apply too much pressure, the thick lead and wide wooden body can leave deep gouges in softwoods or plaster that are incredibly difficult to sand out or paint over.
Regular pencils are the superior choice for these delicate applications. Their fine, hard leads (such as H or 2H grades) lay down crisp, precise lines that do not smudge easily. These lines are narrow enough to be completely covered by a standard paint coat or easily lifted off with a quality rubber eraser without scuffing the underlying finish.
For specialized smooth surfaces like glass, glazed tiles, or polished metal, standard graphite may slide off without leaving a mark. In these cases, while a regular pencil can work on matte finishes, you may need to transition to a specialized grease pencil or non-permanent marker. However, for 90% of indoor finishing tasks, a standard No. 2 or H-grade office pencil provides the perfect balance of visibility, precision, and clean erasability.
Durability, Pocket Safety, and Sharpening Requirements
The practicalities of daily use—how you sharpen the tool, how safely you can carry it, and how well it survives a drop—are just as important as how it marks.
Sharpening Tools and Techniques
Standard round or hexagonal pencils are incredibly easy to maintain. They are fully compatible with common mechanical, electric, or manual rotary sharpeners found in any office or school setting. This allows you to quickly restore a needle-sharp point in seconds, ensuring continuous precision throughout your drafting or layout process.
Carpenter pencils, due to their flat, rectangular shape, cannot fit into standard rotary sharpeners. To sharpen a carpenter pencil, you must use a specialized flat sharpener, a chisel, or a sharp utility knife. Using a utility knife is the most common method on job sites, but it requires practice and strict safety precautions.
To sharpen a carpenter pencil safely with a utility knife, hold the pencil firmly in one hand with the tip pointing away from you. Using your other hand, carefully shave the wooden casing away from the lead, always cutting outward and away from your body, fingers, and legs. Once about a quarter-inch of the flat lead is exposed, whittle the graphite into a flat, wedge-shaped “chisel” edge. This chisel edge is highly versatile: you can draw thin, precise lines using the sharp corner, or rotate the pencil to draw thick, bold lines with the flat edge.
Break Resistance and Job Site Survival
The physical environment of a workshop or construction site is brutal on tools. If you drop a standard round pencil onto a concrete floor, the impact often fractures the delicate, thin lead core along its entire length inside the wooden casing. When you try to sharpen it, the broken lead segments simply fall out, rendering the pencil useless. Furthermore, regular pencils easily snap in half if they are stepped on or compressed inside a packed tool belt.
Carpenter pencils are engineered specifically for survival. Their thick, flat wooden casings act as a protective shield, absorbing heavy impacts and preventing the wide graphite core from fracturing. You can drop a carpenter pencil from a ladder, step on it with heavy work boots, or toss it into a metal toolbox, and it will remain completely intact.
Pocket safety is another major advantage of the flat design. When slipped into a front shirt pocket or a pants pocket, a flat carpenter pencil lies flush against your body. It does not roll around, poke your skin, or snap under the lateral pressure of your movements. A round pencil, by contrast, tends to stand outward, making it highly susceptible to catching on materials, snapping off at the tip, and leaving dark graphite stains on your clothing.
Quick Comparison: Carpenter Pencil vs Regular Pencil
To help you quickly evaluate which tool is best suited for your immediate needs, the following table summarizes the core physical characteristics and ideal use cases of both pencil types.
| Feature | Carpenter Pencil | Regular Pencil |
|---|---|---|
| Shape/Cross-Section | Flat, rectangular, or oval | Round or hexagonal |
| Primary Use Case | Framing, masonry, rough carpentry, outdoor construction | Finishing, detailed joinery, drafting, indoor painting |
| Line Thickness | Wide and bold (adjustable via chisel edge) | Fine, thin, and consistent |
| Best Surfaces | Raw timber, concrete, brick, plywood, drywall | Finished wood, paper, painted walls, tiles |
| Sharpening Method | Utility knife, chisel, or specialized flat sharpener | Standard rotary or manual sharpener |
| Roll Resistance | Excellent (will not roll off sloped surfaces) | Poor (rolls easily on uneven surfaces) |
Note: Always check the individual product packaging or manufacturer specifications for exact lead hardness grades, as these can vary significantly and will affect both the darkness of the mark and its ease of erasure. While traditional wooden pencils are consumed entirely, modern mechanical carpenter pencils are also available, which utilize thick, flat lead refills.
Final Decision Guide for Your DIY and Marking Tasks
To ensure your next project proceeds without a hitch, match your tool selection to your specific role or task scenario. Having the right pencil on hand saves time, prevents costly cutting errors, and protects your materials from damage.
The Woodworker and Builder If your project involves framing walls, building outdoor decks, pouring concrete, or cutting rough lumber, you should rely almost exclusively on carpenter pencils. Keep a bundle of them scattered across your work area, sawhorses, and tool belts. The high visibility of the thick lines ensures you can see your cut marks clearly, even when using loud, vibrating power saws in dusty conditions. The flat shape will save you countless trips down the ladder to retrieve rolled-away tools.
The Home Decorator and Painter If you are installing delicate crown molding, marking lines for accent paint, hanging picture frames, or assembling flat-pack furniture, reach for a standard round pencil. Choose one with a slightly harder lead grade, such as H or 2H, to keep your lines clean and faint. This ensures your marks can be completely erased or painted over without leaving dark smudges or deep indentations in your drywall and finished wood.
The Mixed-Use DIYer For those who tackle a wide variety of home improvement tasks, the best approach is to maintain a hybrid marking kit containing both pencil types. Before committing to a permanent cut or drill hole on unfamiliar materials—such as composite decking, melamine, or pressure-treated wood—always perform a quick test mark on a hidden area or a scrap piece. This allows you to verify how easily the line can be seen, whether the lead slips on the surface coating, and how cleanly the mark can be removed when the project is complete. Ultimately, the ideal marking tool is the one that provides the perfect balance of visibility and precision for the specific material under your hands today.
Frequently Asked Questions (FAQ)
Can I use a regular pencil for woodworking and rough carpentry?
Yes, you can use a regular pencil, but it is far from ideal for rough carpentry. The thin, delicate lead will wear down almost instantly or snap when dragged across rough-sawn timber or concrete. Additionally, the fine lines are incredibly difficult to see in dusty workshop conditions, and the round body means the pencil will constantly roll off your workbench or ladder, leading to frequent interruptions and broken leads.
Why are carpenter pencils flat or oval instead of round?
The flat, oval shape of a carpenter pencil is a deliberate engineering choice designed to prevent the tool from rolling away when placed on sloped surfaces, such as roofs, rafters, or uneven sawhorses. Furthermore, this wide, flat profile provides a much larger gripping surface, making the pencil significantly easier to hold and control when wearing heavy, protective work gloves.
How do you sharpen a carpenter pencil without a special sharpener?
You can easily sharpen a carpenter pencil using a sharp utility knife or a wood chisel. To do this safely, hold the pencil firmly in one hand with the tip pointing away from you, and use the knife to shave the wooden casing away from the lead in outward strokes. Once the lead is exposed, rub the flat sides of the graphite against a piece of scrap wood or sandpaper to create a sharp, durable chisel edge.
Community discussion
Share your experience or ask a question. Comments are reviewed before publication.