
To find the erasable white marker pen that works best, you must match the chemical formulation of the ink to the physical characteristics of your writing surface. There is no single “universal” white marker that performs flawlessly across whiteboards, glass, and paper. A marker designed to wipe cleanly off a glass window with a dry cloth will likely soak into dark cardstock and become permanent, while a highly opaque paint-based marker will ruin a standard melamine whiteboard by leaving permanent ghosting shadows. Selecting the right tool requires analyzing the porosity of your surface, the opacity of the pigment, and the specific erasing mechanism required to clear the marks without leaving a trace.
In tropical climates like the Philippines, high relative humidity and ambient temperature play a significant role in how these markers perform. Humidity affects how quickly solvent-based inks dry, how pigments settle inside the marker barrel, and how easily paper fibers degrade when subjected to friction during erasing. By understanding the science behind ink bases, nib designs, and surface interactions, you can confidently choose a white marker that delivers crisp, high-contrast lines for your presentations, menu boards, or creative projects, and erases cleanly every single time.
Understanding Ink Formulations for Erasable White Markers
The core of any erasable white marker is its ink formulation, which dictates how the pigment is suspended, how it adheres to a surface, and how it can be removed. Unlike black or colored markers that use dyes, white markers rely on heavy pigments—most commonly titanium dioxide—to achieve opacity. Because these pigments are physical particles rather than dissolved dyes, they behave differently on various surfaces and require specific solvents or binders to remain erasable.
Products mentioned in this guide
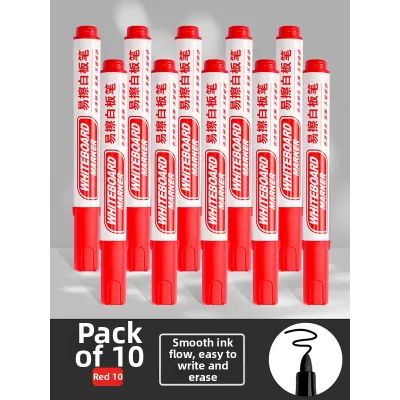
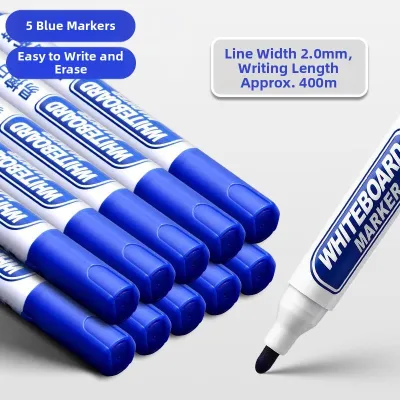
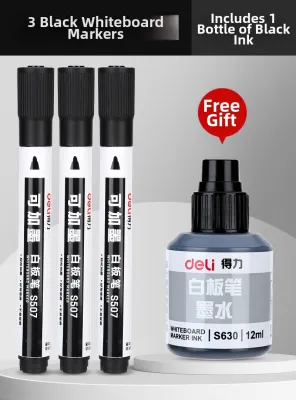
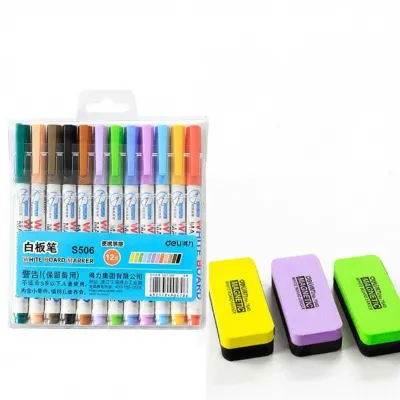
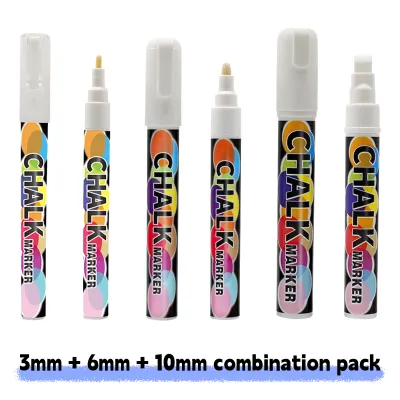
Prices are valid at publication and may change. Please refer to the product page for the latest price.
Water-based inks are the most common formulation for everyday whiteboard use. These inks use water as the primary carrier, combined with a release agent (usually a silicone-based polymer) that prevents the pigment from bonding directly to non-porous surfaces. When you write, the water evaporates, leaving behind a dry, powdery film of pigment that sits loosely on the surface. This film can be easily wiped away with a dry eraser or cloth. While water-based white markers are highly convenient and low-odor, they often suffer from lower opacity. On dark backgrounds, water-based white ink can appear translucent or streaky, requiring multiple passes that can disrupt the underlying layer of dry ink.
Oil-based or liquid chalk formulations offer a much higher pigment concentration, making them the preferred choice for high-contrast displays on glass, acrylic, and non-porous chalkboards. Liquid chalk markers use a liquid base that holds a dense suspension of chalk-like particles. Once applied, the liquid evaporates, leaving behind a vibrant, opaque layer that mimics traditional chalk but without the dust. Because these formulations are designed to resist accidental smudging, they often require a damp microfiber cloth or a specific wet-erase process to break down the binder and lift the pigment. In humid environments, liquid chalk can take slightly longer to dry completely, but once cured, it provides excellent resistance to ambient moisture.
Acrylic or paint-based markers represent the most opaque option available, utilizing acrylic polymers to bind the heavy white pigment. While standard acrylic paint markers are permanent, some specialty markers are marketed as “erasable” or “washable” paint pens. These formulations are designed for temporary use on non-porous surfaces or specialized dark papers. However, they carry a high risk of becoming permanent if left to cure for too long or if exposed to direct sunlight and heat. If you choose an acrylic-based erasable marker, you must pay close attention to the manufacturer’s recommended removal window and verify whether a specific solvent, such as isopropyl alcohol, is required to erase the marks safely.
Key Specifications to Verify Before Purchase
When shopping on online marketplaces or browsing local stationery stores, relying solely on the product title is rarely sufficient. To ensure you get a marker that fits your specific workflow, you must examine several physical and functional specifications on the product label or technical listing.

First, evaluate the nib size and shape, as this directly determines your writing style and the visibility of your text from a distance. Bullet tips, ranging from fine 1mm points to medium 3mm tips, are ideal for detailed writing, labeling, and fine-line illustrations. Chisel tips, which typically feature a slanted edge of 5mm or wider, allow you to vary your line width by changing the angle of the pen. This versatility is essential for professional hand-lettering, bold headings, and filling in large surface areas quickly. For massive display boards or storefront windows, extra-wide block nibs (up to 15mm) are available, though they require a steady hand and a consistent ink flow to prevent streaking.
Next, check the manufacturer’s specifications regarding opacity and pigment load. High-quality white markers will often state whether they are “high-opacity” or designed specifically for “dark surfaces.” Because titanium dioxide is expensive, cheaper markers often skimp on pigment density, resulting in a watery, semi-transparent white line that looks grey or faded on dark backgrounds. Look for user reviews or manufacturer swatches that demonstrate the marker’s performance on black acrylic or dark paper to verify that the ink dries to a solid, bright white.
The erasing mechanism is another critical specification to verify. Markers are generally classified as dry-erase or wet-erase. Dry-erase markers can be wiped away instantly with a standard felt eraser, microfiber cloth, or even a dry tissue, making them ideal for fast-paced brainstorming sessions and classroom teaching. Wet-erase markers, on the other hand, require moisture to dissolve the binding agent. While wet-erase markers require more effort to clean, they offer the distinct advantage of being smudge-resistant, meaning accidental contact with hands, sleeves, or rain will not ruin your work.
Finally, understand the priming mechanism of the marker. Many high-opacity white markers, especially liquid chalk and paint-based formulations, utilize a shake-and-pump priming system. These markers contain an internal mixing ball (which rattles when shaken) to redistribute the heavy white pigments that naturally settle at the bottom of the barrel. To start the ink flow, you must shake the marker vigorously with the cap on, then gently press the nib down repeatedly on a scrap piece of paper until the ink saturates the tip. While this mechanism ensures a fresh, highly concentrated flow of ink, it requires careful handling to prevent over-priming, which can lead to messy leaks, pooling, or ruined nibs.
Matching Markers to Your Specific Writing Surface
Selecting the perfect erasable white marker requires a clear understanding of the material you are writing on. Different surfaces interact with ink solvents and pigments in unique ways, directly affecting how easily the ink can be removed.
Standard Whiteboards and Melamine
Traditional whiteboards are typically made of melamine, painted steel, or porcelain-enameled steel. Melamine is the most common and budget-friendly option, but it is also the most porous of the three. Over time, the protective topcoat on melamine boards wears down, exposing microscopic pores that can trap white pigments.
For these surfaces, you must look for markers explicitly labeled as “dry-erase” and avoid any paint-based or highly concentrated liquid chalk formulations. Paint-based inks will quickly penetrate the worn pores of a melamine board, causing permanent “ghosting” shadows that are incredibly difficult to remove. Additionally, because whiteboards are frequently used in enclosed offices, classrooms, or study rooms, it is highly recommended to verify that the markers use a low-odor, non-toxic formulation. This ensures a comfortable writing experience without the harsh chemical fumes often associated with older solvent-based markers.
Glass and Glossy Non-Porous Surfaces
Glass boards, windows, mirrors, and glazed ceramic tiles represent the ideal surface for liquid chalk and specialized glass-board markers. Because glass is completely non-porous, there are no microscopic pores for the pigment to sink into, allowing for incredibly clean erasure even after the ink has been left on the surface for weeks or months.
When writing on glass, standard dry-erase markers often appear faint and streaky because the smooth surface does not allow the thin, water-based ink to cling evenly. Instead, opt for liquid chalk markers or dedicated glass-board markers that dry to a thick, opaque, matte finish. To ensure a streak-free removal, check the manufacturer’s guidelines. While some glass markers can be wiped away dry, many require a damp microfiber cloth to completely lift the chalk residue without spreading a fine white dust across the glass pane.
Dark Paper and Cardstock
Writing on dark paper, black cardstock, or kraft paper presents a unique challenge because paper is a highly porous, fibrous material. Standard dry-erase and liquid chalk markers are completely unsuitable for paper; the paper fibers will instantly absorb the liquid carrier, pulling the pigment deep into the sheet and making dry or wet erasing impossible without tearing the paper.
To achieve an erasable white line on dark paper, you must look for specialized friction-erasable white gel pens. These pens use a unique thermo-sensitive ink formulation that becomes transparent when subjected to the heat generated by friction. By rubbing the specialized silicone tip attached to the pen over the writing, you can “erase” the white ink without using water or damaging the delicate paper fibers. However, keep in mind that because this process relies on heat, exposing the erased paper to cold temperatures (such as an air-conditioned room or a refrigerator) can cause the white writing to reappear. Always test the pen on a scrap piece of the exact same paper to ensure the fibers do not pill or tear during the erasing process.
How to Test and Maintain Your Erasable White Markers
To get the most out of your erasable white markers and prevent costly damage to your writing surfaces, establishing a proper testing and maintenance routine is essential. White pigments are inherently heavier than colored dyes, making these markers more prone to drying out, clogging, and separating if not cared for correctly.
Before committing to a large project or writing across an entire board, always perform a hidden spot test. Find an inconspicuous corner of your whiteboard, glass pane, or paper sheet and apply a small stroke of the marker. Let the ink dry completely according to the manufacturer’s recommended drying time—usually between one to three minutes. Once dry, attempt to erase the mark using the recommended method (dry wipe, damp cloth, or friction eraser). This simple test allows you to verify three critical factors: the opacity of the white ink against your background, how long it takes to dry completely, and whether it leaves any permanent staining or ghosting behind.
Proper storage orientation is the single most important factor in extending the lifespan of your white markers. Because titanium dioxide pigments are dense, they will settle over time. If you store your markers tip-up, the pigment will settle at the bottom of the barrel, leaving the nib dry, watery, and transparent. Conversely, storing them tip-down can cause the heavy pigment to clog the feed mechanism, leading to a completely blocked nib or a sudden, messy leak when you next open the cap. To prevent this, always store your erasable white markers horizontally. This keeps the pigment evenly distributed along the length of the barrel, ensuring a consistent, high-contrast ink flow every time you write.
If you find that your marker’s tip has dried out or become scratchy, do not discard it immediately. Many manufacturers design their markers with reversible or replaceable nibs. If the nib is clogged with dried pigment, you can often pull it out gently with a pair of tweezers, rinse it under warm water to dissolve the dried binder, let it dry completely on a paper towel, and reinsert it. For alcohol-based dry-erase markers, dipping the dried tip into a tiny amount of isopropyl alcohol for a few seconds can help re-solubilize the dried ink and restore smooth flow. Always consult the manufacturer’s instructions before attempting to revive a marker to avoid altering the ink’s chemical balance.
Finally, you must recognize when a marker has reached the end of its usable life and needs to be replaced. If the white ink remains watery and translucent even after vigorous shaking and priming, the pigment supply inside the barrel has likely been exhausted, leaving only the liquid carrier behind. Other warning signs include a frayed or mushy nib that no longer holds its shape, consistent leaking around the collar of the pen, or ink that leaves a stubborn, greasy residue that cannot be cleaned with standard whiteboard cleaners. Continuing to use a degrading marker can permanently scratch or stain your writing surfaces, making timely replacement the most cost-effective choice.
Frequently Asked Questions (FAQ)
Can I use a dry-erase white marker on regular paper?
No, you should avoid using dry-erase white markers on regular, uncoated paper. Dry-erase ink is formulated with a liquid solvent and a release agent designed specifically to sit on top of non-porous surfaces. When applied to paper, which is highly porous, the paper fibers instantly absorb the liquid carrier and the white pigment. This causes the ink to bleed through the page, feather along the edges, and become completely permanent. Attempting to erase dry-erase ink from paper with a standard eraser or cloth will only smudge the pigment and tear the paper fibers. For writing on paper, stick to specialized friction-erasable gel pens or non-erasable gel pens if permanence is acceptable.
Why does my erasable white marker leave a ghosting shadow?
Ghosting occurs when the white pigment penetrates the surface material rather than sitting loosely on top of it. This is highly common on older melamine whiteboards where the protective, non-porous topcoat has worn away due to age or the use of harsh chemical cleaners. Ghosting can also happen if you leave liquid chalk or dry-erase ink on a surface for an extended period, allowing the binders to cure and bond with the surface. To resolve this, avoid using abrasive scrubbers that can further scratch the board. Instead, use a specialized whiteboard cleaning spray or a microfiber cloth dampened with isopropyl alcohol to gently dissolve the trapped pigment and restore the surface’s smooth finish.
Community discussion
Share your experience or ask a question. Comments are reviewed before publication.