
Starting your drawing journey in the Philippines begins with finding the right pencil for sketch work. While the sheer variety of options in local art shops can feel overwhelming, you do not need an expensive, professional-grade kit to begin. The ideal starting point is a small, curated selection of graphite pencils that allow you to practice basic line work, shading, and value transitions.
Selecting the right tools involves understanding how different graphite grades behave on paper and learning how to spot genuine, well-constructed art supplies. By focusing on a few versatile grades and learning how to spot genuine, well-constructed art supplies, you can build a reliable sketching kit that supports your growing skills without stretching your budget.
Decoding Graphite Grades: What Beginners Actually Need
Graphite pencils are categorized using a standardized scale of letters and numbers that indicate the hardness and darkness of the lead. The letter “H” stands for hard, while “B” stands for black or soft. Pencils marked with an “H” contain more clay binder, making the core harder and the lines lighter and thinner. Conversely, pencils marked with a “B” contain more graphite and less binder, resulting in a softer core that deposits darker, thicker, and richer lines on your drawing surface.
Products mentioned in this guide
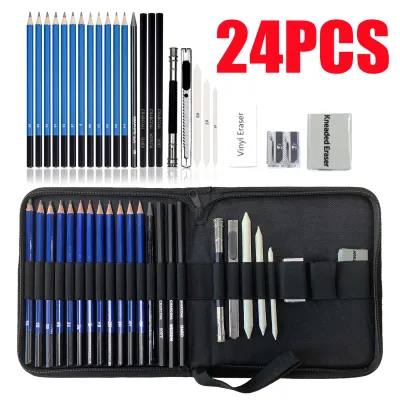
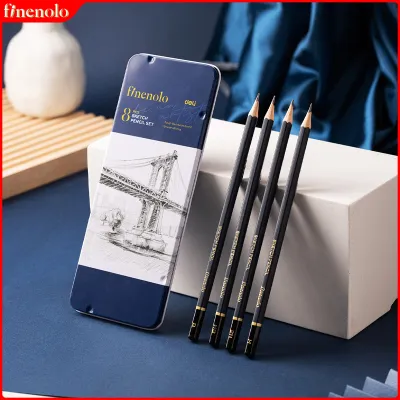
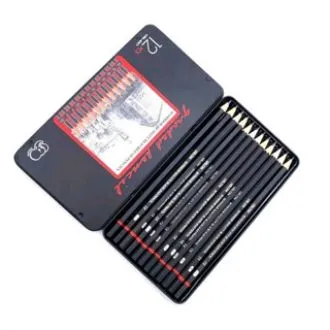
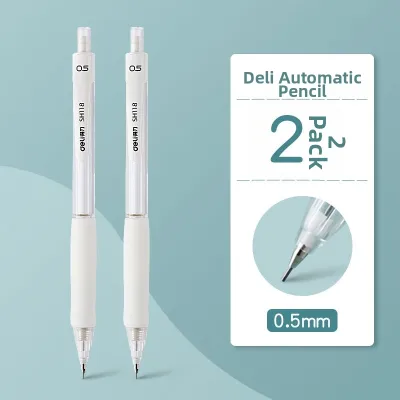
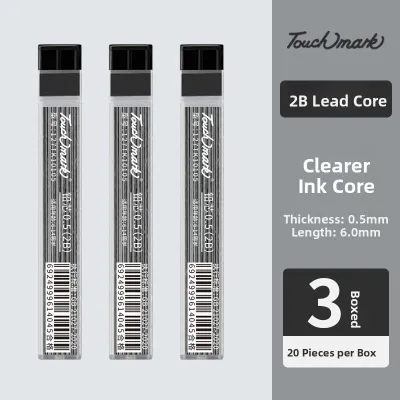
Prices are valid at publication and may change. Please refer to the product page for the latest price.
The middle of this scale is occupied by the “HB” pencil, which is equivalent to the standard school pencil. For sketching, an HB pencil is excellent for initial, light guidelines because it is easy to erase and does not indent the paper easily. As you move up the “H” scale, such as 2H or 4H, the lines become increasingly faint, and the hard tips can scratch your paper if you apply too much pressure.
For beginners, the most useful range for daily practice spans from HB to 4B. A typical starter selection includes an HB for light drafting, a 2B for general drawing and mid-tone shading, and a 4B for deep shadows and rich contrasts. This limited range prevents you from constantly switching pencils while still providing enough tonal variety to make your drawings look three-dimensional.
The performance of these grades is highly dependent on the paper texture, often referred to as the “tooth” of the paper. Smooth paper, such as bristol board or hot-press paper, has very little tooth, meaning it does not shave off much graphite from the pencil core. This makes it easier to achieve clean, precise lines, but harder to build up deep, dark values with soft pencils.
Textured paper, such as standard sketchpad paper or cold-press drawing sheets, has a rougher surface that grabs the graphite. This texture is ideal for soft “B” grades, allowing you to create rich, expressive textures and deep shadows. However, highly textured paper can make fine detail work more challenging and may cause your pencil tips to wear down much faster. When selecting your pencils, always consider the type of sketchpad you plan to use to ensure a compatible match.
Quality Checklist: What to Inspect Before You Buy
When shopping for sketching pencils in local bookstores or specialized art shops, a quick physical inspection can save you from the frustration of constant lead breakage and uneven sharpening. The first element to evaluate is the wood casing. High-quality sketching pencils typically use incense cedar, which is straight-grained and soft enough to sharpen smoothly without splintering. Cheaper alternatives often use low-grade composite woods that can split, warp, or dull your sharpener blades quickly.

Next, look closely at the unsharpened end of the pencil to inspect the lead centering. The graphite core should sit precisely in the middle of the wooden cylinder. If the core is off-center, one side of the wood casing will be thinner than the other when sharpened. This imbalance leads to uneven support for the graphite, causing the tip to snap repeatedly under normal drawing pressure.
The bonding quality between the wood and the graphite core is another critical factor. Reputable manufacturers use specialized bonding processes that glue the lead securely along the entire length of the wooden casing. This internal support prevents the graphite from shattering inside the pencil if it is accidentally dropped. If you are buying individual pencils from open bins, avoid any that show signs of deep dents or cracked casings, as these often indicate internal lead damage.
Finally, consider how the graphite behaves when applied to paper and erased. Softer leads naturally smudge more easily because the loose graphite particles sit on top of the paper fibers. To manage this, you will need to verify how easily the graphite can be lifted. A standard vinyl eraser is excellent for clean, precise corrections on harder leads, but a kneaded eraser is essential for softer “B” grades. Kneaded erasers lift the graphite off the page without rubbing, preserving the texture of your paper and preventing messy smudges.
Choosing the Right Set: Individual Pencils vs. Pre-Packaged Kits
As a beginner, you must decide whether to purchase individual pencils or invest in a pre-packaged sketching set. Buying individual pencils allows you to customize your kit and replace only the grades you use most frequently. For instance, you might find that you use 2B and 4B pencils much faster than HB. Purchasing these individually is highly cost-effective and prevents you from accumulating unused hard pencils.
Pre-packaged kits, on the other hand, offer convenience and a structured introduction to value scales. A small graded set of 3 to 6 pieces is often the perfect compromise for absolute beginners. These sets typically include a balanced selection like HB, 2B, 4B, and 6B, which is more than enough to practice fundamental shading techniques without the confusion of managing a dozen different pencils.
Larger, comprehensive sets containing 12 or more pencils are generally better suited for intermediate artists. These extensive ranges include very hard pencils (up to 9H) and extremely soft pencils (up to 9B). For a beginner, these extreme grades are rarely necessary and can actually hinder your progress by making your workflow overly complex. It is far better to master a small, versatile set before expanding your collection.
You should also consider the choice between traditional wood-cased pencils and mechanical pencils. Traditional pencils offer unmatched versatility; by changing the angle of the pencil, you can transition from a sharp, fine line to a broad, soft shade using the side of the exposed lead. This makes them the preferred choice for expressive sketching and life drawing.
Mechanical pencils excel at consistent line width and do not require sharpening, making them ideal for technical sketching, fine details, and clean outlines. However, they are limited by their lead thickness (typically 0.5mm or 0.7mm) and cannot easily produce broad, shaded strokes. If you choose a mechanical pencil, you will also need to purchase matching lead refills in your preferred hardness grade, such as 2B, to achieve darker lines without breaking the delicate lead.
Sourcing Authentic Art Supplies in the Philippines
Finding genuine art supplies in the local market requires some selectivity, as counterfeit products are common on online platforms. To ensure you are buying authentic sketching pencils, start by visiting established local bookstore chains and specialized art supply shops. These physical stores allow you to handle the pencils, check the wood quality, and verify that the leads are centered before you make a purchase.
If you prefer the convenience of online shopping, take steps to verify the seller on major e-commerce platforms. Always look for official brand flagship stores or authorized distributors, which are typically marked with verification badges. Read customer reviews carefully, paying close attention to photos uploaded by other buyers to check the packaging and product details.
Be highly skeptical of suspiciously low prices. If a complete set of a well-known international brand is listed for ₱50 when authorized retailers sell it for ₱300, it is highly likely to be a counterfeit. Counterfeit pencils often feature poor packaging print quality, misaligned logos, and inconsistent lead hardness markings. More importantly, their internal graphite cores are frequently broken, leading to constant snapping and frustration during your drawing sessions. Investing a little more in authentic supplies ensures a smoother, more enjoyable learning experience.
Frequently Asked Questions (FAQ)
Do Beginners Need a Special Sharpener for Sketching?
You do not need an expensive or highly specialized sharpener to begin sketching, but the quality of your sharpener directly impacts your pencil’s lifespan. Standard manual pocket sharpeners with metal bodies are highly reliable and portable, provided the blade is sharp. Dull blades will tug on the wood casing and snap the graphite core, leading to unnecessary waste.
Electric sharpeners offer speed and consistent points, but they can quickly eat away at your pencils if not monitored closely. Many experienced artists prefer using a utility or craft knife to sharpen their sketching pencils. This manual method allows you to expose a longer segment of the graphite core and shape the tip to a custom point. If you choose this method, always cut away from your body, work slowly, and keep the blades safely stored away from children.
How to Prevent Graphite Smudging on Finished Sketches?
Graphite is a loose medium that smudges easily under your hand as you work across the page. To prevent accidental smearing, always work from the top-left of your drawing to the bottom-right (or top-right to bottom-left if you are left-handed). Placing a clean sheet of paper or a smooth plastic guard sheet under your drawing hand also protects the finished areas of your sketch from the oils and friction of your skin.
Once your sketch is complete, you can protect it permanently by applying a fixative spray. Fixative sprays seal the graphite particles to the paper fibers, preventing smudging and fading over time. When applying fixative, work in a well-ventilated outdoor area to avoid inhaling fumes. Hold the can about 12 inches away from your drawing and apply a light, even mist across the surface, allowing it to dry completely before touching the paper.

Community discussion
Share your experience or ask a question. Comments are reviewed before publication.