
Helping a child learn to write is a milestone that requires patience, practice, and the right tools. Many parents in the Philippines notice their children struggling to hold a pencil comfortably, especially during long writing exercises in warm classrooms. While a variety of colorful accessories claim to solve handwriting difficulties instantly, the key to choosing an effective pencil grip trainer lies in understanding your child’s unique physical development, hand size, and current gripping habits rather than relying on generic recommendations.
A generic recommendation rarely works for every child. A grip that helps one child transition to a mature grasp might cause frustration or hand fatigue in another. By focusing on ergonomic design, material safety, and developmental readiness, you can select a tool that supports natural hand movements and fosters a positive attitude toward writing.
Understanding Pencil Grip Development and When to Use Trainers
Before purchasing a grip trainer, it is essential to observe how your child naturally interacts with writing utensils. Children do not start writing with a mature tripod grasp; instead, they progress through several predictable developmental stages. Toddlers typically begin with a cylindrical grasp, using their whole fist to hold a crayon. As shoulder and arm stability improve, they transition to a digital pronate grasp, where the fingers point down toward the paper. By age four or five, many children naturally adopt a static tripod grasp, eventually refining it into a dynamic tripod grasp where the thumb, index, and middle fingers control the pencil with precise movements.
Products mentioned in this guide
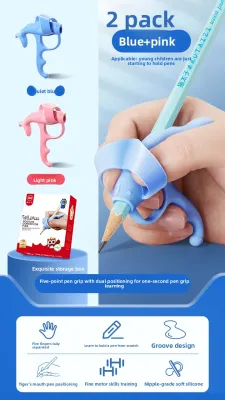
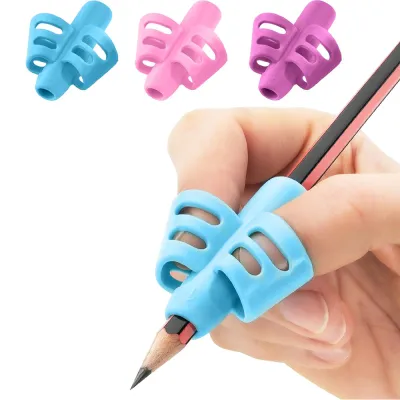
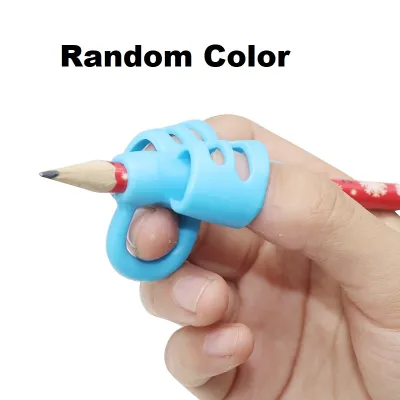
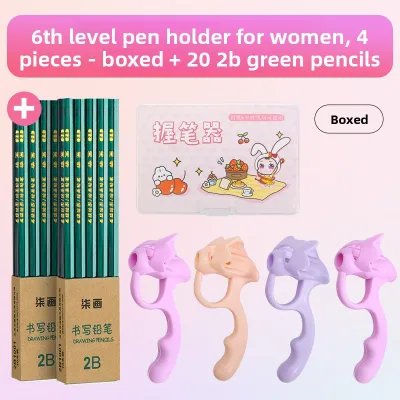
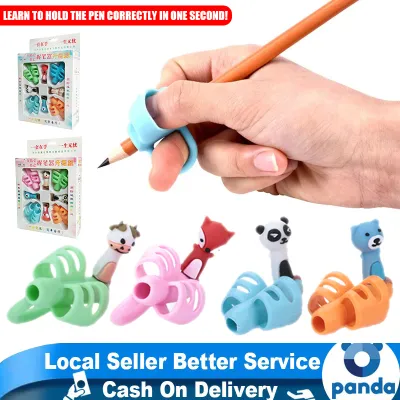
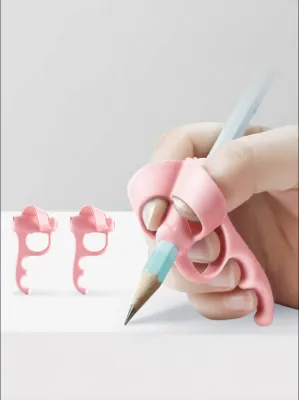
![[🇵🇭 Stock&COD] 4Pcs/Set Pencil Handle Grips Soft Silica Pencil Holder Writing Training Correction Tool For Kids](https://img.lazcdn.com/g/p/c0b6ebbd8293f5e982b7c5a021fc6d9e.jpg_400x400q80.jpg_.webp)
Prices are valid at publication and may change. Please refer to the product page for the latest price.
Introducing a highly structured grip trainer too early can interfere with this natural progression. If a child’s hand muscles and wrist stability are not yet ready for a mature grasp, forcing their fingers into specific slots can lead to hand strain and frustration. Generally, grip trainers are most beneficial when a child is around five to six years old and is beginning formal writing instruction but struggles to maintain a comfortable hold.
You can identify the need for a grip trainer by looking for specific, observable signs of fatigue or discomfort. If your child frequently shakes their hand, complains of pain after writing a few words, or presses down so hard that the pencil lead constantly breaks, their grip may be inefficient. Other signs include wrapping the thumb tightly over the index finger, clutching the pencil with all five fingers, or holding the utensil too close to the tip, which blocks their view of the paper.
However, not all handwriting challenges can be resolved with a simple silicone accessory. If your child exhibits persistent pain, extreme joint flexibility, or a strong avoidance of drawing and writing tasks, it is best to pause and consult an occupational therapist or a pediatrician. These professionals can assess whether underlying issues, such as low muscle tone or fine motor delays, require specialized therapeutic exercises rather than an over-the-counter stationery tool.
Key Features to Look for in a Pencil Grip Trainer
When browsing stationery stores or online marketplaces, the sheer variety of grip trainers can be overwhelming. To narrow down your options, start by evaluating the safety and quality of the materials. Because these tools come into direct, prolonged contact with a child’s skin, look for products explicitly labeled as non-toxic, BPA-free, and latex-free. High-grade silicone is the standard material for quality trainers, but the firmness of the silicone can vary significantly.

In the warm and humid climate of the Philippines, material choice plays a critical role in comfort. Soft, highly flexible silicone provides a cushioned feel that can relieve pressure on sensitive fingers, but it can also become sticky or attract dust and lint in humid environments. Conversely, firmer silicone or molded plastic grips maintain their shape better and offer more structured guidance, but they may feel uncomfortable during long writing sessions if the child tends to squeeze the pencil too tightly.
Ergonomic contours and finger placement guides are the core functional elements of any trainer. Effective designs feature intuitive indentations or physical loops that guide the thumb and index finger into a natural pinch, while supporting the middle finger underneath. The physical barriers should be smooth and seamless; poorly molded seams can rub against the skin, causing irritation or blisters that discourage the child from practicing.
Finally, verify the compatibility of the grip with different writing instruments. A trainer that only fits standard, thin yellow hexagonal pencils may be useless if your child’s school requires thick, triangular beginner pencils or jumbo crayons. Look for flexible designs that can stretch to accommodate various diameters, or check the manufacturer’s specifications to ensure the inner diameter matches the specific pens, pencils, or crayons your child uses daily.
Matching Grip Types to Your Child's Hand Size and Stage
Pencil grip trainers are not one-size-fits-all; they are designed to address specific gripping habits and developmental stages. Understanding the functional differences between common shapes will help you select the right style for your child’s current needs.
For children who are just starting to transition from a whole-hand grasp to a finger-based grasp, highly structured models like the claw or finger-pocket grips are highly effective. These designs feature physical loops or pockets where the child must insert their thumb, index, and middle fingers. This physical containment prevents the fingers from crossing over or slipping, making it an excellent tool for establishing the basic muscle memory of a tripod grasp.
As the child becomes more comfortable with finger placement, you can transition them to transitional shapes, such as triangular grips or contoured bulbous grips. Triangular grips slide onto the pencil and provide three flat surfaces that naturally guide the fingers into place without physically locking them in. Bulbous or pear-shaped grips add bulk to the pencil, which is particularly helpful for children who tend to clutch their writing tools too tightly, as the wider diameter forces the hand to relax and open up.
Estimating the correct size is crucial for both comfort and effectiveness. A grip that is too large for a child’s small hand will allow their fingers to slide around, defeating the purpose of the trainer, while a grip that is too small can pinch the fingers and restrict blood flow. Always check the product’s dimension charts and age recommendations. If your child has particularly petite hands, look for models specifically designated for preschool or kindergarten ages rather than universal or adult-sized ergonomic grips.
Additionally, consider whether your child is left-handed or right-handed. Many molded grip trainers are asymmetrical, featuring specific contours designed exclusively for right-handed writers. If a left-handed child attempts to use a right-handed grip, their fingers will be forced into highly awkward, uncomfortable angles. Look for products clearly labeled as ambidextrous, or seek out specialized left-handed models that accommodate the unique hand positioning and paper angles required for left-handed writing.
How to Build a Shortlist and Verify Quality Before Buying
With countless options available on e-commerce platforms, building a reliable shortlist requires a systematic approach to quality verification. Rather than relying on flashy marketing claims or generic best-seller badges, focus on verifiable product specifications and user feedback.
Start by reading the product labels and manufacturer descriptions carefully. Reputable brands will clearly state the materials used, age recommendations, and any safety certifications. If a product listing lacks basic information about material composition or does not specify whether it is non-toxic, it is best to exclude it from your shortlist.
User reviews can provide valuable insights into how the product performs in real-world conditions. Look for reviews from parents who mention the durability of the material over several weeks or months of daily school use. In tropical climates, some low-quality silicone grips can degrade, stretch out, or become oily over time. Pay close attention to comments regarding how easily the grip slides onto a pencil and whether it stays securely in place or constantly slips down during writing.
Be on the lookout for common red flags when evaluating physical products in a store or analyzing online photos. Avoid grips with sharp, raised seams from the molding process, as these will quickly cause discomfort. Extremely rigid plastic grips should also be avoided for young beginners, as they offer no cushioning and can make writing painful. A high-quality grip should balance structural support with a comfortable, yielding texture. Quality silicone grip sets are widely available, with typical prices ranging from ₱50 to ₱300 depending on the pack size and design complexity.
Practical Tips for Introducing and Using Grip Trainers
Introducing a pencil grip trainer to a child requires a gentle, encouraging approach to prevent them from viewing writing as a chore or a punishment. The goal is to make the transition feel natural and low-pressure.
Begin by introducing the grip during short, fun activities rather than formal homework sessions. Coloring books, mazes, or simple drawing games are excellent opportunities to use the trainer. Keep these initial sessions brief—around five to ten minutes—and gradually increase the duration as the child’s hand muscles adapt to the new positioning. This gradual approach helps build muscle memory without causing physical fatigue or mental frustration.
During these sessions, closely monitor your child’s hand and behavior. Check their fingers for any red marks, deep indentations, or signs of irritation, which could indicate that the grip is too small, too tight, or made of a rough material. Watch for signs of increased fatigue, such as the child dropping the pencil frequently, shaking their wrist, or complaining that their hand feels tired.
Establish clear stopping conditions. If your child shows signs of physical discomfort or becomes highly frustrated, remove the grip and allow them to write or draw normally. Forcing a child to push through pain or extreme frustration can lead to a negative association with writing. If the discomfort persists over several sessions, reassess the fit of the grip, try a different style, or consider consulting a professional for personalized guidance.
Frequently Asked Questions (FAQ)
Can a pencil grip trainer correct a deeply ingrained bad habit?
Correcting an established, inefficient grip habit in older children is more challenging than guiding early development, but it is entirely possible with patience and consistency. Older children have developed strong muscle memory, so transitioning to a new grip will initially feel awkward and slow down their writing speed. To help them adapt, explain the benefits of the trainer—such as reduced hand pain and neater handwriting—to gain their cooperation. Consistent daily practice, even for just fifteen minutes, is key. If the habit is deeply ingrained and causing significant pain or academic difficulties, working with an occupational therapist can provide targeted exercises to ease the transition.
Are left-handed pencil grips different from right-handed ones?
Yes, many pencil grips are designed specifically for either right-handed or left-handed users due to the different angles and finger placements involved. Left-handed writers push the pencil across the page rather than pulling it, and they often need to hold the pencil slightly further from the tip to see what they are writing without smudging the ink. When shopping, look for grips explicitly labeled as ambidextrous or for left-handed use. Ambidextrous grips typically feature symmetrical designs that work equally well for both hands, while dedicated left-handed grips have molded finger slots angled specifically to support the left hand’s natural writing posture.
How do I clean and maintain silicone pencil grips?
Silicone pencil grips are highly durable but can easily collect dust, pencil shavings, and oils from a child’s hands. To clean them, wash the grips in warm water with a few drops of mild dish soap, gently rubbing the surface with your fingers to remove dirt. Rinse them thoroughly with clean water. To dry, place them on a clean towel in a well-ventilated indoor area. Avoid exposing silicone grips to direct sunlight or high heat, as extreme heat can cause the material to warp, become sticky, or degrade over time. If you notice the silicone cracking, tearing, or losing its elasticity, it is time to replace the grip to ensure continued support.
Community discussion
Share your experience or ask a question. Comments are reviewed before publication.