
Customizing your wardrobe with a fabric marker pen is an accessible, creative way to express personal style, but the longevity of your hand-drawn designs hinges entirely on the wash resistance of the ink. Standard writing instruments wash out or bleed into an illegible blur during the very first laundry cycle. To ensure your custom t-shirts, denim jackets, or canvas sneakers survive repeated trips through the washing machine, you must select markers specifically formulated to bond with textile fibers. The ideal marker depends on your fabric’s material composition, the color of the garment, and your willingness to heat-set the finished design.
Understanding Wash Resistance in Fabric Markers
To understand why some inks fade while others remain vibrant, it is helpful to look at how different ink formulas interact with textile fibers. True wash resistance in a fabric marker pen is achieved either through deep physical penetration into the yarn or through a chemical curing process that cross-links the ink polymers to the fabric surface.
When you write on a garment, the liquid ink is drawn into the spaces between the fibers via capillary action. In natural fibers like cotton, linen, and bamboo, these yarns are highly porous and hollow, allowing dye-based inks to soak deep into the core of the fiber. Once dry, the color is locked inside the structure of the thread. Synthetic fibers like polyester, nylon, and acrylic are essentially extruded plastics; they are smooth, non-porous, and hydrophobic. Standard inks cannot penetrate synthetic fibers, meaning they sit entirely on the surface where they are easily rubbed off or dissolved during a wash cycle.
Products mentioned in this guide
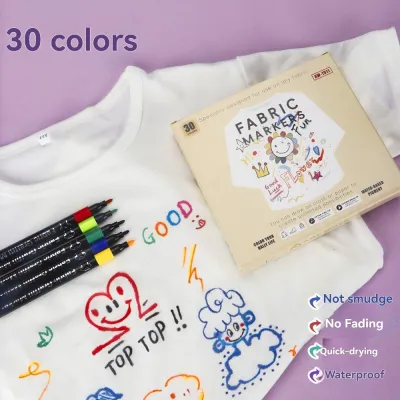
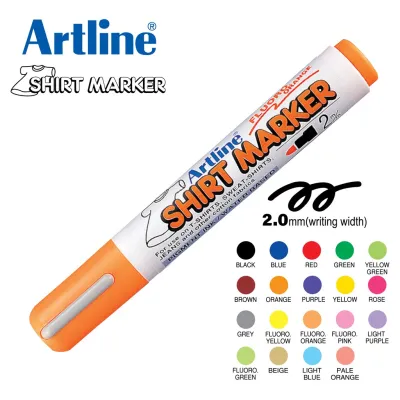
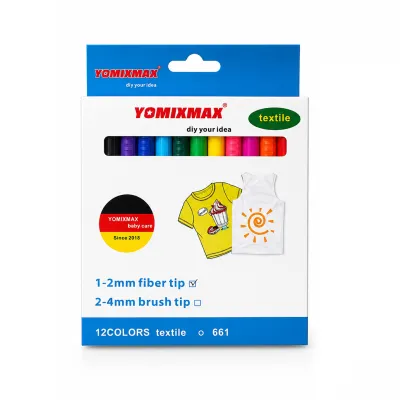
![[COD] EHBqna 8 Pcs Textile Marker Fabric Paint Pen Diy Crafts T-shirt Pigment Painting Pen](https://img.lazcdn.com/g/p/226eb5bed49664c1f97ec708bf1df9cc.jpg_400x400q80.jpg_.webp)
Prices are valid at publication and may change. Please refer to the product page for the latest price.
Furthermore, wash durability is highly dependent on the curing process. Many high-quality fabric markers rely on heat-setting to activate the binders within the ink. When heat is applied, these binders undergo a chemical change, forming a water-resistant polymer shield that anchors the pigment particles to the fibers. Without this crucial step, even the most expensive fabric ink can gradually wash away.
In a tropical, high-humidity environment like the Philippines, ambient moisture can slow down the initial drying phase. If you attempt to heat-set or wash the garment while the ink is still damp at a microscopic level, the design will likely bleed or fade prematurely. Patience during the drying phase is just as critical as the chemical makeup of the ink itself.
Essential Features to Evaluate Before Buying
Selecting the right fabric marker pen requires careful inspection of the product packaging and physical specifications. Taking the time to evaluate these details beforehand saves you from ruined garments and faded artwork.

Label Claims and Curing Requirements Do not assume that a marker labeled “waterproof” or “permanent” is suitable for clothing. Standard permanent markers are designed for non-porous surfaces like plastic or metal; they will quickly bleed and fade on textiles. Look explicitly for terms such as “fabric marker,” “machine washable,” “laundry-safe,” or “highly wash-resistant.” Pay close attention to the curing instructions. Some markers are “self-setting” and only require a 24-to-72-hour air-drying period, while others strictly require heat-setting with an iron or a clothes dryer to become permanent.
Tip Sizes and Shapes The tip of the marker dictates the style and detail level of your customization. Fine tips (ranging from 0.5mm to 1.0mm) are essential for precise outlines, intricate patterns, and writing text. Bullet tips (around 2.0mm to 3.0mm) are the most versatile, suitable for drawing bold lines and filling in medium-sized shapes. Brush tips offer a flexible, paintbrush-like feel, allowing you to create variable line widths, sweeping calligraphy, and watercolor-style blending. If you plan to customize large areas, such as the back panel of a denim jacket, look for broad chisel tips that can cover wide surfaces quickly without wearing down the nib.
Opacity and Color Vibrancy on Light vs. Dark Fabrics The chemistry of the ink determines how visible it will be on different fabric colors. Standard fabric markers use translucent dye inks. These work beautifully on white, cream, and pastel garments because the light fabric reflects through the ink, making the colors appear bright and vibrant. However, if you apply these translucent markers to dark fabrics like black, navy, or charcoal, the ink will virtually disappear. For dark garments, you must use highly opaque pigment-based markers or acrylic paint markers. These formulas contain solid titanium dioxide or metallic pigments that sit on top of the fabric fibers, creating a solid, visible layer that blocks out the dark background.
Fabric Compatibility Always check the manufacturer’s compatibility guidelines. While many markers are marketed as “multi-surface” or “universal fabric markers,” some are chemically optimized for 100% cotton, while others are formulated to adhere to synthetic blends or heavy canvas. Matching the marker’s chemical properties to your garment’s fabric composition is the easiest way to guarantee a smooth application and long-lasting wash resistance.
Comparing Ink Types for Clothing Customization
Fabric markers generally fall into three distinct chemical categories: pigment-based, dye-based, and acrylic paint-based. Understanding these differences allows you to choose the correct medium for your project’s aesthetic and durability needs.
Pigment-Based Markers These markers contain finely ground solid color particles suspended in a liquid binder. When applied, the pigments sit on the outer surface of the fibers, held in place by the binder. Pigment-based inks offer exceptional lightfastness (resistance to fading from sunlight) and high opacity, making them suitable for both light and dark fabrics. They generally require heat-setting to cure the binder, but once set, they offer outstanding wash durability.
Dye-Based Markers These markers use soluble colorants that dissolve completely in the liquid carrier. Because there are no solid particles, the dye penetrates deep into the core of natural fibers, chemically bonding with them. This results in an incredibly soft “hand feel”—the customized area of the fabric remains just as soft and flexible as the rest of the garment. However, dye-based markers are translucent, meaning they are strictly for light-colored fabrics, and they are more prone to bleeding if applied too heavily.
Acrylic/Paint Markers These markers utilize water-based acrylic paint formulas. They provide maximum opacity, vibrant color payoff, and excellent coverage on dark garments, denim, and canvas. The paint forms a physical, rubbery layer on top of the fabric, which is highly resistant to water and washing. The primary trade-off is texture; heavy application of acrylic markers will make the fabric feel stiff, rigid, and less breathable. Over time, thick layers of acrylic paint may crack if applied to highly stretchable garments like ribbed cotton or spandex.
| Ink Type | Best Use Case | Fabric Feel | General Wash Durability |
|---|---|---|---|
| Pigment-Based | Detailed designs on both light and dark fabrics; multi-colored illustrations | Soft to slightly textured; maintains good fabric drape | Excellent; requires heat-setting to lock binders to fibers |
| Dye-Based | Light-colored cotton t-shirts, pastel garments, and soft watercolor effects | Extremely soft; completely imperceptible to the touch | Good on natural fibers; prone to fading on synthetics over time |
| Acrylic/Paint | Heavy denim jackets, canvas shoes, tote bags, and bold graphic designs on dark fabrics | Stiff and rubbery; can crack if applied too thickly on stretchy fabrics | Outstanding; highly resistant to water and physical friction |
How to Set and Care for Customized Clothes
Achieving maximum wash resistance is not just about the marker you buy; it is equally about how you prepare, cure, and launder the customized garment. Following a disciplined preparation and setting routine will prevent your hard work from washing down the drain.
Preparation Steps Always pre-wash your garments before drawing on them. Brand-new clothes are treated with chemical starches and sizing agents during manufacturing to keep them looking crisp on store shelves. These chemicals create a barrier that prevents fabric ink from penetrating the fibers properly. Wash the garment using a standard detergent, but omit fabric softener, as softeners leave a silicone residue that repels ink. Once dry, iron the fabric flat to remove wrinkles. Before you begin drawing, insert a thick piece of cardboard, a plastic cutting board, or a silicone sheet inside the garment. This prevents the ink from bleeding through the front panel to the back of the shirt.
Curing and Heat-Setting After completing your design, patience is key. In the humid climate of the Philippines, it is highly recommended to let the ink air-dry for a full 24 to 48 hours in a well-ventilated room before applying any heat. This ensures all water and solvents in the ink have evaporated completely.
To heat-set the design, use a dry household iron with the steam function completely turned off. Safety and Compliance Check: Always check the garment’s care label to determine the maximum safe ironing temperature, and consult the marker manufacturer’s packaging for specific heat-setting times. Place a clean pressing cloth, a sheet of parchment paper, or a thin cotton pillowcase over the drawn design. This protects your iron from ink transfer and prevents the fabric from scorching. Gently press the iron over the design in a continuous, circular motion for 3 to 5 minutes. Never let the iron sit in one spot, as this can burn the fabric or melt synthetic fibers.
Washing and Laundering Best Practices To preserve the vibrancy of your custom design, treat the garment with care during laundry cycles. Always turn the clothing inside out before washing; this simple step drastically reduces the surface friction between your design and other garments in the wash. Wash the item in cold water on a gentle or delicate cycle. High water temperatures can degrade the chemical binders in the ink, leading to rapid fading. Use a mild, liquid laundry detergent. Avoid using bleach, optical brighteners, or harsh stain removers on the customized area, as these chemicals will strip the color.
Drying and Aftercare Line drying is the gentlest way to dry customized apparel. Hang the garment inside out in a shaded, well-ventilated area to dry naturally. Avoid hanging it in direct, intense sunlight, as ultraviolet rays can break down fabric pigments over time. If you must use a clothes dryer, select a low-heat or air-dry setting to prevent the ink binders from cracking or peeling.
Troubleshooting Fading, Bleeding, and Stiffness
Even with careful preparation, you may encounter issues like ink bleeding, fading, or stiffness. Understanding the root causes of these problems allows you to adjust your technique and salvage your designs.
Bleeding and Feathering This occurs when ink spreads uncontrollably along the fabric fibers, turning sharp lines into fuzzy edges. The primary cause is applying too much ink too quickly, which saturates the fabric beyond its absorption capacity. To prevent this, draw with a light, swift touch rather than holding the marker tip in one spot. If you are working on a highly absorbent or loose-weave fabric, perform an observable trial on a hidden seam, an inside hem, or a scrap piece of similar material first to see how the ink behaves. Let the base layers dry completely before applying adjacent colors or outlines.
Fading After Washes If your design loses its vibrancy after the first few washes, it is usually because the ink was not fully cured or heat-set. Skipping the pre-wash step can also cause fading, as the ink bonds to the temporary fabric sizing rather than the actual fibers, washing away when the sizing dissolves. To fix a faded design, ensure the garment is completely clean and dry, carefully trace over the faded lines with your fabric marker pen to restore the color, allow it to air-dry for 24 hours, and then perform a thorough heat-setting process with a dry iron.
Stiff Fabric Feel A stiff, cardboard-like texture is common when using highly opaque pigment or acrylic markers. This happens when the ink is applied in thick, heavy layers that clog the spaces between the fabric yarns. To maintain a soft, wearable drape, apply the ink in thin, even coats. If you need to build up color opacity, let the first thin layer dry completely before lightly applying a second coat. For soft garments like lightweight cotton t-shirts, prioritize dye-based markers or thin pigment markers, reserving heavy acrylic paint markers for rigid items like denim jackets, canvas tote bags, or sneakers.
Frequently Asked Questions (FAQ)
Can I use regular permanent markers on clothes instead of fabric markers?
Regular permanent markers are formulated for non-porous surfaces like plastic, metal, and glass. When used on textiles, their inks bleed heavily along the fibers, creating fuzzy borders. Furthermore, standard permanent marker ink is not designed to withstand laundry detergents or heat-setting; it will quickly fade to a dull purple, brown, or gray after a few washes. Standard office markers can also cause skin irritation if the uncured ink rubs off on your body through sweat and friction, making specialized fabric markers a much safer and more durable choice.
Are fabric markers safe for children's clothing?
Most fabric markers designed for clothing customization are safe for children’s apparel, provided they carry non-toxic certifications on the label. Look for safety seals such as the AP (Approved Product) seal from the Art and Creative Materials Institute (ACMI) or EN71 compliance. To ensure complete safety, always let the ink dry completely and perform the recommended heat-setting process before allowing a child to wear the garment. This locks the pigments and binders into the fibers, preventing any wet ink transfer to sensitive skin.
How do I fix a mistake made with a fabric marker?
Because fabric marker ink is engineered to be permanent, removing a mistake completely is incredibly difficult once the ink touches the fibers. Attempting to scrub the mistake with harsh chemical solvents or bleach often backfires, spreading the pigment further and leaving unsightly rings or fabric damage. Instead, the most effective solution is to adapt your design. You can cover the mistake by layering a darker color over it, adding a decorative fabric patch, or incorporating the stray mark into a new pattern, turning an accidental smudge into a deliberate design element.
Community discussion
Share your experience or ask a question. Comments are reviewed before publication.