
DTF (Direct to Film) stickers are not actually traditional stickers; they are advanced transfer designs that apply highly durable, vibrant ink directly onto a surface without the bulk of a paper or vinyl backing. While regular stickers use a pressure-sensitive adhesive layer on a paper or plastic sheet that you peel and stick, DTF transfers use heat or pressure to bond only the ink and its specialized adhesive layer to your target material.
For journaling and scrapbooking, this distinction is critical. Regular stickers—such as washi paper, matte paper, or thin vinyl—are designed to decorate the inner pages of your notebooks because they are thin, flexible, and write-on friendly. DTF transfers, particularly UV DTF, are far better suited for customizing the exterior of your journals, including hard covers, leatherette binders, and fabric spines, where durability, water resistance, and a premium “printed-on” look are highly valued. In humid climates like the Philippines, where standard paper stickers can lift, curl, or absorb moisture over time, DTF technology offers a robust, moisture-resistant alternative for personalizing your favorite stationery items.
Understanding DTF Technology for Journaling and Scrapbooking
To understand how DTF can elevate your crafting, it helps to look at how these transfers are made. The Direct to Film process begins by printing a design in reverse onto a clear, release-coated polyethylene terephthalate (PET) film. A layer of white ink is printed over the color, followed by a specialized hot-melt adhesive powder or a pressure-sensitive adhesive layer. Once cured, this film acts as a carrier, allowing you to transfer the ink layer directly onto your chosen medium, leaving no transparent or white border behind.
Products mentioned in this guide
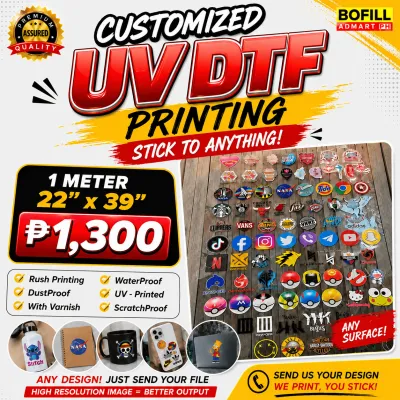
Prices are valid at publication and may change. Please refer to the product page for the latest price.
In the crafting world, you will encounter two distinct types of DTF technology, each requiring a different application method and suited to different materials:
- Traditional DTF (Heat Transfer): This method uses textile inks and a dry adhesive powder that must be melted with heat. It requires a heat press, a mini crafting iron, or a household iron to bond the design to fabrics. In journaling, traditional DTF is perfect for customizing cloth-bound book covers, canvas pencil cases, linen traveler's notebook covers, or fabric spine inserts.
- UV DTF (Pressure Transfer): This variation uses UV-curable inks and a pressure-sensitive adhesive. It does not require heat to transfer. Instead, the design is applied using firm, physical pressure (burnishing) and cured under UV light during production. This makes UV DTF ideal for hard, non-porous surfaces such as rigid plastic binder covers, acrylic page markers, glass ink bottles, and synthetic leatherette covers.
Understanding this distinction is vital before purchasing. If you buy traditional DTF transfers expecting a simple rub-on application, you will be disappointed to find they will not stick without a heat source. Conversely, UV DTF transfers cannot be applied to soft, highly textured fabrics, as the pressure-sensitive adhesive requires a smooth, solid backing to grip effectively. Ultimately, DTF is a transfer medium rather than a standard sticker, acting as a professional-grade printing tool for your physical stationery.
DTF vs. Regular Stickers: Which Is Better for Your Journal?
Choosing between DTF transfers and regular stickers depends on where you plan to apply them and how much wear and tear the item will face. While traditional stickers are the undisputed champions of daily page decoration, DTF transfers offer unmatched durability and a seamless look on journal exteriors.

Adhesion and Application
Regular stickers are pressure-sensitive and incredibly easy to use. You simply peel them from their backing sheet and press them onto the paper. If you make a mistake, many high-quality washi stickers can be gently peeled off and repositioned without tearing the page. DTF transfers, however, are a one-shot application. Once the adhesive bonds—whether through heat or firm burnishing—it is permanent. Attempting to peel off a DTF transfer will ruin the design and likely damage the underlying surface.
Surface Compatibility
Regular paper and washi stickers excel on porous, flat paper surfaces. They blend into the page, allowing you to write over or around them easily. DTF transfers are designed for surfaces where regular stickers struggle to stay flat. Traditional DTF bonds deeply with the fibers of cotton, linen, and canvas, making it virtually impossible to peel off once heated. UV DTF clings tenaciously to smooth, hard materials like glass, metal, hard plastics, and faux leather (polyurethane or PU), which often repel the weaker adhesive of standard paper stickers.
Durability and Texture
In the tropical climate of the Philippines, high relative humidity can cause standard paper stickers to warp, lose their stickiness, or lift at the corners. DTF transfers are completely waterproof, scratch-resistant, and immune to moisture. UV DTF transfers also feature a distinct tactile, raised texture. This three-dimensional, slightly glossy finish feels premium and mimics direct UV printing, whereas washi stickers are ultra-thin, matte, and lie completely flat on the page.
Thickness and Bulk
Journalers who love a “chunky” notebook must still consider how bulk affects their writing experience. Regular washi stickers are exceptionally thin, allowing you to layer dozens of designs on a single page without creating awkward bumps. UV DTF transfers are noticeably thicker because of their cured ink and adhesive layers. If applied to the inner pages of a notebook, they can create hard, uneven ridges that make writing on subsequent pages difficult.
To help you decide which medium to use for your next project, review this comparison of DTF transfers, washi paper, and vinyl stickers:
| Feature / Dimension | DTF Transfers (Traditional & UV) | Washi Paper Stickers | Vinyl Stickers |
|---|---|---|---|
| Application Method | Heat press/iron (Traditional) or firm burnishing (UV) | Simple peel-and-stick | Simple peel-and-stick |
| Ideal Surfaces | Cloth, canvas, leatherette, hard plastic, glass | Paper, cardstock, inner journal pages | Water bottles, plastic covers, smooth paper |
| Water Resistance | High (completely waterproof and humidity-proof) | Low to moderate (absorbs moisture and may warp) | High (waterproof but edges can lift in high humidity) |
| Texture & Profile | Raised, textured finish; thick and tactile | Ultra-thin, matte, flat profile | Smooth, medium profile (glossy or matte) |
| Permanence | Permanent; cannot be repositioned or easily removed | Easily repositionable or removable | Semi-permanent; removable with careful peeling |
| Journal Suitability | Best for outer covers, spines, and rigid dividers | Best for daily writing pages and delicate layering | Best for outer covers, plastic dashboards, and folders |
How to Apply DTF Transfers to Journal Covers and Inserts
Applying DTF transfers requires a methodical approach to ensure the design bonds perfectly without damaging your stationery. Because these transfers are permanent, taking your time during preparation and application is essential.
Ideal Placements
Use traditional DTF transfers to customize fabric-based items. These include cotton or linen book covers, canvas pencil pouches, and cloth traveler’s notebook inserts. Use UV DTF transfers for rigid, non-porous surfaces. Excellent placements include hard plastic binder covers, acrylic page flags, glass ink bottles, metal pen cases, or smooth synthetic leatherette (PU) journal covers.
Surfaces to Avoid
Do not attempt to apply traditional heat-transfer DTF directly to thin paper pages. The heat required to melt the adhesive powder (typically between 140°C and 160°C) will scorch, warp, or discolor standard notebook paper, and it can melt the synthetic glues used in book bindings. Avoid applying UV DTF transfers to highly porous, uncoated papers or delicate vintage ephemera. The aggressive adhesive can bleed into the paper fibers over time, and the raised profile will make writing on the reverse side of the page highly uncomfortable.
Step-by-Step Application Guide
To achieve a flawless transfer, follow these step-by-step instructions:
- Clean the Surface: For UV DTF on hard covers, wipe the area with a dry microfiber cloth to remove dust, lint, and finger oils. For traditional DTF on fabric, use a lint roller to clear the surface.
- Position the Design: Carefully align your transfer film on the target surface. Once the adhesive side of a UV DTF transfer touches the surface, it will grip immediately, so use light pencil marks or a ruler to guide your placement before letting the film make contact.
- Apply Pressure or Heat:
For UV DTF*: Use a plastic scraper, a squeegee, or the edge of an old plastic card to rub the design firmly from the center outward. Ensure you apply even pressure to all fine lines, sharp corners, and delicate details.
For Traditional DTF*: Place a sheet of parchment paper or a Teflon sheet over the transfer film to protect your journal cover. Apply a mini heat press or a household iron (set to low-to-medium heat with no steam) over the design, pressing firmly for 10 to 15 seconds without sliding the iron excessively. - Peel the Carrier Film: Slowly peel the clear carrier film away from one corner. If the design begins to lift with the film, lay it back down and apply more heat or pressure. Pay close attention to whether your specific transfer is "hot peel" (peel immediately while warm) or "cold peel" (allow the surface to cool completely to room temperature before peeling).
Safety and Verification
Always check the specific manufacturer’s instructions for temperature, pressure, and peeling requirements before starting. Do not apply high heat directly to glued book spines or heat-sensitive synthetic covers, as this can liquefy the binding adhesive and ruin the structural integrity of your journal. If your journal is made of an unidentified synthetic material, perform a small test in an inconspicuous area, or consult the manufacturer to verify heat tolerance.
Pros, Cons, and Limitations of DTF Stickers for Paper Crafts
While DTF transfers offer incredible design freedom, they come with practical trade-offs that every paper crafter should consider before investing in them.
Equipment Needs
Unlike regular stickers that require nothing more than your fingers, DTF transfers demand specific tools. Traditional DTF requires a reliable heat source, such as a mini crafting iron, which can be an extra expense if you do not already own one. UV DTF is more accessible, but you still need a sturdy burnishing tool or scraper to prevent air bubbles and ensure complete adhesion on rigid surfaces.
Archival Safety
Standard journaling stickers are often labeled as acid-free and archival-safe, meaning they will not discolor or degrade your paper over decades. DTF inks and adhesives are engineered for commercial durability on garments and hard goods, not for archival paper preservation. Over several years, the strong adhesives used in UV DTF transfers may off-gas or cause slight yellowing on adjacent paper pages. If you are creating a heritage scrapbook or preserving irreplaceable photos, keep DTF designs strictly on the outer covers, or test the transfer on a scrap piece of the same paper for several weeks to observe any adverse reactions.
Cost and Accessibility
DTF transfers are generally more expensive than regular stickers. In the Philippines, custom UV DTF prints are typically sold in “gang sheets” (A4 or A3 sizes) by local specialty print shops, with prices ranging from ₱150 to ₱300 per A4 sheet. While this is highly cost-effective for custom branding or creating a matching set of notebooks, it represents a higher upfront cost than a standard ₱30 to ₱50 sheet of washi stickers from a local craft store.
Edge Peeling
Although the center of a DTF transfer is incredibly durable and resistant to scratches, the raised edges can be a vulnerability. If you frequently slide your journal in and out of a packed bag, the friction against canvas, denim, or other items can catch the raised edges of a UV DTF design over time. This friction can gradually lift fine lines or small text, so it is best to avoid designs with ultra-thin, isolated lines on daily-carry notebooks.
Frequently Asked Questions (FAQ)
Can I use DTF stickers on regular notebook paper?
Using DTF transfers directly on regular notebook paper is generally not recommended. Traditional DTF requires high heat that will scorch, warp, or burn thin paper pages, while also risking damage to the book’s binding glue. UV DTF does not require heat, but its aggressive adhesive can bleed through thin paper fibers (especially papers under 100 GSM), and its raised profile creates a bumpy surface that interferes with writing on the other side of the page. For decorating inner pages, stick to ultra-thin washi paper or standard paper stickers.
Are UV DTF stickers waterproof and scratch-proof for journal covers?
Yes, UV DTF transfers are highly waterproof and scratch-resistant, making them excellent for protecting journal covers against spills, humidity, and daily handling. However, because they sit on top of the cover with a raised, tactile profile, heavy and repeated friction—such as sliding your notebook against keys or rough fabrics in a bag—can eventually snag and lift the edges of very fine details. For maximum protection on a daily-carry journal, verify the specific product’s durability claims with your supplier, and consider applying a thin, paper-safe clear sealant over the edges of the transfer.
Do I need special equipment to apply DTF transfers to my scrapbook?
Your equipment needs depend entirely on the type of DTF transfer you choose. Traditional DTF transfers require a heat source, such as a mini heat press, a household iron, or a specialized crafting iron, to melt and activate the hot-melt adhesive powder. UV DTF transfers do not require any heat; you only need a firm burnishing tool, such as a plastic scraper, a squeegee, or an old credit card, to rub the design onto your surface. Always confirm the exact transfer type with your seller before purchasing to ensure you have the necessary tools at home.
Community discussion
Share your experience or ask a question. Comments are reviewed before publication.