
A comprehensive beginner’s drawing material set serves as the bridge between creative ideas and technical execution. When starting your artistic journey, the sheer volume of available art supplies can feel overwhelming. However, a highly effective starter set does not require a massive investment in professional-grade tools. Instead, it should focus on a carefully curated selection of foundational instruments: graphite pencils for shading, pigment-ink fineliners for clean line work, versatile markers for color exploration, and a supportive sketchbook.
By focusing on how these core tools behave on paper, you can develop essential techniques without the distraction of overly specialized equipment. The goal of a beginner’s drawing material set is to provide maximum versatility, allowing you to experiment with different styles—from realistic portraiture to graphic illustration—while learning how different mediums interact with various drawing surfaces.
Selection Criteria: Choosing Your First Drawing Material Set
Building a versatile drawing material set requires looking beyond brand names and aesthetic packaging. To ensure your tools support your skill development over the long term, you must evaluate them based on three primary dimensions: technique alignment, physical compatibility, and ergonomics.
Products mentioned in this guide
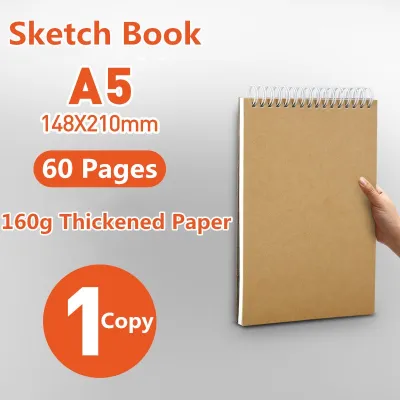
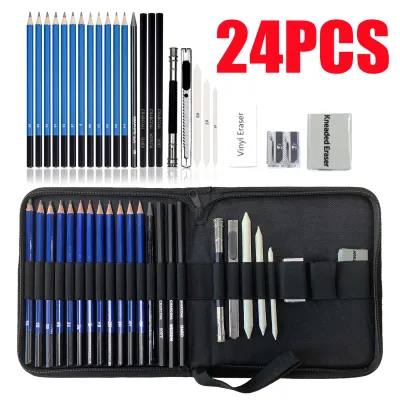
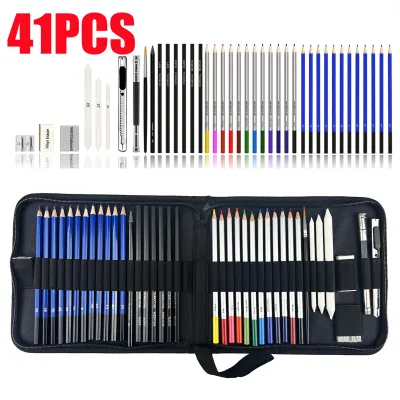
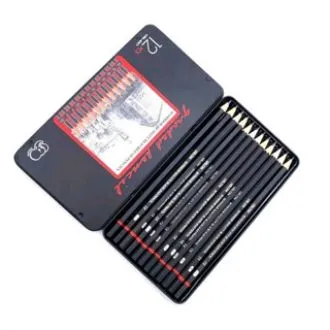
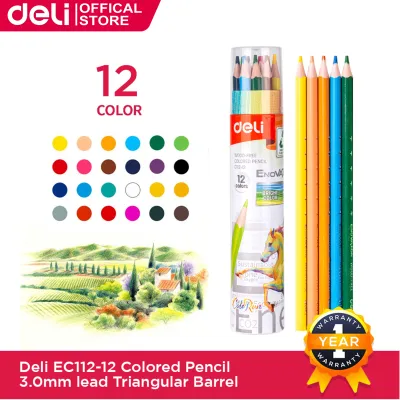
Prices are valid at publication and may change. Please refer to the product page for the latest price.
Matching Tools to Drawing Techniques
Your primary learning goals should dictate which tools receive the largest portion of your budget. If your focus is on mastering form, light, and realistic shading, you should prioritize a diverse range of high-quality graphite pencils. Conversely, if you are drawn to comic illustration, architectural sketching, or detailed line art, your set should center around high-performance fineliner pens. For those eager to explore color theory, gradient blending, and vibrant character design, a compact, well-selected marker set is the most logical priority. Aligning your initial purchases with these specific techniques prevents you from buying tools that will sit unused in your kit.
Checking Compatibility and Refills
A common beginner mistake is purchasing tools without considering how they interact with each other and the paper. Smoothness, bleed resistance, drying speed, water resistance, and erasability are not fixed characteristics of a pen or pencil; they depend entirely on the exact combination of the tool and the drawing medium. Before purchasing, verify the paper weight compatibility of your sketchbook and check the ink bleed tendencies of your pens. Additionally, consider the local availability of replacement components. Opting for mechanical pencils with standard lead sizes (such as 0.5mm or 0.7mm) or markers that offer individual ink refills ensures you can easily replace worn-out elements without buying a completely new set. In the local market, mid-range starter kits typically range from ₱500 to ₱1,500, and choosing refillable options helps keep long-term maintenance costs highly manageable.
Ergonomics and Grip
Drawing practice requires hours of repetitive hand movements, making ergonomics a critical factor in tool selection. Pay close attention to the barrel thickness, weight distribution, and grip texture of your pens and pencils. Triangular barrels are highly recommended for beginners as they naturally encourage a correct finger posture and prevent tools from rolling off slanted drafting tables. Heavy metal barrels can cause hand fatigue during long sketching sessions, whereas lightweight wooden or high-grade plastic barrels offer better comfort. If you frequently draw in warm or humid conditions, look for textured or rubberized grips that prevent slipping when your hands become warm.
Graphite Pencils: Building the Foundation for Shading and Line Work
Graphite remains the absolute foundation of drawing. It is highly forgiving, easily erasable, and capable of producing everything from razor-sharp technical lines to deep, atmospheric shadows. Understanding how to select and manipulate graphite is the first major step in any artist’s education.

Understanding the H and B Grading Scale
Graphite pencils are categorized using the standard H and B scale, which indicates the hardness of the core material. The letter “H” stands for hard, meaning the lead contains more clay binder and less graphite, resulting in light, clean lines that are easy to erase. The letter “B” stands for black, indicating a softer lead that contains more graphite, producing dark, rich tones that smudge and blend easily. The standard HB pencil sits directly in the middle of this scale. For a versatile beginner’s drawing material set, you do not need a massive 24-piece pencil tin. Instead, select a focused range: a 2H pencil for light initial guidelines, an HB pencil for general sketching, a 2B pencil for mid-tone shading, and a 4B or 6B pencil for deep, dramatic shadows. Always check the end of the wooden barrel, where manufacturers stamp these grading labels clearly.
Mechanical vs. Woodcase Pencils
Both mechanical and traditional woodcase pencils have distinct places in a starter set, and each teaches different control habits. Mechanical pencils utilize thin, replaceable polymer leads that maintain a consistent line width without ever needing to be sharpened. This makes them exceptional for precise detailing, clean hatching, and laying down initial grids. However, they are limited when it comes to expressive shading because you cannot tilt them to use the side of the lead. Traditional woodcase pencils, on the other hand, allow you to vary your line width dynamically by altering the angle of your hand. Shading with the exposed side of a wooden pencil’s graphite core teaches you how to control pressure and build smooth, sweeping gradients, making them indispensable for life drawing and portraiture.
Blending and Erasing Techniques
To fully unlock the potential of your graphite pencils, your set must include specific erasing and blending accessories. A standard plastic eraser is useful for clearing large areas, but a kneaded eraser is essential for detailed work. Kneaded erasers can be molded like clay into sharp points, allowing you to lift away tiny highlights or soften dark graphite values without tearing the paper fibers. For smooth transitions, include a blending stump (also known as a tortillon), which consists of tightly rolled paper that softens harsh pencil strokes. When practicing these techniques, observe how the “tooth” or texture of your paper behaves; highly textured paper grips graphite particles securely for rich layering, while overly smooth paper can cause the graphite to slip, resulting in a muddy, unerasable smear.
Fineliner Pens: Developing Precision and Inking Techniques
Fineliner pens introduce beginners to the discipline of permanent ink. Unlike graphite, ink cannot be easily erased, which encourages deliberate line placement, confidence, and a deep understanding of line weight variation.
Nib Sizes and Line Variation
A dedicated fineliner set should feature a variety of calibrated plastic nib sizes to help you establish depth and structure in your drawings. A standard starter set of three to four pens is highly effective. Use an ultra-fine 0.1mm pen for delicate details, textures, and fine cross-hatching. A 0.3mm or 0.5mm pen serves as the workhorse for standard outlines and structural boundaries. Finally, a 0.8mm pen or a flexible brush tip pen is ideal for bold outer borders and filling in solid shadow shapes. By combining these different sizes in a single piece, you can create a clear visual hierarchy that makes your illustrations look professional and dynamic.
Ink Properties and Drying Time
When selecting fineliners, always check the product labels for ink specifications. The two primary ink types are pigment-based and dye-based. Pigment ink contains solid particles suspended in a liquid carrier; once dry, it is highly water-resistant, fade-resistant, and archival. Dye ink is chemically dissolved in liquid, offering vibrant colors but poor water resistance and a tendency to bleed when exposed to moisture. For drawing, pigment ink is highly recommended. Because tropical climates can exhibit high relative humidity, ink drying times on paper can be slightly slower than expected. To prevent accidental smearing from your hand as you draw, look for pens labeled as “quick-drying” and “smudge-proof,” and perform a quick test on a scrap sheet to verify the drying speed before committing to a final piece.
Paper Compatibility
The precision of a fineliner is heavily dependent on the paper surface. When liquid ink meets paper fibers, it can experience “feathering”—a phenomenon where the ink spreads outward along the fibers, turning a sharp line into a fuzzy, blurred mark. To maintain crisp, clean lines, pair your fineliners with smooth, high-density paper, such as Bristol board or heavy cartridge paper. Avoid highly textured watercolor papers or cheap, low-weight sketchpads, which absorb ink too quickly and cause both feathering and severe bleed-through to the next page.
Markers: Exploring Color, Blending, and Depth
Markers are an exciting addition to a drawing material set, offering a fast, vibrant way to study color theory, value contrast, and smooth rendering. However, they require specific handling to avoid ruining your paper or your workspace.
Alcohol-Based vs. Water-Based Markers
Beginners must choose between alcohol-based and water-based markers, as they behave very differently on paper. Alcohol-based markers use an alcohol solvent that evaporates almost instantly, allowing you to layer colors and blend seamless gradients without warping the paper. However, they are highly translucent and will bleed through almost all standard sketchbook papers. Water-based markers use water as a solvent; they are low-odor and do not bleed as aggressively, but layering them too heavily can saturate the paper fibers, causing the surface to warp or “pill” into small, unsightly paper balls. For serious drawing practice, a small, curated set of alcohol-based markers—such as a set of five warm or cool grays plus a colorless blender—is far more valuable than a massive, cheap set of vibrant water-based colors. This focused palette allows you to master value and smooth transitions before introducing complex color choices.
Nib Shapes for Different Strokes
The shape of the marker nib dictates the type of stroke you can achieve. Dual-tip markers are highly popular because they combine two different nib shapes in a single tool. A flexible brush nib behaves like a traditional paintbrush, responding to hand pressure to create fluid, expressive lines and effortless color gradients. A chisel nib is wide, flat, and angled, making it perfect for filling in large blocks of color quickly or creating sharp, geometric edges in architectural renderings. Bullet nibs are small and rounded, offering a consistent line width that is excellent for precise detailing but less effective for smooth blending.
Managing Bleed-Through
Because alcohol markers are designed to saturate paper fibers to facilitate blending, bleed-through is an inevitable physical characteristic rather than a product defect. To manage this safely, never use markers directly on a page without protection. Always place a thick, non-absorbent scrap sheet of cardstock or a thin sheet of plastic directly beneath the page you are working on to prevent the ink from transferring and ruining the subsequent clean sheets in your sketchbook. For the best results, use dedicated marker pads, which feature specially coated, non-porous backings that block ink transfer while keeping your colors vibrant on the surface.
Paper and Sketchbooks: Matching the Surface to Your Tools
The paper you choose is just as important as the drawing instruments themselves. Even the highest-quality pen or pencil will perform poorly if paired with an incompatible drawing surface.
Paper Weight and Texture
Paper weight is measured in GSM (grams per square meter), which indicates the density and thickness of the sheet. Standard printer paper is typically around 70 to 80 GSM and is only suitable for quick, low-pressure pencil sketches. For a proper drawing material set, aim for a sketchbook with paper that is at least 100 to 120 GSM for dry media like graphite and colored pencils. If you plan to use wet media like fineliners, ink washes, or markers, select a heavier paper weight of 150 to 200 GSM, or even a mixed-media paper of 200+ GSM to prevent warping and bleed-through.
Texture, also referred to as “tooth,” is another vital dimension. Smooth paper (often labeled as hot-press or Bristol) provides minimal friction, allowing fineliners to glide effortlessly and markers to blend without wearing down their delicate brush tips. Toothy paper (often labeled as cold-press or cartridge paper) has a noticeable micro-texture that grips graphite and charcoal particles, allowing you to build up rich, deep layers of shading without the medium slipping off the page.
Binding and Format
The physical construction of your sketchbook affects your daily drawing comfort and workspace organization. Spiral-bound sketchbooks are highly practical because they lay completely flat on your desk and allow you to fold the cover all the way back, which is especially helpful when drawing on your lap or in limited desk spaces. They also allow for clean, easy page removal. Hardbound sketchbooks offer a durable, professional feel and excellent protection for your artwork, but they can be difficult to draw on near the center spine (the gutter). Additionally, consider the orientation: portrait sketchbooks are natural for character design, portraits, and vertical compositions, while landscape sketchbooks are ideal for wide environmental scenes, perspective practice, and panoramic layouts.
Frequently Asked Questions (FAQ)
Can I use standard writing pens for drawing practice?
Yes, standard ballpoint or gel pens are highly accessible and excellent for low-pressure, everyday sketching. Drawing with a common ballpoint pen can actually help you overcome the fear of making mistakes, as it forces you to embrace imperfect lines. However, standard writing pens have clear limitations when compared to professional fineliners. They often suffer from inconsistent ink flow, leading to unexpected blobs or dry patches, and their dye-based inks are rarely lightfast or waterproof. If you plan to apply markers or water washes over your line work, standard writing pens will smudge and bleed heavily, making dedicated pigment-ink fineliners necessary for finished pieces.
How do I prevent my drawing tools from drying out in a humid climate?
High humidity and tropical warmth can accelerate the degradation of both ink and paper if they are not stored correctly. To keep your markers and fineliners performing optimally, always cap them tightly immediately after use; even a few minutes of exposure can dry out fine plastic nibs. Store dual-tip markers horizontally rather than vertically. Horizontal storage ensures that the ink remains evenly distributed between both ends of the pen, preventing one tip from drying out while the other becomes oversaturated. For graphite and paper, keep your sketchbooks in dry, enclosed spaces such as a drawer or a sealed plastic storage box. Adding a few silica gel packets to your storage container will absorb excess atmospheric moisture, preventing your paper from becoming damp and wavy, which can cause ink to feather and graphite to lose its erasability.
Should I buy a pre-made drawing set or assemble my own?
Pre-made drawing sets offer convenience and are often more budget-friendly upfront, making them an attractive option for absolute beginners. However, pre-packaged sets frequently include filler items—such as extreme pencil grades (like 9H or 9B) or low-quality sharpeners—that you may never use. Assembling your own custom drawing material set allows you to select high-quality, specific tools tailored directly to the techniques you want to learn. By hand-selecting a few essential graphite grades, two reliable fineliners, a small set of gray markers, and a sketchbook with the exact paper weight you need, you ensure that every peso of your budget is spent on highly functional, durable tools that actively support your growth as an artist.
Community discussion
Share your experience or ask a question. Comments are reviewed before publication.