
A complete quilling tools set for art class beginners must include a metal-tipped slotted quilling tool, fine-tipped precision tweezers, a circle sizer board, a precision glue applicator bottle, and high-quality pre-cut paper strips. These fundamental components ensure that students can easily roll, shape, size, and secure their paper coils without the frustration of unraveling, tearing, or adhesive mess. By focusing on these core elements, educators and parents can provide a frustration-free introduction to this intricate paper craft, allowing students to focus on their creativity rather than struggling with inadequate equipment.
Why Tool Quality Dictates Success in Beginner Quilling Projects
Paper quilling, the art of rolling, shaping, and gluing thin strips of paper to create decorative designs, has become a staple in school art curriculums. It teaches fine motor skills, patience, and spatial awareness. However, the transition from a simple strip of paper to a beautiful mosaic can be incredibly frustrating for a student if they are equipped with subpar tools. Common beginner pain points—such as paper slipping off the tool, coils springing open unevenly, or excessive glue warping the paper—are almost always caused by poor-quality or mismatched instruments.
A properly curated quilling tools set solves these issues by providing mechanical stability and precision. When students use tools designed specifically for their skill level, they experience fewer mechanical failures, which directly boosts their confidence and engagement. A complete beginner set must strike a careful balance: it needs to provide all the essential tools required to master basic shapes (like tight coils, loose coils, teardrops, and marquises) without overwhelming the student with highly specialized or fragile equipment that they are not yet ready to use.
Products mentioned in this guide
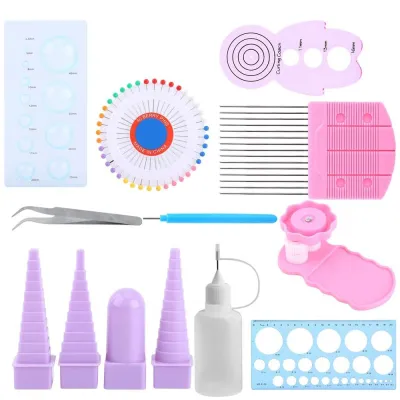
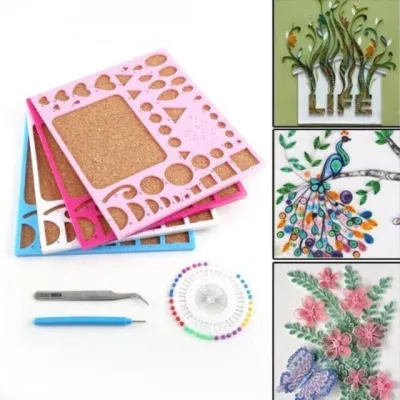
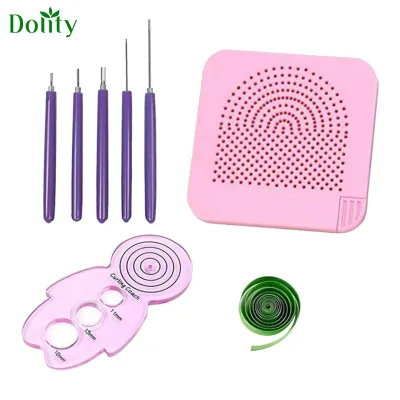
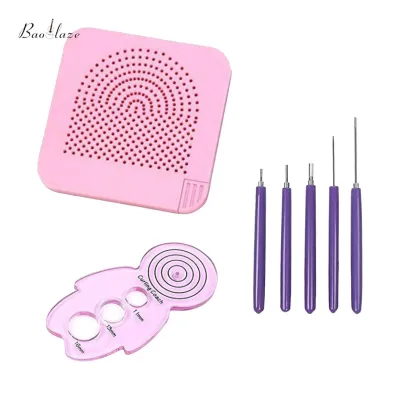
Prices are valid at publication and may change. Please refer to the product page for the latest price.
The Essential Checklist: Core Tools Every Beginner Set Needs
When evaluating a commercial quilling tools set or assembling one for a classroom, certain tools are absolutely non-negotiable. These core instruments form the foundation of every quilling project, handling everything from the initial roll to the final placement and gluing.

Slotted Tools and Precision Tweezers
The slotted quilling tool is the primary instrument of the craft. It features a metal tip with a microscopic slit down the center. To use it, a student inserts one end of a paper strip into the slot and rotates the tool, wrapping the paper around the metal shaft to form a coil. For beginners, a slotted tool is far superior to a needle tool because the slot firmly grips the paper, preventing it from slipping during the initial, crucial rotations. When choosing a slotted tool, look for a handle with a comfortable, non-slip rubber or textured plastic grip. Since students will be holding and twisting this tool for extended periods, an ergonomic handle prevents hand fatigue and ensures smooth, consistent tension.
Equally important are fine-tipped precision tweezers. Paper quilling involves handling delicate, coiled shapes that are easily crushed or distorted by fingers. Tweezers are used to lift coils out of sizing boards, pinch round coils into geometric shapes, and position pieces onto the background paper. For school environments, stainless steel tweezers with aligned, smooth tips are essential. Avoid tweezers with serrated inner tips, as the ridges can scratch or tear the delicate paper fibers, ruining a student’s hard work.
Circle Sizers and Shaping Molds
Achieving uniformity is one of the biggest challenges for beginner quillers. Without a guide, a student trying to make ten identical petals for a flower will end up with ten wildly different sizes. This is where a circle sizer board becomes invaluable. A circle sizer is a flat plastic or cork board featuring graduated circular holes of various diameters. After rolling a coil with the slotted tool, the student releases the coil inside one of these holes. The paper naturally expands to fill the exact boundary of the circle, ensuring every single coil is uniform.
Beyond simple circles, basic shaping molds or guide combs help students transition to advanced geometry. While advanced quilling utilizes complex tools like husking boards, beginners benefit most from simple, integrated shaping guides. Some circle sizer boards feature built-in shapes like squares, triangles, or teardrops. These guides allow students to press their loose coils into specific shapes without crushing the delicate paper layers, providing a reliable stepping stone toward freehand pinching.
Glue Applicators and Climate-Appropriate Adhesives
In paper quilling, glue is both a structural necessity and a potential hazard. Standard school glue bottles feature wide nozzles that dispense far too much adhesive, leading to soggy, warped paper and visible, shiny residue. A complete quilling set must include a precision applicator bottle. These are small, squeezable plastic bottles equipped with ultra-fine metal tips (often 1mm or smaller) or needle-like pins. This design allows students to dispense microscopic dots of glue precisely where needed—such as the outer tab of a coil or the thin edge of a shaped strip—without flooding the paper.
The choice of adhesive itself is highly dependent on environmental conditions. For quilling, a clear-drying, acid-free Polyvinyl Acetate (PVA) craft glue is the standard. However, in humid tropical climates like the Philippines, high atmospheric moisture significantly slows down glue drying times. Excess moisture can cause paper strips to absorb humidity, lose their structural tension, and unravel before the glue can set. Therefore, look for fast-drying, low-water-content PVA formulas. A fast-drying adhesive ensures that coils bond quickly, preventing projects from warping or sticking to the work surface during long, humid classroom sessions.
Paper Strip Specifications: Weight, Width, and Pre-Cut Options
The paper itself is a critical component of any quilling tools set. Not all paper is suitable for quilling, and using the wrong specification can lead to torn strips, cracked edges, or limp, lifeless designs.
- Paper Weight (GSM): Paper weight is measured in Grams per Square Meter (GSM). For beginner quillers, the ideal paper weight lies between 100 GSM and 120 GSM. Standard printer paper (usually around 70 to 80 GSM) is often too thin and limp; it lacks the springiness required to bounce back into a loose coil and tears easily under the tension of a slotted tool. Conversely, heavy cardstock (over 160 GSM) is too stiff; it resists rolling, cracks along the curves, and exerts too much outward pressure, causing coils to spring apart. Paper in the 100 to 120 GSM range strikes the perfect balance, offering excellent structural integrity, smooth rolling, and crisp edges.
- Standard Widths: Quilling paper strips are available in various widths, typically ranging from 1.5mm to 10mm. For school art classes and beginners, 3mm and 5mm are the absolute standards. The 5mm width is highly recommended for younger students or absolute beginners because it is physically easier to handle, align, and glue flat onto a surface. The 3mm width is ideal for older students or those working on more detailed, delicate designs. Avoid introducing ultra-thin 1.5mm strips to beginners, as they require advanced finger dexterity and can easily discourage students.
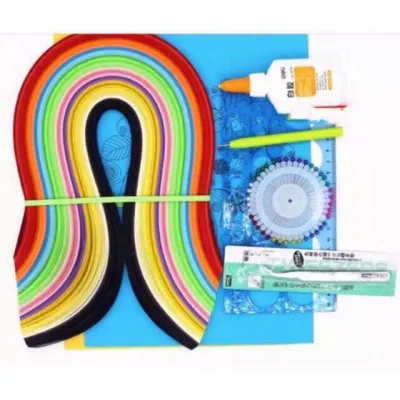
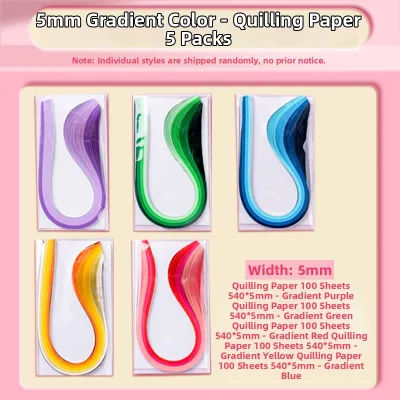
- Pre-Cut vs. Custom: Pre-cut paper strips are highly recommended for classroom settings. They save valuable instructional time and ensure perfectly straight, uniform edges. Trying to cut hundreds of consistent 5mm strips manually with a utility knife and ruler is incredibly tedious and often results in uneven widths, which makes flat gluing impossible. For older students or cash-strapped classrooms, a manual paper shredder or a dedicated quilling paper cutter can be used to process local cardstock into strips. However, for convenience and quality, pre-cut packs with a wide variety of gradient colors are the best inclusion in a beginner set.
Ideal Quilling Set Configurations for Art Class Environments
Depending on the school’s budget, the duration of the art unit, and the age of the students, different quilling set configurations are appropriate. Here is an evaluation of three common setups, highlighting their pros, cons, and ideal scenarios.
Comprehensive All-in-One Classroom Kits
These premium, fully stocked retail kits are designed for serious, multi-session art curriculums. They typically retail between ₱500 and ₱1,000 per kit.
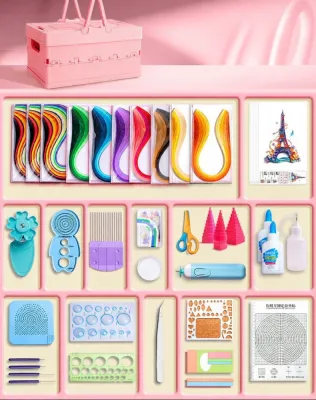
- What it includes: Multiple slotted tools, high-quality stainless steel tweezers, a large circle sizer board, multiple precision glue bottles, 3D shaping domes, a quilling comb, and thousands of pre-cut paper strips in assorted colors.
- Best for: Dedicated art classrooms where paper quilling is a major unit of study spanning several weeks, or for individual students pursuing quilling as a serious hobby.
- Limitations: High upfront cost. These kits also contain advanced tools—such as crimpers, border buddies, and husking pins—which absolute beginners will not use immediately and can easily lose in a busy classroom environment.
Minimalist Budget Starter Packs
These streamlined, highly focused sets focus strictly on the bare essentials required to learn the basic rolls. They are highly economical, often costing under ₱150 per pack.
- What it includes: One plastic-handled slotted tool, a pair of lightweight tweezers, a small empty glue bottle, and a basic assortment of 100 to 200 paper strips in primary colors.
- Best for: Single-day workshops, introductory craft sessions, or bulk purchasing for large student cohorts on a tight school budget.
- Limitations: These packs lack a circle sizer board. Without a sizing guide, students must rely entirely on visual estimation to match coil sizes, which can be highly frustrating for beginners trying to achieve symmetrical designs.
DIY Custom-Assembled Bulk Sets
For resourceful educators managing multiple large classes, assembling custom kits from bulk-sourced components is often the most cost-effective strategy.
- Strategy: Purchase metal-tipped slotted tools and basic tweezers in bulk packs of 50 or 100 from online marketplaces. Buy large, economical bottles of clear-drying PVA glue and decant them into small, reusable precision needle-tip bottles. For paper, purchase bulk packs of multi-colored 100 GSM construction paper and cut them into 5mm strips using a heavy-duty manual paper shredder.
- Best for: Schools and art teachers looking to maximize their budget while ensuring every student has access to high-quality, durable tools without unnecessary fluff.
- Limitations: This approach requires significant preparation time before the school term begins to cut the paper, fill the glue bottles, and organize individual tool kits for student distribution.
Red Flags: What to Avoid When Buying a Beginner Quilling Kit
The market is flooded with cheap, poorly manufactured quilling sets. To prevent student frustration and wasted school budgets, watch out for these common product defects:
- Flimsy Plastic Slotted Tools: Avoid sets where the slotted tip is made of cheap, molded plastic instead of metal. Plastic slots quickly widen, warp, or snap under pressure, making it impossible to grip the paper strip securely. Always ensure the slotted tip is made of stainless steel or durable metal.
- Overly Complex "Professional" Sets: Many mid-range kits pack in dozens of complex plastic molds, paper crimpers, and intricate geometric templates to look high-value. For absolute beginners, these extra tools are distracting and unnecessary. It is far better to buy a set with fewer, higher-quality basic tools than a massive box of cheap, fragile accessories.
- Poorly Dyed, Low-Tensile Paper: Some low-cost kits include paper strips that are rough, brittle, or unevenly dyed. If the paper has a white core (meaning it was only printed on the surface rather than dyed through), the white edges will show when the paper is rolled, ruining the visual effect. Additionally, low-tensile paper will fray or snap when pulled through the slotted tool.
Frequently Asked Questions (FAQ)
Can I use regular school glue instead of the glue provided in the set?
Yes, standard white PVA school glue can be used, but it is not ideal out of the bottle. Standard school glue typically has a higher water content to make it easily washable, which causes thin quilling paper to warp, buckle, and lose its tension. If you must use regular school glue, pour a small amount into a shallow dish and let it sit open for 5 to 10 minutes to allow some water to evaporate, thickening the adhesive. For the best results, especially in humid environments, invest in a dedicated, fast-drying tacky craft glue.
What is the difference between a slotted tool and a needle tool for beginners?
A slotted tool features a tiny metal slit at the tip that holds the end of the paper strip, making it incredibly easy for beginners to start rolling with minimal finger coordination. A needle tool (or awl) is a smooth, solid metal rod with no slot. To use a needle tool, the crafter must manually wrap and hold the paper around the shaft. While a needle tool produces a much smaller, cleaner center hole in the finished coil, it requires significant finger dexterity and practice, making the slotted tool the superior choice for art class beginners.
How do I store paper strips to prevent them from curling or getting damaged?
Quilling paper strips are highly sensitive to physical damage and environmental moisture. Store your paper strips flat in their original plastic sleeves, or organize them in rigid, divided plastic storage boxes to prevent bending. In tropical, humid climates, moisture in the air will cause the paper to absorb water, making it limp, rippled, and difficult to feed into a slotted tool. To prevent this, always store your paper supply in airtight containers alongside several silica gel packets to absorb excess moisture and keep the paper crisp.
Community discussion
Share your experience or ask a question. Comments are reviewed before publication.