
Selecting the right metallic acrylic markers can transform a simple crafting project into a striking, professional-looking piece of art. Whether you are detailing a personal journal, painting intricate designs on river stones, or hand-lettering elegant greeting cards, the performance of your markers depends entirely on matching their technical specifications to your chosen medium. By understanding how nib materials, ink delivery systems, and pigment densities interact with different surfaces, you can make an informed purchase that ensures smooth application, vibrant opacity, and long-lasting results.
Unlike standard fiber-tip pens, metallic acrylic markers utilize a water-based acrylic binder suspended with fine metallic pigments—typically made from mica or treated aluminum powders. This unique formulation allows them to lay down a highly reflective, opaque layer of color that sits on top of the surface rather than soaking into it. However, because these pigments are heavier than standard dyes, choosing the wrong marker type can lead to clogged tips, uneven ink flow, or ruined project surfaces. This guide breaks down the essential criteria for selecting, using, and maintaining metallic acrylic markers across various crafting applications.
Key Selection Criteria for Metallic Acrylic Markers
Before investing in a set of metallic acrylic markers, it is crucial to understand the core specifications that differentiate professional-grade tools from budget options. Evaluating these technical aspects beforehand will save you time, money, and frustration during your creative process.
Products mentioned in this guide
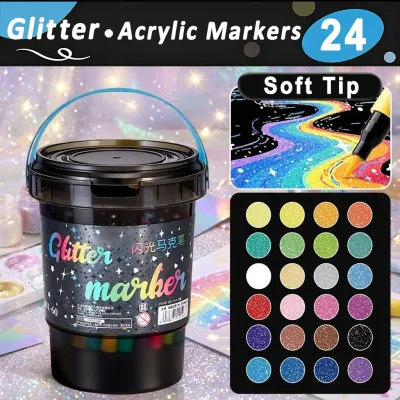
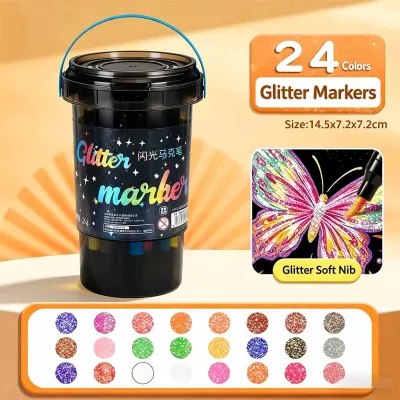
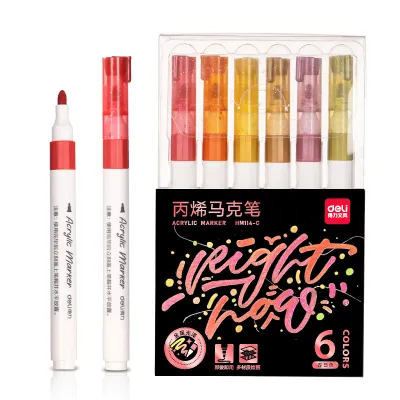
Prices are valid at publication and may change. Please refer to the product page for the latest price.
Nib Types and Sizes
The nib, or tip, of the marker determines both the line width and the level of control you have over the ink flow. Nibs are generally categorized by their shape and size:
- Extra-Fine and Fine Nibs (0.7mm to 1.0mm): Typically made of hard plastic or dense synthetic fiber, these tips are designed for detailed linework, writing, and outlining. They restrict ink flow slightly to prevent pooling on small areas.
- Medium Nibs (2.0mm to 3.0mm): Usually bullet-shaped and made of polyester fiber, these are the most versatile tips. They deliver a steady stream of ink suitable for coloring medium-sized areas and creating bold lettering.
- Broad and Chisel Nibs (5.0mm to 8.0mm or larger): These wide, angled tips are ideal for covering large surface areas quickly, such as background washes on canvas or large wooden signs.
- Brush Nibs: Made of flexible elastomer or bundled synthetic fibers, brush tips mimic the behavior of a traditional paintbrush, allowing for dynamic line variation based on the pressure applied.
Ink Flow Mechanisms
Acrylic markers generally employ one of two ink delivery systems: valve-action or free-flow (capillary) systems.
- Valve-Action Markers: These feature an internal ball bearing and a spring-loaded valve. Shaking the marker mixes the heavy metallic pigments with the acrylic binder, and pressing down on the nib opens the valve to saturate the tip. This mechanism is highly effective for thick, opaque metallic inks because it prevents the pigment from settling and clogging the feed system.
- Free-Flow (Capillary) Markers: These markers rely on a fibrous reservoir inside the barrel to draw ink to the nib via capillary action. While they are ready to use immediately without shaking or priming, they typically use thinner, less opaque inks to prevent the internal fibers from clogging. This makes them less suitable for dark or highly textured surfaces.
Evaluating Set Sizes and Price-per-Marker
When browsing local craft stores or online marketplaces in the Philippines, you will find options ranging from budget-friendly multi-packs to premium individual markers. To find the best value, calculate the price-per-marker by dividing the total set price by the number of markers included.
For example, a budget set of 12 markers priced at ₱360 yields a cost of ₱30 per marker, whereas a professional-grade set of 8 priced at ₱800 costs ₱100 per marker. While budget sets are excellent for casual crafting and practice, professional-grade markers often feature replaceable nibs and refillable barrels, making them a more sustainable and cost-effective investment over time for dedicated artists.
What to Look for in Markers for Journaling and Paper Crafts
Journaling, scrapbooking, and paper crafting require a delicate balance between ink opacity and paper preservation. Because standard journal pages are relatively thin, using the wrong type of acrylic marker can result in severe bleed-through, ghosting, or paper warping.

Prioritizing Fine Nibs for Intricate Detailing
For writing, drawing borders, or adding metallic accents to planner layouts, fine or extra-fine nibs (0.7mm or smaller) are indispensable. These tips allow you to write legibly in tight spaces without the ink spreading or feathering. Hard plastic tips are particularly useful for paper crafts because they maintain their shape under pressure, ensuring consistent line widths across your pages.
Checking for Quick-Drying Properties
Smudging is a common issue when working with metallic inks on paper, especially for left-handed crafters. In tropical climates with high relative humidity, water-based acrylic inks naturally take longer to dry. When selecting markers, look for manufacturer specifications that highlight quick-drying formulas. Fast-drying ink ensures that as you move your hand across the page, you will not accidentally smear your work.
Verifying Paper Weight and Testing for Bleed-Through
Standard notebook paper (typically 80 gsm to 100 gsm) is highly porous and prone to absorbing liquid quickly, which can cause the binder to bleed through to the reverse side of the page. For the best results, use journals with heavier paper weights, such as 120 gsm, 160 gsm, or mixed-media paper.
Regardless of the paper weight, always perform an observable trial on a scrap piece of the same paper or an inconspicuous back page of your journal. Apply a single stroke, wait for it to dry completely, and check the reverse side for any signs of ghosting or bleeding before proceeding with your final design.
Choosing Markers for Rock Painting and Non-Porous Surfaces
Rock painting, stone decorating, and working on non-porous materials like glass, glazed ceramics, or plastics present unique challenges. These surfaces do not absorb ink, meaning the paint must adhere firmly to the surface and dry into a durable, cohesive film.
Selecting Valve-Action Mechanisms
Textured, uneven, or dusty surfaces like river stones can quickly dry out a marker nib. Valve-action markers are highly recommended for these projects. If the nib begins to dry or skip due to surface dust, a quick shake and a gentle pump of the nib on a scrap surface will instantly re-saturate the tip with fresh, wet ink. This ensures continuous, opaque coverage without skipping or leaving thin, watery patches.
Opting for Medium or Broad Nibs
When painting rocks or large outdoor decorations, using a fine tip to fill in background colors is inefficient and can wear down the nib prematurely. Medium bullet tips (2.0mm to 3.0mm) or broad chisel tips are ideal for laying down solid base coats of metallic color. Once the base coat is dry, you can transition to finer tips for detailed overlay designs.
Reviewing Surface Preparation Requirements
To ensure the metallic ink adheres properly and does not peel or scratch off over time, proper surface preparation is essential. Always consult the product label for specific preparation instructions.
As a general rule, wash rocks or non-porous items thoroughly with soap and water to remove dirt, oils, and wax coatings. For highly porous stones or ultra-smooth plastics, applying a thin base coat of matte acrylic primer or gesso will seal the surface, giving the metallic ink a stable, high-grip foundation to cling to.
Ideal Marker Features for Card Making and Mixed Media
Card making and mixed-media art often involve layering different materials, working on dark or colored cardstocks, and incorporating hand lettering. To achieve professional results, your markers must offer high opacity and excellent layering capabilities.
Using Brush Nibs for Calligraphy and Blending
Flexible brush nibs are highly prized in card making because they respond dynamically to hand pressure. Pressing down firmly creates broad, sweeping strokes, while lifting pressure produces delicate, hairline details. This flexibility is perfect for modern calligraphy, brush lettering, and creating organic floral elements. Additionally, high-quality brush nibs allow for subtle color blending when two wet metallic shades are worked together on the page.
Evaluating High-Pigment Metallic Inks on Dark Backgrounds
Cheap metallic markers often look dull or transparent when applied to black or dark navy cardstock. To achieve a striking contrast, look for markers formulated with high-density, professional-grade metallic pigments. These inks reflect light intensely, ensuring that gold, silver, and bronze shades pop vividly against dark backgrounds without requiring multiple coats.
Checking Layering Capabilities and Drying Times
In mixed-media art, you will often need to apply metallic details over existing layers of watercolor, gouache, or matte acrylic paint. To prevent the wet metallic ink from reactivating or lifting the underlying paint layers, the marker ink must dry to a water-resistant, permanent finish.
Always allow underlying paint layers to cure completely before applying the metallic marker. When applying multiple coats of the metallic ink itself, let the first coat dry fully to avoid scraping up the semi-dry paint with the marker tip.
Quick Comparison: Matching Marker Specs to Crafting Needs
To help you quickly identify the right tool for your next project, use the following matrix to match your primary crafting medium with the ideal marker specifications and pre-purchase checks.
| Project Type | Recommended Nib Size & Shape | Ink Flow Type | Key Pre-Purchase Check & Trial Standard |
|---|---|---|---|
| Journaling & Paper Crafts | Extra-Fine (0.7mm) Plastic or Fiber Tip | Capillary or Valve-Action | Test on scrap paper of the same gsm; check for bleed-through and drying speed. |
| Rock Painting & Stone | Medium (2.0mm) Bullet or Broad Chisel | Valve-Action | Verify nib durability on rough surfaces; check label for weather/water resistance. |
| Card Making & Dark Cardstock | Flexible Brush or Medium Bullet | Valve-Action | Apply a single stroke to black cardstock; verify opacity and metallic sheen once dry. |
| Mixed Media & Non-Porous | Medium Bullet or Brush Tip | Valve-Action | Test adhesion on a sample piece; check compatibility with primers and sealants. |
How to Test, Store, and Maintain Your Metallic Acrylic Markers
Proper care and maintenance will significantly extend the lifespan of your metallic acrylic markers, preventing dry-outs, clogged nibs, and messy ink leaks.
Properly Priming Valve-Action Markers
When you first open a new valve-action marker, the nib will be completely dry and white. To prime it safely:
- Shake thoroughly: Keep the cap securely on and shake the marker for at least 30 seconds. You should hear the internal ball bearing rattling, which redistributes the heavy metallic pigments evenly throughout the acrylic binder.
- Press gently: Place the marker tip vertically on a piece of scrap paper. Press down gently until the nib retracts slightly into the body, opening the internal valve. Hold it down for a few seconds, then release.
- Wait for saturation: Repeat this pressing motion rhythmically—do not pump rapidly or forcefully, as this can flood the feed system and cause a large puddle of ink to leak out. Stop pressing as soon as you see the metallic ink begin to saturate the fiber tip.
Testing Performance on Scrap Material
Before starting on your final piece, always perform a quick test run on a scrap piece of material that matches your project surface. This allows you to verify that the ink is fully mixed, check the actual color and reflectivity of the metallic pigment, and gauge the drying time under your current room temperature and humidity conditions.
Storing Markers Horizontally
Storage position is critical for metallic acrylic markers. Always store them horizontally when not in use.
If you store them vertically with the tip pointing down, the heavy metallic pigments will settle into the nib, clogging the feed system and making future use difficult. Conversely, if you store them vertically with the tip pointing up, the pigments will settle at the bottom of the barrel, resulting in watery, transparent strokes when you next try to write. Horizontal storage keeps the pigment particles evenly distributed along the length of the marker barrel, ensuring consistent color and flow every time you pick them up.
Frequently Asked Questions (FAQ)
Can I use metallic acrylic markers on fabric?
Yes, you can use metallic acrylic markers on fabric, but their performance and durability depend on the ink formulation and preparation. Standard acrylic markers will write on fabric, but because they dry to a rigid plastic film, the design may crack, stiffen, or wash out over time.
Before starting, check the marker packaging to see if the manufacturer explicitly lists fabric compatibility. For the best results, wash and dry the fabric beforehand without fabric softener to remove any sizing agents. Once your design is completely dry, heat-set the ink by placing a protective cloth over the design and pressing it with a dry iron on a medium setting for several minutes. This helps bond the acrylic binder to the textile fibers.
How do I fix a metallic marker that is skipping or dried out?
If a valve-action metallic marker begins to skip or dry out, it is often due to dried acrylic paint clogging the nib rather than the marker running out of ink. To revive it, try the following steps:
- Remove the nib: Gently pull the fiber nib out of the marker body using your fingers or a pair of tweezers.
- Rinse with warm water: Soak the nib in warm water for a few minutes to dissolve any dried acrylic binder. Do not use alcohol or harsh solvents, as these can degrade the synthetic fibers.
- Dry completely: Press the nib firmly between paper towels to extract all water, and let it air dry completely.
- Reinsert and re-prime: Place the clean, dry nib back into the marker, shake the barrel thoroughly, and gently press the tip on scrap paper to re-saturate it with ink.
If the ink inside the main barrel has completely cured or solidified due to a loose cap, the marker cannot be revived and should be replaced to prevent damaging your crafting surfaces.
Community discussion
Share your experience or ask a question. Comments are reviewed before publication.