
Choosing between genuine leather and faux leather per yard for your embroidery projects requires balancing aesthetic goals, machine capabilities, and budget constraints. Genuine leather offers unmatched durability, a premium tactile feel, and a natural finish that matures beautifully over time, but it demands specialized tools and leaves permanent needle holes that make mistakes unforgiving. Faux leather, on the other hand, provides a highly uniform, budget-friendly surface that is easier to hoop and stitch, though it lacks the long-term structural resilience of real hide, especially in warm climates. Understanding how these materials interact with your embroidery machine is the key to achieving professional, clean results without damaging your equipment or fabric.
Stitching Performance: Needle Penetration and Tension
Embroidering on leather-like surfaces presents unique mechanical challenges compared to standard woven fabrics. Genuine leather is composed of a dense, interlocking network of natural collagen fibers. When an embroidery needle penetrates real leather, it does not push threads aside; instead, it cuts or punches a permanent hole through the fiber network. Because these holes cannot self-heal, high stitch density can easily create a “postage stamp” effect, where the needle perforations slice a clean line through the leather, causing the entire embroidered design to tear away from the base material.
Faux leather, typically constructed from a polyurethane (PU) or polyvinyl chloride (PVC) coating over a fabric backing, behaves differently under the needle. The synthetic top layer has a degree of elasticity that can sometimes tolerate slightly denser stitch patterns than genuine leather. However, high-speed stitching can generate friction heat, which occasionally causes the synthetic coating to soften or stick to the needle, leading to skipped stitches or thread breaks. Choosing a faux leather with a stable, non-woven fleece or woven cotton backing helps mitigate this tearing risk.
Products mentioned in this guide
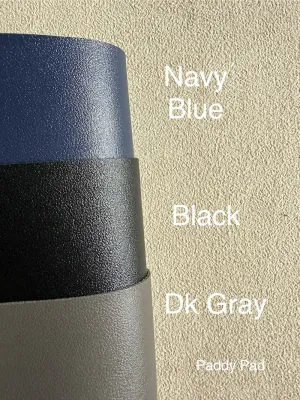
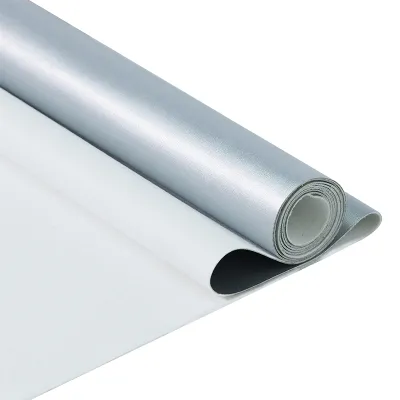
Prices are valid at publication and may change. Please refer to the product page for the latest price.
Hooping tension is another critical factor where these two materials diverge. Genuine leather is stiff and highly prone to “hoop burn”—permanent indentations or discoloration left by the pressure of the embroidery hoop. To prevent this, embroiderers rarely hoop genuine leather directly; instead, they hoop the stabilizer alone and “float” the leather on top, securing it with temporary adhesive or basting stitches. Faux leather is more pliable and can sometimes be hooped directly, but stretchy synthetic varieties can easily warp under uneven hoop tension, resulting in puckered or distorted designs once the material is released.
To support dense embroidery patterns on either material, stabilizer selection is non-negotiable. Heavy-duty cut-away stabilizers provide the necessary structural foundation to prevent the stitches from sinking or distorting. For floating techniques, a strong sticky-back stabilizer or a water-soluble topping can help keep the material perfectly aligned during high-speed stitching cycles.
Durability and Project Lifespan
The long-term survival of your embroidered creation depends heavily on how the base material responds to wear, handling, and environmental exposure. Genuine leather is celebrated for its exceptional longevity. As it ages, it develops a unique patina, absorbing oils and exposure to light without losing its structural integrity. This makes real leather the premier choice for high-wear, functional items such as custom bags, wallets, belts, and heavy jacket patches that are expected to endure years of daily handling.

Faux leather has a more predictable, uniform appearance out of the box, but its lifespan is inherently limited. Over time, the chemical bonds in the synthetic coating begin to break down. In tropical environments characterized by high heat and humidity, this degradation is accelerated by hydrolysis—a process where moisture in the air chemically splits the polyurethane chains. This causes the faux leather to peel, flake, or crack, often starting around the high-tension areas of the embroidery stitches.
For lightweight decorative pieces, framed wall art, or seasonal items that will not face constant friction or moisture, faux leather is highly practical and structurally sufficient. However, if you are investing hours of meticulous stitching into an heirloom-quality piece, the natural resilience of genuine leather ensures that your hard work will not peel away after a few seasons of humid weather.
Budgeting and Cost Per Yard
When planning your project’s financial layout, the upfront cost of the material per yard is only the starting point. Genuine leather is rarely sold in perfect, linear yards; instead, it is sold by the hide or by the square foot. When you calculate the equivalent area of a standard 54-inch wide fabric yard, genuine leather represents a premium investment. Furthermore, because hides conform to the natural shape of the animal, they contain irregular edges, brand marks, scars, and insect bites that must be bypassed, resulting in a waste factor of 20% to 30% per project.
Faux leather is sold in continuous, uniform rolls by the linear yard, usually at a fraction of the cost of real hide. Because it is manufactured to a consistent width with no natural blemishes, you can utilize nearly 100% of the material, making it incredibly cost-effective for large-scale production, group projects, or beginner practice runs.
To estimate your true project expenses in ₱, you must also factor in specialized consumables. A realistic budgeting checklist should account for the following components:
- Base Material: Calculate the required yardage, adding a 25% waste margin for genuine leather or a 10% margin for faux leather.
- Specialized Needles: Leather-specific wedge-point needles dull quickly against dense fibers and must be replaced every few hours of active stitching to prevent fabric damage.
- Heavy-Duty Stabilizers: Budget for premium cut-away or adhesive-backed stabilizers to ensure proper material support.
- Specialty Thread and Lubricants: High-tensile polyester threads and occasional needle lubricants help prevent thread shredding on tough surfaces.
Pre-Purchase Inspection: What to Check Before Buying
Before committing to a full yard of material, performing a few simple physical checks can save you from ruined projects and broken machine needles. If you are shopping at a local textile market, always ask for a small swatch to test. If you are sourcing from online fabric distributors, request a sample pack to evaluate the weight and flexibility firsthand.
Begin with the fold test to evaluate creasing recovery. Fold a corner of the material tightly between your fingers and apply firm pressure for five seconds. Genuine leather will crease but will gradually relax and soften without cracking. High-quality faux leather should also recover its shape smoothly. If the synthetic material retains a sharp, white crease line, or if the plastic coating shows signs of separating from the fabric backing, it is highly likely to peel and split under the dense impact of embroidery needles.
Next, perform a stretch test. Pull the material firmly along the grain and diagonally on the bias. A good embroidery substrate should have minimal diagonal stretch. If the material warps easily under light hand tension, it will require extensive stabilizing to prevent your embroidery designs from shifting out of alignment during stitching.
Always read the manufacturer’s specifications on the product label or listing. Pay close attention to the thickness, which is typically measured in millimeters. For standard domestic embroidery machines, materials thicker than 1.2mm can strain the motor and cause timing issues. Additionally, check the backing material; a brushed fleece or woven cotton backing provides a much more stable foundation for stitching than a slippery, thin knit backing.
Decision Framework: Choosing the Right Leather for Your Project
To finalize your material selection, match your project requirements against this straightforward decision framework:
Select Genuine Leather if:
- The finished item is a high-wear, functional heirloom (such as a premium bag, wallet, or heavy jacket patch) that needs to last for years.
- You desire a natural, irregular aesthetic that develops a rich patina over time.
- Your budget accommodates higher material costs, a higher waste margin, and specialized heavy-duty needles.
- Your embroidery machine has a robust motor and a presser foot clearance capable of handling dense, natural hides.
Select Faux Leather if:
- The project is budget-conscious, intended for practice, or involves large-scale production where cost efficiency is paramount.
- You require a perfectly uniform texture and color across multiple yards for repetitive, multi-hoop designs.
- The finished item is primarily decorative, lightweight, or intended for short-term seasonal use.
- You are using a standard domestic embroidery machine and want to minimize the risk of motor strain.
Before purchasing your chosen leather by the yard, always verify your embroidery machine’s manual. Check the maximum recommended material thickness and ensure you have the correct presser foot—such as a non-stick Teflon foot or a roller foot—to prevent the material from dragging or sticking during the stitching process.
Frequently Asked Questions (FAQ)
Do I need a special sewing machine to embroider on leather?
You do not necessarily need an industrial sewing machine to embroider on leather, but you must use specialized hardware and adjust your settings. Standard embroidery needles feature a round or ball-point tip designed to push fabric threads aside; using these on leather will cause excessive friction, thread shredding, and skipped stitches. Instead, you must install a leather-specific needle, which features a wedge-shaped cutting point that slices a clean, tiny slit through the dense material as it penetrates.
Additionally, your machine’s motor must work harder to pierce leather. To prevent strain, slow your stitching speed down to its lowest setting. If your machine allows, adjust the presser foot pressure to prevent the dense material from flagging (lifting up with the needle), and use a non-stick Teflon or roller foot to ensure the sticky surface of faux or finished genuine leather glides smoothly under the needle.
Can I use standard embroidery stabilizers on leather?
Standard lightweight tear-away stabilizers are generally insufficient for leather embroidery. Because leather does not have a woven grid to support stitches, the stabilizer must carry the structural load of the design. A medium-to-heavy cut-away stabilizer is highly recommended because it remains permanently behind the design, preventing the stitches from sagging or tearing the leather over time.
Avoid using temporary spray adhesives directly on genuine leather, as the chemical solvents can permanently stain, discolor, or strip the natural oils from the hide. Instead, opt for a high-quality sticky-back stabilizer. When using sticky-back stabilizers on genuine leather, peel the material off gently after stitching to avoid lifting the delicate grain on the underside of the hide.
Community discussion
Share your experience or ask a question. Comments are reviewed before publication.