
Gundam markers are specialized paint pens designed specifically for plastic model kits, commonly known as Gunpla. Developed by GSI Creos under the Mr. Hobby brand, these tools allow hobbyists of all skill levels to detail, color-correct, and weather their models without the need for complex airbrush setups or extensive hand-painting equipment. The right Gundam marker to buy depends entirely on the specific task you want to accomplish on your model kit. For drawing clean, recessed panel lines, a Fine Tip or Pour Type marker is ideal. For shading and realistic weathering, a Real Touch marker is the best choice. For painting mechanical details, weapons, or small armor sections, you should opt for Broad Tip or Metallic markers.
Understanding the chemical composition, tip variations, and plastic compatibility of these markers is essential for any builder. Using the wrong marker on certain plastics can lead to ruined parts, while choosing the correct tool can elevate a standard out-of-the-box build into a highly detailed, professional-looking masterpiece. This guide breaks down every major variant available, helping you make an informed decision for your next project.
Quick Guide: Matching Gundam Markers to Your Gunpla Needs
Selecting the correct tool for your specific modeling task saves time and prevents costly mistakes on your kits. The following matrix maps common Gunpla detailing tasks to the recommended marker types, highlighting their primary features and the ideal surface conditions for application.
Products mentioned in this guide
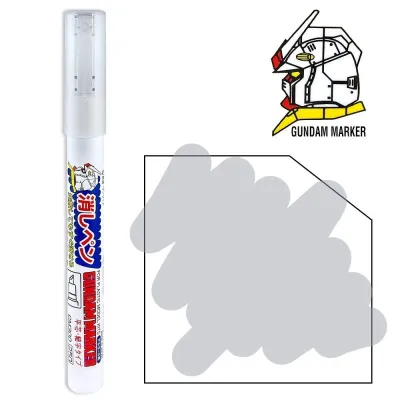
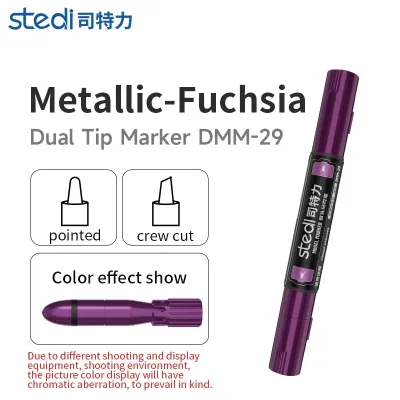
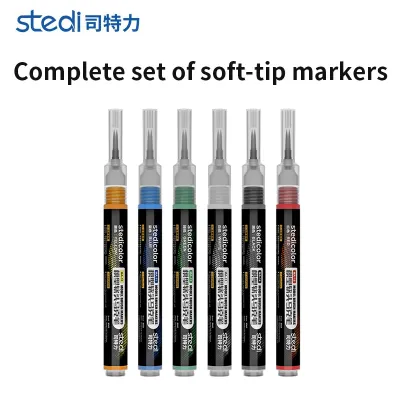
Prices are valid at publication and may change. Please refer to the product page for the latest price.
| Gunpla Detailing Task | Recommended Marker Type | Key Feature | Best Surface Finish |
|---|---|---|---|
| Crisp, thin panel lines | Fine Tip (Draw Type) | Hard plastic nib for precise control | Bare plastic or gloss coat |
| Effortless, self-flowing panel lines | Pour Type (Capillary) | Flow-type ink that fills grooves automatically | Gloss coat (highly recommended) |
| Soft shading and realistic panel lines | Real Touch Marker | Dual-tipped water-based ink, highly blendable | Matte or semi-gloss coat |
| Painting small mechanical parts | Broad Tip (Standard) | Wide chisel nib for quick paint delivery | Bare plastic or primed surface |
| Adding metallic frame accents | Metallic / EX Series | High-density metallic flakes in alcohol base | Bare plastic or gloss black base |
| Replicating glowing sensors and eyes | Fluorescent Marker | UV-reactive vibrant pigments | Silver base coat or clear parts |
| Creating rust, mud, or soot effects | Weathering Marker | Smudgeable, water-soluble pigment | Matte or flat topcoat |
While this matrix provides an excellent starting point for your workflow, remember that surface preparation is the ultimate foundation of hobby painting. Applying a gloss clear coat before you begin panel lining, for instance, dramatically improves ink flow and makes clean-up much easier, whereas trying to wipe ink off a raw matte surface can leave permanent stains.
Understanding the Main Types of Gundam Markers
Gundam markers are engineered with different chemical bases, pigments, and physical nibs to perform specific roles. Using a marker outside its intended purpose can result in uneven paint coverage, clogged tips, or chemical damage to your model kit.

Panel Lining and Fine Detailing (Fine Tip and Real Touch)
Panel lining is the process of applying dark ink into the recessed grooves of a model kit to simulate shadows and separate different armor panels, giving the mecha a sense of scale and realism. GSI Creos offers two distinct approaches to this task: Fine Tip (including Pour Type) and Real Touch markers.
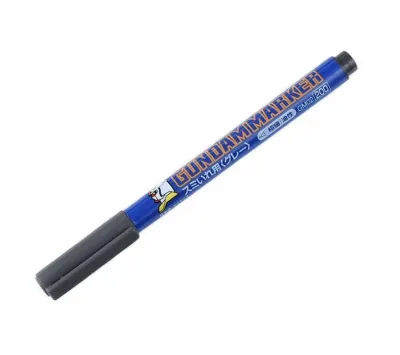
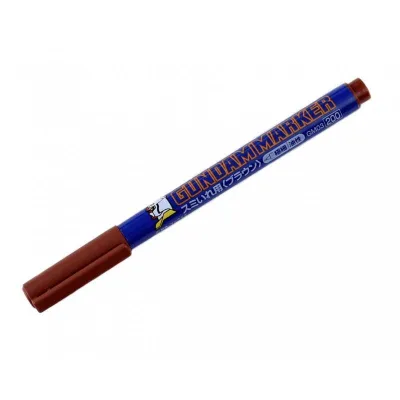
Fine Tip markers, such as the classic GM01 (Black), GM02 (Gray), and GM03 (Brown), feature a hard, ultra-fine plastic nib. These are “draw-type” markers designed for drawing lines directly into the grooves. They are highly controllable and excellent for crisp, sharp, permanent lines on bare plastic. A variation of this is the Pour Type marker (like the GM301 series), which uses a highly fluid, capillary-action ink. When you press the spring-loaded nib into a panel line, the ink automatically flows through the entire groove on its own, mimicking the behavior of traditional enamel wash panel liners.
Real Touch markers (the GM400 series) utilize a completely different philosophy. These are dual-tipped, featuring a soft, flexible brush nib on one end and a fine detail nib on the other. The ink is water-based, highly blendable, and designed to dry slowly. Instead of leaving a stark, solid line, Real Touch markers allow you to apply the ink generously over a panel line and then partially wipe away the excess using a cotton swab, a soft cloth, or a dedicated blending marker (GM400 Blending Marker). This technique leaves a soft, shaded gradient along the panel line, mimicking scale-appropriate shadows, accumulated dirt, and subtle grime.
The physical texture of your kit’s plastic plays a massive role in how these markers behave. On a glossy or highly polished plastic surface, both fine-tip ink and Real Touch ink wipe away cleanly, leaving color only in the deepest recesses. On a matte or sanded surface, the rough microscopic texture of the plastic grabs the pigment. If you use a Real Touch marker on a matte surface, the ink will stain the flat plastic, making it difficult to wipe away completely but highly effective for creating broad, dusty weathering transitions. Always observe the surface texture before choosing your detailing tool.
Base Coating and Large Area Coverage (Broad Tip)
Broad Tip markers (such as the standard GM04 to GM19 series) feature a wide, angled chisel nib. These are designed to deliver a high volume of liquid acrylic or alcohol-based paint to cover larger areas of a model kit. They are excellent for color-correcting parts that Bandai molded in the wrong color, such as the yellow vents on a Gundam’s chest or the grey mechanical joints inside an elbow.
However, painting large, flat surfaces like a shield or a wide leg armor plate with a chisel tip presents significant challenges. Because the paint dries relatively quickly, overlapping brush strokes will create visible ridges, uneven thickness, and unsightly paint pooling. The surface can end up looking streaky and thick.
To achieve a clean finish, limit the use of broad tips to smaller “large” components, such as weapons, thruster bells, or small armor panels. If you need to paint a massive surface like an entire HG or MG torso, it is highly recommended to transition to spray cans (lacquer-based hobby sprays) or an airbrush setup, which apply paint in a micro-fine, uniform mist. Alternatively, intermediate builders often use the Gundam Marker Airbrush System, a specialized tool that connects a standard Gundam marker to a compressed air source, spraying the marker’s paint as a fine mist to eliminate brush strokes entirely.
Special Effects and Accents (Metallic, Fluorescent, and Weathering)
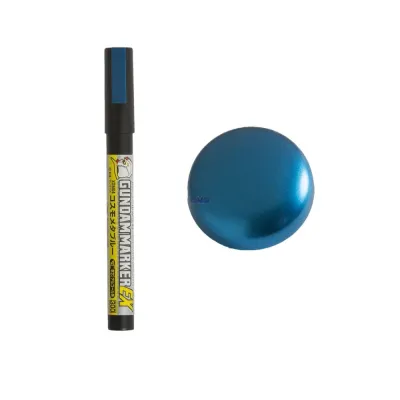
Metallic markers are among the most popular tools in a Gunpla builder’s arsenal. Standard shades like metallic gold, silver, gunmetal, and metallic red utilize real metallic flakes suspended in an alcohol-based acrylic carrier. To use these effectively, you must shake the marker vigorously for at least 30 seconds to distribute the heavy metallic particles evenly throughout the liquid. Priming the nib on a scrap surface is essential to ensure the flakes flow smoothly without clogging the tip.
Fluorescent markers are engineered with highly vibrant, UV-reactive pigments. These are perfect for painting the clear plastic parts used for sensors, camera eyes, and beam saber effects. When exposed to a blacklight or UV light source, these painted parts glow intensely, adding a dynamic, high-tech look to your display shelf. For the best color payoff, apply these over a bright silver base coat if the underlying plastic is dark.
Weathering markers (often sold in sets like the Real Touch weathering sets) are formulated to mimic realistic environmental wear, such as rust, mud, sand, and soot. Unlike permanent paint markers, weathering markers rely on physical smudging, blending, and layering. The ink does not bind permanently to the plastic immediately, allowing you to use a dry cotton swab, a makeup sponge, or your fingertip to smear the pigment across edges and flat surfaces to simulate wind-blown dust or exhaust soot.
Key Factors to Consider Before Buying
Before purchasing any Gundam markers, it is crucial to understand how their chemical formulations interact with your model kits and building environment. Neglecting these technical factors can result in ruined parts, smudged paintwork, or cracked plastic.
Plastic Compatibility Gunpla kits are molded from several types of plastic, primarily Polystyrene (PS), Acrylonitrile Butadiene Styrene (ABS), and sometimes Polypropylene (PP) or Polyethylene (PE) for polycaps. ABS is commonly used for inner frame parts, joint connections, and transformable mechanisms due to its strength and rigidity. However, ABS is highly susceptible to chemical stress cracking when exposed to the harsh solvents found in some Gundam markers—especially pour-type panel liners and alcohol-based broad tips. The solvent can seep into the microscopic stress fractures of the plastic, causing the joint to crumble or snap under pressure. Always check the instruction manual of your model kit to identify which parts are molded in ABS (usually labeled on the runner map). Before applying any solvent-heavy marker, verify the marker’s chemical base and test it on a spare piece of the runner (the plastic frame that holds the parts) to observe if it degrades or weakens the plastic.
Ink Base and Drying Time Gundam markers generally fall into three chemical categories: water-based, alcohol-based, and oil-based. Water-based inks (like those in Real Touch markers) dry slowly, are highly forgiving, and can be cleaned up with water or mild alcohol, but they have lower durability and require a protective topcoat. Alcohol-based acrylic paints (found in standard broad and metallic markers) dry quickly and offer excellent coverage, but they can bleed if painted over other alcohol-based layers. Oil-based inks (commonly found in fine-tip panel liners) provide incredibly crisp lines and dry to a highly durable finish, but they require specific panel-line erasers or mineral spirits for cleanup. Understanding these drying times and smudge resistance levels helps you plan your assembly sequence without accidentally ruining previous paintwork.
Surface Preparation The existing finish of your model kit dictates how well the marker ink adheres and flows. Raw, unpainted plastic is relatively smooth, but it can still have mold release oils from the manufacturing process. Washing your runners in warm, soapy water and drying them thoroughly before building is a great habit. If you plan to panel line, applying a gloss clear coat (topcoat) first creates an ultra-smooth, glass-like barrier. This gloss surface allows panel line ink to glide effortlessly through the channels via capillary action, and any excess ink can be wiped away with a clean cotton swab without leaving a dark smudge or staining the bare plastic. Conversely, applying markers directly to a matte or heavily sanded surface will cause the ink to bleed into the rough texture, making clean-up extremely difficult.
Recommended Purchasing Strategies for Gunpla Builders
Your purchasing strategy should align with your current skill level, budget, and the specific requirements of the kits you build. Buying excessive sets can lead to unused colors, while buying only individual markers might end up costing more in the long run if you need a broad palette.
For Beginners If you are new to the hobby, buying a massive collection of individual markers can be overwhelming and unnecessarily expensive. Instead, recommend starting with a basic multi-color set (such as the GMS105 basic set). These sets typically include the essential primary colors (red, blue, yellow), a white or grey marker for general touch-ups, a metallic silver or gold for mechanical details, and a fine-tip black or grey marker for panel lining. This single purchase provides everything needed to color-correct basic High Grade (HG) kits and complete out-of-the-box builds with professional-looking panel lines.
For Intermediate and Advanced Builders As your skills progress, you will find that pre-packaged sets often contain colors you rarely use, leading to waste. Intermediate and advanced builders should transition to purchasing individual markers tailored to their specific projects. Focus on acquiring a selection of Real Touch markers (such as Real Touch Gray 1, Gray 2, and Brown) for subtle, realistic panel shading on white and colored armor. Additionally, invest in individual high-quality metallic markers (like EX series plated silver or gold) to detail inner frames and thrusters, matching the specific color scheme of the mecha you are building.
Purchasing Verification When shopping for Gundam markers in the Philippines—whether visiting a local hobby shop in Greenhills, a major mall in Manila, or browsing online marketplaces—always verify the condition of the markers before purchasing. The hot, humid tropical climate of the Philippines can accelerate the degradation of hobby paints if they are stored improperly. Check the manufacturing date if available, ensure the plastic packaging seal is completely intact, and, if buying in person, gently shake the marker to listen for the mixing ball inside. If the mixing ball feels completely stuck or heavy, the paint may have dried up or separated severely due to prolonged exposure to heat. Avoid buying from sellers who store their stock in direct sunlight or non-air-conditioned warehouses.
Essential Tips for Using and Maintaining Gundam Markers
Proper usage and maintenance of your Gundam markers will extend their lifespan, prevent messy accidents on your kits, and ensure consistent paint quality.
Priming the Nib Gundam markers are valve-action pens. When you first open a new marker, the nib will be dry and white. To prime it, shake the marker thoroughly with the cap securely on. Then, press the nib straight down onto a scrap piece of cardboard or a spare plastic runner. Hold it down for a few seconds to compress the internal valve, allowing the paint to flow down into the nib. Do not pump the nib repeatedly on your model kit, as this will cause a sudden flood of liquid paint, creating messy blobs and ruining your hard work.
Proper Storage To maximize the lifespan of your markers, always store them horizontally. Storing them vertically with the tip pointing down can cause the heavy paint pigments to settle in the nib, leading to clogs and flooding. Storing them vertically with the tip pointing up can cause the solvent to pool at the bottom, leaving the nib dry and unusable. Horizontal storage keeps the solvent and pigments evenly distributed.
Nib Cleaning Over time, marker nibs can collect dried paint, topcoat residue, or tiny plastic shavings from your model kit. If you notice the ink flow becoming inconsistent or the nib looking dirty, gently wipe the tip with a lint-free cloth or a cotton swab lightly dampened with rubbing alcohol. For stubborn clogs, some builders carefully remove the nib with tweezers, soak it in a small amount of marker cleaner or isopropyl alcohol, and reinsert it once clean.
Topcoating Safety A topcoat is a protective clear spray applied to seal your paintwork. However, you must check topcoat compatibility before spraying your entire kit. Applying a harsh, solvent-based lacquer topcoat directly over Gundam marker inks can cause the paint to smear, run, or dissolve completely. Always test your planned topcoat spray on a painted runner piece first. To prevent reactions, apply very light “mist coats” from a safe distance, allowing each layer to dry before applying a heavier wet coat.
Frequently Asked Questions (FAQ)
Can I use regular art markers instead of official Gundam Markers?
While regular alcohol-based art markers can technically apply color to plastic, they are not formulated for the unique demands of scale modeling. Standard art markers often have much larger, softer brush tips that make fine detailing on 1/144 or 1/100 scale kits incredibly difficult. Furthermore, the ink formulation in standard art markers lacks the specific plastic-adhesion properties of Gundam markers, meaning the paint will easily scratch off, pool unevenly, or react poorly with hobby-grade topcoats. Official Gundam markers are engineered with precise tip sizes and solvent balances designed specifically to grip polystyrene without damaging the details.
How do I fix a mistake made with a Gundam Marker?
Mistakes are a natural part of the building process, and fortunately, Gundam marker inks are highly reversible if caught early. The most effective tool is the dedicated Gundam Marker Eraser pen (GM300), which contains a mild solvent designed to dissolve marker ink without harming the underlying plastic. Alternatively, you can use a cotton swab lightly dampened with 91% isopropyl alcohol or a mild, plastic-safe hobby solvent. Always test your eraser or solvent on an inconspicuous area of the kit or a spare runner first to ensure it does not melt the plastic, weaken a joint, or strip away any underlying base paint.
Community discussion
Share your experience or ask a question. Comments are reviewed before publication.