
Setting up a physical bills payments organizer is one of the most reliable ways to manage household expenses, track utility payments, and maintain clear financial records. While digital tracking is common, having a tangible, well-structured filing system ensures that critical receipts, tax documents, and service contracts are immediately accessible when needed. By utilizing folders, binders, and specific stationery accessories, you can create a durable system that protects your documents from physical damage and keeps your financial life orderly.
Choose the Right Folders, Binders, and Accessories
Selecting the correct filing tools depends on your document volume, how often you need to access them, and your local environment. For high-volume storage, heavy-duty ring binders—specifically those with D-ring mechanisms—are highly effective because they allow pages to lie flat and accommodate more sheets without tearing. If you prefer a more portable option for monthly bills, an expandable accordion folder with built-in dividers offers a compact solution. Pocket folders work well for temporary storage or for separating active bills that require immediate attention before they are moved to a permanent binder.
When choosing binders and folders in a tropical climate like the Philippines, material selection is critical for long-term preservation. High humidity can cause standard paper to absorb moisture, leading to mold, warping, and ink degradation. To prevent this, opt for binders made of durable polypropylene rather than paper-wrapped cardboard. Additionally, using acid-free plastic pocket sleeves protects individual documents from moisture and prevents ink from lifting off the paper and sticking to the plastic over time.
Products mentioned in this guide
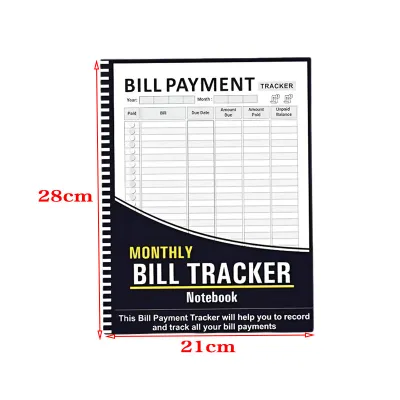

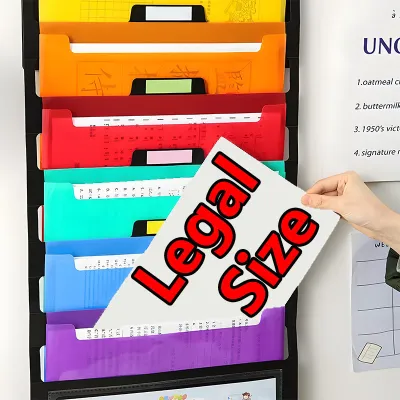
Prices are valid at publication and may change. Please refer to the product page for the latest price.
Essential accessories complete your bills payments organizer. A sturdy, adjustable hole punch is necessary to prepare documents for ring binders, and you must ensure the punch settings match your binder’s ring configuration, such as standard two-ring or three-ring setups. Tab dividers are indispensable for indexing categories, while color-coded sticky notes can serve as temporary flags for unpaid items. Finally, a reliable label maker or high-quality printable adhesive labels will ensure that your folder spines and divider tabs remain legible and professional.
Create a Logical Sorting Structure for Your Bills
Before placing any paper into your new organizer, you must establish a clear and logical categorization system. Grouping your financial documents into distinct categories prevents confusion and reduces the time spent searching for specific records. A practical structure typically includes primary categories such as utilities (electricity, water, internet, and phone services), housing (rent agreements, association dues, or mortgage statements), insurance policies, medical receipts, and recurring subscriptions.

To keep your system functional, you must separate active documents from historical records. Create a dedicated “Pending Payment” section at the very front of your organizer or in a highly visible pocket folder. When a new bill arrives, it immediately goes into this pending section. Once the payment is processed and the receipt is issued, the document can then be moved to its permanent category in the main binder. This simple separation ensures you never miss a payment deadline or pay a bill twice.
Within each primary category, decide on a consistent sorting method. Chronological sorting—arranging documents by date with the most recent on top—is generally the most efficient method for utility bills and monthly payments. This structure allows you to quickly track monthly consumption patterns and verify payment histories. For diverse categories like medical records or insurance, you might choose an alphabetical sub-sorting method by provider name, followed by chronological order within each provider’s section.
Assemble and Label Your Bills Payments Organizer
Once your materials are ready and your structure is defined, you can begin the physical assembly of your organizer. Follow these sequential steps to build a clean, functional filing system.
Step 1: Purge Unnecessary Papers Gather all your loose bills, receipts, and financial statements in one workspace. Carefully review each document and discard duplicate copies, junk mail, and outdated promotional inserts. Keep only essential documents, such as official receipts, tax-deductible statements, active contracts, and warranty papers. Be cautious not to discard documents that may be required for future tax filings or insurance claims.
Step 2: Prepare and Insert Documents Sort the remaining papers into your pre-defined categories. For documents going into ring binders, use your hole punch to create clean holes, ensuring the alignment matches your binder rings. If you are using plastic pocket sleeves to protect thermal receipts—which are prone to fading—slide them gently into the sleeves. Group smaller receipts together on a single sheet of paper using a light adhesive or paperclips before filing them to prevent them from slipping out.
Step 3: Label Every Section Clear labeling is the key to maintaining an organized system over time. Use a label maker or neat handwriting to label the spine of your binder or the front of your expandable folder with the title “Bills and Payments” and the current calendar year. Label each tab divider with its specific category, such as “Electricity,” “Water,” or “Insurance.” If your binder covers multiple years, clearly indicate the date range on the cover to avoid mixing old and new records.
Step 4: Designate a Secure Storage Location Place your completed organizer in an easily accessible, dry, and cool location in your home or office. Avoid storing paper files in areas prone to high humidity, direct sunlight, or potential water leaks, such as near windows, air conditioning units, or concrete walls that sweat during the rainy season. Keeping the organizer in a dedicated cabinet or on a sturdy shelf ensures it remains clean, dry, and ready for regular use.
Maintain Your Filing System and Archive Old Records
A filing system is only as good as the routine used to maintain it. Without regular upkeep, papers will quickly accumulate on desks and countertops, defeating the purpose of your organizer. Establish a weekly or monthly schedule to process incoming mail and digital printouts. During this routine, review your pending folder, make necessary payments, and immediately file the paid receipts into their designated chronological sections.
At the end of each calendar year, perform an annual archive process to keep your active organizer light and manageable. Transfer the older, completed sections from your active binder into long-term storage boxes, such as cardboard archive boxes or plastic storage bins with tight-fitting lids to protect against dust and pests. Label these archive boxes with the specific year and contents. Once the old records are moved, reset your active binder with fresh tab dividers and labels for the upcoming year.
When archiving or clearing out old files, secure disposal is essential to protect your personal information. Financial documents, utility bills, and receipts often contain sensitive details like your full name, address, account numbers, and payment histories. Instead of throwing these documents directly into the trash, use a cross-cut paper shredder to destroy them. This practice prevents identity theft and ensures that your private financial data remains confidential even after you no longer need to keep the physical records.
Frequently Asked Questions (FAQ)
How long should I keep physical utility bills and payment receipts?
For regular monthly utility bills, keeping physical copies for one to two years is generally sufficient to resolve any billing disputes or track annual usage. However, documents related to taxes, property ownership, home improvements, or major appliance warranties should be kept much longer, often for several years or for as long as you own the asset. It is advisable to check local tax guidelines in the Philippines, such as those from the Bureau of Internal Revenue, or consult a professional to determine the exact legal retention periods for your specific financial records.
What is the best way to handle digital receipts alongside physical folders?
A hybrid approach works best for managing a mix of physical and digital financial records. For critical digital receipts, such as major purchases or tax-deductible expenses, print a physical copy and file it directly into the corresponding section of your binder. For routine digital statements, you can maintain a matching folder structure on your computer or backup drive. Alternatively, you can save digital files onto a secure USB flash drive and store it inside a zippered utility pouch designed to fit directly into your physical ring binder.
Community discussion
Share your experience or ask a question. Comments are reviewed before publication.