
Starting your journey into oil painting is an exciting endeavor, but walking into an art supply store or browsing online marketplaces can quickly become overwhelming. With dozens of brands, tube sizes, and color configurations available, finding the right oil painting color set requires understanding how these materials behave, especially under the unique environmental conditions of the Philippines. The country’s tropical climate, characterized by high relative humidity and warm ambient temperatures, plays a significant role in how oil paints dry, flow, and cure on your canvas.
To make a smart investment, you must look beyond the aesthetic appeal of a starter kit and focus on the practical factors that support your learning process. A great beginner set should offer high-quality pigments that mix predictably, durable tube packaging that protects the paint from drying out, and a balanced selection of colors that teaches you the fundamentals of color theory. By focusing on these core elements, you can avoid the common pitfalls of purchasing low-quality materials that lead to frustration, muddy color mixtures, and wasted effort.
Evaluating Paint Quality and Tube Formats for Beginners
When selecting your first oil painting color set, the first major decision you will face is choosing between student-grade and professional-grade paints. Student-grade paints, often labeled as “studio” or “academic” lines, are designed specifically for beginners, students, and hobbyists who need affordable materials for practice. These paints achieve their lower price point by using synthetic alternatives for expensive organic pigments and incorporating a higher proportion of fillers, such as barium sulfate or calcium carbonate. While this makes them highly accessible—often costing only a few hundred pesos for a complete starter set—it also means they have lower tinting strength, meaning you will need to use more paint to achieve vibrant, saturated colors.
Products mentioned in this guide
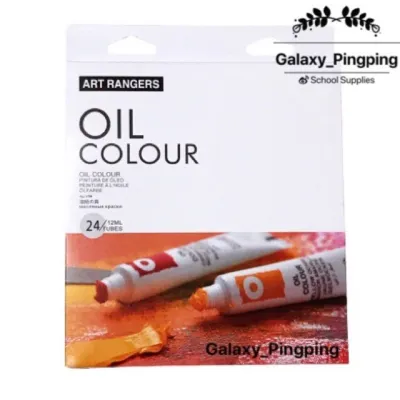
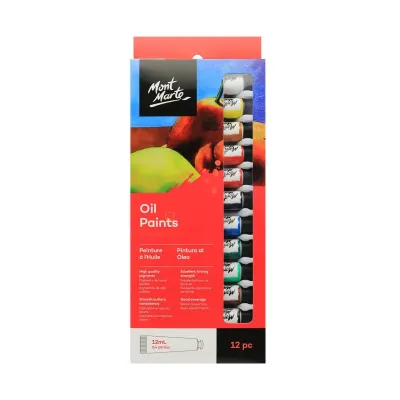
Prices are valid at publication and may change. Please refer to the product page for the latest price.
Professional-grade paints, on the other hand, feature pure, highly concentrated pigments suspended in top-tier drying oils without unnecessary fillers. This results in exceptional tinting strength, rich coverage, and superior lightfastness, which is the paint’s ability to resist fading when exposed to light over time. For beginners in the Philippines, where intense tropical sunlight can accelerate the fading of low-quality pigments, checking the lightfastness rating on the tube is crucial. Look for manufacturers that clearly print ASTM international standards (typically rated as Class I for excellent lightfastness or Class II for very good lightfastness) or star ratings on their packaging. While student-grade sets are perfectly adequate for learning and initial color studies, choosing a reputable brand that prioritizes pigment quality will make your mixing experience much more predictable and rewarding.
Beyond pigment grade, the physical size of the paint tubes in a set is a critical factor that directly impacts your painting workflow. Many entry-level sets are packaged in small 12ml tubes, which can seem like an economical way to acquire a wide variety of colors. However, these micro-tubes run out incredibly fast, particularly when you begin mixing larger background areas or practicing thick, textured impasto techniques. A far more practical approach is to look for sets that feature larger tubes, such as 21ml, 37ml, or 40ml capacities. If you do choose a set with smaller tubes, it is highly recommended to purchase an additional, separate large tube of Titanium White, typically in a 75ml or 120ml size. Because white is used in almost every mixture to adjust value and opacity, you will consume it at three to four times the rate of any other color in your palette.
Finally, you must evaluate the paint’s consistency and binder ratio by reviewing the manufacturer’s specifications. High-quality oil paint should have a smooth, buttery consistency right out of the tube, allowing it to hold brushstrokes and blend seamlessly on the canvas. In a warm, humid climate, the behavior of the binder—usually linseed oil, safflower oil, or poppy seed oil—is incredibly important. High humidity does not speed up the drying process of oil paint; instead, oil paint cures through a slow chemical process of oxidation, where the oil absorbs oxygen from the air and polymerizes into a solid film. If a paint set has a poor binder-to-pigment ratio, you may notice excess oil separating from the pigment and leaking out of the tube, which can lead to uneven drying, wrinkling, or a sticky, tacky finish that refuses to cure properly in humid weather.
Building a Practical Palette: Core Colors and Mixing Mediums
A common mistake among beginners is purchasing a massive paint set containing 24, 36, or even more pre-mixed colors. While a large array of tubes looks impressive, it often hinders your artistic growth by preventing you from learning how colors actually interact. Instead, building a practical palette around a “split-primary” system is the most effective way to master color mixing. A split-primary palette consists of a warm and a cool version of each primary color: red, yellow, and blue. This simple combination, along with a few essential earth tones and white, allows you to mix virtually any color imaginable with incredible clarity and vibrancy.

To implement this approach, look for a starter set that includes, or can be supplemented with, specific core colors. For yellows, you want a warm yellow (such as Cadmium Yellow Medium) and a cool yellow (such as Lemon Yellow). For reds, select a warm red (such as Cadmium Red Light) and a cool red (such as Alizarin Crimson or Quinacridone Magenta). For blues, include a warm, red-leaning blue (such as Ultramarine Blue) and a cool, green-leaning blue (such as Phthalo Blue or Cerulean Blue). To complete this versatile palette, ensure you have essential earth tones like Yellow Ochre and Burnt Sienna, which are invaluable for mixing realistic skin tones, shadows, and natural landscapes.
Sets that are overloaded with pre-mixed “convenience colors”—such as various shades of green, purple, and orange—can severely limit your understanding of color theory. When you rely on pre-mixed greens, for example, your paintings can easily look flat, artificial, and disconnected. Mixing your own greens using different combinations of your warm and cool blues and yellows teaches you how to control the temperature, saturation, and value of your mixtures. This skill is particularly important when trying to capture the rich, diverse greens of tropical Philippine foliage, where a single pre-mixed tube of green paint simply cannot replicate the subtle shifts of light and shadow found in nature.
In addition to the paint itself, you must understand the role of mixing mediums and solvents, which are essential for altering the paint’s viscosity, drying time, and gloss. Linseed oil is the most common medium; it increases the fluidity of the paint, enhances gloss, and slows down drying times, making it ideal for wet-on-wet techniques. However, because the Philippine climate is naturally humid, using too much linseed oil can cause your painting to remain wet and vulnerable to dust for weeks. To balance this, artists use solvents like odorless mineral spirits (OMS) to thin the paint for the initial, fast-drying underpainting layers. When purchasing these mediums, safety must be your top priority. Always verify that your solvents are labeled as odorless and non-toxic, and ensure you work in a well-ventilated space with active airflow to prevent the accumulation of chemical fumes in your home.
Assessing Included Accessories: Brushes, Palettes, and Surfaces
Many beginner oil painting sets come bundled with accessories like brushes, palettes, and painting surfaces to provide an all-in-one solution. While these kits offer convenience, it is essential to evaluate the quality and suitability of these non-paint tools, as low-quality accessories can make the painting process unnecessarily difficult. Brushes designed for oil painting must be resilient enough to handle the heavy, viscous nature of the medium. Traditional oil painters often prefer stiff natural hog bristle brushes, which are excellent for holding large amounts of thick paint and leaving expressive, textured marks on the canvas.
However, high-quality synthetic brushes designed specifically for oil and acrylic painting have become increasingly popular due to their durability and smooth application. Synthetic brushes are generally softer than hog bristles, making them ideal for delicate blending, glazing, and fine detail work. When evaluating the brushes in a starter kit, pay close attention to the handle length. Long-handled brushes are the standard for oil painting because they allow you to stand or sit at an arm’s length from your easel, giving you a broader perspective of your entire composition rather than forcing you to focus solely on tiny details. Ensure the ferrules—the metal bands connecting the bristles to the handle—are securely crimped to prevent shedding, which can leave annoying loose hairs embedded in your wet paint.
The palette is another crucial accessory that requires careful assessment. A suitable palette must be completely resistant to the solvents and oils used during painting and cleaning. Traditional wooden palettes are highly durable and offer a classic feel, but they must be properly seasoned with linseed oil before their first use to prevent them from absorbing the moisture and binder from your paint. Plastic palettes are lightweight and affordable, but they can degrade, warp, or melt if they come into contact with strong solvents. For beginners, disposable paper palettes are an exceptionally practical alternative. These pads consist of wax-coated sheets of paper that do not absorb oil; once your painting session is complete, you can simply tear off the top sheet and discard it, eliminating the need for tedious cleanup.
Finally, you must verify the preparation of any painting surfaces included in the starter kit, such as canvas boards, stretched canvases, or specialized paper. Oil paint contains natural acids that will slowly rot and degrade raw fabric or paper fibers over time if they come into direct contact. To prevent this, the surface must be treated with a primer, typically acrylic gesso, which creates a stable, non-porous barrier between the oil paint and the support. When inspecting bundled canvases, ensure they are labeled as “gesso-primed” or “triple-primed.” If you prefer working on paper to save space and budget, verify that the paper is specifically manufactured for oil painting, featuring a barrier layer that prevents the oil binder from seeping through and leaving greasy halos around your brushstrokes.
Purchasing Safely: Where to Buy and What to Verify
Sourcing authentic, high-quality art supplies in the Philippines requires a strategic approach to avoid counterfeit products and damaged goods. While general e-commerce platforms and online marketplaces offer incredible convenience and competitive pricing, they are also home to unauthorized third-party sellers offering counterfeit or expired paints. To ensure you are getting genuine products, prioritize purchasing from authorized local art supply stores, official brand flagship stores, or reputable national bookstores. These established retailers maintain direct relationships with manufacturers and adhere to proper storage standards, ensuring the paint you receive is fresh and safe to use.
Before finalizing any purchase, there are several critical factors you must verify to protect your investment. First, check the seller’s authenticity by reading customer reviews, looking for high ratings, and verifying that they are an authorized distributor of the brand. When your oil paint set arrives, conduct a thorough physical inspection of the packaging. Each tube should be factory-sealed, typically with a metal foil seal under the cap or a tightly crimped plastic nozzle. Inspect the tubes for any signs of leaking, denting, or oil separation; if a tube feels unusually hard or stiff, the paint inside may have already begun to cure due to a compromised seal or improper storage.
Additionally, pay close attention to the manufacturing or batch dates printed on the packaging. While high-quality oil paint has an incredibly long shelf life when sealed properly, stock that has been sitting in hot, unconditioned warehouses for several years can experience severe oil separation or dry out completely. The tropical heat and humidity in local warehouses can accelerate the degradation of plastic tubes and caps, making them brittle and prone to cracking. When ordering online, choose sellers who use robust packaging materials, such as thick bubble wrap and sturdy cardboard boxes, to protect the paint tubes from being crushed, punctured, or exposed to extreme heat during transit.
Frequently Asked Questions (FAQ)
Can I use regular cooking oil instead of linseed oil for painting?
No, you should never use regular household cooking oils, such as vegetable, canola, coconut, or palm oil, for oil painting. Cooking oils are classified as non-drying oils, meaning they do not possess the chemical structure required to undergo polymerization—the process where the oil reacts with oxygen to dry and harden into a solid, durable film. If you mix cooking oil with your paint, the mixture will remain wet, sticky, and tacky indefinitely. This sticky surface will attract dust, hair, mold, and insects, ultimately ruining your artwork and making it impossible to varnish or preserve. Always use dedicated, artist-grade drying oils like linseed oil, safflower oil, or walnut oil, which are specifically formulated to cure safely and permanently.
How do I safely clean up and dispose of oil painting solvents at home?
Working with oil painting solvents in a residential setting requires strict safety protocols to protect your health and your home. Always paint in a well-ventilated room with open windows or an active exhaust fan to prevent the inhalation of solvent fumes. Never pour used solvents, such as odorless mineral spirits, down the household sink, as they can damage your plumbing, contaminate local water systems, and harm the environment. Instead, practice a recycling method: pour your dirty solvent into a sealed glass jar and let it sit undisturbed for several days. The paint pigment particles will settle to the bottom, leaving clear, clean solvent at the top that you can carefully decant into a fresh jar for reuse. For disposal of solvent-soaked rags, store them in a water-filled, airtight metal container before taking them to a local hazardous waste collection point, as rags soaked in drying oils can generate heat and spontaneously combust if left exposed to the air.
Is it better to buy a large set or a small set when starting out?
For most beginners, it is far better to invest in a smaller set containing 6 to 12 essential colors in larger tubes (such as 21ml to 40ml) rather than a massive set of 24 or 36 colors in tiny 12ml tubes. A smaller, focused set forces you to learn the invaluable skill of color mixing, which is the absolute foundation of successful painting. Relying on a massive set of pre-mixed colors prevents you from understanding how different pigments interact and can lead to flat, unharmonious paintings. Furthermore, tiny 12ml tubes run out incredibly quickly—especially white and blue—leaving you with a collection of unused, highly specific colors and no paint left for your main palette. Purchasing a high-quality, smaller set of core colors offers superior long-term value, better paint quality, and a much more rewarding learning experience.

Community discussion
Share your experience or ask a question. Comments are reviewed before publication.