
When introducing the craft of painting diamonds to a school art class, selecting the right kits requires balancing creative engagement with practical classroom logistics. The ideal classroom kit must be safe, durable, and structured to fit within the constraints of a standard school period. By focusing on specific physical components—such as drill shapes, adhesive types, and canvas sizes—you can ensure that your students enjoy a smooth, frustration-free artistic experience.
For a successful classroom project, you should look for kits that feature round resin drills, clear high-contrast symbol keys, and poured-glue canvases that resist the peeling effects of tropical humidity. Because school art budgets and storage spaces are often limited, choosing compact, partial-drill designs rather than massive full-canvas projects keeps the activity manageable and highly rewarding. With the right preparation, this tactile craft can foster fine motor skills, patience, and artistic confidence in students of all ages.
Key Features to Look for in Classroom Diamond Painting Kits
The physical components of a diamond painting kit directly influence how easily students can work within a busy classroom environment. The first major decision is choosing between round and square drills (the small resin facets used to create the mosaic). For school art classes, round drills are highly recommended. Round drills are much easier to pick up and place onto the canvas because they do not require perfect alignment to look neat. This tolerance for slight placement errors significantly reduces student frustration, especially for beginners or younger children who are still developing their fine motor skills. Square drills, while offering a fuller mosaic look, require precise alignment and can cause the canvas to warp or the drills to pop off if placed even slightly crookedly.
Products mentioned in this guide
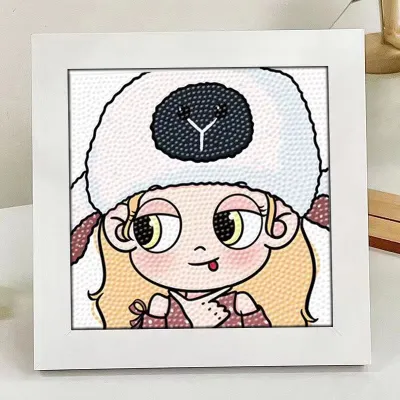




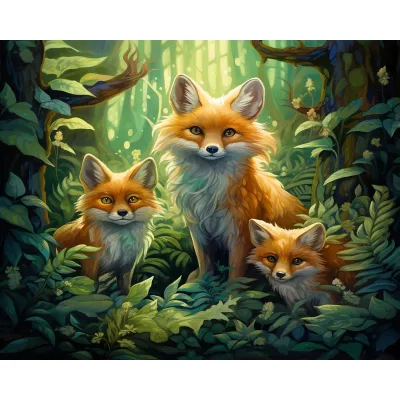
Prices are valid at publication and may change. Please refer to the product page for the latest price.
Canvas selection is another critical factor for classroom success. Canvases are generally divided into “full drill” (where the entire surface is covered in diamonds) and “partial drill” (where only specific focal points are covered, leaving the printed background exposed). For a school setting, partial-drill designs are far more practical. They require significantly less time to complete, making them ideal for fitting into a curriculum that spans only a few weeks. Furthermore, you must pay close attention to the adhesive used on the canvas. In warm, humid tropical climates, double-sided adhesive tape can easily dry out, bubble, or lose its stickiness when exposed to open air. Look for canvases that use poured-glue adhesive, which remains highly tacky even in humid conditions and allows students to peel back the protective cover repeatedly without losing adhesion.
The clarity of the printed symbols on the canvas is equally vital. Classrooms are not always equipped with specialized craft lighting, and students must rely on standard overhead fluorescent bulbs. If the symbols on the canvas are blurry, too small, or printed in colors that closely resemble one another, students will experience eye strain and make frequent mistakes. Prioritize kits that feature high-contrast, bold lettering or distinct symbols that are easily readable from a normal sitting distance.
Lastly, evaluate the quality of the tools included in the kit. Standard kits come with a plastic applicator pen, a small slab of pink wax, and a plastic sorting tray. For classroom use, the applicator pens should have a comfortable, slightly thick grip to prevent hand fatigue during extended crafting sessions. The wax must be firm enough to stay inside the pen tip without melting quickly in warm weather, yet sticky enough to pick up the resin drills effortlessly. The sorting trays should feature deep, distinct ridges; when students gently shake the tray, the drills should easily flip upright and align in neat rows, making them quick to grab with the applicator pen.
Strategies for Material Management and Classroom Cleanup
Managing hundreds of tiny resin drills in a room full of energetic students can quickly lead to chaotic spills if you do not establish a clear organization system. While many commercial kits package their drills in thin, tear-open plastic packets, these are highly impractical for a classroom. Once torn, they cannot be resealed, leading to immediate spills. Instead, look for kits that supply drills in resealable ziplock bags, or plan to transfer the drills into small, labeled plastic containers before the first lesson. Stackable plastic pill organizers or small bead storage boxes are excellent investments for school art departments, as they keep colors separated and secure between classes.

To minimize the inevitable spills that occur during active crafting, establish designated workspace boundaries for each student. Providing each desk with a shallow plastic tray, a large silicone baking mat, or even a simple cardboard box lid creates a physical barrier that catches stray drills before they bounce onto the classroom floor. Instruct students to keep their sorting trays inside these boundaries at all times. If a spill does occur, having a few dedicated cleanup tools on hand—such as a small hand broom and dustpan, or a lint roller with sticky sheets—allows students to quickly gather the fallen pieces without disrupting the rest of the class.
Labeling is the cornerstone of multi-week classroom art projects. Because diamond painting cannot be completed in a single session, you must have a foolproof system for identifying which kit belongs to which student. Use permanent markers to write each student’s name, grade, and section directly on the back of their canvas and on their drill storage containers. You can also assign a unique number to each student and label their corresponding tools with matching numbered stickers.
To prevent the loss of specific color codes over a multi-week unit, keep a master inventory sheet of the color codes (often based on standard DMC embroidery thread numbers) used in the projects. If a student accidentally loses their bag of a specific shade, you can easily identify the color code and supply a replacement from a communal “spare parts” bin. This spare bin can be populated by collecting leftover drills from completed kits, ensuring you always have a backup supply on hand without needing to purchase extra materials.
Matching Project Complexity to Student Skill Levels
To ensure that diamond painting remains an enjoyable and educational activity, the complexity of the chosen kits must align with the developmental stage of your students. For younger students, such as those in early elementary grades, look for kits with simple, bold designs that feature a limited color palette of five to ten highly contrasting colors. The symbols on the canvas should be large and easy to distinguish, such as simple geometric shapes or clear capital letters. Avoid designs with “color confetti”—areas where single drills of many different colors are scattered closely together—as this requires constant switching of drill colors and can quickly overwhelm younger minds.
For older students in middle or high school, you can introduce more complex canvases that feature subtle shading, gradient color transitions, and a higher density of symbols. These advanced projects can incorporate fifteen to thirty different colors, allowing students to explore concepts of color theory, depth, and visual texture. The increased detail challenges their focus and patience, turning the craft into a meditative, mindful exercise that helps them unwind during a busy school day.
Project timelines must also be carefully planned to fit your school’s academic calendar. If you only have a single art session to dedicate to this craft, opt for small-scale introductory activities. Diamond painting stickers, keychains, or small 10×10 cm canvases can easily be completed within a 45-to-60-minute class period. These micro-projects give students a complete sense of accomplishment without requiring long-term storage. For a comprehensive multi-week art unit, larger canvases ranging from 15×15 cm to 20×30 cm are highly appropriate, allowing students to dedicate 20 to 30 minutes of each class session to steady progress.
You can also adapt the format of the activity to encourage either individual focus or collaborative teamwork. While individual projects are excellent for promoting personal mindfulness and fine motor control, collaborative projects foster teamwork and community spirit. For a group project, you can purchase a large multi-panel diamond painting design where each student is responsible for completing one small section of the overall mosaic. Once all the individual panels are finished, they can be mounted together on a large foam board and framed, creating a beautiful, collaborative mural to decorate the school library or hallway.
Pre-Purchase Checklist for Evaluating Art Kits
Before committing a portion of your school’s art budget to a bulk purchase of diamond painting kits, it is essential to perform a thorough quality and safety check. Use the following checklist to evaluate sample kits or product specifications before making a final decision:
- Verify Kit Completeness: Read product descriptions and user reviews carefully to ensure the manufacturer includes a generous surplus of drills (ideally 20% to 30% extra of each color) to account for the inevitable losses that happen in a classroom. The kit should also include a sufficient amount of wax; a single tiny square of wax may not last through a multi-week project if multiple students are sharing tools.
- Check Safety Certifications: Ensure the materials carry recognized non-toxic certifications, such as ASTM D-4236 or EN71. This guarantees that the plastic drills, the canvas adhesive, and the wax are safe for prolonged skin contact and do not emit harmful chemical odors, which is especially important in enclosed classroom spaces.
- Assess Instruction Clarity: Review the instruction manual included in the kit. The steps should be clearly written and accompanied by detailed visual diagrams showing how to peel the film, apply wax to the pen, pick up the drills, and place them on the canvas. Clear instructions empower students to work independently, allowing you to focus on guiding students who need extra assistance.
- Evaluate Packaging Durability: If you are purchasing individual kits for each student, check if they arrive in sturdy boxes or thick plastic sleeves. Fragile packaging can easily tear during transit or storage, leading to mixed-up drills and damaged canvases before the project even begins.
- Confirm Canvas Flatness: Some budget kits are shipped tightly rolled or folded, resulting in deep creases that make it difficult for drills to stick properly. Look for kits that are shipped flat or rolled around a foam noodle, ensuring the canvas lies perfectly flat on classroom desks.
By systematically verifying these factors, you can confidently select high-quality, safe, and durable diamond painting kits that fit your school’s budget (typically ranging from ₱100 to ₱300 per student kit for standard classroom sizes) and provide a rewarding creative outlet for your students.
Frequently Asked Questions (FAQ)
Are diamond painting kits safe for early elementary students?
Diamond painting kits can be safe for early elementary students, provided that appropriate precautions and direct supervision are in place. Because the resin drills are very small (typically 2.7 mm to 2.8 mm in size), they present a clear choking hazard for young children who may still put objects in their mouths. For students under the age of eight, constant adult supervision is necessary during the activity. Always verify that the kits carry non-toxic material certifications, ensuring that the plastics, adhesives, and wax are completely safe for skin contact. If a student accidentally swallows a drill or a piece of wax, immediately contact the school nurse or a medical professional for guidance.
How can teachers store unfinished student projects between classes?
To protect unfinished diamond painting projects between weekly art classes, you must keep the adhesive surface clean and free of dust. Instruct students to always replace the original clear plastic protective film over the sticky canvas before packing up; never use household wax paper, as it can permanently bond to the adhesive and ruin the project. For storage, keeping the canvases flat is the best way to prevent the drills from shifting or popping off. You can slide the flat canvases into labeled cardboard portfolios, shallow plastic drawers, or even stack them carefully between sheets of clean cardboard. If flat storage space is unavailable, you can roll the canvases loosely with the drills facing outward, which keeps the adhesive surface under tension and prevents the drills from squeezing against one another.
Community discussion
Share your experience or ask a question. Comments are reviewed before publication.