
Selecting the ideal rainbow loom set for a school art class requires balancing student engagement with practical classroom management. While these colorful kits are excellent for developing fine motor skills, spatial awareness, and pattern recognition, a poorly chosen set can quickly lead to classroom chaos, broken pegs, and lost pieces. To find the best fit, you must evaluate the physical design of the loom boards, verify the safety and material composition of the bands, ensure there are enough tools for group work, and plan for long-term storage that can withstand tropical humidity. By focusing on these structural and organizational factors, you can select a kit that supports your curriculum and keeps students focused on their creative designs.
In a school environment, art supplies undergo rigorous daily handling that far exceeds typical home use. A single kit might be shared by multiple class sections throughout the week, meaning the materials must endure constant stretching, bending, and packing. Furthermore, the physical layout of a classroom—with shared desks, limited storage space, and tight schedules—imposes unique constraints on how these activities are conducted. Therefore, making an informed decision involves analyzing the technical specifications of the loom components to ensure they can withstand the demands of a busy school term.
Evaluating Loom Board Configurations for Classroom Desks
The physical layout of school desks plays a major role in how students interact with their art projects. Classroom desks are often smooth, slightly slanted, or shared among multiple students, which can make stabilizing a loom board quite challenging. When selecting a loom set, the first major decision is choosing between fixed single boards and modular, interlocking boards. Fixed single boards are highly stable and excellent for beginners making simple bracelets. Because they have no moving parts, there is no risk of students losing small connector pieces or incorrectly assembling the board. This simplicity allows teachers to start lessons quickly without troubleshooting mechanical issues.
Products mentioned in this guide
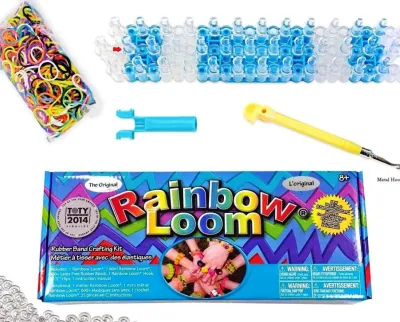
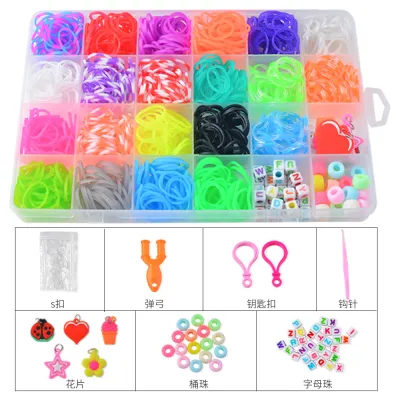
Prices are valid at publication and may change. Please refer to the product page for the latest price.
On the other hand, modular or interlocking boards offer immense creative flexibility. These systems allow students to connect multiple boards side-by-side or end-to-end, enabling them to create wider or longer designs, such as complex tapestries, figures, or wide cuffs. However, modular boards require careful handling, as the plastic connection points can wear out or snap if students force them together incorrectly. For collaborative group projects, modular boards are highly advantageous because they allow multiple students to contribute to a single large piece, fostering teamwork and cooperative learning. If your curriculum focuses on individual, self-contained assignments, fixed boards are generally the more durable and hassle-free option.
Regardless of the board type, stability on smooth classroom desks is essential. Active looming involves pulling bands under high tension, which can cause a lightweight plastic board to slide, tilt, or flip. To prevent this, look for loom boards equipped with non-slip bases, rubberized feet, or weighted bottoms. These features keep the board firmly anchored to the desk surface, allowing students to use both hands to manipulate the bands and hooks without constantly chasing a sliding board. If a kit lacks built-in rubber feet, teachers can apply small adhesive silicone pads to the underside of the boards as a quick classroom modification, ensuring a safer and less frustrating crafting experience.
Finally, you must assess the structural durability of the pegs. The pegs on a loom board bear significant tension, especially when students layer multiple bands for complex, multi-tiered patterns. Review the manufacturer’s specifications to verify the material composition of the pegs. High-quality boards use thick, impact-resistant plastics that resist bending or snapping under pressure. Look for pegs with deep, U-shaped grooves and flared lips at the top. The groove allows the hook to slide easily underneath the bands, while the flared lip prevents the bands from slipping off prematurely during the looping process. Avoid ultra-thin, brittle plastic boards that can easily crack under the pressure of tight bands or heavy-handed student manipulation.
Checking Band Materials and Safety Specifications
Safety is paramount in a classroom setting where dozens of students handle materials simultaneously. The primary concern when purchasing loom bands is the risk of allergic reactions. Many budget-friendly bands contain natural rubber latex, which can trigger severe allergic responses in sensitive students. To ensure a safe and inclusive environment for everyone, always check the physical packaging and manufacturer labels for explicit “latex-free” certifications. Choosing silicone or synthetic rubber bands prevents latex-related allergic reactions and ensures that every student can participate in the art activity without health concerns.

Band thickness and elasticity are critical factors that directly influence usability, especially across different age groups. Younger students, such as those in primary grades, often struggle with fine motor control and require thicker, highly elastic bands. Thicker bands are easier to grasp, less likely to slip out of small fingers, and offer greater resistance to snapping when stretched over multiple pegs. Conversely, older students can handle thinner, high-tension bands, which allow for more intricate, detailed designs. When selecting bands, look for those that offer a balance of flexibility and strength, ensuring they can stretch to several times their original size without losing their shape or snapping mid-project.
In tropical climates, such as the Philippines, high humidity and ambient heat pose a significant threat to the longevity of rubber bands. Poor-quality bands can quickly degrade, becoming sticky, brittle, or prone to melting when stored in warm classrooms. To avoid this, look for non-toxic material compliance marks on the physical packaging, such as international safety standards or local quality seals, rather than relying solely on unverified online marketing claims. High-quality silicone bands are particularly resistant to heat and humidity, making them an excellent investment for long-term classroom use, even if they carry a slightly higher initial cost.
Furthermore, the chemical safety of the dyes used in colorful bands must be verified. Cheap, unbranded kits may use low-grade colorants that can transfer onto students’ hands or emit strong chemical odors. Ensure the packaging states that the materials are non-toxic and lead-free. This is especially important for younger students who might unconsciously put their hands or the bands near their mouths. Prioritizing certified safe materials protects student health and provides peace of mind for both educators and parents.
Assessing Tools, Clips, and Group Usability
A common bottleneck in classroom art projects is a shortage of essential tools. When multiple students share a single large kit, a lack of hooks or clips can lead to idle time, frustration, and behavioral disruptions. Before purchasing, calculate the ratio of hooks and C-clips (or S-clips) to the number of students in each working group. Ideally, every student should have their own hook, while clips should be distributed in generous quantities. If a kit contains 6,000 bands but only two hooks, it is not suitable for a group of six students unless you purchase additional individual hooks separately. Ensuring a 1:1 ratio of hooks to students keeps the entire class engaged and moving forward at a consistent pace.
The design of the hook itself plays a major role in student comfort and success. Standard, thin plastic hooks included in basic kits can bend or snap under high tension, and their narrow profiles can cause hand fatigue during long art sessions. Look for ergonomic hooks with thicker, rubberized handles or sturdy metal tips. These ergonomic designs provide a comfortable, non-slip grip that conforms to a child’s developing hand strength, reducing strain and allowing for more precise control. Metal-tipped hooks are highly durable and long-lasting in a classroom environment, making them the preferred choice for educators who want tools that will last for multiple school years.
Some advanced loom kits include specialized accessories, such as hair clip extensions, charm connectors, beads, or tassels. While these additions can increase student excitement, they should only be prioritized if they directly align with your planned lesson outcomes. For a basic introductory weaving unit, these extra items can become distractions or sources of conflict among students. If your curriculum focuses on structural patterns and color theory, stick to kits that maximize the quantity of high-quality bands and basic clips, rather than paying extra for novelty fillers that do not contribute to the core learning objectives. Keeping the toolset focused and functional helps maintain classroom order and ensures students master the fundamental techniques before moving on to complex embellishments.
Planning for Refills, Storage, and Organization
Managing hundreds of tiny, colorful bands requires a robust organizational strategy. A chaotic pile of mixed bands slows down the creative process and leads to significant material waste. When evaluating a loom set, closely inspect the included storage case. The ideal case should feature deep, adjustable compartments that allow you to separate bands by color, style, or size. It must also have secure, heavy-duty latches that prevent accidental spills during transport between classrooms or storage shelves. A transparent lid is highly beneficial, as it allows teachers to quickly assess inventory levels without opening every box, making prep work much more efficient.
Because bands are consumable items, the initial kit will eventually run out. To ensure your loom boards do not become useless after a few projects, verify the local availability and standard sizing of refill bands. Standard loom bands are typically 15mm in diameter. Check local school supply stores or reliable online marketplaces to ensure you can easily source compatible, high-quality refills in bulk. Avoid proprietary or non-standard sizes that lock you into a closed ecosystem, as this can dramatically increase the long-term cost of maintaining your art curriculum. Sourcing bulk refills in single-color packs is often the most cost-effective way to replenish popular colors like black, white, and primary shades.
In humid tropical environments, storing leftover bands properly is essential to prevent material degradation. When exposed to moisture and warm air, cheap rubber bands can fuse together into a solid mass or lose their elasticity. To prevent this, establish a practical sorting and storage routine at the end of each class. Store bands in airtight plastic containers or zip-top bags, and consider adding a small silica gel packet to each compartment to absorb excess moisture. Encourage students to sort leftover bands by color before putting them away, which not only preserves the materials but also teaches responsibility, cleanup discipline, and organizational skills that extend beyond the art classroom.
Building Your Shortlist: A Pre-Purchase Checklist
To finalize your selection and ensure the best value for your school’s budget, use a structured decision matrix. Begin by defining your budget allocation per student or per group. For instance, you might allocate ₱200 to ₱500 per group of four students. Filtering your options based on this financial boundary helps you avoid overspending on unnecessary features while ensuring you acquire enough functional equipment for the entire class. Keeping costs manageable is especially important when funding comes directly from school budgets or parent-teacher associations.
Next, cross-reference the kit’s stated total piece count with the actual number of usable components. Many manufacturers advertise kits with “10,000 pieces,” but a closer inspection reveals that a large portion of this count consists of tiny plastic beads, charms, and clips, leaving you with far fewer actual bands than expected. Calculate the cost per usable band to determine the true value of the kit. A high-quality kit with 5,000 durable bands and robust boards is often a better investment than a 12,000-piece kit filled with low-quality accessories and fragile plastic tools. Focus on kits that prioritize the core essentials: boards, bands, hooks, and clips.
Finally, review the return policies and warranty conditions of the retailer or online marketplace before completing your purchase. Because plastic boards can occasionally suffer damage during transit, and rubber bands can dry out if stored in hot warehouses prior to sale, having a reliable return policy is crucial. Inspect the kit immediately upon delivery, checking for brittle bands that snap easily or warped loom boards. Securing your purchase through a reputable seller with a clear return window ensures you can replace any defective materials before the school term begins, preventing any delays in your planned art curriculum.
Frequently Asked Questions (FAQ)
Can regular rubber bands from the office be used as a substitute?
No, regular office rubber bands are not suitable substitutes for specialized loom bands. Office bands are designed for securing documents and packaging, meaning they have different physical properties, including higher rigidity, lower elasticity, and a rougher texture. When stretched over the rigid pegs of a loom board, office bands are highly prone to snapping due to the intense tension required for intricate weaving patterns. This snapping poses a safety hazard, as a broken band can fly off the board and strike a student’s eye or hand. Furthermore, office bands are typically thicker and lack the uniform sizing of loom bands, making it difficult to loop them precisely or secure them with standard C-clips, which ultimately causes the student’s project to unravel.
How should dried-out or snapped bands be disposed of in the classroom?
Dried-out, brittle, or snapped bands must be disposed of promptly and safely to maintain a clean and hazard-free classroom environment. Teachers should establish a routine inspection protocol where students check their band inventory before starting a project, discarding any sticky, discolored, or brittle pieces. These degraded bands should be swept up and placed directly into a secure trash bin to prevent them from falling onto the floor, where they can become slipping hazards or be accidentally ingested by younger children. Because degraded rubber and silicone cannot be easily recycled, disposing of them in the general waste is the standard practice. Keeping the classroom floor clear of stray bands also prevents them from getting caught in vacuum cleaners or broom bristles during post-class cleanup.
Community discussion
Share your experience or ask a question. Comments are reviewed before publication.