
Finding the right air dried clay in the Philippines can transform your creative ideas into durable, beautiful crafts. Whether you are sculpting delicate jewelry, constructing lightweight cosplay armor, or engaging in a weekend crafting session with your family, the local market offers a diverse array of options. However, because air-dried clay cures solely through exposure to the air, selecting the wrong type can lead to frustrating issues like warping, cracking, or crumbling. This is particularly true in the tropical climate of the Philippines, where high relative humidity can significantly alter drying times and material behavior.
To find the best air dried clay for your project, you must look beyond the brand name and evaluate the underlying material composition. Clays are formulated differently depending on their intended use, ranging from heavy stone-based compounds designed for fine details to ultra-lightweight foam clays perfect for large, structural props. By matching the physical properties of the clay—such as its weight, shrinkage rate, flexibility, and sanding compatibility—to your project’s requirements, you can ensure a smooth crafting process and a finished piece that stands the test of time.
Understanding Air-Dried Clay Materials and Their Best Uses
Before purchasing a block of air dried clay, it is essential to understand the primary material categories available in local craft stores and online marketplaces. Each category possesses unique physical properties, structural behaviors, and drying characteristics that dictate how it handles under your fingers and how it performs once cured.
Products mentioned in this guide
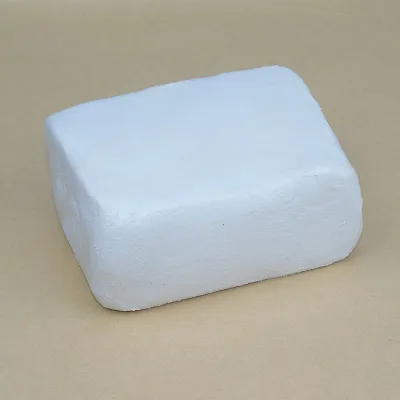
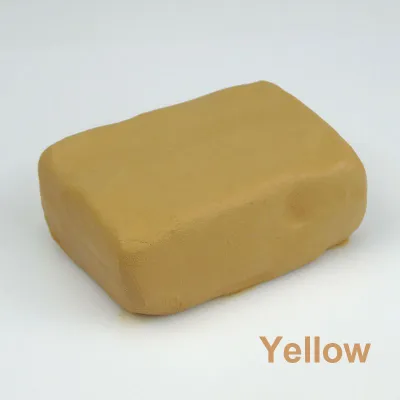
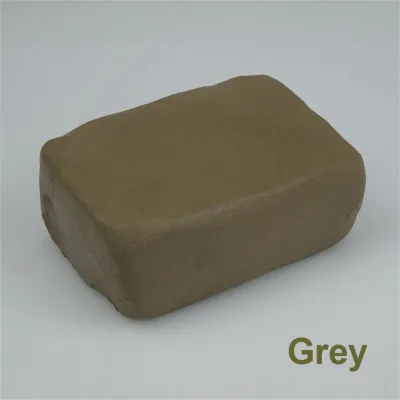
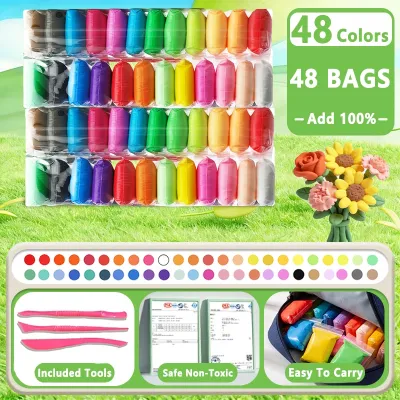
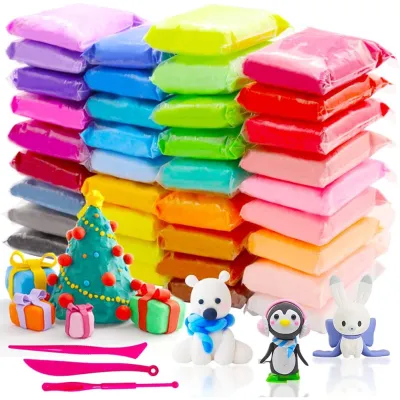
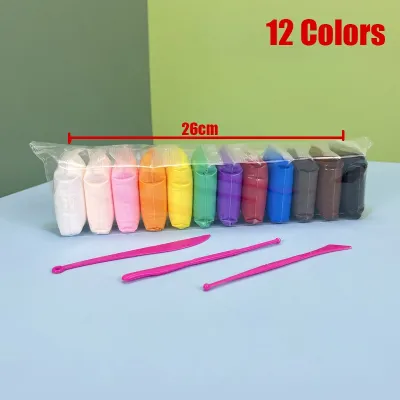
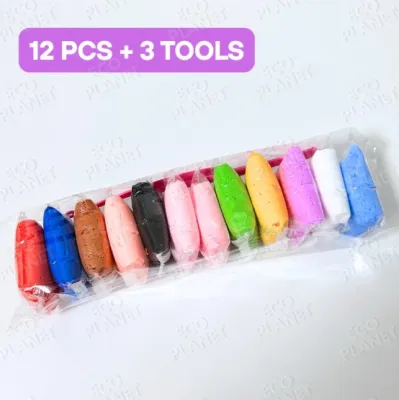
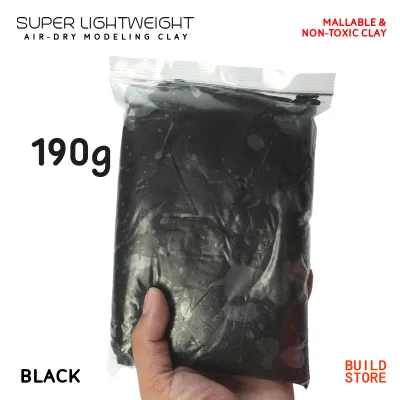
Prices are valid at publication and may change. Please refer to the product page for the latest price.
Paper-Based Clay Paper-based clay, often referred to as paper clay, is formulated by blending natural clay or cellulose fibers with paper pulp. This combination results in an exceptionally lightweight and fibrous material that is highly forgiving for both beginners and experienced crafters. When wet, it is soft and easy to mold, making it ideal for creating ornaments, lightweight figurines, and decorative hanging pieces. Once fully cured, paper-based clay remains remarkably light and retains a slightly porous, paper-like texture. One of its greatest advantages is its workability after drying; you can easily sand, carve, or drill into it to refine its shape. However, because of its fibrous nature, it may not hold ultra-fine, razor-sharp details as cleanly as denser clays, and it requires thorough sealing to protect it from moisture.
Stone or Ceramic-Based Clay For sculptors seeking a traditional ceramic feel without the need for a high-temperature kiln, stone-based or ceramic-based air-dry clay is the premier choice. This material is made from finely ground stone dust or mineral compounds, resulting in a dense, heavy clay that mimics the texture of natural earth clay. It is highly plastic and exceptionally smooth, allowing you to sculpt intricate details, sharp edges, and realistic textures. Once dried, stone-based clay cures to a hard, stone-like finish that feels solid and substantial in the hand. This durability makes it the preferred medium for detailed doll-making, fine-art sculptures, and miniature models. After curing, the surface can be sanded to a porcelain-smooth finish or carved with precision tools. Its main trade-off is weight; large, solid pieces can become heavy and may crack if not supported by an internal support structure.
Resin-Based or Flexible Clay Resin-based clays, which include cold porcelain and specialized polymer-mimicking air-dry clays, are formulated with synthetic resins and binders. This unique chemistry produces a highly elastic clay that can be rolled out into paper-thin sheets without tearing. It is the go-to material for crafting realistic clay flowers, delicate jewelry, doll accessories, and flexible joints. Unlike paper or stone clays, which dry to a rigid and brittle state, resin-based clay retains a degree of flexibility and bounce even after it is completely cured. This flexibility makes the finished pieces highly durable and less prone to snapping or shattering if dropped. However, resin-based clays tend to dry relatively quickly on the surface, requiring a swift hand, and they often exhibit a slightly translucent finish that may require mixing with acrylic paint or oil colors to achieve full opacity.
Foam Clay Foam clay is a highly specialized, ultra-lightweight material composed of tiny foam beads suspended in a water-based binder. It is incredibly soft, stretchy, and satisfying to mold, making it popular for both sensory play and advanced crafting. In the cosplay and prop-making community, foam clay is highly valued because it can be pressed into intricate silicone molds or applied directly over foam armor pieces to create detailed filigree, rivets, and textures. As it dries, foam clay expands slightly and cures to a flexible, high-density foam texture that weighs almost nothing. This allows crafters to create massive, oversized props and structural elements that remain comfortable to wear or carry. While excellent for bulk and lightweight structures, foam clay is not suitable for fine, hard-edged sculptures, as its soft texture cannot be sanded or carved in the same manner as stone-based clays.
A Note on Brand Formulations While these categories provide a reliable framework for understanding clay behavior, it is important to remember that these are general material classifications. Manufacturers frequently blend different binders and fibers to create proprietary formulas, meaning that behavior, drying times, and finishes can vary significantly between brands. Always verify the exact formulation, safety warnings, and handling instructions on the specific product label before beginning your project.
How to Match Clay Properties to Your Specific Project Needs
Selecting the perfect air dried clay requires a clear understanding of your project’s ultimate goals. By evaluating the physical demands of your craft—whether it demands microscopic precision, child-safe simplicity, or structural integrity—you can narrow down your choices to the exact material that will guarantee success.

Fine Detail Work and Miniatures
When crafting miniatures, scale models, or highly detailed figurines, your primary concern is how well the clay can capture and retain microscopic textures. For these projects, you should seek out clays specifically labeled for fine-detail sculpting or professional doll-making. These formulations typically feature an ultra-fine grain structure and a smooth, non-sticky texture that allows your sculpting tools to glide effortlessly without pulling the material.
Low shrinkage is another critical specification for detailed work. As air-dry clay cures, the evaporation of water causes the material to contract. High-shrinkage clays can warp delicate features, distort proportions, or cause fine limbs to snap off. Look for stone-based or high-grade resin clays that boast minimal shrinkage rates to ensure your dried piece matches your wet sculpture.
Additionally, you must verify how the cured clay behaves under post-processing. A high-quality detail clay should allow you to sand away minor imperfections, carve fine lines with a craft knife, or drill small holes for wire joints without crumbling or fracturing. Finally, check the clay’s surface compatibility with your coloring mediums; the dried surface should readily accept fine-tip acrylic paints, pigment powders, and detail brushes without absorbing the paint unevenly or causing the colors to bleed.
Kids' Crafts and Beginner Projects
For children’s crafts, classroom activities, and beginner projects, safety, ease of use, and immediate gratification are the top priorities. The first and most critical step is to check the product packaging for certified non-toxic labels, such as the AP (Approved Product) seal or compliance with EN71 safety standards. This ensures that the clay is safe for prolonged skin contact and does not contain harmful chemical solvents or heavy metals.
Beginners and children benefit greatly from clays that feature a soft, highly pliable, and forgiving texture. Clays that require extensive kneading or conditioning can quickly tire out young hands and lead to frustration. Look for lightweight foam clays or soft paper-based clays that are ready to mold straight out of the package. A slower drying time is also advantageous, as it provides novices with ample time to experiment, reshape, and correct mistakes before the clay begins to skin over and dry.
Pre-tinted or brightly colored clays are highly engaging for children, eliminating the immediate need for painting and reducing clean-up time. However, before letting children work with colored clays, verify whether the pigments transfer to skin, clothing, or tabletops during use. Opting for water-soluble, stain-free formulations will make post-crafting clean-up simple and stress-free for parents and educators.
Large Sculptures and Structural Pieces
Creating large sculptures, home decor items, or complex structural pieces presents unique engineering challenges. Because air-dried clay does not have the structural support of a fired ceramic body, attempting to sculpt large, solid masses out of pure clay will almost certainly result in severe cracking, warping, or structural collapse. To prevent this, you must construct an internal armature using materials like aluminum wire, foil, or cardboard, and select a clay that exhibits excellent adhesion to these core materials.
For large-scale builds, denser stone-based clays are highly recommended. These clays possess the structural body and tackiness required to cling securely to your armature without sagging or sliding off under their own weight. When building up a large piece, you must apply the clay in successive, thin layers rather than one thick mass. This layered approach ensures that the clay dries evenly from the inside out.
Before applying your clay, always check the manufacturer’s maximum recommended thickness per layer, which is typically around 5 to 10 millimeters. Exceeding this thickness traps moisture deep within the core of the sculpture. As the outer shell dries and shrinks, the trapped moisture inside will struggle to escape, building up pressure that ultimately manifests as deep, structural cracks. Choosing a clay designed for layered application will help you avoid this common pitfall.
Key Specifications to Check Before Buying Air Dried Clay
To avoid project failures and wasted materials, you should treat the product label as a technical specification sheet. Paying close attention to the manufacturer’s stated properties will help you anticipate how the clay will behave throughout the molding, drying, and finishing stages.
Drying Time and Conditions The curing process of air-dried clay is highly sensitive to environmental factors, particularly ambient humidity and temperature. In the tropical climate of the Philippines, where high humidity levels are common, the moisture in the clay evaporates much slower than it would in dry, arid regions. When reading a product label, look for the estimated curing times, which typically range from 24 to 48 hours depending on the thickness of the piece. Keep in mind that these estimates are usually calculated under standard laboratory conditions. In highly humid conditions, you should expect the actual drying time to double, requiring patience and a well-ventilated drying space.
Shrinkage Rate Because air-dried clay relies on the evaporation of water to cure, some degree of shrinkage is inevitable. As the water leaves the clay matrix, the solid particles compress closer together. Standard air-dry clays typically experience a shrinkage rate of 5% to 10% by volume. If your project requires precise dimensions—such as fitting a clay lid onto a jar, creating a bezel for a gemstone, or matching specific scale proportions—you must look for high-grade clays that explicitly state a low shrinkage rate (typically under 3%). Understanding this rate beforehand allows you to sculpt your wet piece slightly larger to compensate for the natural contraction during drying.
Sanding and Painting Compatibility The final aesthetic of your project depends heavily on how the cured clay interacts with paints, pigments, and sealants. Some clay formulations, particularly those high in synthetic resins or plastics, dry to a slick, non-porous surface that can cause water-based paints like acrylics or watercolors to bead up, peel, or pool unevenly. Conversely, highly fibrous paper clays can be excessively porous, absorbing paint like a sponge and requiring multiple coats of primer. Before purchasing, verify if the manufacturer recommends priming the surface or if the clay is compatible with standard craft paints. This ensures you can achieve vibrant, long-lasting colors without the paint flaking off over time.
Package Size and Shelf Life Air-dried clay begins to cure the moment it is exposed to the atmosphere. Because of this, buying in bulk is not always the most economical choice unless you plan to use the entire amount in a single session. Once a package is opened, any remaining clay is highly susceptible to drying out, even if wrapped carefully. When shopping, look for brands that package their clay in smaller, individually sealed portions or those that provide high-quality, resealable zip-lock bags. If you must store leftover clay, wrapping it tightly in plastic wrap, placing it in an airtight container with a slightly damp paper towel, and storing it in a cool, dark place will help prolong its shelf life.
Essential Tools and Finishing Supplies for Air Dried Clay
To elevate your clay creations from simple crafts to professional-looking art pieces, you need the right suite of tools and finishing supplies. Working with air-dry clay requires specialized implements that help you shape, join, and protect your work, especially when dealing with the unique environmental challenges of the Philippines.
Shaping and Texturing Tools While your hands are your primary tools, a basic set of sculpting implements will dramatically expand your creative capabilities. Wooden or plastic modeling tools are essential for carving, smoothing seams, and shaping contours. Silicone shapers, often called color shapers, are invaluable for blending seams between wet clay pieces without leaving fingerprints or harsh marks. Rolling pins equipped with thickness guides ensure that you roll out perfectly flat sheets of clay at a uniform thickness, which is crucial for even drying and preventing warping. Finally, craft knives and detail needles are essential for making clean, precise cuts and engraving fine textures like hair, fur, or scales.
Adhesives and Joining Techniques Joining clay pieces securely requires different techniques depending on whether you are working with wet or dry materials. To join two pieces of wet clay, you must use the “slip and score” method. Scratch the joining surfaces with a needle tool (scoring) and apply a small amount of water or clay slip (a liquid mixture of clay and water) to act as a glue before pressing them firmly together. If you need to attach a cured clay piece to another cured piece, water will not work and can actually soften the joint, causing it to fail. Instead, use a strong, high-quality craft glue, PVA glue, or a two-part epoxy adhesive. When adding fresh, wet clay to a piece that has already dried, lightly moisten the surface of the dry piece first to improve adhesion, and use a thin layer of PVA glue or slip to bond the two layers securely.
Sealing and Protection Because air-dried clay cures through water evaporation and does not undergo chemical vitrification in a kiln, the finished piece remains naturally porous and highly susceptible to moisture. In the humid climate of the Philippines, unsealed air-dry clay can absorb atmospheric moisture over time, leading to softening, mold growth, or structural degradation. To protect your work, applying a high-quality sealant is an absolute necessity. You should coat your finished, painted pieces with a compatible acrylic varnish, polyurethane sealer, or epoxy resin. These sealants create a non-porous barrier that locks out humidity and protects the paint from scratching or fading.
Testing for Compatibility Before applying any varnish or sealant to your completed sculpture, always perform a compatibility test on a small, hidden area of the project or on a cured scrap piece of the same clay. Some chemical solvents in spray varnishes can react negatively with certain clay binders or paint brands, resulting in a permanently tacky, sticky surface or causing the paint to run and discolor. Testing first ensures you achieve your desired finish—whether matte, satin, or high-gloss—without ruining hours of hard work.
Troubleshooting Common Issues When Working with Air-Dried Clay
Even with careful planning, working with air-dried clay can occasionally present challenges. Knowing how to diagnose and resolve these common issues will help you salvage your projects and improve your sculpting technique.
Preventing and Fixing Cracks Cracking is the most common issue crafters face, and it almost always stems from uneven or rapid drying. When the exterior of a clay piece dries much faster than the interior, the shrinking outer layer pulls against the rigid core, causing fissures to open up. To prevent this, avoid placing your drying sculptures near direct heat sources, air conditioning vents, or under direct sunlight. If you notice minor surface cracks forming as the piece cures, you can easily repair them. Lightly moisten the cracked area with a damp brush, then press a small amount of fresh clay or wet clay slip into the crevice, smoothing it out with your finger or a silicone shaper. Allow the patch to dry slowly.
Managing Humidity and Warping High humidity levels can significantly prolong drying times, sometimes extending a 24-hour cure to several days. If wet clay remains damp for too long, it can begin to warp, sag, or even develop mold. To manage this in humid tropical environments, always dry your pieces in a well-ventilated room with consistent airflow, such as near an open window or in a room with a ceiling fan running. Place your sculptures on a non-porous, flat surface lined with parchment paper, and turn them periodically. Turning the pieces ensures that all sides are exposed to the air equally, promoting even moisture evaporation and preventing the bottom of the piece from remaining wet and warping.
Surface Roughness and Imperfections Achieving a professional, porcelain-smooth finish can be difficult when working with wet clay, as fingerprints and tool marks are easily left behind. Fortunately, most air-dried clays can be easily refined after they are completely dry. Once your piece is fully cured, use a fine-grit sandpaper (such as 220-grit or 400-grit) to gently sand away bumps, ridges, and fingerprints. Always wear a simple dust mask during this process to avoid inhaling fine clay dust. After sanding, use a soft, dry brush or a slightly damp microfiber cloth to thoroughly wipe away all dust from the surface before applying any paint or sealant. This ensures a clean, smooth base for your final decorative steps.
Frequently Asked Questions (FAQ)
Is air-dried clay naturally waterproof?
No, air-dried clay is not naturally waterproof. Because it cures purely through the evaporation of water without undergoing chemical changes in a kiln, it remains highly sensitive to moisture. If an unsealed piece of air-dried clay is exposed to water or prolonged high humidity, it will absorb the moisture, soften, and eventually dissolve or lose its structural integrity. If your finished project will be placed outdoors, used near water, or handled frequently, you must apply a robust, waterproof sealant, such as a marine-grade varnish or a clear epoxy resin, to create a complete protective barrier.
Can I bake air-dried clay to speed up the drying process?
You should never bake, microwave, or apply direct heat to air-dried clay unless the manufacturer’s product label explicitly states that it is safe to do so. Applying external heat forces the water inside the clay to evaporate too rapidly. This rapid expansion of moisture builds up internal steam pressure, which inevitably leads to severe cracking, warping, bubbling, or even the complete shattering of your sculpture. In extreme cases, placing organic-based clays near heating elements can pose a fire hazard. The safest and most effective way to dry your clay is to allow it to cure naturally in a well-ventilated space with moderate airflow.
Community discussion
Share your experience or ask a question. Comments are reviewed before publication.