
Choosing the right clay slip is a foundational decision in pottery that determines whether your ceramic pieces survive the firing process intact or crack apart in the kiln. Clay slip—essentially liquid clay suspended in water—serves as the structural glue, the decorative canvas, or the casting medium for your pottery. To select the correct slip, you must match its composition to your base clay body, adjust its water content to suit your specific technique, and decide whether a commercial pre-mixed formula or a studio-made batch fits your workflow.
In tropical environments like the Philippines, managing moisture levels and drying times is critical. High humidity slows down the evaporation process, which affects how slip behaves when applied to leather-hard clay. Understanding the physical properties of your slip and how it interacts with your environment will help you avoid common firing failures and achieve professional, durable results in your ceramic work.
Understanding Clay Slip and Its Core Functions
Clay slip is a mixture of clay particles and water, but it should not be confused with glaze or engobe. While glaze contains glass-forming minerals designed to melt into a glassy, impervious coating at high temperatures, slip is chemically identical or highly similar to the clay body itself. It does not melt into glass; instead, it vitrifies alongside the clay body during firing. Engobe sits between slip and glaze, containing added fluxes and colorants to create a semi-vitreous, opaque decorative layer that can be applied to greenware or bisque ware.
Products mentioned in this guide
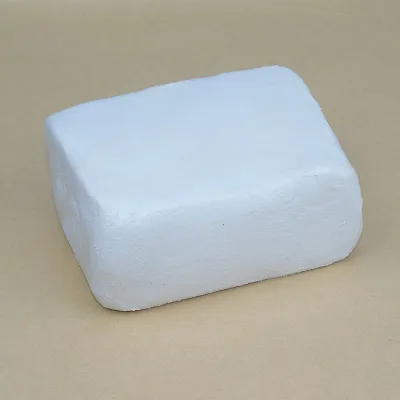

Prices are valid at publication and may change. Please refer to the product page for the latest price.
In a pottery studio, clay slip serves three primary functions. First, it acts as an adhesive to bond separate clay components, such as attaching handles to mugs, joining coils, or adding decorative relief elements. Second, it is used for surface decoration, allowing potters to paint, trail, or carve through contrasting colored layers. Third, slip is used for slip casting, a process where liquid clay is poured into plaster molds to create hollow, uniform ceramic shapes.
Each of these functions requires different material properties. A joining slip needs high tackiness and a shrinkage rate that matches the base clay to prevent joints from pulling apart as they dry. Decorative slip must have a smooth, brushable flow and stable suspension so that added colorants do not settle to the bottom of the container. Casting slip requires low viscosity with minimal water content to prevent the plaster molds from becoming saturated and to minimize shrinkage during drying.
Matching Slip to Your Clay Body
To ensure a successful firing, your slip must be chemically and physically compatible with your base clay body. Clay bodies are categorized by their maturing temperatures: earthenware (low-fire), stoneware (mid-to-high fire), and porcelain (high-fire). Your slip must match the firing range of your base clay. If you apply a low-fire earthenware slip to a high-fire stoneware body, the slip will overfire, blister, or melt in the kiln. Conversely, a high-fire porcelain slip applied to earthenware will remain underfired, chalky, and poorly adhered.

Shrinkage rates and thermal expansion compatibility are equally critical. As clay dries and fires, it loses volume and shrinks. If the slip shrinks faster or slower than the underlying clay body, stress builds up at the interface. This mismatch leads to defects like shivering, where the slip flakes off because it is too large for the body, or crawling, where the slip pulls back into beads and exposes the raw clay underneath. To avoid these issues, formulate or purchase slip made from the exact same clay body recipe as your working clay.
Color and texture alignment should also guide your selection. A dark stoneware body will bleed through a thin, translucent white slip, altering the final color of your decoration. Coarse grog in a base clay can also telegraph through a fine slip layer, affecting the smoothness of the surface. Before committing to a large project, verify these characteristics by planning test firings to observe how the slip’s color and texture mature alongside the base clay.
Selecting Slip Consistency by Technique
For scoring, joining, and repairing seams, you need a thick, paste-like consistency similar to peanut butter or frosting. This high-viscosity slip fills the gaps between the two scored surfaces, creating a continuous clay bridge as the water evaporates. If the joining slip is too runny, it will introduce excess water into the joint, causing the surrounding clay to soften, sag, or crack as it dries unevenly in the studio.
For brushing, trailing, and surface decoration, aim for a medium, cream-like consistency resembling heavy yogurt. The slip must flow smoothly through a slip-trailer nozzle or off a brush without running uncontrollably down the vertical surfaces of your pot. This consistency allows you to build up raised textures, perform sgraffito (carving through slip to reveal the clay beneath), or create slip-trailed patterns that retain their definition during drying and firing.
Slip casting requires a thin, fluid consistency that can easily fill intricate plaster molds. However, simply adding water to thin the slip causes high shrinkage, warping, and cracking. Instead, casting slips use deflocculants, such as sodium silicate or Darvan, to chemically disperse the clay particles. This allows the slip to flow like water while maintaining a high solid-to-water ratio, ensuring the cast piece releases cleanly from the mold and shrinks minimally.
Evaluating Commercial vs. DIY Slip Options
Pre-mixed commercial slips offer excellent batch consistency and convenience, especially for beginners or busy studios. In the Philippines, local art suppliers and ceramic specialty shops offer imported or locally processed commercial slips. Prices can range from ₱300 to over ₱1,500 per container depending on the clay type, with porcelain slips generally commanding a premium. While convenient, shipping heavy liquid slip can incur high freight costs, and you are limited to the specific clay bodies supported by the manufacturer.
Making your own slip is highly cost-effective and guarantees a perfect material match because you use your own studio clay scraps. To prepare DIY slip, dry your clay scraps completely, crush them into small pieces, and slake them in water. For decorative or casting slips, pass the mixture through a fine sieve, typically 60 to 80 mesh, to remove lumps and grog. If you are making casting slip, you will need to carefully measure and add deflocculants to achieve the desired fluidity without over-watering.
In the warm, humid climate of the Philippines, organic matter in DIY slips can quickly ferment, leading to mold growth and unpleasant odors. While mold does not ruin the slip and can actually improve its plasticity, it can be unpleasant to work with. Commercial slips often contain preservatives to extend shelf life, but they can still settle over time. Store both types in airtight plastic containers, away from direct sunlight, and stir thoroughly before each use to redistribute settled particles.
Testing and Troubleshooting Your Slip Selection
Never apply a new slip to a finished piece without testing. Create small, L-shaped test tiles using your base clay. Apply the slip at various thicknesses, score and join small clay scraps to the tiles, and fire them to your target cone. Observe the tiles after both the bisque and glaze firings to check for cracks, peeling, or color shifts.
If you identify defects, you can adjust your slip recipe to correct them. Cracking at joints is usually caused by joining pieces with mismatched moisture levels or using slip that is too wet; adjust by using a thicker slip and drying the joined piece slowly under plastic. Peeling or shivering indicates the slip is shrinking less than the clay body, which can be resolved by adding a small amount of flux or a higher-shrinkage clay to the slip. Crawling occurs when the slip shrinks too much or was applied too thickly to dry ware; thin the slip or apply it to wetter greenware.
Before finalizing your project, evaluate the fired test tiles against your aesthetic goals. Check if the slip texture is too rough, if the color matches your design, and if it accepts your studio glazes without bubbling or running. Keeping a detailed log of your slip recipes, consistencies, and firing results will help you achieve consistent success in your pottery projects.
Frequently Asked Questions (FAQ)
Can I use the same slip for both joining and decoration?
Yes, you can use the same base clay recipe, but you must adjust the water content and viscosity. Joining slip must be thick and paste-like to hold structural pieces together without sagging. Decorative slip needs to be thinner and smoother to flow off a brush or out of a trailing bulb. If you try to use thick joining slip for decoration, it will leave clumpy, uneven marks; if you use thin decorative slip for joining, the joint will lack structural strength and likely crack during drying.
How long does commercial clay slip last in storage?
Commercial clay slip can last indefinitely if stored in a tightly sealed, airtight container to prevent water evaporation. However, over months of storage, the clay particles will naturally settle to the bottom, forming a hard pack, and deflocculants in casting slips can lose their effectiveness. In the humid Philippine climate, mold can also develop on the surface. To revive settled slip, stir it thoroughly with a paint mixer attachment on a drill, and add a few drops of water or deflocculant if the viscosity has drifted.
Community discussion
Share your experience or ask a question. Comments are reviewed before publication.