
Selecting the correct glitter paper thickness is essential for achieving clean cuts, secure adhesion, and balanced layouts in scrapbooking. Because the glitter coating and backing materials alter how paper behaves compared to standard cardstock, relying solely on visual appeal can lead to jammed machines or warped pages. Matching your paper weight to specific techniques like layering, card making, and embellishments ensures your materials support your creative vision rather than hinder it.
By understanding how different weights perform under various crafting conditions, you can avoid common pitfalls like dull blades, torn edges, and bulky layouts. This guide provides a practical framework to help you evaluate glitter paper thickness, test its compatibility with your tools, and select the ideal sheet for every page in your album.
Understanding Glitter Paper Weight and Thickness Standards
Paper thickness is typically measured in GSM (grams per square meter) or points (pt), which indicate the weight and caliper of the sheet respectively. While standard cardstock weight is a reliable indicator of stiffness, glitter paper introduces unique variables. The final thickness of a glitter sheet is a combination of the base paper, the adhesive layer used to bind the glitter, and the glitter particles themselves. Consequently, a 200 GSM glitter paper will often feel significantly stiffer and thicker than a standard 200 GSM smooth cardstock.
Products mentioned in this guide
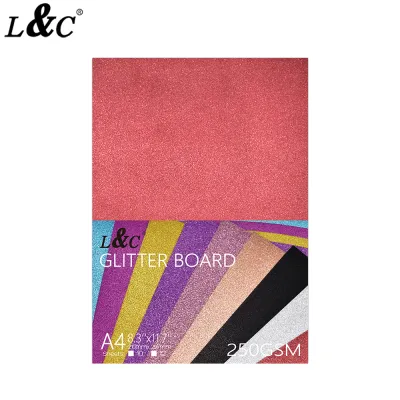
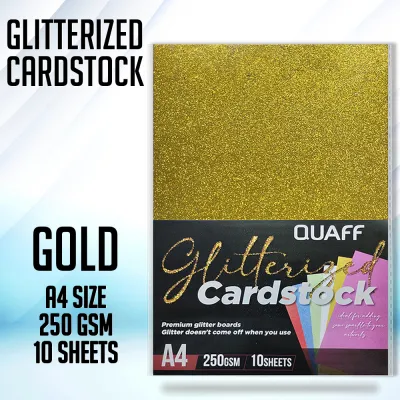
Prices are valid at publication and may change. Please refer to the product page for the latest price.
To make informed purchasing decisions, it is helpful to categorize glitter paper into three general thickness spectrums based on observable flexibility:
- Lightweight (120 to 180 GSM): This paper is highly flexible and easy to fold, feeling similar to premium wrapping paper or thin flyer stock. It bends effortlessly without creasing and is ideal for delicate, non-structural applications.
- Medium Weight (200 to 250 GSM): Offering moderate stiffness, this is the standard weight for most decorative crafting. It holds its shape well when held upright but can still be curved or folded with light pressure.
- Heavyweight (280 GSM and above): This category is rigid and resists bending, feeling closer to thick chipboard or heavy cover stock. It provides excellent structural integrity but requires scoring before folding to prevent damage.
Environmental factors also play a role in how these standards behave in practice. In warm, humid climates like the Philippines, paper fibers naturally absorb ambient moisture from the air. This humidity can soften the paper backing of your glitter sheets, making lightweight options feel limp and causing heavyweight sheets to warp if they are stored flat without proper weight on top. Choosing a glitter paper with a synthetic or high-quality plastic-coated backing can help mitigate these moisture-related issues, ensuring your layouts remain crisp and flat over time.
Matching Thickness to Specific Scrapbooking Techniques
Every scrapbooking technique places different physical demands on your paper. Using the wrong thickness can result in a layout that is either too flimsy to support its decorations or too bulky to fit inside a standard album sleeve.

Layering and Die-Cutting
Multi-layered layouts require careful weight management to prevent the finished page from becoming excessively thick. When stacking multiple elements, lightweight to medium-weight glitter papers (120 to 200 GSM) are the most practical choices. They add the desired sparkle and visual depth without creating thick, heavy edges that catch on page protectors.
For die-cutting, thinner papers are highly advantageous. Intricate metal dies require uniform pressure to cut through both the glitter surface and the backing material. A lightweight glitter paper allows the die to slice cleanly in a single pass, reducing the risk of incomplete cuts or torn edges when you weed out the delicate pieces.
Card Making and Bases
If you are creating interactive elements, fold-out flaps, or independent cards to tuck into scrapbook pockets, structural integrity is paramount. Heavyweight glitter paper (280+ GSM) is the ideal choice for these structural bases. It provides a sturdy foundation that can support the weight of additional photos, ribbons, and embellishments without sagging or collapsing.
However, folding heavyweight glitter paper requires care. The thick glitter coating can crack along the fold line, exposing the plain backing underneath and ruining the clean look of your project. To prevent this, always score the paper first using a bone folder and a scoring board, and fold away from the score line to keep the glitter surface intact.
Embellishments and Accents
Creating custom embellishments, such as 3D paper flowers, borders, or title lettering, requires a balance between flexibility and structure. For 3D elements that need to be shaped, curled, or molded, lightweight glitter paper is essential. You can easily curl the petals of a paper flower using a pen or bone folder without creasing the paper or lifting the glitter.
For flat accents like borders, frames, and large title letters, medium-weight glitter paper (200 to 250 GSM) offers the perfect compromise. It is stiff enough to stand out from the background and resist bending during handling, yet thin enough to cut easily with standard punches or scissors.
Practical Checklist for Evaluating Glitter Paper Before Use
Before committing a premium sheet of glitter paper to your scrapbook layout, perform these quick, observable checks to ensure compatibility with your tools and design.
The Flexibility and Crease Test
Take a small scrap piece of your chosen glitter paper and bend it gently between your fingers. Observe how the glitter surface reacts to the tension. If the glitter flakes off excessively or the backing paper begins to separate from the glitter layer, the paper may be too brittle for folding or intricate cutting. If you plan to fold the paper, press a sharp crease into the scrap piece; if the fold line cracks and reveals the white core, you will need to score the paper first or switch to a lighter weight.
Adhesive Compatibility Check
Because glitter paper has a highly textured, non-porous surface, standard dry adhesives like double-sided tape runners often struggle to grip it securely. Test your adhesive on a small scrap of the glitter paper before assembling your layout.
In humid tropical environments, water-based liquid glues can slow-dry and saturate the paper backing, leading to severe warping. For lightweight glitter paper, a dry, high-tack double-sided tape is often the safest choice. For heavyweight sheets, which exert more physical tension when bent or layered, a strong solvent-based adhesive or heavy-duty foam dots will provide a more reliable bond that won’t fail when the weather gets damp.
Machine Clearance and Test Cuts
Before running a new sheet of glitter paper through your manual die-cutting machine or electronic cutter, verify the clearance. For manual roller machines, if you have to force the cutting sandwich through the rollers with extreme pressure, the paper is too thick. Forcing it can warp the machine’s rollers or snap the internal gears. For electronic cutters, always perform a small test cut—such as a simple one-inch square—to ensure your blade depth and pressure settings are correct before cutting your final design.
Common Mistakes to Avoid When Working with Glitter Paper
Working with specialty papers requires adjusting your typical crafting habits. Avoiding these common mistakes will save you time, frustration, and valuable materials.
- Using Excessively Thick Paper for Intricate Cuts: Attempting to cut highly detailed, lace-like designs out of heavyweight glitter paper is a common cause of ruined projects. The thick fibers and glitter particles clog the fine details of the die, resulting in incomplete cuts, torn paper, and dull blades. Save the heavyweight sheets for simple geometric shapes and use lightweight sheets for intricate designs.
- Overloading Layouts with Heavy Layers: A single scrapbook page featuring multiple layers of heavyweight glitter paper will become incredibly heavy. This extra weight can cause the page protector to sag, pull at the binder rings, and prevent the scrapbook album from closing flat. Keep your heavy elements limited to focal points and use lighter weights for background layers.
- Ignoring the Backing Material: Some glitter papers feature a smooth, plastic-like backing, while others have a rough, fibrous paper backing. Plastic backings require specialized adhesives, such as solvent-based glues or ultra-tack tapes, to bond securely. Paper backings are much easier to glue with standard crafting adhesives. Always inspect the back of the sheet before choosing your glue to prevent your elements from peeling off over time.
Frequently Asked Questions (FAQ)
How do I prevent glitter paper from shedding when cutting?
To minimize shedding and keep your workspace clean, always use a sharp, high-quality blade. Dull blades drag through the paper, tearing the backing and pulling the glitter particles loose. If you are using a manual paper trimmer, slide the blade in a single, swift motion. For electronic cutters, ensure your cutting mat is sticky enough to hold the paper firmly in place so it does not slide and tear. If the glitter is exceptionally loose, you can lightly spray the sheet with a clear acrylic sealer before cutting, provided the manufacturer’s instructions do not advise against it.
Can I print on glitter paper with a standard home printer?
Printing on glitter paper with a standard home inkjet or laser printer is generally not recommended unless the paper is specifically labeled as printable. Standard glitter paper has a textured, non-porous surface that prevents inkjet ink from drying, leading to severe smudging and pooling. For laser printers, the intense heat of the fuser can melt plastic-based glitter or damage the printer’s rollers. Additionally, the thickness of heavyweight glitter paper can easily cause paper jams in printers with tight paper paths. If you need printed text or images, print them on standard paper or vellum first, then layer them over your glitter paper.
Community discussion
Share your experience or ask a question. Comments are reviewed before publication.