
Choosing the right loop wire—commonly known as a wire loop turner or tube turner—depends on matching the tool’s gauge, length, and hook style to the specific weight of your fabric and the diameter of your sewn tube. Selecting the correct tool ensures that delicate fabrics do not snag, heavy fabrics do not bend the wire, and your sewing projects proceed smoothly without frustrating delays or ruined materials. By understanding the mechanical relationship between the metal turner and your fabric fibers, you can easily turn thin spaghetti straps, sturdy belt loops, and long drawstrings right-side out.
What Is a Loop Wire and Why Does It Matter?
A loop wire, often referred to in sewing communities as a wire loop turner, is a specialized metal tool designed to solve one of the most tedious tasks in garment construction: turning narrow fabric tubes right-side out. Physically, it consists of a long, slender metal shaft with a finger ring or handle at one end and a delicate latch-hook or folded hook at the other. This tool is indispensable when creating spaghetti straps, button loops, drawstrings, bag handles, and fabric belts, where manual turning with a safety pin is either too slow or physically impossible due to the narrowness of the tube.
Using an incorrect loop wire can quickly ruin a sewing project. If the wire is too thick for the tube, it will stretch the fabric permanently or burst the seams as you force it through. Conversely, if you use a flimsy wire on heavy fabrics like denim or canvas, the wire will bend out of shape or the hook will snap off under the tension required to pull the bulky seam allowances through the narrow opening. In humid climates like the Philippines, fabrics can hold onto moisture, which increases surface friction and makes smooth gliding even more difficult, highlighting the importance of using a high-quality, polished metal tool.
Products mentioned in this guide
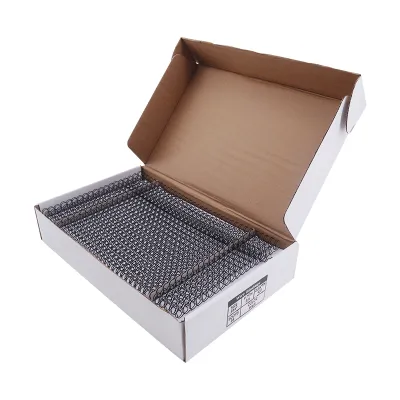
Prices are valid at publication and may change. Please refer to the product page for the latest price.
Treating the loop wire as a precision instrument rather than a generic piece of metal is the first step toward professional-looking finishes. The tool must glide smoothly along the inside of your sewn tube, hook the fabric securely at the far end, and pull it back through without snagging the delicate warp and weft threads. Understanding how to select the right wire gauge, length, and hook style will save you hours of frustration and prevent costly fabric waste.
How to Match the Loop Wire to Your Fabric and Project
Selecting the ideal loop wire requires a clear understanding of your project’s physical dimensions and the structural properties of your chosen textile. You must evaluate three primary variables: the wire’s thickness (gauge), the outer diameter of the hook relative to your sewn tube, and the overall length of the tool. Balancing these factors ensures that the tool can perform its task without meeting excessive resistance or causing structural damage to the seams.

Matching Wire Gauge to Fabric Weight
The thickness and rigidity of the loop wire must directly correspond to the density and weight of the fabric you are sewing. Delicate fabrics such as silk, chiffon, georgette, and lightweight rayon require thin, highly flexible wires. These fine materials have delicate weaves that can easily run or snag if exposed to a heavy, thick metal hook. A thin wire bends slightly with the fabric’s movement, minimizing the stress placed on the delicate fibers as they fold in on themselves during the turning process.
On the other hand, heavy fabrics like denim, canvas, thick linen, and upholstery materials demand a much thicker, rigid wire or a specialized clasp-style turner. When you attempt to turn a thick fabric tube, the bulk of the seam allowances creates immense resistance inside the cylinder. A thin, delicate wire will simply deform, bend permanently, or snap at the weld point under this level of tension. For these robust projects, a heavy-duty wire provides the necessary leverage to pull the bulky fabric through without losing its shape.
Checking Loop Size Against Tube Diameter
Before purchasing a loop wire, you must calculate the geometric constraints of your sewn fabric tube. The physical hook or latch mechanism at the end of the wire must be significantly smaller than the internal diameter of the tube. It is a common mistake to measure only the flat width of the pattern piece; instead, you must account for the finished internal clearance once the tube is sewn and the seam allowances are folded inside.
To determine the correct fit, sew a short test tube using your project’s fabric and seam allowance. Measure the actual opening of this tube when it is flat, and subtract the space occupied by the internal seam allowances. The loop wire’s hook must be at least two to three millimeters narrower than this actual opening to pass through smoothly. If the hook is too large, it will catch on the internal seam allowances as you slide it in, potentially ripping your stitches before you even begin the turning process.
Choosing the Right Length for Your Project
The length of your loop wire determines how easily you can reach the end of your fabric tube to initiate the turn. Short sewing projects, such as button loops (rouleau loops), small decorative casings, or keychains, are best handled with short, stiff wires measuring around 15 to 20 centimeters. These shorter tools offer superior control and tactile feedback, allowing you to manipulate tiny fabric pieces with high precision.
Longer projects, such as spaghetti straps for sundresses, drawstrings for hoodies, or wide fabric belts, require extra-long loop wires, typically 30 to 45 centimeters in length. Attempting to turn a very long tube with a standard or short wire forces you to bunch up an excessive amount of fabric on the metal shaft. This bunching dramatically increases friction, making it incredibly difficult to pull the hook through and often resulting in torn fabric or broken seams. Always verify the maximum effective length of the loop wire to ensure it can comfortably traverse the entire length of your longest pattern piece.
Top Loop Wire Styles for Different Sewing Needs
To build a versatile sewing toolkit, it helps to understand the distinct styles of loop wires available on the market. Each style is optimized for specific fabric types and project scales, offering unique advantages and limitations. By selecting the right style, you can ensure clean finishes on everything from delicate bridal wear to rugged outdoor gear.
Thin-Gauge Wires for Delicate Fabrics and Narrow Straps
Thin-gauge loop wires are engineered specifically for precision work on lightweight and delicate textiles. These tools typically feature a highly polished, thin stainless steel wire with a diameter of 1.0mm to 1.2mm, ending in a tiny, smooth latch-hook or a folded hook. The latch-hook is particularly useful because the tiny metal latch swings shut over the hook once it grabs the fabric, preventing the sharp tip from catching on the interior walls of the tube as you pull it through.
These delicate wires are the perfect choice for creating silk spaghetti straps, narrow bias tubes, and lightweight lingerie casings. Because they are so thin, they can easily navigate tubes with a finished width of 5mm or less. However, their main limitation is their lack of structural strength; they will permanently deform if subjected to heavy pulling forces or used on thick fabrics. To maintain their performance, store them flat or hanging up rather than tossing them into a cluttered sewing basket where heavy shears or rulers might bend them.
Heavy-Duty Wires and Clasps for Thick Fabrics
For projects involving robust materials, heavy-duty loop turners offer the strength required to overcome high friction and bulky seams. These tools are constructed from thicker steel wire, often 2.0mm or more in diameter, and frequently replace the delicate latch-hook with a sliding metal clasp, alligator gripper, or a specialized wide-loop head. The sliding clasp mechanism clamps down securely on the fabric edge, distributing the pulling force across a wider area rather than concentrating it on a single point.
This style is ideal for turning denim belt loops, canvas bag handles, thick waistbands, and heavy linen drawstrings. The robust construction ensures the tool will not bend or snap, even when pulling multiple layers of heavy fabric through a tight opening. The primary limitation of heavy-duty turners is their bulk; they cannot be used on narrow tubes, typically requiring a minimum tube diameter of 1.5 centimeters to function without jamming. Additionally, the aggressive grip of the clasp can leave marks or tears on delicate weaves, making it strictly suitable for sturdy textiles.
Multi-Piece Sets for Versatile Sewing Projects
For sewists who work on a wide variety of projects, a multi-piece loop turner set provides the ultimate flexibility. These sets generally include several tools of varying lengths and thicknesses, along with companion accessories like flexible plastic draw tapes and metal bodkins. A bodkin is a blunt, needle-like tool with a large eye or a clamping ring, which is excellent for threading elastic or heavy cords through pre-turned casings, complementing the work of the wire loop turner.
Investing in a high-quality set ensures you always have the correct tool on hand, whether you are sewing a delicate chiffon blouse or a structured canvas backpack. When evaluating a set, prioritize rust-resistant materials like stainless steel or coated brass, which are essential for preventing rust stains on light fabrics in humid environments. Look for tools with smooth, burr-free hooks and comfortable, ergonomic handle loops that allow you to maintain a steady, controlled grip without causing hand fatigue during long sewing sessions.
Quick Comparison of Loop Wire Options
The table below summarizes the key differences between the three main loop wire styles, helping you quickly identify the best tool for your current sewing project based on physical properties and performance limitations.
| Tool Style | Best Fabric Weight | Ideal Tube Diameter | Best Project Types | Main Limitation |
|---|---|---|---|---|
| Thin-Gauge Wire | Lightweight (Silk, Chiffon, Rayon) | 5mm to 10mm | Spaghetti straps, button loops, lingerie | Bends easily under high tension or heavy loads |
| Heavy-Duty Clasp | Heavyweight (Denim, Canvas, Thick Linen) | 15mm and wider | Belt loops, bag handles, wide waistbands | Too bulky for narrow tubes; can damage fine weave |
| Multi-Piece Set | All weights (Variable tools included) | Variable (Uses multiple tool sizes) | Diverse garments, bags, home decor | Higher initial cost; requires proper storage organization |
How to Use a Loop Wire Without Tearing Your Fabric
Even with the perfect tool, proper technique is essential to prevent fabric damage and ensure a smooth turning process. Preparing your fabric tube correctly before inserting the wire will dramatically reduce friction and stress on the seams. Begin by pressing your sewn seams open or to one side; this helps flatten the fabric layers and creates a clearer pathway for the loop wire to slide through.
Next, trim and grade your seam allowances. Grading involves cutting one seam allowance slightly narrower than the other, which staggers the bulk inside the tube and prevents a thick “choke point” from forming during the turn. If you are working with a very narrow tube, trim the seam allowances down to 3mm and cut the corners at the starting end at a 45-degree angle. This angled cut reduces the initial bulk that must be pulled into the tube to start the turning process.
Slide the loop wire through the fabric tube until the hook emerges from the far end. Securely catch a small amount of the fabric near the edge—ideally within the seam allowance to avoid visible holes on the finished garment—and close the latch over the hook. If your fabric is particularly dry or high-friction, such as a crisp linen or a textured cotton, you can lightly mist the tube with water or apply a tiny dusting of talcum powder to help it glide. Always check the fabric manufacturer’s care instructions first to ensure moisture or powder will not stain or degrade the material.
As you begin to pull the wire back through the tube, use your non-dominant hand to gently guide and massage the fabric over the hook and down the wire shaft. Never yank or force the tool if you meet resistance. If the fabric bunches up and stops moving, gently push the wire back a few millimeters to release the tension, smooth out the bunched fabric with your fingers, and try again with gentle, steady pressure. Finally, avoid using makeshift DIY tools like cut wire coat hangers or paperclips; these lack the smooth, finished ends of professional tools and are highly likely to snag, tear, or permanently ruin your fabric.
Frequently Asked Questions (FAQ)
Can I use regular craft wire instead of a dedicated loop turner?
While regular craft wire or floral wire can be used in an emergency, it is not recommended for high-quality sewing projects. Craft wire lacks the specialized latch-hook or smooth folded end of a dedicated loop turner, meaning its sharp, cut ends will easily snag and tear the internal threads of your fabric tube. Additionally, craft wire is often too soft and will bend out of shape immediately under the tension required to turn a tube, making the process frustrating and inefficient compared to using a professional, polished steel tool.
What to do if the loop wire gets stuck inside the fabric tube?
If your loop wire becomes jammed inside the fabric tube, do not panic and avoid pulling harder, as this will only tighten the knot of fabric and potentially rip your seams or break the wire. Instead, gently push the wire forward to release the tension on the hook, then use your fingers to massage and spread out the bunched fabric along the shaft. If you are working with a natural fiber like cotton or linen, slightly dampening the fabric can help reduce friction. If the tool is completely stuck and cannot be budged, use a seam ripper to carefully open a small section of the seam near the jam, extract the hook, and then resew the opened seam after turning.
Community discussion
Share your experience or ask a question. Comments are reviewed before publication.