
Choosing the right leather paint requires matching the paint’s formulation to the specific leather type and the physical demands of your item. In tropical climates like the Philippines, where high humidity and ambient heat can affect drying times and paint adhesion, selecting a compatible paint and preparation system is essential for a long-lasting finish. Using a product like luntian leather paint offers an accessible way to restore or customize items, but achieving a professional, crack-free result depends on systematic material identification, proper surface preparation, and correct application techniques.
Before purchasing any materials, you must evaluate whether your item is made of genuine leather, synthetic leather, or a textured variant like suede. Each material reacts differently to pigments and binders, meaning a paint that adheres beautifully to a genuine leather boot might peel off a synthetic vinyl bag. By understanding these material differences and matching them to the correct paint properties, you can protect your investment and ensure your customized items withstand daily wear and tear.
Identify Your Leather Type and Project Requirements
Determining the exact material of your item is the first step in narrowing down your paint options. Genuine leather, synthetic leather (such as PU or PVC), and suede or nubuck each require distinct treatment. You can distinguish between these materials using simple visual and tactile checks. Genuine leather features irregular pore patterns, feels warm to the touch, and slowly absorbs a tiny droplet of water. Synthetic leather typically displays highly uniform patterns, feels plasticky or cool, and repels water completely. Suede and nubuck have a raised, fuzzy nap that absorbs liquids instantly; these textured materials require specialized dyes rather than surface-coating paints.
Products mentioned in this guide
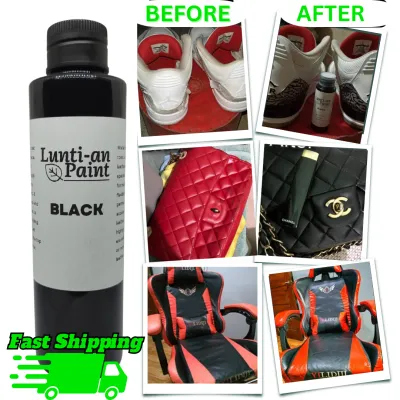
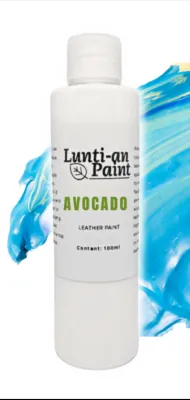
Prices are valid at publication and may change. Please refer to the product page for the latest price.
Next, assess the physical demands and flexibility of the item you plan to paint. High-flex items, such as sneakers, shoes, and the elbow joints of jackets, undergo constant bending and creasing during daily use. These projects require highly elastic paint formulations that can stretch without cracking. Conversely, rigid items like structured handbag bodies, picture frames, or decorative straps experience minimal flexing but require excellent scratch and rub resistance to withstand handling.
Finally, examine the item for any existing factory coatings or manufacturer care labels. Many commercial leather goods are treated with water-repellent sealants, silicone finishes, or oils that prevent paint from adhering. Identifying these coatings beforehand helps you determine how aggressively you need to clean and prepare the surface. If the manufacturer’s label warns against chemical cleaning or solvent exposure, you may need to adjust your preparation strategy or choose a milder paint system to avoid damaging the underlying material.
Match Paint Properties to Your Leather Material
Once you have identified your material, you must select a paint formulation with the appropriate adhesion properties. Acrylic-based leather paints are the most common and versatile choice for both genuine and synthetic leathers. These water-soluble formulas dry to a highly flexible, plastic-like film that bonds well to prepared surfaces. Alcohol-based paints and penetrating dyes, on the other hand, soak deep into the porous fibers of genuine leather. While alcohol-based options offer unmatched durability on genuine leather, they cannot penetrate synthetic PU or PVC and will simply pool or smear on the surface.

To verify flexibility and compatibility claims, always read the product label and manufacturer specifications carefully. Look for explicit indications that the paint is formulated for your specific material, especially if you are working on synthetic leather. High-quality leather paints will specify their elasticity, drying characteristics, and whether they require specialized additives to adhere to non-porous surfaces. Avoid using generic multi-surface acrylics, as they lack the specialized plasticizers needed to flex with leather and will quickly crack under tension.
Preparing synthetic or heavily finished leathers often requires a dedicated primer or leather preparer. Because synthetic materials lack natural pores, paint cannot form a mechanical bond with the fibers. A specialized preparer or deglazer chemically strips away factory sealants and slightly roughens the surface on a microscopic level. This step creates the necessary texture for the acrylic binder to grip, ensuring the paint layer remains fused to the item even under humid conditions.
Choose the Desired Finish and Color Effect
Selecting the right finish is crucial for achieving your desired aesthetic and matching the original look of your item. Leather paints and topcoats generally come in matte, satin, and gloss finishes. A matte finish offers a modern, non-reflective look that is excellent for casual sneakers or rugged jackets. Satin provides a subtle, natural sheen that closely mimics the original factory finish of luxury handbags and dress shoes. Gloss finishes deliver a highly reflective, shiny surface that is ideal for patent leather styles or bold, eye-catching custom designs.
Color opacity determines how easily a paint covers the underlying leather color. Light paint colors, such as white, yellow, or pastel shades, have lower opacity and require multiple thin coats to cover dark brown or black leather. Attempting to speed up this process by applying a single thick layer will trap moisture and lead to cracking. When planning your project, budget for additional paint volume if you are executing a dramatic color transition, as you will need to apply several thin, even layers to achieve uniform coverage.
Environmental factors in the Philippines, such as intense sunlight and high humidity, make colorfastness and UV resistance critical considerations. Check the paint packaging for specifications regarding UV stability to ensure your custom colors do not fade or discolor when exposed to outdoor light. Additionally, verify water-resistance claims to ensure the dried paint film will not soften, become tacky, or bleed when exposed to sudden tropical downpours or high humidity.
Essential Preparation and Testing Steps
Proper surface preparation is the most critical factor in determining the longevity of your painted leather project. Begin by cleaning the item thoroughly with a mild leather cleaner to remove surface dirt, dust, and body oils. Once dry, apply a leather deglazer or high-strength isopropyl alcohol using a clean, lint-free microfiber cloth. Rub the surface gently in circular motions to strip away the factory finish and any residual oils. You will know the finish is successfully removed when the leather surface takes on a slightly dull, matte appearance.
Before applying paint to the entire item, always perform a hidden patch test. Select an inconspicuous area, such as the inside of a strap, the inner tongue of a shoe, or an interior seam. Apply a very thin layer of your selected paint and allow it to dry completely according to the manufacturer’s instructions. Observe the test patch over 24 hours to check for color accuracy, drying behavior, and how well the paint adheres to the material when gently flexed or rubbed.
Define clear stop conditions during your patch test to avoid ruining a valuable item. If the paint remains sticky or tacky after the recommended drying time, it may be reacting poorly to a synthetic material or a residual factory coating. If the paint peels off easily when rubbed gently with a finger, or if the underlying leather begins to warp, harden, or degrade, stop the project immediately. These signs indicate that you must use a different paint formulation, apply a more compatible primer, or consult a professional leather restoration specialist.
Application Tips and Maintenance for Painted Leather
Using the right application tools ensures a smooth, professional finish without visible brush strokes. Soft, synthetic flat brushes are ideal for applying paint to smooth, flat panels, while detail brushes work best for intricate designs and seams. Sponges are highly effective for textured leather or for blending smooth color gradients without leaving lines. For large-scale projects like jackets or bags, an airbrush provides the most even, factory-like coating, though it requires diluting the paint according to the manufacturer’s precise specifications.
Applying paint in multiple paper-thin coats is essential for durability. Thick coats trap wet paint beneath a dried surface skin, preventing proper curing and causing the layer to crack or peel later. In humid tropical environments, you must extend the drying time between each coat. Allow each layer to dry completely to the touch before applying the next. Rushing this process traps moisture between the layers, which weakens the overall bond and can result in a permanently tacky surface.
After applying your final color coat and allowing it to cure, apply a compatible leather finisher or sealant. The finisher acts as a protective barrier against scratches, dirt, water, and friction. Ensure that the finisher you choose is chemically compatible with your paint brand to prevent bubbling or cloudiness. Apply the finisher in thin, even coats, and allow the completed item to cure fully in a dry, well-ventilated space for at least 24 to 48 hours before exposing it to daily use or outdoor conditions.
Frequently Asked Questions (FAQ)
Can I mix different leather paint colors to create custom shades?
Yes, you can mix leather paint colors to create custom shades, but you must follow strict compatibility rules. Only mix paints that come from the same brand and the same product line to ensure the chemical binders and pigments blend uniformly. Never mix water-based acrylic leather paints with solvent-based or alcohol-based paints or dyes. Mixing incompatible formulations will cause the paint to clump, separate, or fail to adhere properly to the leather surface. Always consult the manufacturer’s mixing guidelines before blending your colors.
How do I fix peeling or cracking paint on a leather jacket?
Peeling or cracking paint on a leather jacket typically indicates poor surface preparation, excessive paint thickness, or the use of an incompatible paint formula on high-flex areas. To fix this issue, you must first remove the failed paint layers. Use a manufacturer-approved leather paint remover or a mild solvent on a lint-free cloth to gently strip away the peeling paint without damaging the underlying leather fibers. Once the area is completely clean, dry, and free of residue, re-prepare the surface with a leather deglazer. Apply thin, flexible coats of compatible leather paint, allowing adequate drying time between each layer, and seal the repair with a flexible leather finisher.
Community discussion
Share your experience or ask a question. Comments are reviewed before publication.