
Selecting the right planner layout is a highly personal decision that directly impacts your daily productivity and mental clarity. To choose the ideal Plan and Chill planner layout, you must evaluate your daily task volume, your scheduling complexity, and how much creative freedom you require. Matching these personal habits to the correct structural format—whether it is a highly detailed daily schedule, a balanced weekly spread, or a minimalist monthly overview—ensures your planner remains a practical tool that supports your lifestyle rather than an overwhelming chore.
When a planner layout does not align with your natural workflow, you are more likely to abandon it within a few weeks. A layout that is too structured can feel restrictive and stressful, while a layout that is too open can leave you feeling lost and unorganized. By taking the time to analyze your planning style before making a purchase, you can find a format that seamlessly integrates into your daily routine and helps you achieve your goals.
Identify Your Core Planning Style and Needs
Before browsing through different designs, take a close look at your daily routine and task density. If your day is dictated by hourly meetings, client calls, or strict deadlines, you require a layout that visualizes time blocks clearly. Conversely, if your tasks are flexible and can be completed at any point during the day, a simple checklist format prevents the anxiety of empty hourly slots and allows you to focus on deliverables rather than the clock. Understanding this distinction is the first step in narrowing down your options.
Products mentioned in this guide
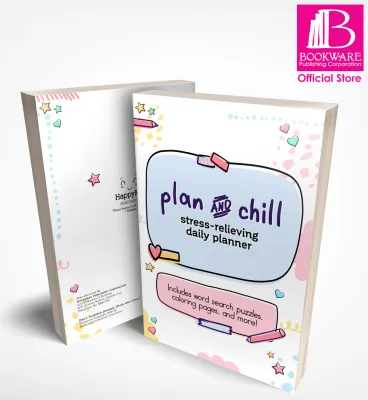
Prices are valid at publication and may change. Please refer to the product page for the latest price.
You must also consider how you balance professional scheduling, personal habit tracking, and creative journaling. Many professionals and students juggle multiple roles, from corporate responsibilities to side projects and personal wellness goals. Decide whether you want a single, unified space to track your water intake, budget, and work deadlines, or if you prefer keeping these domains strictly separated. A planner that tries to do too much can quickly become cluttered, while one that is too sparse might force you to carry multiple notebooks to keep track of different areas of your life.
Another critical factor is your preference for structure versus customization. Some individuals thrive under the guidance of pre-printed prompts, daily gratitude sections, and designated goal-setting pages, which reduce decision fatigue and help establish a consistent routine. On the other hand, if your routine changes weekly or you enjoy sketching, hand-lettering, and designing your own trackers, an open-ended layout with minimal pre-printed text offers the creative freedom you need to adapt the pages to your changing priorities. Identifying where you fall on this spectrum will guide you toward the right level of page structure.
Match Your Workflow to the Right Planner Layout
Daily and Hourly Layouts
Daily and hourly layouts are designed for individuals with intense, schedule-driven routines. If your day is packed with hourly commitments, university lectures, or client consultations, these spreads provide a clear visual timeline of your availability. They allow you to allocate specific blocks of time to individual tasks, which can significantly improve focus and prevent overcommitment during busy workdays. This format is particularly useful for those who practice time-blocking or need to coordinate multiple time-sensitive projects.

However, this high level of structure comes with trade-offs. Daily layouts typically dedicate one full page to a single day, which makes the planner significantly thicker and heavier to carry in your bag during a humid commute. Additionally, because most of the page is occupied by time slots and structured boxes, there is very little room left for freeform brainstorming or meeting notes. If your days are relatively open or task-based rather than time-bound, an hourly layout can feel restrictive and leave you with discouraging amounts of unused space.
Weekly Spreads
Weekly spreads are often considered the middle ground of the planning world, offering a bird’s-eye view of your entire week across a two-page layout. This format is highly effective for tracking medium-term goals, monitoring weekly habits, and managing moderate task lists without feeling overwhelmed by daily details. It allows you to see how your tasks are distributed across the week, making it easier to plan ahead for busy days and manage your energy levels effectively.
The primary limitation of a weekly layout is the restricted space allocated to each individual day. If you have a highly complex schedule with dozens of daily sub-tasks or back-to-back appointments, you may find yourself running out of writing room quickly. To make a weekly layout work for a busy schedule, you often have to write in a very small hand or use fine-tipped pens, which can limit your choice of writing instruments and make the pages harder to read at a glance. Weekly layouts are best suited for those who prioritize weekly flow over hourly tracking.
Monthly and Minimalist Formats
Monthly and minimalist formats are tailored for high-level overviews and long-term planning. If your primary goal is to track major deadlines, travel dates, exam schedules, or project milestones, a monthly calendar spread provides the necessary big-picture perspective. These formats are incredibly low-maintenance, making them ideal for users who find daily or weekly logging too time-consuming or restrictive for their lifestyle.
The main challenge with relying solely on a monthly format is the lack of space for daily execution. You cannot easily break down a massive project into daily actionable steps within a small calendar square. Consequently, users who opt for monthly planners often need to supplement them with separate digital tools, sticky notes, or a secondary notepad to manage their daily to-do lists and immediate priorities. This format works best as a master schedule rather than a daily task manager.
Dotted, Grid, or Blank Pages
For those who find pre-designed layouts too confining, dotted, grid, or blank pages offer the ultimate canvas for customization. This style is the foundation of bullet journaling, allowing you to design custom trackers, weekly spreads, and daily logs that adapt to your changing needs. It is particularly popular among creative planners who enjoy incorporating stickers, washi tape, and hand-drawn elements into their organization, turning planning into a therapeutic artistic outlet.
The trade-off for this absolute freedom is the significant investment of time and effort required to set up each page. Drawing grids, writing out dates, and designing layouts from scratch can become a burdensome chore, especially during busy weeks when you need your planner the most. If you lack the time or patience to maintain a DIY layout, your planner can quickly fall out of use, leaving you without a reliable system for tracking your tasks. This format requires a high level of commitment to maintain.
Verify Physical Specs and Paper Compatibility Before Buying
Before investing ₱500 to ₱1,500 in a quality planner, it is crucial to evaluate the physical specifications to ensure it fits your daily lifestyle. Consider the overall dimensions and weight, especially if you plan to carry it to work, school, or coffee shops. A heavy, thick planner might end up staying on your desk, defeating its purpose as an on-the-go companion. Additionally, look at the binding style: lay-flat thread binding offers a seamless writing experience across two-page spreads, while wire-o or disc-bound systems allow you to fold the planner back on itself to save desk space in tight working environments.
The paper weight, typically measured in grams per square meter (gsm), and the finish of the pages play a critical role in your writing experience. In the humid climate of the Philippines, paper can absorb ambient moisture, which can affect ink drying times and increase the likelihood of feathering or bleed-through. If you prefer using fountain pens, gel pens, or heavy ink markers, look for planners with thicker paper (typically 100 gsm or higher) and a smooth, coated finish. Thinner paper may cause your writing to show through on the reverse side, rendering the back of the page unusable and ruining your layouts.
Finally, review the inclusion of built-in organizational tools that can enhance your planning efficiency. Features like integrated ribbon bookmarks, elastic closures, expandable back pockets, and monthly tab dividers make navigating your planner much faster. Check if the layout includes dedicated dashboard pages at the start of each month for goal setting, or if the page margins are wide enough to accommodate standard-sized sticky notes and decorative stickers without covering up your written schedule. These small details can significantly improve the daily usability of your planner.
Frequently Asked Questions (FAQ)
Can I mix different layouts within a single Plan and Chill planner?
Whether you can mix layouts depends entirely on the binding system of the specific planner model you choose. If you select a traditional book-bound or perfect-bound planner, the pages are permanently fixed, meaning you cannot add, remove, or rearrange layouts. However, if you opt for a disc-bound or ring-bound system, you can easily customize your planner by purchasing separate layout inserts—such as daily, weekly, or dotted pages—and inserting them exactly where you need them to create a hybrid system that matches your unique workflow.
How do I test if my favorite pens will bleed through the planner paper?
To prevent ruining your main planning pages, always perform a pen test on an inconspicuous area, such as the very last page or the back of a notes section. Write a few words using your preferred pens, applying your normal writing pressure, and wait a few minutes to observe the results. Check the reverse side of the page for ghosting (where the ink is visible through the paper) or bleeding (where the ink actually penetrates the fibers to the other side). This test is especially important in humid environments, as moisture in the air can cause water-based inks to dry slower and spread more than usual on untreated paper.
Community discussion
Share your experience or ask a question. Comments are reviewed before publication.