
When selecting your first polymer clay molding set, you should prioritize three core criteria: clay quality and color variety, the inclusion of essential shaping tools, and verified non-toxic safety certifications. A well-designed starter kit balances having enough material for hands-on practice without overwhelming you with highly specialized, complex equipment that you may not yet know how to use. Before making a purchase, always verify the manufacturer’s recommended baking temperatures and age suitability to ensure the set matches your home environment and crafting goals.
For beginners, polymer clay is an exceptionally forgiving medium because it does not dry out when exposed to air, allowing you to work at your own pace. However, the sheer volume of starter kits available on online marketplaces can make the selection process confusing. By focusing on sets that offer reliable clay formulas, durable basic tools, and clear safety labels, you can avoid the frustration of crumbly materials or tools that break under pressure. Investing in a set that meets these baseline standards ensures a smooth, encouraging introduction to the craft.
Essential Components Every Beginner Set Should Include
A complete starter kit should allow you to open the box and complete a project from preparation to final curing without requiring immediate trips to the craft store. While specialized tools can be added later, a beginner needs a reliable foundation of clay, basic shaping implements, and finishing accessories to learn the fundamental techniques of the craft.
Products mentioned in this guide
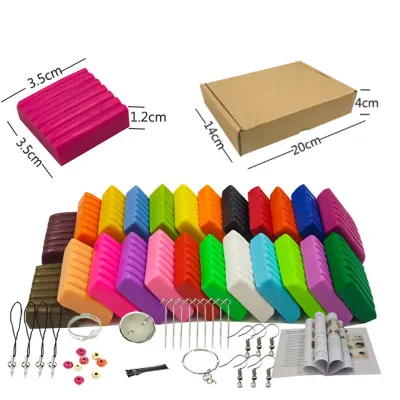
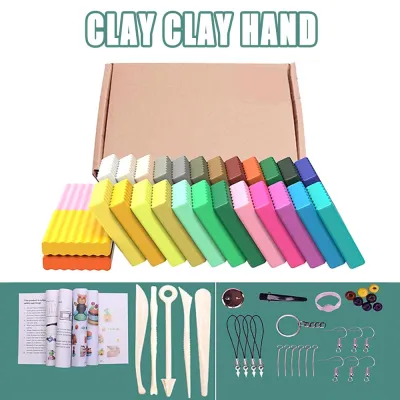
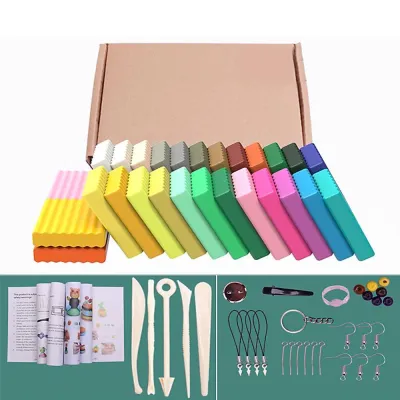
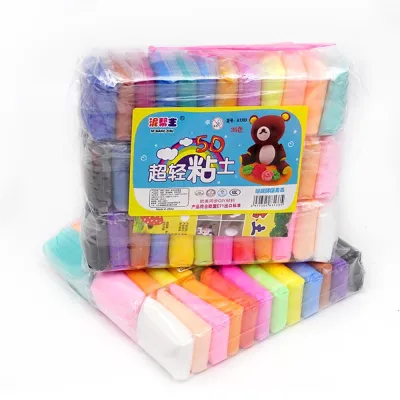
Prices are valid at publication and may change. Please refer to the product page for the latest price.
Polymer Clay Variety and Block Size
Your starter set should include a diverse selection of colors, ideally featuring primary colors like red, blue, and yellow, along with essential neutrals such as white, black, and translucent clay. Having these foundational shades allows you to practice color mixing, which is a vital skill for any clay crafter. Translucent clay is particularly valuable for beginners, as it can be mixed with colored clays to create realistic gemstone effects or used as a base for delicate projects.
Pay close attention to the block size and overall weight of the clay included in the set. Beginner kits typically feature small blocks weighing between 10 grams and 30 grams each, which is an ideal size for testing different colors and creating small charms or figurines without wasting material. If you plan to build larger base structures or larger sculptures, you will eventually want to supplement these with larger individual blocks of 50 grams or more, but the smaller, multi-color blocks are perfect for initial experimentation.
Always verify the specific type of clay included in the molding set before finalizing your purchase. True polymer clay is an oven-bake medium made from polyvinyl chloride (PVC) and liquid plasticizer, which requires heat to cure. Do not confuse this with air-dry clay or lightweight foam clay, which dry out naturally at room temperature but do not offer the same durability, water resistance, or fine-detail preservation as oven-baked polymer clay.
Core Shaping and Texturing Tools
To mold and sculpt your clay effectively, your starter set must contain a few high-quality, versatile tools rather than dozens of flimsy plastic accessories. Look for a set that includes a smooth acrylic roller, which is indispensable for flattening clay into even sheets without leaving unsightly fingerprints or lint. Avoid wooden rolling pins, as they can absorb the plasticizers from the clay over time and leave unwanted wood grain textures on your smooth surfaces.
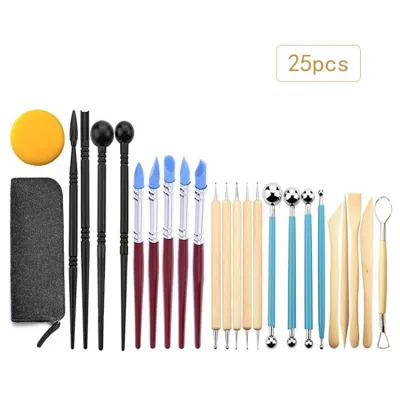
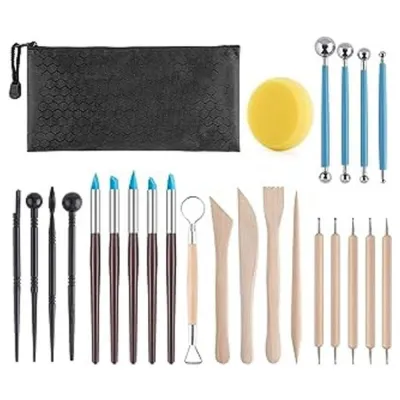
Clean cuts are essential for professional-looking clay work, making a flexible stainless steel cutting blade a vital component of any good set. These thin blades allow you to slice through clay canes and blocks without distorting the internal patterns or squishing the shape. Additionally, look for basic sculpting tools with double-ended designs, such as ball-end dotting tools for creating circular indentations and silicone shaper tips for smoothing out seams and joints.
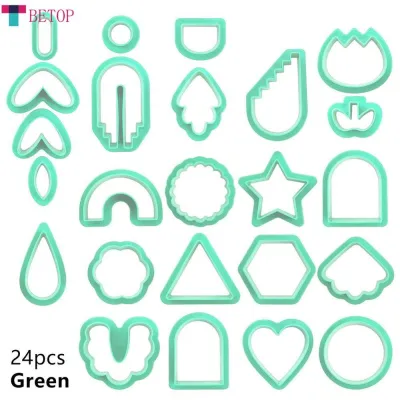
Simple texturing tools, such as small silicone texture mats or basic geometric cutters, add immense value to a beginner set. These accessories allow you to stamp intricate patterns or cut perfect circles, stars, and squares with minimal effort. When evaluating a kit, avoid those that rely heavily on fragile, single-use plastic cutters that can easily bend or snap when pressed into firm clay; instead, look for sturdy metal or high-density plastic cutters.
Baking and Finishing Accessories
The curing and finishing stages are just as important as the sculpting process, yet many starter kits overlook the accessories needed for these steps. A high-quality set will occasionally include baking parchment paper or a small, non-stick silicone baking mat to protect your household baking sheets. Alternatively, working and baking directly on a smooth ceramic tile prevents you from having to peel the delicate, uncured clay off your work surface, which often causes distortion.
Once your clay is baked and cooled, it will often require some post-cure refinement to look its best. Look for starter sets that bundle basic finishing items, such as wet-and-dry sanding pads in varying grits (such as 400 and 800 grit) to smooth away fingerprints, and a soft buffing cloth to restore a natural satin sheen. A small bottle of water-based clear gloss varnish is also highly beneficial for sealing your finished pieces and protecting surface details.
If these finishing accessories are not included in your chosen starter kit, you will need to source them separately to achieve a polished, durable finish. Attempting to use household sandpaper or solvent-based varnishes (like standard nail polish) can ruin your hard work, as incompatible chemicals can react with the cured polymer clay and make it permanently sticky or soft over time.
How to Evaluate Clay and Tool Quality Before Buying
Not all polymer clay molding sets are created equal, and purchasing a low-quality kit can lead to a frustrating experience where the clay is either too hard to work with or snaps easily after baking. Knowing how to assess the quality of both the clay and the accompanying tools before you buy will save you time and money.

Assessing Clay Texture and Curing Reliability
The ideal polymer clay should feel pliable and smooth at room temperature, allowing you to knead and shape it without it sticking excessively to your fingers or crumbling into dry flakes. When rolled into a thin strand, high-quality clay should bend easily without cracking. In warm, tropical climates like the Philippines, ambient heat and humidity can make some clay formulas overly soft or sticky; if this occurs, you can easily “leach” the clay by placing it between sheets of clean printer paper for a few hours to absorb excess oils.
Before you begin sculpting, all polymer clay requires a process called conditioning, which involves kneading and warming the clay to activate the plasticizers and align the polymer chains. Some professional-grade clays require significant physical effort to condition, whereas beginner-friendly sets are designed to be soft and workable almost immediately out of the package. Check product descriptions and user feedback to ensure the clay is labeled as easy to condition.
When browsing online marketplaces, read user reviews specifically to check for complaints regarding post-baking durability, color shifting, and surface bubbling. Poorly formulated clays often become incredibly brittle after baking, snapping under the slightest pressure, or they may darken significantly in the oven, ruining your planned color schemes. Bubbling on the surface of baked clay is another common indicator of low-quality formulation or trapped moisture, which you want to avoid.
Checking Tool Durability and Safety Certifications
The durability and design of the tools included in your molding set directly impact your comfort during long crafting sessions. Look for tools with ergonomic handles that feature comfortable, non-slip grips made from smooth wood, durable silicone, or textured metal. Thin, sharp plastic handles can dig into your fingers and cause hand fatigue quickly, making detailed sculpting work uncomfortable.
Safety is a paramount consideration, especially when dealing with the sharp cutting tools included in polymer clay sets. Ensure that any flexible cutting blades or detail needles come with protective safety caps or a dedicated storage case to prevent accidental cuts when reaching into your tool drawer. If the set is intended for younger crafters, check that the cutting tools are age-appropriate or can be easily substituted with safer plastic alternatives under adult supervision.
Always inspect the product packaging or online listing for recognized non-toxic safety certifications, such as the ASTM D-4236 seal or the European CE/EN71 mark. These certifications verify that the materials have been tested by toxicologists and do not contain harmful levels of toxins or heavy metals. This is particularly important for polymer clay, as the material comes into direct, prolonged contact with your hands and is baked in household environments where food is prepared.
Which Set Type Matches Your Crafting Goals?
Polymer clay is an incredibly versatile material used for everything from delicate jewelry to sturdy home decor. Because different projects require different tools and clay volumes, starter sets are often tailored to specific crafting niches. Choosing a set that aligns with your specific goals prevents you from paying for specialized accessories you do not need.
| Set Focus | Typical Clay Volume | Key Specialized Tools Included | Best For |
|---|---|---|---|
| Jewelry Making | Small blocks (10g–20g) in a wide variety of vibrant colors | Earring hooks, jump rings, eye pins, hand drill, precision shape cutters | Creating earrings, pendants, charms, and wearable beaded accessories |
| Miniature Sculpting | Medium blocks (20g–50g) with a focus on skin tones and neutrals | Fine needle tools, ball-end dotting tools, wire armature, silicone shapers | Sculpting figurines, dollhouse miniatures, detailed models, and small statues |
| General Crafting | Mixed sizes, high color variety, larger white and black blocks | Basic plastic sculptors, acrylic rolling pin, simple cookie cutters, texture mats | Family craft projects, school activities, mixed-media art, and general experimentation |
If your primary goal is to make wearable art, a dedicated jewelry-making set is highly recommended. These kits save you the hassle of buying jewelry findings separately, providing the essential metal hardware like jump rings, earring hooks, and eye pins alongside precision cutters designed specifically for jewelry scaling. Without these specialized components, assembling your finished clay pieces into wearable jewelry can be incredibly difficult.
For those interested in sculpting characters, animals, or dollhouse miniatures, a miniature sculpting set is the ideal choice. These kits prioritize fine detailing tools over jewelry hardware, offering wire armatures to support the weight of your sculptures and specialized silicone shapers to blend seams seamlessly. They also tend to provide larger blocks of neutral and blending colors, which are essential for building up the core structures of figurines.
If you are still unsure of your long-term crafting direction, a general crafting starter set is the safest and most economical choice. These sets offer a broad variety of colors and basic, multi-purpose tools that allow you to experiment with different techniques. As your skills develop and your interests become clearer, you can gradually transition from your general starter set to high-end, specialized tools like a dedicated clay conditioning machine, brass ball tools, or professional-grade clay brands.
Safe Baking, Storage, and Tool Maintenance
To ensure your polymer clay creations last and your tools remain in excellent condition, you must practice proper baking, storage, and maintenance habits. Taking care of your materials not only guarantees safer crafting but also extends the lifespan of your molding set, saving you money on replacements.
- Use an Independent Oven Thermometer: Built-in oven dials are notoriously inaccurate and can fluctuate by 10°C or more. Placing a cheap, independent oven thermometer next to your clay is the only way to guarantee you are baking at the exact temperature specified by the manufacturer.
- Ensure Proper Ventilation: Always bake your polymer clay in a well-ventilated room. Open nearby windows or use an exhaust fan to keep the air moving, especially in warm, humid climates where indoor air can easily become stagnant.
- Avoid Microwaves and High Heat: Never attempt to bake polymer clay in a microwave, as this causes rapid, uneven heating that will burn the clay and release toxic fumes. Stick to standard kitchen ovens or dedicated countertop toaster ovens.
- Protect Your Clay from Direct Heat: To prevent the thin edges of your clay projects from scorching or darkening, place a loose tent of aluminum foil over your baking tray. This shields the clay from the direct radiant heat of the oven's heating elements.
- Store Unused Clay in Compatible Plastic: Keep your leftover clay wrapped tightly in its original packaging, plastic cling wrap, or in ziplock bags. Store these bags inside airtight containers made of polypropylene (marked with recycling code 5) or glass, as some other plastics can react with the clay's plasticizers and melt over time.
- Keep Clay Away from Heat and Sunlight: Store your clay containers in a cool, dark drawer or cupboard. In tropical environments, exposing your raw clay to direct sunlight or high ambient temperatures can cause it to partially cure and harden in the package, rendering it unusable.
- Clean Tools Immediately After Use: Wipe down your metal blades, rollers, and sculpting tools with rubbing alcohol or a wet wipe immediately after your crafting session. This removes any lingering clay residue before it has a chance to collect dust or harden on the tool surfaces.
- Store Blades Safely: Always place protective sheaths or caps back onto your cutting blades and detail needles before storing them. This preserves the sharpness of the blades and prevents accidental cuts when you unpack your kit for your next project.
By establishing these safe baking, storage, and cleaning routines early on, you protect your health and ensure that your polymer clay molding set remains in peak condition for years to come. Always remember to defer to the specific instructions printed on your clay’s packaging, as different brands formulate their clays with unique baking times and temperature requirements.
Frequently Asked Questions (FAQ)
Can I use a standard kitchen oven for baking polymer clay?
Yes, you can safely use a standard kitchen oven to bake polymer clay, provided you follow proper safety precautions. Always place an independent oven thermometer inside the oven to verify the temperature, as built-in dials are often inaccurate and can cause the clay to burn. To prevent any raw clay residue or fumes from coming into contact with your food preparation surfaces, bake your clay on a tray lined with parchment paper, or use a covered baking dish made of two clamped aluminum pie pans.
What causes polymer clay to crack or burn during baking?
Cracking is typically caused by under-baking the clay, sudden temperature drops, or trapping tiny air bubbles inside the clay during the conditioning and molding process. Burning or severe darkening, on the other hand, occurs when the oven temperature exceeds the manufacturer’s recommended limits. To prevent these issues, always use a dedicated oven thermometer to monitor the heat, condition your clay thoroughly to remove air pockets, and protect your pieces with a loose foil tent during baking.
How should I store leftover polymer clay to keep it usable?
To keep your leftover polymer clay soft and free of dust, wrap it tightly in plastic cling wrap or place it in airtight ziplock bags. Store these bags in a cool, dark place away from direct sunlight and heat sources, which can cause the clay to cure prematurely. Ensure your storage containers are made of glass, metal, or polypropylene plastic (recycling code 5), as other types of plastic can react chemically with the clay and melt.
Community discussion
Share your experience or ask a question. Comments are reviewed before publication.