
Starting a new creative hobby like polymer clay sculpting is exciting, but choosing your first starter kit can be overwhelming. To find the right polymer clay set with tools, you must look beyond the sheer number of pieces in a box. A high-quality beginner set should offer genuine, oven-bake polymer clay in a versatile color range, include durable core tools like a solid acrylic roller and a sharp metal blade rather than flimsy plastic alternatives, and feature secure, resealable packaging. By focusing on these essential criteria, you can avoid the common frustrations of brittle clay, warped tools, and failed baking attempts, ensuring a smooth and rewarding entry into the craft.
Evaluating the Clay: Quality, Colors, and Climate Storage
When browsing for a polymer clay set with tools, your first priority is verifying the type of clay included. True polymer clay is a synthetic modeling material composed of polyvinyl chloride (PVC) and a liquid plasticizer. It remains completely workable at room temperature and only hardens when baked in an oven. Many beginners shopping on online marketplaces mistakenly purchase air-dry clay kits, which cure through water evaporation and dry out rapidly when exposed to air. Always read the product specifications carefully to ensure the set is explicitly labeled as “oven-bake” clay, preventing your material from drying out mid-sculpt.
The number of colors included in a set is another crucial decision point. While a massive kit boasting 50 or more tiny blocks of clay might seem like an incredible bargain, it is often a counterproductive choice for beginners. These oversized sets frequently include redundant shades, pastels, and neon colors that encourage over-mixing. When a novice crafter blends too many disparate colors together, the pigments inevitably combine into a muddy, dull gray or brown. Opting for a set with 12 to 24 core primary and secondary colors is a much smarter strategy. It forces you to learn the basics of color mixing and clean blending while ensuring you receive larger, more practical blocks of each color.
Products mentioned in this guide
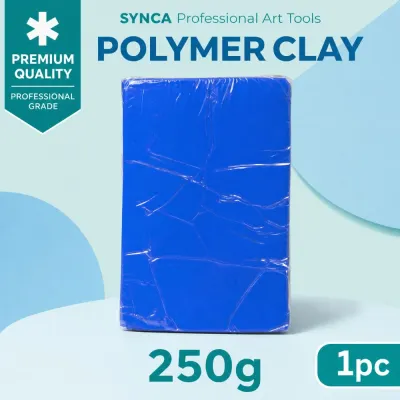
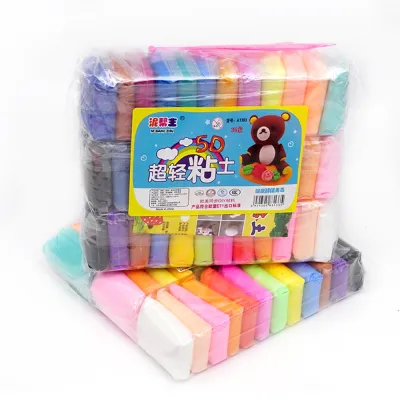
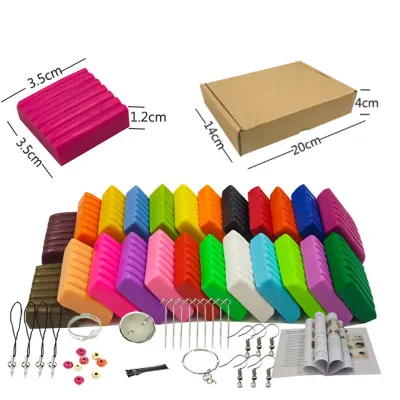
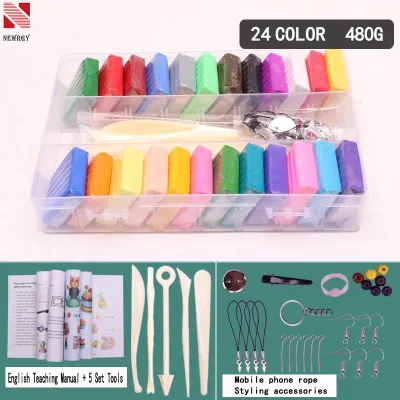
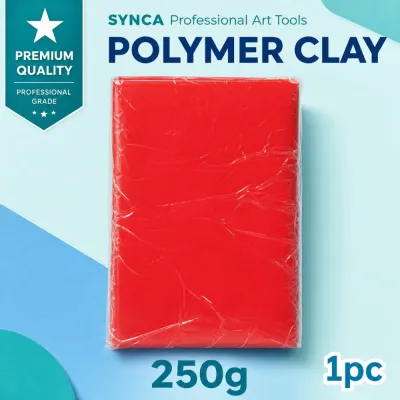
Prices are valid at publication and may change. Please refer to the product page for the latest price.
The physical condition of the clay straight out of the box is a direct indicator of its quality. When you open a fresh block of polymer clay, it should feel firm but slightly yielding. If the clay is excessively brittle and crumbles into dry flakes when you try to knead it, it has likely been stored poorly, is expired, or has lost its essential plasticizers. Conversely, clay that is overly soft, sticky, or leaves a greasy residue on your hands is difficult to detail and will warp under light finger pressure. High-quality clay should become smooth, pliable, and easy to shape after a few minutes of hand-kneading, a process known as conditioning.
In the warm and humid tropical climate of the Philippines, managing polymer clay requires extra care. High ambient temperatures, which frequently exceed 30°C, can cause the liquid plasticizers to leach out of the clay, leaving it sticky and difficult to handle. If left exposed to the open air, the clay can degrade and lose its workable texture. To prevent this, look for beginner sets that come in sturdy, airtight plastic container boxes or individual resealable bags. This protective packaging shields the clay from dust, moisture, and premature softening, ensuring it remains fresh and usable for months.
Finally, safety should never be overlooked when working with synthetic craft materials. Always check the product packaging for recognized non-toxic certifications, such as the AP (Approved Product) seal from the Art and Creative Materials Institute (ACMI) or compliance with EN71 safety standards. These labels guarantee that the clay does not contain harmful phthalates or toxic heavy metals, making it safe for general crafting, prolonged skin contact, and household use.
Essential Tools vs. Filler Items: What Actually Matters
Many beginner kits are marketed with high piece counts to create an illusion of superior value, but most of these pieces are cheap fillers. To get the most out of your purchase, focus on sets that prioritize the non-negotiable basics. Every beginner needs a smooth acrylic roller to flatten clay into uniform sheets, a sharp and flexible metal craft blade for clean cuts, a fine needle tool for detailing and piercing, and a few basic double-ended shaping tools. These core implements are the foundation of almost every polymer clay project, from jewelry making to miniature sculpting.

The material quality of these tools is just as important as their presence. Metal blades and solid acrylic rollers consistently outperform cheap plastic alternatives. Plastic rollers often feature prominent mold lines that transfer unwanted textures onto your smooth clay sheets, and they tend to stick to the clay, causing frustrating tears. Dull plastic blades compress and distort the clay rather than slicing through it cleanly, ruining your delicate designs. Choosing a set that includes a solid, clear acrylic rod and a stainless steel cutting blade will immediately improve your precision and reduce cleanup time.
To spot “value” sets that pad their item count, look closely at the accessories included. Kits that boast 100+ pieces often fill the box with dozens of flimsy silicone molds, dull plastic cookie cutters, and low-grade jewelry findings like jump rings and earring hooks. While these accessories might seem useful, manufacturers often include them at the expense of the clay’s quality and volume. You will likely end up with tiny, unusable portions of low-grade clay and a drawer full of plastic trinkets that bend or break during their first use. It is always better to buy a set that focuses on high-quality clay and a few durable, reusable tools.
Your workspace setup also plays a major role in how well your tools perform. Polymer clay requires a completely smooth, non-porous work surface. Working directly on wooden tables, paper, or cardboard is highly discouraged, as these materials are porous and will absorb the plasticizers directly from the clay, leaving it dry and brittle while leaving greasy stains on your furniture. Additionally, raw clay can chemically react with and damage certain finished plastics. To protect your furniture and ensure a smooth release, look for a kit that includes a silicone craft mat, or set up your workspace on a sheet of glass, a smooth ceramic tile, or a metal baking sheet.
Baking Requirements and Safety Boundaries
Curing is the most critical step in the polymer clay process, as it permanently hardens your creations. Polymer clay must be baked using dry, ambient heat to fuse the PVC particles. This requires a standard household oven, a toaster oven, or a dedicated craft oven. You must never attempt to cure polymer clay in a microwave. Microwaves rely on exciting water molecules to generate heat, whereas polymer clay is an oil- and plastic-based material with zero water content, so a microwave will cause rapid, uneven heating. This leads to bubbling, scorching, melting, and poses a severe fire hazard.
Accurate temperature control is the secret to a successful bake. If your oven temperature is too low, the clay will remain under-baked, resulting in finished projects that are brittle and easily snap or crumble. If the temperature is too high, the clay will scorch, discolor, and release irritating, toxic fumes. Because the built-in temperature dials on home ovens and toaster ovens are notoriously inaccurate—often fluctuating by 10°C to 20°C—it is highly recommended to purchase a standalone metal oven thermometer. Placing this thermometer directly next to your clay in the oven allows you to monitor the actual temperature accurately.
Maintaining proper hygiene and ventilation during the baking process is essential. Always bake your clay in a well-ventilated room by opening windows or turning on an exhaust fan to disperse any mild odors. While baked polymer clay is non-toxic, you should avoid baking clay and food simultaneously in the same oven space without proper protection. To prevent any plasticizer residue from settling on your oven walls, bake your clay projects inside a dedicated covered container, such as two aluminum foil pans clamped together, or use a dedicated toaster oven reserved solely for your craft projects.
It is important to remember that baking times and temperatures vary significantly by brand and product line. Some brands cure at 110°C, while others require 130°C, and baking times can range from 15 to 30 minutes per 6mm of thickness. Always defer to the specific instructions printed on your product’s packaging rather than relying on generic online guides. To ensure compatibility and avoid ruining a complex sculpture, perform a simple trial: bake a small, flat test piece of clay first, let it cool completely, and verify that it bends slightly without snapping before committing your final project to the oven.
Assessing Value: Branded Sets vs. Bulk Generic Kits
When shopping on local e-commerce platforms, you will face a clear choice between established craft brands and unbranded bulk kits. Branded sets from reputable manufacturers are engineered for consistency, offering reliable curing, predictable pliability, and durable finished pieces that resist cracking over time. Unbranded bulk kits, while highly affordable, often feature inconsistent formulations. You may find some blocks are rock-hard and impossible to condition, while others are so sticky they lose all detail, resulting in projects that crack or degrade quickly after baking.
Reframing your purchase from a cost-per-use perspective will help you make the right choice. Investing in a smaller, high-quality set of branded clay is far better for learning foundational techniques than struggling with inferior materials. When cheap clay repeatedly cracks, crumbles, or fails to hold details, it leads to unnecessary frustration and often causes beginners to abandon the hobby entirely. A reliable starter set ensures that your effort translates into beautiful, durable creations, making your initial investment far more valuable in the long run.
A smart approach for any beginner is to start with a solid, reputable basic set and upgrade gradually. You do not need to purchase every tool and accessory on day one. As your skills progress and you identify your specific interests—whether that is jewelry making, miniature sculpting, or cane work—you can purchase specialized tools separately. This includes professional-grade liquid clays, specialized ball styluses, clay extruders, or specific individual colors. This upgrade path keeps your initial costs manageable while ensuring your toolkit grows naturally alongside your advancing skills.
Frequently Asked Questions (FAQ)
Can I bake polymer clay in a microwave?
No, you cannot bake polymer clay in a microwave. Microwaves rely on exciting water molecules to generate heat, whereas polymer clay is an oil- and plastic-based material with zero water content. Attempting to microwave polymer clay will result in rapid, uneven heating, causing the clay to bubble, melt, scorch, and release toxic fumes, creating a significant fire hazard. Always use a conventional oven, toaster oven, or dedicated craft oven to cure your clay safely.
Why did my polymer clay project crack or break after baking?
Cracking and breakage are typically caused by under-baking, incorrect temperatures, or low-quality clay. If the oven temperature is too low or the baking time is too short, the PVC particles in the clay will not fuse completely, leaving the finished piece weak and brittle. Conversely, overheating can scorch and weaken the material. Using cheap, unbranded generic clays also increases the risk of breakage, as these formulations often lack the structural integrity and high-quality plasticizers found in premium brands.
How should I store polymer clay in a warm climate?
To protect your polymer clay from the high heat and humidity of a tropical climate like the Philippines, store it in airtight plastic containers or individual zip-top bags. Keep the containers in a cool, dark place, such as a cupboard or drawer, completely away from direct sunlight and heat sources. Avoid storing raw clay on porous surfaces like wood or paper, as these will absorb the essential plasticizers and leave your clay dry and crumbly.
Community discussion
Share your experience or ask a question. Comments are reviewed before publication.