
Selecting the perfect waterproof sticker requires matching the sticker’s material and adhesive to the specific surface and environment it will encounter. A sticker that remains pristine on a dry planner page will quickly deteriorate on a water bottle exposed to daily washing, while a heavy-duty decal might be too thick and rigid for delicate paper journaling. By understanding how different materials interact with moisture, heat, and physical wear, you can make an informed choice that ensures your designs stay vibrant and intact.
In tropical climates where high humidity and warm temperatures are constant, selecting the right material becomes even more critical. Moisture in the air can weaken standard paper adhesives over time, causing edges to curl prematurely. To avoid disappointment, you must look beyond generic “waterproof” marketing claims and evaluate the specific technical attributes of the sticker, such as its base material, laminate coating, and adhesive type.
Understanding Waterproof Sticker Materials and Labels
When browsing online marketplaces or local stationery shops, you will encounter terms like “water-resistant” and “waterproof.” It is essential to distinguish between these labels based on manufacturer specifications. Water-resistant stickers, often made of treated paper, can withstand occasional light splashes or high humidity but will degrade if submerged. True waterproof stickers are typically constructed from robust synthetic polymers like vinyl (PVC), polyester (PET), or polypropylene (PP), which do not absorb moisture or break down when wet.
Products mentioned in this guide
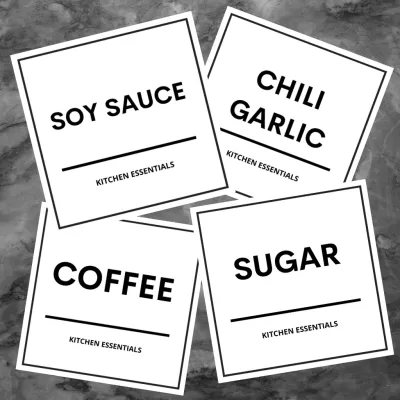
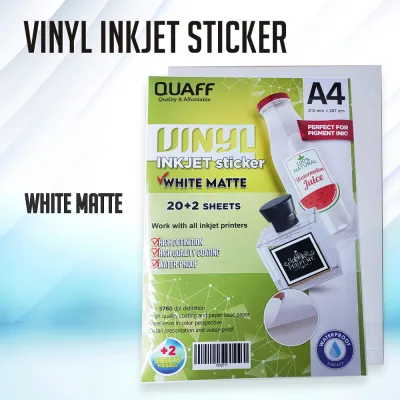

Prices are valid at publication and may change. Please refer to the product page for the latest price.
The durability of a sticker also depends heavily on the printing method and ink type. Standard dye-based inkjet inks are highly water-soluble and will bleed when wet, even on a plastic sheet. For reliable waterproof performance, look for stickers printed with pigment-based, UV-curable, or eco-solvent inks. Additionally, high-quality waterproof stickers often feature a clear protective laminate layer—either matte or glossy—applied over the printed design. This laminate acts as a physical barrier, shielding the ink from water, oil, friction, and UV rays.
Before purchasing, check the product description for details on the adhesive backing. Permanent acrylic-based adhesives offer the strongest bond and are highly resistant to water ingress, making them ideal for outdoor gear and drinkware. If you plan to reposition your stickers or want the option to remove them later without leaving a sticky residue, look for removable or low-tack acrylic adhesives. Always verify these specifications on the packaging or the seller’s product page rather than assuming all plastic-looking stickers perform equally.
Matching Stickers to Your Planner and Paper Surfaces
For planners, bullet journals, and scrapbooks, the primary goal is to add visual flair without compromising the structural integrity of the paper. Standard waterproof vinyl stickers are often too thick and rigid for thin planner pages, such as Tomoe River paper or lightweight notebook sheets. When thick stickers are layered throughout a journal, they create bulk, causing the book to swell, close unevenly, or develop a distorted spine. For paper crafts, look for ultra-thin water-resistant options, such as matte paper stickers with a light protective coating, or thin plastic films like PET and polypropylene that lie flat.

Adhesive strength is another critical factor when working with delicate paper. High-tack permanent adhesives can easily tear thin pages if you make a mistake during placement and try to peel the sticker off. If you enjoy rearranging your layouts, prioritize repositionable or low-tack stickers, often marketed as removable washi stickers or repositionable PET deco stickers. These allow you to lift and adjust the design without lifting the fibers of the paper beneath.
Furthermore, ensure the sticker’s adhesive and backing do not cause ink bleeding or show-through on the reverse side of the page. Some low-quality adhesives contain solvents or oils that can seep through thin paper over time, leaving greasy yellow stains or blurring your handwritten notes. Opting for acid-free, archival-safe stickers designed specifically for stationery use prevents this chemical degradation, keeping your planner clean and legible.
Selecting Stickers for Water Bottles and Curved Surfaces
Decorating water bottles, tumblers, and travel mugs requires stickers that can handle constant handling, condensation, and curved surfaces. Standard flat-bed vinyl can be stiff, leading to puckering, creasing, or lifting along the edges when applied to cylindrical or spherical shapes. To ensure a seamless fit, look for highly flexible, conformable vinyl stickers—often referred to as cast vinyl or premium flexible vinyl. These materials stretch slightly, allowing them to conform smoothly to complex curves without creating air channels where water can seep in.
Exposure to water is inevitable for drinkware, so you must verify the manufacturer’s care instructions. While some premium vinyl stickers are labeled as dishwasher-safe, many are rated for hand-washing only. High temperatures and intense water pressure inside a dishwasher can melt the adhesive or cause the protective laminate to delaminate from the vinyl base. If you prefer the convenience of a dishwasher, look for stickers that explicitly state dishwasher safety on the label; otherwise, plan to wash your decorated bottles gently by hand using non-abrasive sponges.
Proper surface preparation is the secret to achieving a long-lasting bond on smooth metals, powder-coated flasks, or plastic bottles. Even a microscopic layer of finger oils, dust, or manufacturing residue can prevent the adhesive from making full contact. Before applying your sticker, clean the area thoroughly with isopropyl alcohol or warm, soapy water, and let it dry completely. Avoid household glass cleaners, as they often leave behind a thin chemical film that interferes with adhesive bonding.
Choosing Stickers for Laptops and Daily-Tech Gear
Laptops, tablets, and phone cases present a unique set of challenges for stickers, including heat exposure, constant friction, and the necessity of residue-free removal. Electronics generate internal heat during operation, which can soften standard adhesives, causing stickers to slide, lift at the corners, or ooze sticky residue. When choosing stickers for tech gear, look for heat-resistant vinyl specifications. Additionally, if you frequently work near windows or outdoors in sunny environments, select stickers with UV-resistant laminates to prevent the colors from fading under intense sunlight.
Because tech devices are expensive investments, preserving their original finish is paramount. Avoid using cheap, permanent paper stickers that require intense scrubbing or harsh solvents to remove. Instead, prioritize stickers featuring premium removable adhesives. These adhesives are formulated to hold securely during daily use but release cleanly when pulled slowly from one corner, leaving the aluminum, plastic, or glass surface of your device completely pristine.
Daily-tech gear also experiences significant friction as it is slid into backpacks, placed on desks, or held in your hands. This constant rubbing can quickly scuff unprotected printed designs. To prevent this wear, choose stickers with a thick, scratch-resistant matte or glossy laminate. This protective layer absorbs the friction of daily travel, ensuring your designs remain sharp and free of unsightly scratches even after months of commuting.
Application and Care Tips for Long-Lasting Results
To maximize the lifespan of your waterproof stickers, proper application is just as important as choosing the right material. Begin by preparing the target surface. Ensure the area is completely clean, dry, and free of dust, oils, or wax. If you are applying the sticker in a humid environment, wipe the surface down immediately before application to remove any micro-condensation that may have settled from the air.
When placing the sticker, avoid touching the adhesive side with your fingers, as skin oils can weaken the bond. Align one edge of the sticker against the surface first, then slowly lower the rest of the design. Using a clean microfiber cloth or the edge of a plastic card, apply firm, even pressure from the center outward to the edges. This technique pushes out trapped air bubbles and ensures that the pressure-sensitive adhesive activates and bonds completely with the substrate.
Finally, respect the manufacturer’s recommended curing time. Adhesives do not achieve their maximum bond strength instantly; they require time to flow into the microscopic textures of the surface. It is best to let the newly applied sticker sit undisturbed in a dry, room-temperature environment for at least 24 to 48 hours before exposing it to water, heavy handling, or temperature fluctuations. This simple waiting period can significantly extend the life of your sticker.
Frequently Asked Questions (FAQ)
Can I make regular stickers waterproof at home?
Yes, you can apply aftermarket sealants to standard paper or non-waterproof stickers, but this method has clear limitations. Applying a clear acrylic sealant spray or placing a self-adhesive laminating sheet over the sticker can provide a basic level of water resistance, making them suitable for indoor items or low-moisture environments. However, these home remedies rarely match the durability of factory-made waterproof vinyl. The success of this workaround depends heavily on the original ink and paper; some inkjet inks may smudge or bleed when the liquid sealant is applied. Always test the sealant on a small, hidden area or a spare sticker first to check for ink reactions or adhesive failure before committing to your main project.
How do I safely remove a waterproof sticker without leaving residue?
Removing a stubborn waterproof sticker requires patience to avoid damaging the underlying surface. You can apply gentle heat from a hairdryer set to a low temperature to soften the adhesive backing, making it easier to peel away. Before doing this, strictly check the heat tolerance limits of your device or water bottle, as excessive heat can damage laptop screens, internal electronics, or plastic containers. Once the adhesive is warm, slowly peel the sticker back at a sharp angle rather than pulling straight up. If any sticky residue remains, apply a mild, surface-safe adhesive remover or a drop of cooking oil to a microfiber cloth, test it on an inconspicuous spot first, and gently wipe the residue away. Avoid using sharp metal tools, razor blades, or abrasive scrubbers, as these can permanently scratch anodized aluminum, plastic, or glass finishes.
Community discussion
Share your experience or ask a question. Comments are reviewed before publication.