
Finding the perfect white color pencil can transform your creative projects, whether you are adding the final glint of light to a portrait, writing on dark cardstock, or highlighting key sections in your daily planner. Unlike standard colored pencils that rely on the white of the paper to show their brilliance, a white pencil must lay down a physical barrier of pigment to mask the dark or colored surface beneath it. The right choice depends entirely on your specific medium, the texture of your paper, and how much opacity your work demands.
Many artists and journal enthusiasts buy a white pencil expecting a stark, chalky line, only to find it leaves a faint, translucent streak. This happens because white pencils are formulated with different binders, pigment concentrations, and core hardness levels. By understanding how these structural elements interact with paper fibers, you can select a tool that delivers clean, vibrant highlights without frustrating wax bloom or frequent core breakage.
Core Factors to Evaluate Before Buying
To choose a white color pencil that performs reliably under various conditions, you must look closely at its physical composition. The core of a colored pencil is a mixture of pigment, filler, and a binding agent. In white pencils, the pigment is almost always titanium dioxide or zinc oxide, both of which offer different levels of coverage and color temperature. Titanium dioxide provides a highly opaque, bright white, while zinc oxide tends to be more translucent and cooler, making it excellent for subtle blending.
Products mentioned in this guide
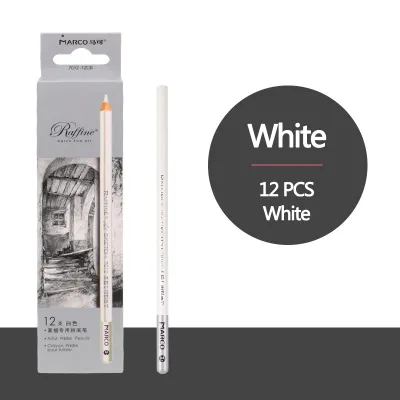
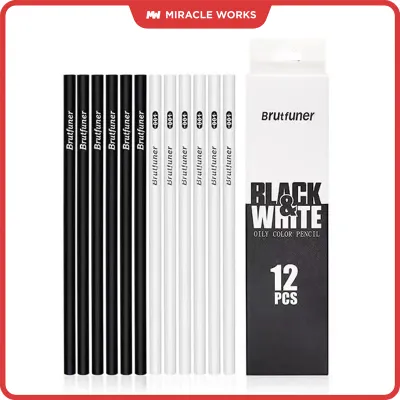
Prices are valid at publication and may change. Please refer to the product page for the latest price.
The binding agent holds these pigments together and dictates how the pencil glides across the page. Wax-based binders are incredibly common and are known for their soft, buttery texture. They allow for rapid color laydown and effortless blending, making them ideal for filling large areas on textured paper. However, soft wax cores are prone to “wax bloom,” a natural process where a cloudy film of wax rises to the surface of the drawing over time. This can be particularly noticeable in humid tropical climates, where warm temperatures can accelerate the migration of wax to the surface of your artwork.
Oil-based binders, on the other hand, utilize vegetable or mineral oils to bind the pigment. These pencils generally feature slightly harder cores that hold a sharp point much longer than their wax-based counterparts. They lay down color in thin, precise layers, allowing you to build up opacity gradually without the risk of wax bloom. If you work on detailed illustrations or fine lettering where crisp edges are essential, an oil-based white pencil provides the control you need.
Core hardness is directly tied to the binder-to-pigment ratio. A soft core contains more binder and pigment, allowing it to shear easily under light pressure and leave a thick, opaque layer. A hard core contains more filler or a firmer binder, which resists crumbling and maintains a fine point for intricate details. Balancing these two properties is key: a core that is too soft will wear down in seconds and break under moderate pressure, while a core that is too hard will scratch the paper surface and fail to deposit enough pigment to cover dark backgrounds.
Lightfastness is another critical specification to verify, especially if you intend to sell your artwork or display it in brightly lit spaces. Lightfastness refers to a pigment’s resistance to fading or discoloring when exposed to light over time. Manufacturers often print lightfastness ratings directly on the pencil barrel using star symbols, Roman numerals, or ASTM standards. For archival work, look for pencils rated as highly lightfast to ensure your white highlights do not yellow or fade into the paper over years of exposure.
Finally, consider how the white pencil interacts with other mediums. Some formulations are designed to blend seamlessly with underlying layers of colored pencil, softening harsh transitions and creating smooth gradients. Others are formulated to resist blending, sitting cleanly on top of markers, watercolors, or ink without lifting the underlying colors. Understanding these chemical behaviors prevents unexpected smudging and ruined pages in your sketchbook or journal.
Matching the Pencil to Your Creative Task
Every creative project presents unique challenges, meaning a white color pencil that excels in a detailed portrait might frustrate you when used in a daily planner. Matching the pencil’s formulation to your specific task ensures that you get the desired opacity, line quality, and durability without wasting time or materials.

Artwork on Dark Paper
Drawing on black, gray, or toned paper requires a white color pencil with maximum opacity and a high pigment load. When working on these dark surfaces, your primary goal is to completely block out the dark background to establish bright highlights and midtones. For this application, prioritize soft, wax-based or oil-rich pencils that are explicitly labeled as “opaque” or “covering” rather than standard blending whites.
Achieving a solid, vibrant white on dark paper often requires a combination of layering and burnishing. You will want to apply light, even layers of pigment first to build a solid foundation on the paper’s tooth. Once the paper fibers are filled, you can apply firmer pressure—a technique known as burnishing—to smooth out the pigment and create a polished, reflective finish. A soft-core pencil excels here because it deposits enough material to fill the paper’s texture quickly, preventing the dark background from peeking through the gaps.
Bullet Journaling and Highlights
For bullet journaling, planner organization, and adding small highlights to ink drawings, the requirements shift from broad coverage to precision and stability. Journal pages are often handled frequently, meaning any white marks must dry quickly and resist smudging when the book is closed. A white color pencil with a medium-to-hard core is ideal for this task, as it maintains a sharp point for writing small text or drawing fine decorative borders.
When highlighting over water-based markers, gel pens, or fine liners, you must ensure the pencil does not lift or smear the underlying ink. Harder oil-based pencils are excellent for this because they glide over dried ink without dissolving it. Additionally, look for formulations that do not leave a thick, sticky residue on the page. A heavy wax buildup can transfer to the opposite page when your journal is closed, especially in warm, humid environments where pages are pressed tightly together.
General School and Craft Projects
For everyday schoolwork, poster making, and casual craft projects, versatility and cost-effectiveness are the primary considerations. Students and hobbyists often work on standard copy paper, construction paper, or lightweight cardstock, which may not tolerate heavy layering or intense burnishing. In these scenarios, a versatile, medium-hardness white color pencil is the most practical choice.
These mid-range pencils offer a balanced performance, providing decent opacity on colored construction paper while remaining durable enough to withstand the rough handling typical of classroom environments. When purchasing pencils for younger students, always check the packaging for non-toxic certifications, such as the AP (Approved Product) seal. Buying these pencils in budget-friendly multi-packs or as single open-stock items from local stationery stores ensures you can replace frequently used colors without purchasing entire sets.
Paper Pairing and Application Techniques
The performance of any white color pencil is heavily influenced by the paper you choose. Paper texture, often referred to as “tooth,” acts like a miniature grater that scrapes pigment off the pencil core as you draw. If your paper is completely smooth, such as hot-pressed watercolor paper or heavy cardstock, a soft-core pencil may slide across the surface without depositing much color. Conversely, highly textured paper, like cold-pressed watercolor paper or pastel card, will quickly wear down a soft pencil but will hold a massive amount of pigment, allowing for incredibly bright highlights.
To achieve the brightest possible finish, master the art of gradual layering. Instead of pressing down hard on your first pass, apply multiple light layers, changing the direction of your strokes with each pass to fill the paper’s valleys. Once you have built up a sufficient layer of pigment, you can use a clean blending stump or a harder white pencil to burnish the area. This flattens the pigment particles, creating a solid, reflective surface that appears much brighter to the eye.
You can also use white colored pencils as a resist medium. Because wax and oil naturally repel water, drawing a design with a heavy hand using a white pencil and then washing watercolor or water-soluble ink over it will reveal the white design underneath. This technique is excellent for creating snow, rain, or textured patterns in mixed-media art. Keep in mind that this effect is permanent; once the wax is laid down, water-based media cannot penetrate it, so plan your composition carefully before applying the pencil.
Proper sharpening is crucial to extending the lifespan of your white pencils, particularly those with soft, high-pigment cores. Standard wedge sharpeners with dull blades can easily pull or twist the delicate core, causing it to break inside the wood casing. To prevent this, use a high-quality manual sharpener with a sharp, replaceable steel blade, or a rotary crank sharpener that holds the pencil steady while shaving the wood. When sharpening soft cores, hold the sharpener in your dominant hand and turn the sharpener around the pencil, rather than twisting the pencil itself, to minimize torsional stress on the core.
Pre-Purchase Checklist and In-Store Verification
Before spending your budget on a single pencil or a premium set, taking a few minutes to verify the product’s specifications and physical quality can save you from disappointment. If you are shopping at a local stationery store, use this practical checklist to evaluate your options.
First, read the packaging and the pencil barrel carefully. Look for clear indications of the binder type—wax or oil—and check for lightfastness ratings if you are working on archival art. If the pencil is intended for children or classroom use, verify that it carries a recognized non-toxic certification seal.
If the store provides tester pencils and scrap paper, perform a quick swatch test. Bring a small piece of dark paper from home if possible, as store-provided scrap paper is often white and will not show the pencil’s true opacity. Draw a solid block of color to see how easily the pigment covers the dark surface. Observe whether the pencil leaves a smooth, opaque layer or if it appears scratchy and translucent. Try layering the white over a dark marker stroke to see if it smudges the ink or sits cleanly on top.
Next, inspect the physical construction of the pencil. Look at the end of the pencil to ensure the colored core is perfectly centered within the wood casing. An off-center core is a common manufacturing defect that leads to uneven sharpening and constant breakage, as one side of the wood support will always be thinner than the other. Check the wood casing for any visible cracks or splits along the length of the barrel.
Finally, consider your purchasing strategy. If you are testing a new brand or formulation, avoid buying a large, expensive set right away. Instead, look for stores that sell open-stock pencils, which allow you to buy a single white pencil to test at home on your preferred paper. This low-risk approach lets you verify the pencil’s performance under your specific working conditions before making a larger financial commitment.
Frequently Asked Questions (FAQ)
Can I use a regular white graphite pencil instead of a colored pencil?
White graphite does not actually exist; pencils marketed as such are typically made of white charcoal, pastel, or chalk. These mediums use a completely different binder than colored pencils, resulting in a dry, dusty texture that does not contain wax or oil. While white charcoal and pastels offer incredible opacity and can be easily smudged for soft gradients, they do not adhere permanently to the paper without a fixative spray. Colored pencils, with their wax or oil binders, adhere firmly to the paper fibers, allow for precise layering, and do not rub off or smear when touched, making them much better suited for journals and sketchbook pages.
Why does my white colored pencil look gray or transparent on dark paper?
A translucent or gray appearance usually indicates a low pigment concentration, a core that is too hard, or a lack of paper texture. Budget-grade pencils often contain more filler and less titanium dioxide pigment, which allows the dark background color to show through the thin wax layer. To fix this, try switching to a softer, artist-grade pencil with a higher pigment load. If you are already using a high-quality pencil, ensure your paper has enough tooth to grab the pigment, or try building up the opacity slowly with multiple light layers rather than pressing down hard on a single pass.
How do I keep white colored pencils from breaking inside the sharpener?
Soft-core white pencils are highly susceptible to internal breakage, especially if they have been dropped or exposed to extreme temperature changes. To minimize breakage, always use a sharpener with a fresh, sharp blade; dull blades drag against the wood and twist the core until it snaps. You can also try warming the pencil slightly in your hands before sharpening to soften the wax binder, making it less brittle. When sharpening, apply gentle, even pressure and avoid over-sharpening the pencil to an extremely fine needle point, as a blunt, slightly rounded tip is much more stable and less likely to crumble upon contact with the paper.

Community discussion
Share your experience or ask a question. Comments are reviewed before publication.