
Decorating a laptop with vinyl stickers is an excellent way to personalize your workspace, showcase your interests, and add a layer of light scratch protection to your device. However, choosing the wrong type of sticker can lead to peeling edges, faded designs, or a sticky, ruined laptop finish when you eventually try to remove them. To find stickers that look vibrant and stand up to daily wear, you must evaluate several physical properties, including the vinyl material type, the adhesive formulation, the protective laminate coating, and how these elements interact with your specific laptop surface. By understanding these technical details, you can curate a beautiful, long-lasting setup that preserves the integrity of your expensive hardware.
Core Material and Adhesive Qualities to Evaluate
When shopping for laptop stickers, the term “vinyl” can cover a wide range of material grades. The two primary types of vinyl you will encounter are calendered and cast vinyl. Calendered vinyl is thicker, typically ranging from 75 to 100 microns, making it relatively stiff and easy to handle during application. This thickness is ideal for flat laptop lids, as it resists stretching and tearing. Cast vinyl, on the other hand, is much thinner and highly flexible, conforming effortlessly to curved edges or recessed contours on more aerodynamic laptop designs. While cast vinyl is a premium material often used for vehicle wraps, high-quality calendered vinyl is usually more than sufficient for standard laptop decoration.
The surface finish of the sticker plays a significant role in both aesthetics and usability. Glossy finishes offer high contrast and vibrant, saturated colors, making complex illustrations pop. However, glossy surfaces are highly reflective and can catch glare from overhead office lights or tropical sunlight, and they tend to show fingerprint smudges easily. Matte finishes provide a modern, satin look that diffuses light and resists smudging, making them highly practical for a device that is handled constantly. Holographic, metallic, or glitter finishes introduce a dynamic, light-catching element to your laptop, but they require careful manufacturing to ensure the metallic foil layers do not separate or oxidize over time.
Products mentioned in this guide


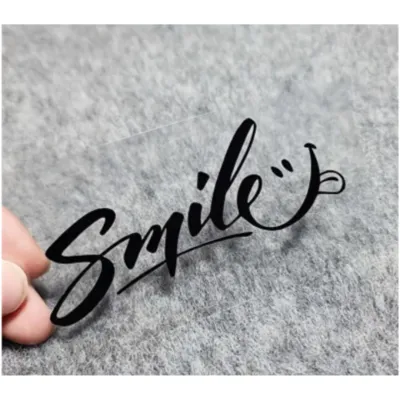
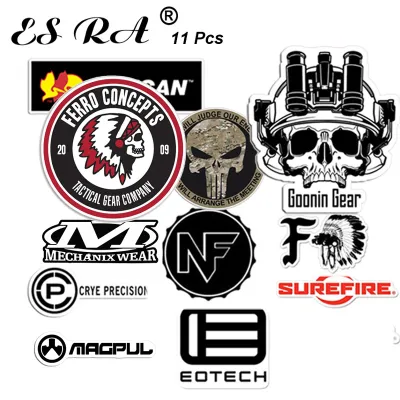
Prices are valid at publication and may change. Please refer to the product page for the latest price.
Regardless of the finish, a high-quality vinyl sticker must feature a protective laminate layer. This clear top coat is applied over the printed ink to shield it from physical friction, moisture, and ultraviolet (UV) light. Without a laminate, the printed design will quickly scratch off from being slid into a backpack, and the colors will fade under exposure to sunlight. When evaluating stickers, always check if the seller specifies whether the product is laminated or UV-protected, as unlaminated paper or basic vinyl stickers will degrade rapidly under daily use.
The adhesive backing is perhaps the most critical factor for device safety. You should look for stickers that utilize a low-tack, removable acrylic adhesive. This type of adhesive is designed to form a secure bond with smooth surfaces while remaining easy to peel off without leaving a sticky residue behind. Avoid stickers with permanent adhesives, which are intended for outdoor signage or industrial labeling. Over time, the heat generated by your laptop’s processor and battery can bake permanent adhesives onto the lid, causing a chemical bond that is incredibly difficult to break without using harsh solvents that could melt plastic or discolor anodized aluminum.
Matching Sticker Formats to Laptop Surfaces
Stickers are available in several formats, each suited to different design layouts and coverage preferences. Die-cut stickers are cut through both the vinyl and the backing paper to the exact shape of the design, providing a clean, individual piece that is perfect for standalone placement. Kiss-cut stickers are cut only through the vinyl layer, leaving the rectangular backing paper intact. This format is highly beneficial for delicate designs with intricate borders, as the backing paper protects the fragile edges from bending or lifting before application. Sticker sheets contain multiple smaller designs on a single page, allowing you to create a cohesive, themed collage with smaller accent pieces without buying dozens of individual decals.

The material of your laptop lid heavily influences how well a sticker will adhere. Anodized aluminum surfaces, common on premium ultrabooks, offer an incredibly smooth, high-energy surface that bonds beautifully with vinyl adhesives. However, aluminum also conducts heat efficiently, which can warm the adhesive and make it more pliable over time. Smooth, non-porous polycarbonate or ABS plastic lids also provide excellent adhesion. In contrast, laptops with heavily textured, matte, or rubberized finishes present a significant challenge. These textured surfaces contain microscopic peaks and valleys, which drastically reduce the actual contact area for the sticker’s adhesive, often causing the edges of thicker stickers to lift or peel within a few weeks.
Environmental factors and your daily routine also dictate the best sticker choices. In tropical climates characterized by high humidity and ambient warmth, low-quality adhesives can soften, causing the stickers to slide or leave sticky borders. Furthermore, if you frequently slide your laptop in and out of a tight, padded sleeve or backpack, the constant friction will test the limits of the sticker’s edges. To minimize this wear, choose stickers with rounded outer shapes rather than sharp, pointed corners, as rounded edges are far less likely to catch on fabric and peel back during transit.
Design, Sizing, and Placement Strategy
Before purchasing any vinyl decals, it is essential to measure your laptop lid to plan your layout accurately. Do not rely solely on the advertised screen size of your laptop, as bezel widths and chassis designs vary significantly between manufacturers. Use a physical ruler to measure the exact width and height of the flat portion of the lid. If your laptop has a prominent brand logo in the center, decide whether you want to cover it completely, frame it with your stickers, or integrate it into your overall design.
Planning a cohesive aesthetic prevents your laptop from looking cluttered or disorganized. If you prefer a collage style, try laying out your stickers on top of the closed laptop lid before peeling off any backing paper. This physical mockup allows you to experiment with overlapping layers, balance different color palettes, and ensure that your favorite designs are placed prominently. You can create a unified look by sticking to a specific color scheme, such as monochrome, pastels, or vibrant neon, or by grouping stickers by a common theme like retro tech, nature, or hand-drawn illustrations.
While decorating, you must identify and respect your laptop’s hardware safe zones. Never place stickers over ventilation grilles, exhaust ports, or speaker meshes, as blocking these openings can restrict airflow, trap heat, and cause your system to throttle or overheat. Keep decals clear of the display hinges, the front lip where you grip the lid to open it, and any external ports, status indicator lights, or built-in cameras. Leaving a small margin of clear space around the edges of the lid also prevents the stickers from rubbing against surfaces when the laptop is carried or placed in a bag.
Verifying Quality and Seller Reliability Online
When shopping on online marketplaces or e-commerce platforms, distinguishing high-quality vinyl stickers from cheap paper alternatives requires careful inspection of the product listings. Reliable sellers will provide detailed material specifications, explicitly stating if they use polymeric calendered vinyl, waterproof inks, and protective laminates. Be skeptical of listings that use vague terms like “waterproof sticker” without explaining whether the water resistance comes from the vinyl material itself or a temporary surface coating. Look for mentions of professional printing methods, such as eco-solvent or UV-curable inks, which offer superior fade resistance compared to standard desktop inkjet prints.
Customer reviews and user-submitted photos are invaluable resources for verifying a seller’s claims. Analyze these photos closely to check the print resolution; look for sharp lines and smooth color gradients rather than pixelated edges or visible printing bands. Pay close attention to reviews from users who have uploaded photos after several months of use, as these will reveal whether the stickers suffer from premature edge peeling, color fading, or adhesive failure under real-world conditions.
Budgeting for your sticker collection involves comparing the cost-per-sticker across different formats. On local e-commerce platforms, individual die-cut vinyl stickers typically range from ₱20 to ₱80 each, depending on the size, finish, and custom nature of the design. If you plan to cover your entire laptop lid, purchasing curated sticker packs or sticker sheets is often much more economical, with prices ranging from ₱100 to ₱300 for a set of 10 to 50 stickers, bringing the cost-per-sticker down significantly. However, ensure that these packs are made of genuine vinyl rather than coated paper, as paper stickers will quickly disintegrate when exposed to hand oils or light moisture.
Finally, review the store’s shipping and packaging policies before placing an order. Because thin vinyl stickers are highly susceptible to bending, creasing, or folding during transit, reputable sellers will package their products with rigid cardboard inserts or bubble mailers to ensure they arrive flat and undamaged. If you are ordering custom-printed designs, verify the seller’s image resolution guidelines—usually requiring at least 300 DPI (dots per inch) in a high-quality format—to guarantee that your custom graphics print clearly without blurriness.
Safe Application and Removal Practices
Proper application is key to ensuring your vinyl stickers look professional and adhere securely for years. Start by turning off your laptop, unplugging it from any power source, and closing the lid. Clean the surface thoroughly using a lint-free microfiber cloth lightly dampened with isopropyl alcohol (70% concentration is generally safe for most metal and plastic chassis, but always check your laptop manufacturer’s manual first to confirm compatibility). Avoid using household glass cleaners or dish soaps, as these can leave a thin chemical residue that prevents the adhesive from bonding correctly. Allow the surface to dry completely before proceeding.
To apply the sticker without trapping air bubbles, use the hinge method for larger decals. Peel back a small strip of the backing paper along one edge of the sticker, align it precisely on your laptop lid, and press the exposed adhesive down. Using a plastic card wrapped in a soft microfiber cloth, slowly sweep across the sticker from the adhered edge outward, gradually peeling away the remaining backing paper as you press the vinyl down. This sweeping motion pushes air out ahead of the adhesive, preventing bubbles. If a small bubble does form, you can gently push it toward the nearest edge using the card, or carefully prick the center of the bubble with a fine sewing needle to release the trapped air before smoothing it flat.
When you decide to update your laptop’s look or prepare the device for resale, removing the stickers safely requires patience. Never use sharp metal blades, scrapers, or abrasive pads, as these will permanently scratch aluminum or gouge plastic lids. Instead, use a hair dryer on its lowest heat setting to apply gentle warmth to the sticker for 10 to 15 seconds. This heat softens the acrylic adhesive, making the vinyl pliable. Slowly peel the sticker back from one corner, keeping the vinyl folded back at a sharp, 180-degree angle close to the surface rather than pulling straight up, which minimizes stress on the laptop lid. If any sticky residue remains, apply a tiny drop of isopropyl alcohol or a mild, citrus-based adhesive remover to a microfiber cloth and gently rub the area until clean, wiping away any excess liquid immediately.
Frequently Asked Questions (FAQ)
Will vinyl stickers damage my laptop's finish?
High-quality vinyl stickers formulated with removable acrylic adhesives generally do not damage anodized aluminum or high-quality plastic laptop finishes. However, over a long period, the areas of the laptop lid covered by stickers are shielded from ambient light, dust, and natural oxidation, while the exposed areas are not. When you eventually remove the stickers, you may notice a slight shadow or color difference between the covered and uncovered areas, particularly on silver aluminum or colored plastic chassis. Additionally, if your laptop has a delicate painted or soft-touch rubberized coating, aggressive adhesives can sometimes lift or peel these coatings during removal. To mitigate this risk, always check your device manual for surface care instructions, and consider testing a tiny, inconspicuous area of the laptop with a small piece of low-tack tape before applying stickers across the entire lid.
Can I put stickers on the inside of my laptop or near the keyboard?
While you can technically apply thin vinyl stickers to the palm rest area of your laptop, you must exercise extreme caution. Avoid placing any stickers on or directly adjacent to the trackpad, as the vinyl layer can interfere with the capacitive touch sensitivity and multi-finger gesture controls. Any stickers placed on the palm rest must be exceptionally thin to ensure they do not prevent the laptop lid from closing completely; even a slightly raised sticker can press against the delicate glass screen when the laptop is closed, potentially causing pressure marks or cracks. Furthermore, never place stickers over the keyboard keys, ventilation grilles, or speaker ports on the keyboard deck, as this can restrict essential airflow, trap heat, and lead to hardware performance issues.
Community discussion
Share your experience or ask a question. Comments are reviewed before publication.