
Starting your first memory-keeping project is an exciting milestone, but stepping into a craft store can quickly become overwhelming. With endless aisles of patterned papers, delicate stickers, and specialized tools, it is easy to overspend on items that do not work well together. Choosing a curated scrap book materials set is the most practical way to bypass this confusion, offering a balanced, pre-coordinated selection of supplies designed to work in perfect harmony.
To select the right starter set, you need to look beyond aesthetic appeal and evaluate the structural quality, material safety, and utility of the components included. A great beginner kit provides the essential foundation—thick base papers, reliable adhesives, and cohesive embellishments—without burying you under complex tools you do not yet know how to use. By prioritizing archival-safe materials and matching the kit’s physical specifications to your specific project goals, you can preserve your cherished photos safely for decades to come.
Why a Curated Scrap Book Materials Set is the Best Starting Point
For absolute beginners, buying a pre-assembled scrap book materials set is far more practical than purchasing individual items. One of the biggest hurdles in scrapbooking is color coordination and design matching. Curated kits are designed by professional graphic artists who select complementary color palettes, patterns, and themes, ensuring that every sticker, paper sheet, and die-cut looks cohesive when placed on the same page. This eliminates the guesswork and design anxiety that often stalls beginners before they even paste their first photo.
Products mentioned in this guide
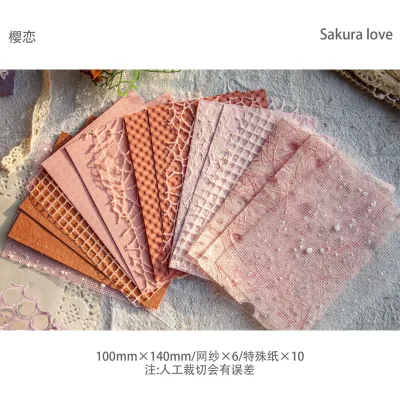
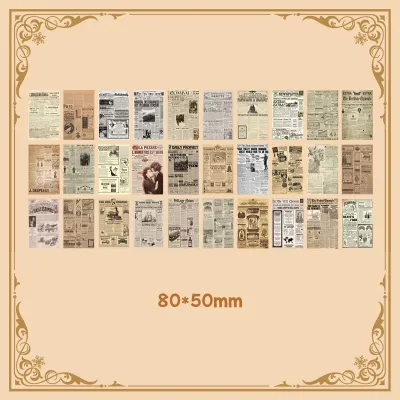
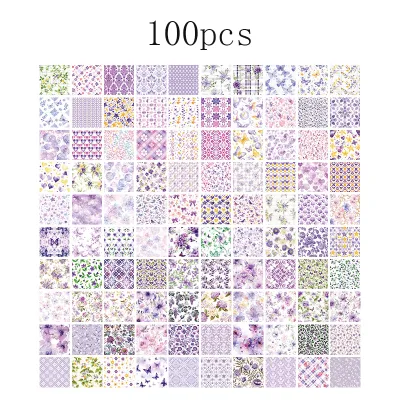
![ENWEI 52 Pcs [English Alphabet Series] Vintage Journal Stickers Washi Paper Sticker Paper Scrapbooking Material Scrapbook Kit](https://img.lazcdn.com/g/p/be17faf11df226b0a05f9927bff90e50.jpg_400x400q80.jpg_.webp)
![ENWEI 10 Pcs [Romantic Encounter Series] Aesthetics Journal Material Paper Cassia Paper Deco Paper Scrapbooking Sticker Scrapbook Kit](https://img.lazcdn.com/g/p/433af111ac15839341c080dfdb122798.jpg_400x400q80.jpg_.webp)
![ENWEI 100 Pcs [Beautiful Stop Motion Series] Vintage Journal Material Paper Writable Deco Paper Scrapbooking Sticker Scrapbook Kit](https://img.lazcdn.com/g/p/41e0d706b7ebd93329a726ab51d46aa0.jpg_400x400q80.jpg_.webp)
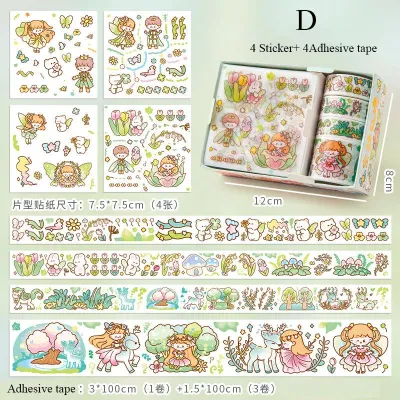
Prices are valid at publication and may change. Please refer to the product page for the latest price.
Financially, starter kits offer exceptional value. Purchasing full-sized retail packages of cardstock, multiple rolls of washi tape, and individual sticker sheets can easily cost several thousand Philippine pesos. In contrast, a starter set typically ranges from ₱400 to ₱1,500, offering a diverse, scaled-down assortment of these exact same items. This allows you to experiment with various materials and textures without committing to large, expensive bulk quantities of a single design.
It is also important to set realistic expectations for what a beginner kit can achieve. These sets are designed to teach you the fundamentals of layering, layout design, and basic memory keeping. They do not typically include high-end, specialized tools like heavy-duty die-cutting machines, heat embossing guns, or professional eyelet setters. Instead of viewing this as a limitation, look at it as a focused environment that allows you to master the core techniques of pasting, cutting, and arranging before investing in advanced gear.
Essential Components Your First Kit Must Include
A functional starter kit should contain everything you need to complete a project from start to finish. When browsing product descriptions on online marketplaces or in local craft shops, ensure the kit contains a balanced mix of structural bases, fastening tools, and decorative elements.

Albums, Base Paper, and Cardstock
The structural foundation of any scrapbook is its paper. A high-quality starter set should include either a bound album or a generous selection of loose base pages that serve as your canvas. Alongside the main pages, look for patterned paper packs and solid cardstock sheets, which are vital for creating borders, frames, and background layers behind your photographs.
When evaluating these paper elements, always check the Grams per Square Meter (GSM) rating indicated on the packaging. Standard copy paper is usually around 70 to 80 GSM, which is far too thin for scrapbooking; it will buckle, warp, and tear under the weight of wet glues and heavy photos. For base pages, look for a minimum weight of 160 to 200 GSM, while decorative layering papers should ideally be at least 120 GSM. Thicker cardstock provides the structural integrity needed to support multiple layers of embellishments without sagging.
Adhesives and Basic Cutting Tools
Assembling your layouts cleanly requires reliable, easy-to-use fastening and cutting tools. Beginner-friendly kits often include double-sided tape runners, glue dots, or photo corners. Tape runners are highly recommended for beginners because they apply a dry, thin strip of adhesive instantly, eliminating the messy wrinkling associated with standard liquid school glues. Photo corners are another excellent inclusion, as they hold the photo in place by its corners without applying permanent adhesive directly to the picture itself.
For shaping your elements, a basic kit should provide clean cutting tools such as detail scissors, a small paper trimmer, or a craft knife. Because these tools involve sharp blades and chemical adhesives, safety must be your top priority. Always check the manufacturer’s instructions for any included cutting tools, keep blades capped or locked when not in use, and work in a well-ventilated area if your kit includes strong liquid adhesives. Ensure that any adhesive provided in the set is explicitly labeled as photo-safe and acid-free to prevent chemical damage to your prints.
Embellishments and Journaling Elements
The decorative elements are what give your scrapbook its unique personality. A well-rounded starter set will include a variety of flat and dimensional embellishments, such as adhesive sticker sheets, die-cut cardstock shapes, washi tape rolls, and small metal brads. These elements allow you to build depth and visual interest around your photos.
Equally important are journaling cards, tags, or lined labels. Scrapbooking is not just about displaying photos; it is about telling the stories behind them. Journaling elements provide dedicated, neat spaces to write dates, names, locations, and personal reflections. Before purchasing, review the product images to ensure the embellishments match the set’s overall theme and that the color palette is versatile enough to complement your actual photo collection.
Quality Markers: How to Spot Archival-Safe Materials
The primary purpose of a scrapbook is to preserve memories for future generations, which makes the chemical composition of your materials incredibly important. Standard paper and adhesives contain natural acids and organic compounds that degrade over time. When these substances come into contact with physical photographs, they cause irreversible damage, leading to fading, yellowing, and brittle, crumbling paper.
To protect your photos, look for sets that explicitly carry “acid-free” and “lignin-free” labels. Lignin is a natural wood polymer that gives paper its strength but turns yellow and acidic when exposed to light and air. True archival-safe and photo-safe materials have undergone rigorous testing to ensure they will not react chemically with photographic emulsions. If a kit does not clearly state these certifications on its packaging or product description, it is best to pass it by.
You can also perform several visual and tactile quality checks upon unboxing your kit:
- Dye Lot Consistency: Inspect the solid cardstock sheets under bright, natural light. High-quality paper has consistent coloring across the entire sheet and throughout the pack, without streaks, faded patches, or uneven saturation.
- Clean Edges: Examine the edges of the paper and die-cuts. They should be cleanly cut without paper dust, fraying, or fuzzy fibers, which indicate dull manufacturing blades and lower-grade paper pulp.
- Rust Resistance: If the kit includes metal embellishments like brads, eyelets, or paperclips, verify that they are made of rust-resistant alloys or treated with a protective coating. In humid climates, cheap iron-based metals will quickly rust, staining your pages with orange spots.
- Tool Quality: Ensure that metal scissors or craft knives are sharp and move smoothly without catching or wobbling.
Avoid the temptation to supplement your kit with standard household or office supplies. Regular clear sticky tape, yellow masking tape, standard school glue sticks, and typical office markers are highly acidic and will ruin your hard work within a few years. Stick strictly to specialized, archival-safe crafting supplies.
Matching Size, Binding, and Theme to Your Project
Before committing to a specific scrapbook materials set, you must align its physical dimensions, binding style, and aesthetic theme with your practical crafting goals and the physical space you have available.
First, consider the physical size of the scrapbook. The three most common standards are:
- 12×12 Inches: This is the traditional industry standard. It provides a massive canvas that easily accommodates multiple 4×6-inch photos, extensive journaling, and heavy embellishments on a single page. However, it requires a dedicated storage space and can feel intimidatingly large for a complete beginner to fill.
- 8×8 Inches: This size offers a perfect middle ground. It comfortably fits one or two photos per page alongside small decorative accents, making layouts much quicker to design and perfect for focused, single-event albums.
- A5 or 6×8 Inches: These compact sizes are highly portable and popular for journal-style scrapbooking, travel logs, and daily memory keeping. They are incredibly beginner-friendly because they require less paper coverage to look complete.
Next, evaluate the album’s binding mechanism, which dictates how you will interact with and expand your book:
- Post-Bound: These albums use metal posts screwed through eyelets to hold pages together. They allow pages to lay completely flat when open, creating seamless two-page spreads. However, adding or rearranging pages requires unscrewing the posts, which can be tedious.
- Strap-Bound: Utilizing a flexible plastic strap threaded through page protectors, these albums are highly expandable but can sometimes be difficult to find refills for.
- Ring-Bound or Disc-Bound: These systems use openable metal rings or plastic discs. They make it incredibly easy to pop pages in and out, rearrange your layout order, and add thick, dimensional elements. The trade-off is that pages do not lay perfectly flush against each other in the center.
Finally, select a theme that matches your photo collection. If you have a stack of vacation photos, a travel-themed kit with vintage maps and globe stickers is ideal. If you are documenting daily life, look for versatile, everyday neutral themes with soft pastel or earth-toned color palettes. Ensure the colors do not clash with the dominant colors in your photographs.
Common Purchasing Mistakes Beginners Make
One of the most frequent mistakes beginners make is falling into the “more is better” trap. Purchasing massive, cheap bulk boxes filled with thousands of random, unthemed stickers and paper scraps often leads to immediate decision fatigue. When faced with too many mismatched choices, many beginners feel overwhelmed and abandon the project entirely. It is always better to purchase a smaller, highly focused, and professionally coordinated set.
Another common error is ignoring paper compatibility. If your kit contains heavy, dimensional embellishments like thick wooden shapes, heavy metal charms, or large resin flowers, but only provides thin, low-GSM background paper, your pages will sag and tear. Always verify that the structural base paper is heavy enough to support the weight of the decorative items included in the same box.
Lastly, avoid buying kits that feature overly complex or advanced tools before you have mastered the basics. Electronic die-cutting machines, complex stamping platforms, and intricate hot-foil systems require steep learning curves and significant financial investments. Start simple: master the art of hand-cutting, layering, and clean adhesive application first. You can always upgrade your toolkit as your confidence and skills grow.
How to Inspect and Test Your Supplies Before Crafting
Once your scrapbook materials set arrives, take a few minutes to inspect and test the components before starting on your actual photos. This step is especially critical in tropical climates like the Philippines, where high humidity and ambient moisture can affect paper and adhesives even before the box is opened.
Begin by checking the paper sheets and sticker sheets for any signs of humidity damage. Look for curling edges, warping, or stickers that have begun to lift from their backing sheets. If the paper feels slightly damp or limp, let it acclimate in an air-conditioned room or a sealed container with silica gel packets for 24 hours to restore its crisp texture.
Next, conduct a simple trial on a piece of scrap paper to verify the performance of your adhesives and writing tools. Note that smoothness, bleed resistance, drying speed, and water resistance depend entirely on the exact material combination of your paper and ink. Write a few words with your journaling pens on a scrap piece of the kit’s cardstock to observe how quickly the ink dries and whether it bleeds through to the other side. Test your tape runner or liquid glue on a small scrap to check its adhesion strength and ensure it does not cause the paper to wrinkle or warp. Finally, carefully test the sharpness of your scissors or craft knife on a scrap edge to ensure they deliver clean, effortless cuts without tearing the fibers.
Frequently Asked Questions (FAQ)
Is it better to buy a complete set or individual scrapbook supplies?
For absolute beginners, a complete scrapbook materials set is highly recommended. It provides a cost-effective, stress-free introduction to the craft, ensuring all your papers, stickers, and colors match perfectly without a massive upfront financial investment. As you gain experience, understand your personal style, and empty your initial supplies, you can transition to purchasing individual items. This allows you to customize your projects, invest in specialized tools, and replenish frequently used consumables like photo-safe tape runners and heavy cardstock.
How do I store my scrapbook materials in a humid climate?
In tropical environments, humidity is the greatest enemy of paper crafts, causing paper to warp, adhesives to degrade, and mold to grow. To preserve your supplies, store all paper sheets, sticker books, and completed albums in airtight plastic storage bins. Place several rechargeable silica gel packets inside the bins to actively absorb excess moisture. Keep these storage containers in a cool, dry room away from direct sunlight, concrete walls (which can transfer moisture), and floor vents to prevent fading, warping, and mildew.
Community discussion
Share your experience or ask a question. Comments are reviewed before publication.