
When selecting your first scrapbook materials set, the goal is to find a balanced collection that provides foundational tools without overwhelming you with low-quality filler items. For beginners, the most critical evaluation markers involve the versatility of the washi tape, the usability of the sticker assortment, and the archival safety of the paper components. A well-curated kit acts as a structured entry point, allowing you to experiment with different textures, layouts, and themes without a massive upfront investment. By focusing on material compatibility and quality indicators, you can avoid common pitfalls and choose a starter set that keeps your creative projects looking beautiful for years to come.
In tropical climates like the Philippines, high humidity and heat can significantly affect how paper and adhesives behave over time. Cheap glues may lose their stickiness or become greasy, while low-grade papers can warp simply from absorbing moisture from the air. Therefore, understanding what goes into a high-quality starter kit is not just about aesthetics; it is about ensuring your hard work does not degrade. Prioritizing sets with reliable, climate-resilient materials will make your entry into scrapbooking smooth, enjoyable, and highly rewarding.
Core Components to Look for in a Starter Set
A comprehensive scrapbook materials set should provide the essential building blocks of paper crafting so you do not have to make immediate secondary purchases. The foundation of any layout is the paper itself. A good starter set should include a variety of base papers and cardstocks in standard sizes, such as A5, A6, or square 6×6 inch formats. These sizes are highly manageable for beginners and fit easily on standard journal pages. Pay attention to the paper weight, which is measured in grams per square meter (gsm). Lightweight papers ranging from 80 gsm to 120 gsm are ideal for layering, collaging, and folding because they do not add excessive bulk to your pages. Conversely, heavier cardstocks ranging from 160 gsm to 250 gsm serve as sturdy background bases that can support multiple layers of wet glue, heavy stickers, or light watercolor washes without warping or buckling.
Products mentioned in this guide
![ENWEI 52 Pcs [English Alphabet Series] Vintage Journal Stickers Washi Paper Sticker Paper Scrapbooking Material Scrapbook Kit](https://img.lazcdn.com/g/p/be17faf11df226b0a05f9927bff90e50.jpg_400x400q80.jpg_.webp)
![ENWEI 16 Pcs [Hollow Mesh Series] Lovely Journal Material Paper Multiple Materials Deco Paper Scrapbooking Sticker Scrapbook Kit](https://img.lazcdn.com/g/p/9cafe27bc4d45a35808befcff5b311db.jpg_400x400q80.jpg_.webp)
![ENWEI 100 Pcs [Beautiful Stop Motion Series] Vintage Journal Material Paper Writable Deco Paper Scrapbooking Sticker Scrapbook Kit](https://img.lazcdn.com/g/p/f07b75d862d649fad9da4e7c51f8465c.jpg_400x400q80.jpg_.webp)
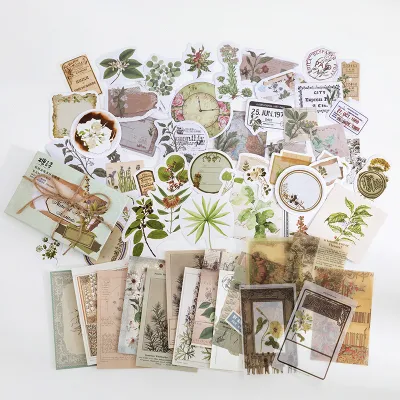

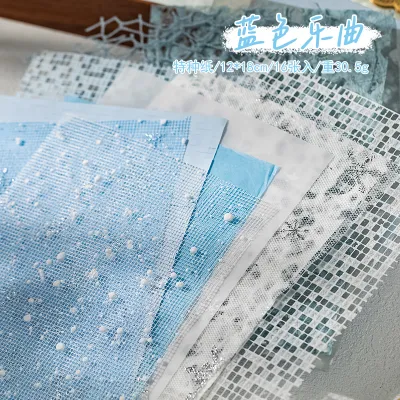
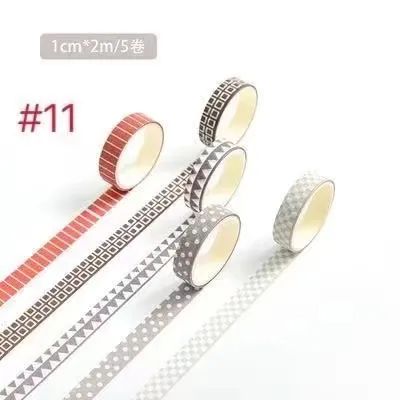
Prices are valid at publication and may change. Please refer to the product page for the latest price.
Adhesives are the literal glue that holds your projects together, and using the wrong type can quickly ruin your layouts. Look for sets that include specialized paper-craft adhesives rather than standard liquid school glues. Liquid glues have a high water content that causes paper fibers to expand, resulting in unsightly wrinkles and bubbles. Instead, seek out kits that feature tape runners or double-sided adhesive rollers. These tools apply a clean, dry strip of adhesive that bonds instantly without warping the paper. Glue dots are another excellent inclusion, providing a strong, localized bond that is perfect for securing small, dimensional embellishments like buttons, ribbons, or thick cardstock die-cuts without any messy cleanup.
Finally, basic cutting and measuring tools are indispensable for achieving clean, professional-looking layouts. A quality starter set should include a pair of fine-tip craft scissors, which are essential for detailed fussy-cutting of intricate sticker designs and paper elements. If the kit is intended for younger crafters, ensure these scissors feature rounded safety tips while remaining sharp enough to cut paper cleanly without tearing. A clear acrylic ruler, preferably with both centimeter and inch markings, is another crucial tool. The transparency allows you to align elements precisely on your page, while the straight edge can be used to tear paper cleanly, creating a stylish, rustic deckled edge that adds texture to your designs.
How to Evaluate Washi Tape Variety and Quality
Washi tape, a decorative adhesive tape made from traditional Japanese paper fibers, is a cornerstone of modern scrapbooking. When evaluating a scrapbook materials set, look for a collection that offers a diverse range of tape widths and lengths to maximize your design options. Fine tapes, measuring between 3mm and 5mm in width, are incredibly useful for creating delicate borders, dividing pages into sections, or framing small photos. Standard 15mm tapes are the most versatile option for general decoration, while wide tapes, measuring 30mm to 50mm, can be used to create bold background blocks, torn for textured layers, or cut up so that individual illustrated elements can be used as standalone stickers.

The quality of the adhesive on the washi tape is just as important as its visual appeal. High-quality washi tape must strike a delicate balance: it should adhere smoothly to paper without lifting at the corners, yet remain repositionable so you can peel it off and adjust its placement without tearing the delicate base paper underneath. To verify this quality, you can perform a simple trial on a scrap piece of paper. Press a strip of tape down firmly, leave it for a few minutes, and then peel it back slowly. It should release cleanly without leaving a sticky residue or pulling up the paper fibers. In warm, humid environments, inferior adhesives can become overly gummy or slide off the roll entirely, so look for tapes that feel dry to the touch but hold firmly when pressed onto a page.
Pattern diversity is another key factor that separates a premium starter set from a mediocre one. Avoid kits that offer multiple rolls of the exact same pattern in slightly different colorways, as this severely limits your creative freedom. Instead, look for a set that provides a thoughtful mix of design styles. A well-balanced selection includes solid pastel or neutral colors for grounding your layouts, subtle geometric patterns like grids or dots that add structure without distracting from your photos, and a few highly detailed thematic prints, such as botanical illustrations, vintage scripts, or celestial motifs. This variety ensures that you can adapt the tapes to different page themes and moods as your crafting style evolves.
What Makes a Good Sticker Assortment for Beginners
Stickers add instant personality and focal points to your scrapbook pages, but not all stickers are created equal. A good starter set should introduce you to different material types, each suited for specific layout functions. Paper stickers have a classic matte finish and a low profile, allowing them to blend seamlessly into the background of your page. Because they are made of paper, you can easily write on them with standard gel pens or markers, making them excellent for labeling and journaling. Vinyl stickers are thicker, highly durable, and water-resistant, making them ideal for decorating the outer covers of your scrapbooks or journals. Clear polyethylene terephthalate (PET) stickers feature a transparent backing that makes the printed design look as though it was painted directly onto your page, which is incredibly effective when layering designs over patterned background papers.
Theme cohesion is another critical element to look for in a sticker assortment. Cheap, low-quality sets often bundle a random, mismatched assortment of stickers—such as a cartoon animal next to a vintage Victorian teacup—which makes it incredibly difficult for a beginner to design a visually harmonious page. A high-quality scrapbook materials set will feature stickers that adhere to a unified visual style or color palette. Common cohesive themes include vintage ephemera, botanical gardens, cozy daily life, or minimalist travel. Working with a cohesive theme helps you learn the basics of visual storytelling and page composition without the frustration of trying to force mismatched elements together.
Additionally, consider the ease of peeling and cutting the stickers, as this directly impacts your crafting experience. Stickers generally come in three formats: die-cut, kiss-cut, and perforated sheets. Die-cut stickers are individually cut to the exact shape of the design; while they are fun to sort through, they can sometimes be frustrating to peel if the backing paper does not feature a split seam. Kiss-cut sheets feature designs that are pre-cut on a larger adhesive sheet, allowing you to peel them off effortlessly while keeping the backing intact. Perforated sheets offer a convenient middle ground, allowing you to tear off individual sections to work with. For beginners, a mix of kiss-cut sheets and split-back die-cuts offers the most user-friendly experience.
Quality Markers and Red Flags to Check Before Buying
Before purchasing a scrapbook materials set, it is essential to look for specific quality markers that guarantee the longevity of your creations. The most critical technical specifications to check are the “acid-free” and “lignin-free” labels on all paper and adhesive components. Acid and lignin—a natural organic polymer found in wood pulp—are the primary culprits behind the yellowing and deterioration of paper over time. More importantly, if these chemicals come into contact with printed photographs, they can cause the images to fade, discolor, or develop permanent brown spots. To protect your memories, always verify that the kit explicitly states its materials are archival-safe and acid-free.
Another common pitfall to avoid is the “misleading piece count” trap. Many online listings advertise massive numbers, such as “600-piece scrapbook sets,” to make the product seem like an incredible bargain. However, a closer reading of the detailed contents often reveals that 500 of those pieces are tiny, identical paper dots, microscopic sticker flakes, or repetitive paper scraps that are practically unusable. To assess the true value of a kit, ignore the total piece count and look at the breakdown of substantial items. A high-quality set will clearly list the number of full-sized sticker sheets, individual rolls of washi tape, background papers, and functional tools included in the box.
Finally, evaluate the physical packaging of the set. Scrapbook materials are delicate and can easily become bent, creased, or ruined by dust and moisture if left unprotected. A premium starter set should come housed in a sturdy, reusable storage box, a durable zippered pouch, or a multi-compartment organizer. This not only keeps your materials pristine during transit but also provides a convenient storage solution for your leftover supplies as you work on your projects. Reusable packaging saves you from having to purchase separate storage containers immediately, adding significant value to your initial investment.
How to Build a Shortlist Based on Your Crafting Style
To find the perfect scrapbook materials set, you must first define your primary crafting focus, as different styles require different tools. If your goal is heavy journaling and writing, prioritize sets that emphasize functional elements, such as lined or grid papers, neutral-toned washi tapes, and functional stickers like date trackers, memo blocks, and speech bubbles. If you prefer photo-centric layouts, look for kits that include sturdy cardstock bases, photo corners to secure your pictures safely, and minimalist decorative elements that enhance rather than distract from your photographs. For those drawn to highly decorative, collage-style scrapbooking, look for sets packed with textured papers, lace elements, and a wide variety of thematic stickers and washi tapes.
Once you have identified your style, evaluate the financial value of the sets on your shortlist by comparing the bundle price against standalone purchases. In the local market, a comprehensive beginner scrapbook materials set typically ranges from ₱300 to ₱1,200, depending on the volume and quality of the materials. To determine if a set is worth the price, calculate the cost of buying similar items individually. For example, if purchasing three rolls of quality washi tape, a pack of sticker sheets, and a small decorative paper pad separately would exceed the price of the bundled kit, the set represents excellent value. However, this calculation only holds true if you plan to use at least two-thirds of the items included in the bundle; otherwise, buying select standalone pieces may be more cost-effective.
Lastly, always verify seller descriptions by thoroughly reading user reviews and looking at real-life photos posted by other crafters. Online product images are often highly stylized or digitally enhanced, which can misrepresent the actual colors and textures of the materials. Look for customer feedback regarding the actual thickness of the paper—does it feel like premium cardstock or cheap, thin printer paper? Check for comments on color accuracy, ensuring the prints are vibrant and sharp rather than blurry or washed out. Pay close attention to reviews mentioning how well the adhesives and tapes hold up in warm, humid conditions, as this is a reliable indicator of how well the materials will perform in your local environment.
Frequently Asked Questions (FAQ)
Do I need specialized tools to start scrapbooking with a basic set?
No, you do not need expensive, specialized equipment to begin your scrapbooking journey. While advanced crafters often use specialized paper trimmers, die-cutting machines, and embossing pens, a beginner can easily complete beautiful, professional-looking layouts using standard household items. A basic pair of household scissors and a standard plastic ruler are perfectly adequate for most projects. For clean, straight paper cuts, a simple utility knife paired with a thick piece of cardboard as a makeshift cutting mat works beautifully. You can also use the edge of a plastic ruler to tear paper, creating a stylish deckled edge without any cutting tools at all. As you develop your skills and identify your preferred style, you can gradually invest in specialized tools.
How can I store leftover washi tape and stickers to keep them usable?
Proper storage is essential for maintaining the adhesive quality and physical condition of your leftover scrapbooking materials, especially in tropical climates where high humidity and heat can cause adhesives to degrade and paper to warp. Keep your washi tapes and stickers in a cool, dry place away from direct sunlight, which can fade the printed designs over time. Avoid storing them in airtight plastic containers if they have already been exposed to humidity, as this can trap moisture and lead to mold growth. Instead, use breathable cardboard boxes or organizers, and place a few silica gel packets inside to absorb excess moisture. For easy organization, store sticker sheets in clear plastic sleeves inside a binder, and thread your washi tape rolls onto a simple binder ring or store them flat in shallow drawers so you can easily see your entire collection at a glance.

Community discussion
Share your experience or ask a question. Comments are reviewed before publication.