
Choosing your first water color set is the most critical decision you will make as a beginning artist. The right paints will respond predictably to water, blend smoothly without turning muddy, and help you master fundamental techniques like washes and glazing. Conversely, a poor-quality set can lead to immense frustration, making you believe the difficulty lies in your skill rather than your tools.
To make an informed choice, you must balance your budget with your painting environment, understand the physical formats of paint, and prioritize paper compatibility. By focusing on a few high-quality essentials rather than a massive box of cheap supplies, you will set yourself up for a rewarding and successful creative journey.
Student Grade vs. Professional: Setting Your Budget and Expectations
When browsing art supplies, you will quickly notice a vast price disparity between different boxes of paints. This divide separates student-grade products from professional- or artist-grade formulas. Understanding what goes into these tubes and pans will help you choose a set that matches your learning goals without overstretching your wallet.
Products mentioned in this guide
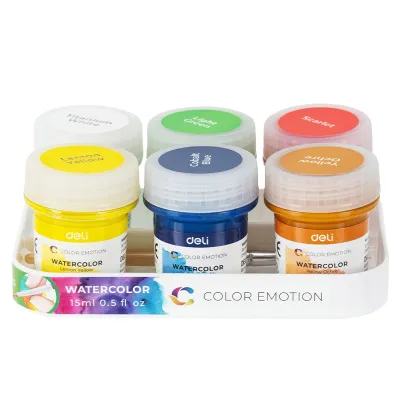
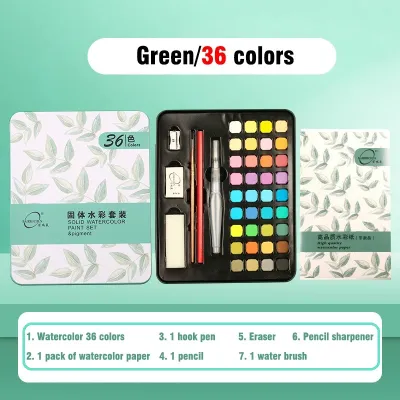
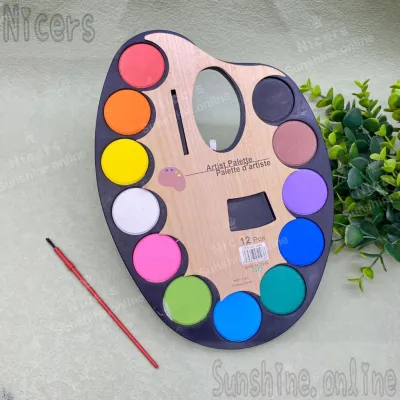
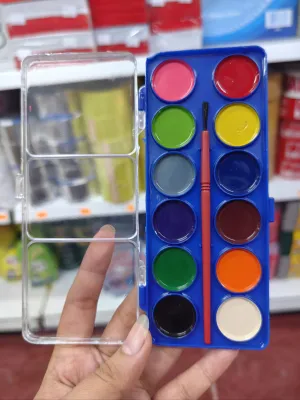
Prices are valid at publication and may change. Please refer to the product page for the latest price.
Student-grade watercolors are formulated specifically for beginners, hobbyists, and students who need to practice techniques without worrying about the cost of materials. To keep prices accessible, manufacturers use alternative pigments or synthetic substitutes (often labeled as “hues”) and mix them with a higher proportion of binders and fillers, such as dextrin or chalk. Because of these fillers, student paints are highly forgiving; they do not rush across wet paper as aggressively as professional paints, giving you more time to control your brushstrokes. They typically range from ₱300 to ₱1,500 for a starter set in the Philippines, making them an excellent, low-risk entry point.
Professional- or artist-grade watercolors, by contrast, prioritize pure pigment load and minimal fillers. They utilize high-quality gum arabic as a binder, resulting in exceptional vibrancy, superior transparency, and excellent lightfastness, which prevents the colors from fading over decades. Because of the high concentration of genuine minerals and rare pigments, these paints are significantly more expensive, with individual tubes often costing several hundred pesos each, and complete starter sets easily exceeding ₱3,000 to ₱6,000. For a beginner, the intense reactivity of professional paints can sometimes feel difficult to control, but the purity of the color mixing is unmatched.
A smart budget strategy for beginners is to avoid the temptation of buying massive, cheap sets containing dozens of low-quality colors. Instead, invest your budget in a high-quality student-grade set from a reputable manufacturer, or assemble a very limited palette of five to six professional-grade colors. This approach ensures you experience how real paint behaves under water without wasting money on chalky fillers that hinder your progress.
When evaluating any set, learn to read the manufacturer’s label rather than relying solely on marketing names like “peacock blue” or “sunset red.” Look for the standardized pigment codes printed on the packaging, which consist of letters and numbers (such as PB29 for Ultramarine Blue, PY43 for Yellow Ochre, or PR108 for Cadmium Red). If a paint tube lists multiple pigments for a single color, it is a convenient mix that is more likely to turn muddy when blended with other paints. A single-pigment paint, even in a student line, will always yield cleaner, more vibrant mixes.
Pan vs. Tube Watercolors: Choosing the Right Format for Your Workspace
Watercolor paints are primarily sold in two physical formats: solid dry cakes known as pans, and liquid pastes packaged in squeezable metal or plastic tubes. Neither format is objectively superior to the other; your choice should depend entirely on your physical workspace, how often you paint, and your preferred painting habits.

Pan Watercolors (Solid Cakes)
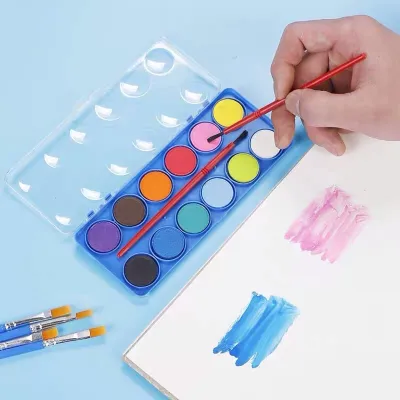
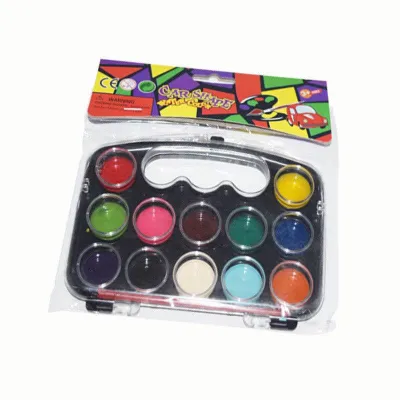
Pan watercolors are small, dry blocks of concentrated pigment housed in plastic cups (half-pans or full-pans) arranged inside a metal or plastic travel tin.
- Portability: Their compact size makes them incredibly easy to transport, fitting comfortably into a backpack or even a pocket.
- Workspace Footprint: They require very little desk space, making them ideal for small home setups, study desks, or painting outdoors.
- Minimal Waste: You only use what you activate with your wet brush, meaning there is virtually zero paint wasted at the end of a session.
- Reactivation: To use them, you simply drop a small amount of water onto the dry cake, wait a few moments for the binder to soften, and lift the liquefied paint with your brush.
Tube Watercolors (Liquid Paste)
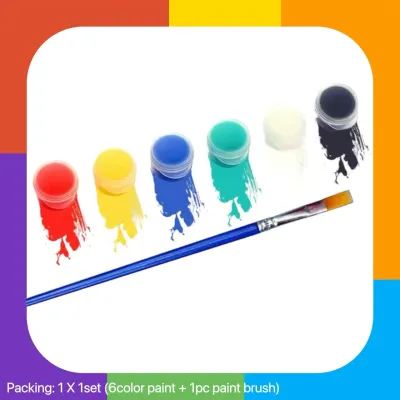
Tube watercolors contain moist, creamy paint that can be squeezed directly onto a mixing palette.
- Vibrancy and Wetness: Because the paint is already wet and highly concentrated, it is incredibly easy to pick up large, saturated amounts of color quickly.
- Large Washes: Tubes are the superior choice if you enjoy working on large sheets of paper or need to mix substantial pools of color for broad washes, such as skies or background landscapes.
- Palette Setup: Squeezing paint from tubes requires a dedicated, sealable mixing palette with deep wells.
- Storage Risks: If left unused for months in a dry environment, paint in the tubes can occasionally dry out and harden near the cap, making them difficult to open without damaging the metal casing.
For absolute beginners, pans are generally the more convenient and less intimidating option. They require no preparation, prevent you from accidentally squeezing out too much paint, and are incredibly easy to clean up. However, if you plan to paint large-scale works immediately, starting with a small selection of 5ml or 15ml tubes will save you from prematurely wearing down your brushes trying to scrub color out of a tiny pan.
Building Your Palette: Why Fewer Colors Are Better for Beginners
One of the most common mistakes beginners make is purchasing giant wooden boxes or plastic trays containing 48, 60, or even 72 different colors. While these massive sets look impressive, they are highly counterproductive for someone learning the craft.
A limited palette of 6 to 12 carefully selected colors is the gold standard for beginner education. Working with fewer colors forces you to learn color theory through practical mixing. You will quickly discover how to create warm greens, cool purples, and rich, natural shadows using only your primaries. This hands-on experience builds an intuitive understanding of color relationships that you can never develop if you simply reach for a pre-mixed convenience color every time.
When choosing a starter set, look for a balanced selection that includes both warm and cool versions of the three primary colors, along with a few foundational earth tones:
- Yellows: A cool yellow (like Lemon Yellow) and a warm yellow (like Gamboge or New Gamboge).
- Reds: A cool, pink-leaning red (like Quinacridone Magenta or Alizarin Crimson) and a warm, orange-leaning red (like Pyrrol Scarlet or Cadmium Red Light).
- Blues: A cool, green-leaning blue (like Phthalo Blue or Cerulean) and a warm, reddish blue (like Ultramarine Blue).
- Earth Tones: Burnt Sienna and Yellow Ochre are indispensable for mixing skin tones, landscapes, and neutralizing overly bright primary mixes.
Avoid cheap, oversized sets that promise dozens of colors for a suspiciously low price. These sets are almost always packed with cheap white fillers and low-grade dyes that look dull on paper, fade rapidly in daylight, and turn into a gray, muddy slurry the moment you try to mix them. Furthermore, check if the brand you are buying offers “open stock” replacements. This means you can buy individual pans or tubes of that specific color when you inevitably run out of your favorites, rather than being forced to purchase an entirely new multi-color set.
Beyond the Paint: Essential Accessories and Paper Compatibility
Even the most expensive, professional-grade paint will perform poorly if you use the wrong accessories. To ensure a smooth learning experience, you must budget for a few essential companion tools that complement your paint set.
First, prioritize your brushes. You do not need a massive collection; two high-quality synthetic round brushes—a size 6 for detailed work and a size 10 or 12 for larger washes—are more than enough to start. Synthetic fibers are highly durable, hold their shape well over time, and offer a springy snap that helps beginners control paint application. You will also need a mixing palette with deep, sloped wells to keep your color mixtures from running into each other, and two clean water jars (one for rinsing dirty paint off your brush, and one for clean water to wet your paper or dilute clean paint).
The most critical factor in watercolor painting, however, is your paper. Standard printer paper, sketchbooks, and cheap drawing paper are completely unsuited for wet media. They lack the structural integrity to handle water, causing the surface to buckle, warp, and pill (shedding tiny paper fibers) as soon as you apply a wash. Furthermore, non-watercolor paper lacks proper “sizing”—a chemical treatment that controls how fast the paper absorbs water—causing the paint to sink instantly into the fibers, leaving dull, flat, and unblendable marks.
For a successful start, always look for dedicated watercolor paper with a weight of at least 300gsm (grams per square meter) or 140lb. For the best blending and layering performance, 100% cotton cold-pressed paper is the industry standard, as it absorbs water evenly and allows you to lift paint easily. If cotton paper is outside your initial budget, high-quality wood cellulose (pulp) paper is an acceptable alternative for basic exercises, but be prepared for faster drying times and less forgiving blending characteristics.
Step-by-Step Guide to Buying and Testing Your First Water Color Set
When you are ready to make your purchase, following a structured workflow will prevent impulse buying and ensure you get the best value for your money.
Step 1: Determine format and budget. Assess your physical workspace and artistic goals. If you have a small desk or plan to paint on the go, choose a pan set. If you prefer large paintings and have a dedicated studio table, opt for tubes. Set a realistic budget, keeping in mind that you also need to reserve funds for 300gsm watercolor paper and a couple of decent synthetic brushes.
Step 2: Choose a reliable retailer. In the Philippines, purchase your art supplies from established specialty physical art shops or trusted online storefronts that specialize in creative materials. Avoid buying from generic, unverified sellers on massive online marketplaces, as counterfeit paints filled with toxic chemicals or expired, dried-out tubes are common issues in the discount market.
Step 3: Inspect the packaging. Before finalizing your choice, read the product specifications on the box or tube. Look for a clear lightfastness rating, which is typically marked using the ASTM scale (Category I is excellent, Category II is very good) or the Blue Wool scale (ratings of 6 to 8 are highly lightfast). Additionally, check for transparency symbols: an open square or circle indicates transparent paint, a diagonal line indicates semi-transparent, and a filled-in shape indicates opaque paint. Beginners should prioritize transparent paints, as they are much easier to layer.
Step 4: Perform a home swatch test. Once your set arrives, do not jump straight into a complex painting. Instead, create a swatch card on a scrap piece of your 300gsm watercolor paper. Paint a small rectangle of each color, transitioning from highly concentrated paint on one side to a very watery, diluted wash on the other. This simple trial allows you to observe several key behaviors:
- Reactivation Speed: Note how quickly dry pans soften when a wet brush touches them.
- Transparency: Draw a black waterproof ink line on your paper first, then paint over it to see if the pigment hides or reveals the line.
- Granulation: Watch if the pigment particles settle into the texture of the paper to create a textured, speckled look (common in colors like Ultramarine).
- Lifting: Wait for a swatch to dry completely, then scrub a damp brush over it and dab with a clean tissue to see how easily the paint lifts off the paper fibers.
Frequently Asked Questions (FAQ)
Can I mix student-grade and professional watercolors?
Yes, you can freely mix student-grade and professional watercolors on your palette. However, keep in mind that the resulting mixture will inherit the physical limitations of both grades. The overall vibrancy, transparency, and lightfastness of the blend will be reduced by the fillers and synthetic pigments present in the student-grade paint. It is a common and cost-effective practice to use student-grade paints for large background washes and professional-grade paints for focal points where intense color and fine detail are required.
Do I need to buy watercolor paper separately?
Yes, you must almost always purchase watercolor paper separately. The vast majority of beginner paint sets do not include paper, or if they do, it is usually low-grade cellulose paper that is too thin to handle wet washes. Investing in a separate pad of 300gsm cold-pressed paper is the single most important decision you can make to ensure your paints blend, flow, and layer correctly without ruining your work.
How do I store my watercolor set to prevent mold in humid climates?
In the warm, humid climate of the Philippines, mold growth on watercolor palettes is a frequent issue. To protect your investment, never snap your pan set closed while the paints are still wet. After a painting session, leave the tin open in a well-ventilated room to let the pans air-dry completely before storing them. For tube paints, wipe the threads of the nozzle clean with a damp cloth before screwing the cap back on tightly; this prevents paint buildup from drying out and breaking the seal, which can let humid air inside and ruin the remaining paint.
Community discussion
Share your experience or ask a question. Comments are reviewed before publication.