
Decorating an empty money cake is the key to transforming a simple, structural paperboard box into an unforgettable centerpiece for celebrations like weddings, birthdays, and debuts. An empty money cake provides the physical framework—typically a multi-tiered cardboard or plastic stand designed to house rolled cash—but its raw surfaces require thoughtful styling to look truly premium. By selecting the right ribbon widths, mastering layering techniques, and securing your decorations with safe, non-damaging adhesives, you can create a polished presentation that keeps the focus on the celebration.
In the Philippines, gift-giving is deeply personal, and a beautifully decorated cash gift adds a touch of effort and sincerity to milestone events. However, working with paper-based structures in warm, humid climates presents unique challenges. Adhesives can behave unpredictably, and heavy fabrics can sag if not selected with care. Understanding how to match your decorative wrapping accessories to the scale and material of your empty money cake ensures your gift remains structurally sound and visually stunning throughout the event.
Choosing Ribbons and Bows That Fit Your Money Cake
Matching Ribbon Widths to Tier Dimensions
The physical scale of your empty money cake dictates the size of the ribbons you should choose. Standard money cake boxes feature two or three tiers, with diameters decreasing from the bottom to the top. To create a balanced, tapering visual effect, use wider ribbons for the base tier and progressively narrower ribbons as you move upward.
Products mentioned in this guide
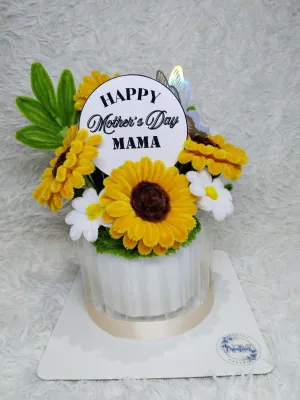
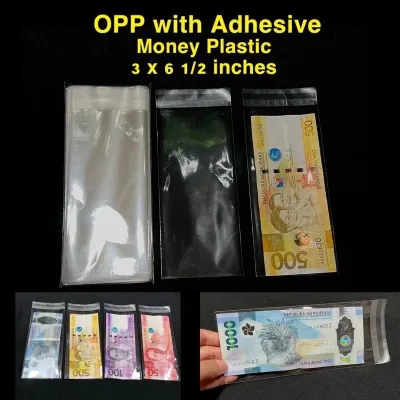
Prices are valid at publication and may change. Please refer to the product page for the latest price.
- Base Tier: Best suited for ribbons measuring 1.5 to 2 inches (approx. 3.8 to 5 cm) in width. This wide band covers the structural seams of the largest tier and establishes a solid visual foundation.
- Middle Tier: Ideal for ribbons measuring 1 inch (approx. 2.5 cm) in width, providing a clean transition between the top and bottom layers.
- Top Tier: Best dressed in narrow ribbons of 0.5 to 0.75 inches (approx. 1.3 to 1.9 cm) to prevent the top of the cake from looking cramped or top-heavy.
Pre-Made Wired Bows vs. Hand-Tied Soft Bows
Choosing between structured and soft bows depends on the overall aesthetic you want to achieve and the environmental conditions of your venue.
Wired bows feature thin, flexible wires woven into the edges of the ribbon. They are highly recommended for the main cake topper because they can be easily fluffed, shaped, and manipulated. In humid tropical climates, wired ribbons are particularly useful as they resist sagging and maintain their voluminous shape even during long, warm outdoor celebrations.
Hand-tied soft bows made from standard satin, grosgrain, or organza offer a soft, natural drape. While they provide a classic, romantic look, they lack internal support. Use hand-tied bows as secondary accents on the lower tiers where they can lie flat against the cardboard surface, reducing the risk of drooping over time.
Evaluating Material Textures and Box Compatibility
The material of your ribbon must harmonize with the surface texture of the empty money cake box, which is typically made of matte cardboard, glossy paperboard, or smooth plastic.
Satin offers a high-gloss, luxurious finish that is perfect for formal events. However, satin is slippery and prone to showing grease marks from heavy liquid glues. It works best on smooth, laminated paper boxes when secured with dry double-sided tape.
Grosgrain features a ribbed texture that provides excellent grip and structural integrity. It is highly durable, easy to cut without excessive fraying, and adheres beautifully to matte cardboard surfaces.
Organza is a sheer, lightweight fabric that adds a soft, dreamy quality. Because organza is translucent, the plain cardboard underneath will show through if used alone. Always layer organza over a solid base ribbon to hide the structural box while retaining its airy, delicate aesthetic.
Step-by-Step Guide to Layering and Securing Ribbons
Surface Preparation and Inspection
Before applying any decorative elements, inspect the empty money cake box to ensure it is ready for assembly. Wipe down the entire surface with a dry, lint-free microfiber cloth to remove dust, paper fibers, or manufacturing residues. In high-humidity environments, ensure the paperboard is completely dry to the touch; any trapped moisture can weaken adhesives and cause the paper tiers to warp or bubble once the ribbons are applied.

Wrapping the Foundational Base Ribbon
The base ribbon layer acts as the background for all other decorations. Measure the circumference of each tier, adding an extra 1 inch (approx. 2.5 cm) of ribbon to allow for a clean overlap at the back. Cut the ribbons using sharp fabric shears, as dull scissors can pull the threads of satin or organza, causing messy, frayed edges.
Wrap the ribbon tightly around the center of the tier, ensuring it is level all the way around. Align the overlapping ends at the exact back of the cake box. Keeping all seams in a single vertical line at the rear ensures the front presentation remains completely clean and seamless.
Layering Secondary Ribbons for Visual Depth
To elevate the design from simple to professional, layer a secondary, narrower ribbon over the base band. Select a contrasting color or a different texture, such as a thin metallic gold trim over a wide navy-blue satin ribbon.
Center the narrower ribbon precisely over the base layer. Pull the secondary ribbon taut—but not so tight that it compresses or buckles the cardboard tier underneath—and secure it at the back seam using the same alignment.
Selecting and Testing Adhesives Safely
Because the compatibility of adhesives depends entirely on the specific combination of your ribbon material and the box’s surface coating, you must perform a quick verification check before final assembly.
Apply a small drop of your chosen adhesive to a scrap piece of ribbon and press it onto an inconspicuous area of the box, such as the bottom of the lowest tier or the inside of the lid. Wait 10 minutes. Check for any wet bleed-through, oil spotting on the ribbon, or signs of the paperboard warping or lifting. If the adhesive damages the surface, switch to a dry alternative.
- Double-Sided Tape: Excellent for flat satin and organza ribbons on glossy or laminated boxes. It provides a clean, instant hold with zero dry time and no risk of liquid bleed-through.
- Glue Dots: Perfect for securing lightweight bows and small accents. They offer a strong, localized bond without the mess of liquid glues.
- Low-Temperature Hot Glue: Highly effective for securing heavy wired bows and fabric flowers to sturdy cardboard. Always use a low-temperature glue gun. High-temperature glue can melt plastic components, warp delicate paperboard, leave bulky lumps under thin ribbons, and cause accidental skin burns.
Adding Wrapping Accessories for a Polished Finish
Strategic Placement of Embellishments
Once your ribbons are secured, you can introduce supplementary wrapping accessories to add texture and hide structural elements. Place small faux floral picks, eucalyptus sprigs, or pearl pins directly behind the ribbon bands or into the center of the top bow.
Apply self-adhesive rhinestones or pearls along the edges of the ribbons for a touch of sparkle. Use these small embellishments strategically to cover up visible tape edges, glue spots, or staples at the back or front of the cake, ensuring a flawless finish from every angle.
Integrating Personalization Elements
An empty money cake is ultimately a vessel for a generous cash gift, making personalization essential. Attach a small, elegant card stock tag to the neck of the top bow using thin twine or metallic thread.
Alternatively, insert a plastic or wire card holder stick into the top tier of the cake, nesting it securely behind the main bow. This holder can carry a miniature envelope containing a handwritten note, a dedication card, or a guide explaining how the recipient should pull the ribbon to reveal the hidden cash bills inside.
Achieving Visual Balance and Focus
When decorating, it is easy to over-embellish. To maintain a professional look, distribute your accessories evenly across the tiers using the rule of balance. Keep the top bow as the primary focal point; it should be the largest, most detailed decorative element on the cake.
Use smaller, complementary accents on the lower tiers. For example, if the top features a large gold bow with white roses, the middle and lower tiers should only feature simple gold ribbon bands with single rosebuds or small pearl clusters. This prevents the cake from looking bottom-heavy or cluttered.
Ready-to-Use Styling Combinations for Any Occasion
Elegant and Classic
This timeless style is perfect for formal celebrations like traditional weddings, silver wedding anniversaries, or grand 18th birthday debuts.
- Ribbon Base: Wide, rich cream or champagne-colored satin ribbon wrapped around all tiers.
- Bows: A large, structured gold-wired bow positioned as the cake topper, with its tails cascading gently down the sides of the cake.
- Accessories: Delicate faux pearl pins inserted into the bow centers, and a thin lace trim layered over the satin base ribbons. Complete the look with a formal, gold-foiled card stock gift tag.
Festive and Vibrant
Ideal for lively, joyful milestones such as children’s birthdays, graduation parties, or colorful family reunions.
- Ribbon Base: Sturdy, ribbed grosgrain ribbons in bright, contrasting colors like royal blue and sunny yellow, or pastel pink and mint green.
- Bows: A playful, multi-looped bow made of sheer, matching organza ribbon that catches the light beautifully.
- Accessories: Colorful self-adhesive rhinestone dots scattered along the ribbon bands, accompanied by miniature paper flag banners draped between the tiers.
Minimalist and Modern
A clean, sophisticated aesthetic suited for corporate gifts, housewarmings, or minimalist celebrations.
- Ribbon Base: Thin, matte cotton or velvet ribbons in muted, earthy tones such as sage green, terracotta, or warm slate gray.
- Bows: A simple, unstructured hand-tied bow with long, elegant tails, avoiding any stiff wire.
- Accessories: A single sprig of dried baby's breath or a small eucalyptus leaf tucked into the bow knot. Finish with a rustic, rectangular kraft paper tag tied with a thin strand of natural jute twine.
Common Decorating Mistakes and What to Avoid
The Pitfalls of High-Temperature Hot Glue
While hot glue is a staple in crafting, using a high-temperature glue gun on an empty money cake is a major mistake. The intense heat can easily warp thin cardboard tiers, melt plastic pull-out mechanisms, and cause delicate paper finishes to bubble or peel.
Furthermore, high-temp glue dries very quickly, often leaving thick, uneven lumps underneath your ribbons that ruin the smooth, cylindrical shape of the cake tiers. Always opt for low-temperature glue guns or high-tack double-sided tapes for a flat, professional finish.
Overcomplicating the Color Palette
One of the fastest ways to make a beautiful gift look unpolished is by using too many colors. Limit your palette to two or three complementary shades that match the theme of the event.
If your base box is white, pairing it with gold and one primary accent color (such as emerald green or dusty rose) creates a cohesive, high-end look. Avoid mixing multiple patterns, neon shades, and competing metallic finishes on a single cake.
Mismatching Material Weights and Textures
Be mindful of how different material weights interact on a small-scale structure. Pairing a heavy, rustic burlap ribbon with an ultra-delicate, sheer silk bow can look disjointed and structurally awkward.
Heavy, stiff fabrics can pull too tightly against lightweight paperboard tiers, causing the empty money cake box to buckle, cave in, or lose its round shape. Keep your material weights consistent, ensuring that the structural strength of your decorative accessories matches the physical durability of the empty money cake box.
Community discussion
Share your experience or ask a question. Comments are reviewed before publication.