
Creating a personalized portfolio design is an intentional process of curation, protection, and presentation. Whether you are preparing for a creative pitch in Bonifacio Global City, presenting academic achievements, or showcasing technical drawings to a prospective client, the physical medium you choose speaks volumes before anyone reads a single word. A well-structured binder or folder system allows you to organize your documents dynamically, giving you the flexibility to swap, rearrange, and protect your materials as your career evolves.
To build a portfolio that commands attention, you must look beyond basic storage and focus on the tactile experience of the reader. The weight of the paper, the clarity of the protective sleeves, and the smooth operation of the binder rings all contribute to a professional impression. By selecting high-quality filing components and organizing your content with a clear narrative, you transform a simple collection of papers into a compelling professional story.
Define the Purpose and Audience for Your Portfolio
Before purchasing any stationery supplies, you must clearly define the primary goal of your portfolio. A portfolio designed for a corporate interview requires a sleek, minimalist aesthetic, whereas a creative design portfolio might benefit from a more expressive layout with varied textures. Understanding your audience helps you decide whether to prioritize rapid page-turning, high-durability materials, or specialized compartments for physical samples.
Products mentioned in this guide
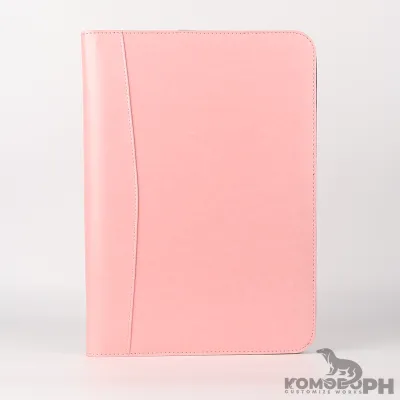
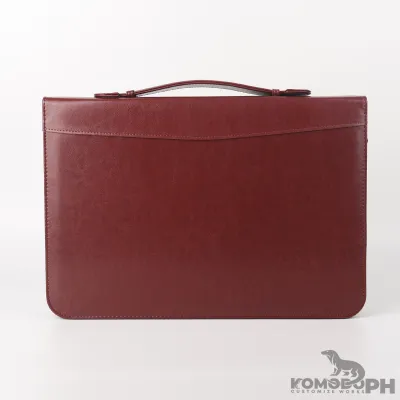
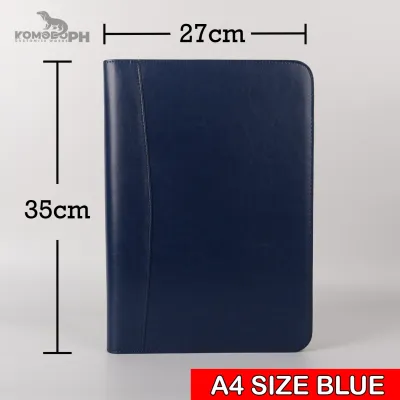

Prices are valid at publication and may change. Please refer to the product page for the latest price.
The physical environment where the presentation takes place also dictates your material choices. If you expect to present while standing or in tight spaces, a rigid, hardback binder provides a stable viewing surface. Conversely, if your portfolio will lie flat on a conference table, a flexible presentation folder or a binder with a lay-flat spine is more practical.
Finally, establish your standard paper size early in the planning phase. In the Philippines, A4 (210mm x 297mm) is the standard for most corporate and academic documents, while Letter size (8.5 x 11 inches) remains common in specific industries. Mixing these standards without planning can lead to messy, uneven edges that detract from a polished look. Choose one standard size and ensure your binder, dividers, and sheet protectors are precisely manufactured to match those dimensions.
Choose the Right Binders, Folders, and Filing Components
The foundation of your personalized portfolio design is the binder or folder mechanism you select. Standard round-ring binders are widely available, but they cause pages to ride up and curve when the binder is full, which can damage the inner margins of your documents. For a professional presentation, D-ring binders are highly recommended because the straight edge of the ring allows pages to lie completely flat and align perfectly on the right side. This mechanism also increases document capacity by up to 25 percent compared to round rings of the same size.

For items that cannot be hole-punched—such as original certificates, delicate sketches, or fabric samples—supplementary folder types are essential. Integrated pocket folders within your binder or standalone accordion files allow you to carry these loose items safely. When selecting these components, verify that the pocket material is non-stick and acid-free to prevent ink transfer over time.
Sheet protectors are critical for preserving the pristine condition of your documents, but they must be chosen based on your presentation environment. High-clarity, glossy sheet protectors make colorful graphics, photographs, and vibrant prints stand out with excellent contrast. However, they reflect overhead fluorescent lights easily, which can make text difficult to read. If your portfolio contains text-heavy documents, reports, or financial statements, opt for non-glare, matte-finish sheet protectors to ensure comfortable reading under any lighting conditions.
To prevent binding strain, always verify the binder’s ring capacity against your estimated page count. A standard 1-inch (25mm) binder comfortably holds about 175 sheets of standard 80 gsm paper, but this capacity drops significantly when you introduce thick sheet protectors, cardstock, or dividers. Overloading the rings makes page-turning difficult, increases the risk of the rings misaligning, and can tear the holes of your dividers. If your document count exceeds the comfortable limit of a single binder, consider splitting the content into two cohesive volumes rather than forcing them into one.
In the tropical climate of the Philippines, high humidity can cause paper to warp and stick to plastic surfaces. To safeguard your work, look for sheet protectors made from archival-safe polypropylene rather than polyvinyl chloride (PVC). Polypropylene is chemically inert, highly resistant to moisture, and will not lift toner or ink from your printed pages, ensuring your portfolio remains pristine even during the wet season.
Assemble and Organize Your Documents Step-by-Step
Assembling your portfolio requires a systematic approach to ensure a logical flow and a professional finish. Start by gathering all your materials in a clean, spacious workspace free from dust and moisture. By establishing a structured assembly sequence, you can maintain a coherent narrative that guides your reader naturally from your introductory profile to your final credentials.
Sort and Sequence Your Work Samples
Begin by grouping your work samples into distinct, thematic sections. For example, a marketing portfolio might be divided into campaign strategy, creative assets, and performance metrics. Grouping related items helps your audience navigate the content easily and understand the breadth of your skills without feeling overwhelmed by a random assortment of documents.
Within each section, place your strongest or most relevant pieces at the very beginning. Decision-makers often skim portfolios quickly, so capturing their immediate attention with high-impact work is crucial. Follow these lead pieces with supporting documents that demonstrate your process, consistency, and attention to detail.
If your portfolio exceeds thirty pages, a master table of contents is indispensable. Place this page immediately after your cover sheet, using clear section titles that correspond exactly to your tabbed dividers. This small addition shows organizational maturity and allows busy reviewers to jump directly to the sections that interest them most.
Use Dividers and Sheet Protectors Effectively
Tabbed dividers are the primary navigational tools of your portfolio. Choose dividers with write-on or printable tabs, and ensure they are staggered from top to bottom so that every section title is visible at a glance. If you are using sheet protectors, make sure to purchase “extra-wide” or “oversized” dividers; standard dividers will be hidden behind the wider plastic sleeves, defeating their purpose.
Slide your documents carefully into the sheet protectors, handling the paper by the edges to avoid leaving fingerprints. If you are presenting double-sided documents, place two sheets back-to-back inside a single protector rather than printing on a single sheet, as this adds structural rigidity to the page.
Avoid the temptation to overfill individual sheet protectors with multiple documents. Forcing three or more pages into a single sleeve stretches the plastic, causes the edges to curl, and creates an uneven, bulky profile. Keep each protector limited to one or two sheets to maintain a flat, uniform appearance throughout the binder.
Customize the Exterior and Interior Layout
A truly personalized portfolio design extends to the visual presentation of both the exterior and interior layouts. The cover page is your first opportunity to establish your personal brand. Design a clean, uncluttered cover insert that features your name, professional title, and contact information in a highly readable font. If your binder has a clear plastic overlay on the spine, print a matching spine label so your portfolio can be easily identified when stored on a shelf or carried in a bag.
Inside the portfolio, do not let your work samples stand alone without context. Insert custom title pages or brief introductory notes at the start of each section to explain the background, your specific role, and the significance of the complex projects shown. This narrative layer helps the reader understand the “why” behind your work, turning a simple gallery into a case study.
To unify the entire presentation, maintain consistent typography, margins, and header or footer styles across all custom-printed elements. If you are using different paper stocks, verify their compatibility with your printer. For instance, heavy cardstock (such as 200 gsm or higher) provides a premium feel for title pages, but you must ensure your printer can handle this thickness without jamming or causing ink smudges.
Before finalizing your prints, perform a quick trial on a single sheet of your chosen paper. Check for ink drying speed and bleed resistance, especially if you are using an inkjet printer. Inkjet prints can sometimes smear when exposed to the static electricity or minor moisture trapped inside plastic sheet protectors. Allowing your printed pages to dry completely for several hours—or using a laser printer, which fuses toner to the paper with heat—prevents these unsightly smudges.
Perform a Final Review and Maintain Your Portfolio
Once assembly is complete, conduct a thorough physical audit of the entire portfolio. Turn every page slowly to check for torn sheets, misaligned binder holes, or divider tabs that stick together. Look closely inside the sheet protectors to ensure no dust, hair, or paper clippings are trapped against your documents, as these small imperfections can distract a reviewer.
A portfolio is a living document that must be updated regularly to reflect your growing expertise. Establish a routine to review the contents every six months, removing outdated projects and replacing them with your latest achievements. During these updates, inspect the physical condition of your filing components; replace any sheet protectors that have become scratched, cloudy, or creased from frequent handling.
Proper storage is vital to preserving your portfolio’s longevity. Store your binder upright on a sturdy shelf rather than stacking multiple binders on top of one another, which can warp the covers and distort the ring mechanisms over time. Keep the portfolio in a dry, well-ventilated room away from direct sunlight. In the humid climate of the Philippines, storing your portfolio near a source of dry air or placing a small silica gel packet inside the storage box can prevent moisture buildup, keeping your papers crisp and your presentation flawless for years to come.
Frequently Asked Questions (FAQ)
How do I prevent documents from slipping out of sheet protectors?
If you are showcasing smaller documents, such as business cards, certificates, or postcards, they can easily slide around or fall out of standard top-loading sheet protectors. To secure them, insert a sturdy backing card or mount the smaller document onto a full-size carrier sheet using acid-free, double-sided adhesive tape. This fills the sleeve completely and keeps the item centered. Alternatively, look for specialized top-loading protectors that feature a secure top flap or a reinforced lip, which naturally seals the opening and prevents contents from sliding out during transport.
Can I mix different paper sizes in one binder portfolio?
Yes, you can mix different paper sizes, but doing so requires careful planning to maintain a professional look. For smaller pages, center them within a standard A4 or Letter-sized sheet protector, using a small touch of photo-safe adhesive or mounting corners to hold them in place against a clean backing sheet. For oversized documents like architectural blueprints, fold-out maps, or large design spreads, use specialized fold-out sleeves that fold neatly within the binder’s standard dimensions. Alternatively, integrate a dedicated pocket folder at the back of the binder to house these larger items safely without folding them excessively.
Community discussion
Share your experience or ask a question. Comments are reviewed before publication.