
Creating custom stickers for your bullet journal allows you to tailor your planning tools to your exact organizational needs, whether you require custom habit trackers, daily headers, or specific decorative themes. The process involves planning your layout to match your journal’s grid, designing the graphics with proper print specifications, choosing between die-cut and kiss-cut formats, and selecting a printing service that can bring your digital designs to life on paper or vinyl. By understanding the technical requirements of printing, you can avoid common mistakes like blurry images, misaligned cuts, or ink smudging.
Designing your own stationery ensures that every tracker, header, and icon fits your personal planning style perfectly. Instead of adapting your handwriting to pre-made layouts, custom sticker printing gives you complete control over the size, color palette, and functionality of your journal spreads.
Planning Your Custom Sticker Sheet
Before opening any design software, you must define the functional and aesthetic requirements of your stickers. Start by identifying your specific bullet journal use cases. If you struggle with drawing consistent layouts every week, functional stickers like weekly headers, mood trackers, water intake logs, or circular date dots can save hours of setup time. Decorative elements, such as botanical illustrations, borders, or motivational quotes, can be planned alongside these functional pieces to maintain a cohesive visual theme throughout your monthly spreads.
Products mentioned in this guide
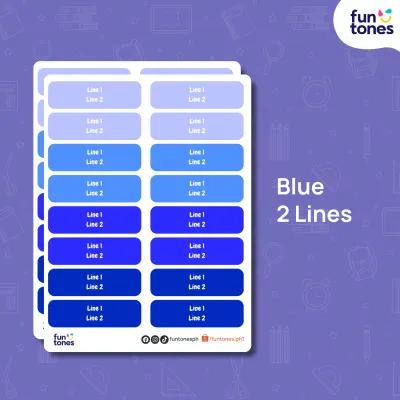
Prices are valid at publication and may change. Please refer to the product page for the latest price.
To ensure your stickers fit seamlessly onto your pages, align their dimensions with your journal’s grid system. Most popular bullet journals utilize a 5mm dot grid. If you are designing a habit tracker that spans seven days, the sticker should ideally be exactly 35mm wide—or slightly less to allow for a small border—so it aligns perfectly with seven grid squares. Measure your journal’s total page width and height in millimeters, and use these measurements to guide the overall size of your sticker sheet. Common sheet sizes like A5 or A6 are highly practical because they can be tucked directly into the back pocket of your journal.
Your choice of base material directly impacts how you interact with your stickers. Matte paper is the most versatile option for bullet journaling because it has a porous, uncoated surface that accepts writing from almost any pen. Washi paper offers a semi-translucent, textured look that blends beautifully with the page, making it ideal for layering and repositioning. Transparent PET (polyethylene terephthalate) plastic is highly durable and sleek, perfect for decorative overlays where you want the background grid to show through, though it requires specialized permanent markers to write on.
Designing Your Stickers: Tools and Techniques
Selecting the right digital design tool depends on your skill level and the complexity of your designs. For beginners, web-based design platforms like Canva offer intuitive drag-and-drop interfaces and pre-made shapes that are easy to assemble. Illustrators often prefer raster-based drawing apps like Procreate on the iPad for hand-drawn elements. However, for the ultimate precision required by professional printing services, vector-based software such as Adobe Illustrator or the free, open-source alternative Inkscape is highly recommended. Vector graphics can be scaled infinitely without losing sharpness, and they allow you to create clean paths that cutting machines follow.

When setting up your digital canvas, configuring the correct file settings is critical to avoiding blurry or pixelated prints. Always set your canvas resolution to a minimum of 300 DPI (dots per inch) at the exact physical size you want the stickers printed. Additionally, change your document’s color mode from RGB (Red, Green, Blue) to CMYK (Cyan, Magenta, Yellow, Key/Black). RGB is designed for digital screens, whereas CMYK is the standard for physical ink printing. Designing in CMYK from the start prevents unexpected color shifts, ensuring that the vibrant pastel or deep jewel tones you see on your screen actually match the printed product.
To prevent unsightly white borders or cut-off designs, you must establish proper bleed areas and draw accurate cut lines. A cut line is a vector path—usually colored in a bright, contrasting stroke like 100% magenta—that tells the printing machine exactly where to slice. Because cutting blades can shift slightly during production, you must extend your background artwork at least 1.5mm to 3mm past this cut line. This extended area is the bleed. Any critical text or design elements should remain within a “safe zone” at least 1.5mm inside the cut line to ensure they are never accidentally trimmed away.
Creating Die-Cut vs. Kiss-Cut Designs
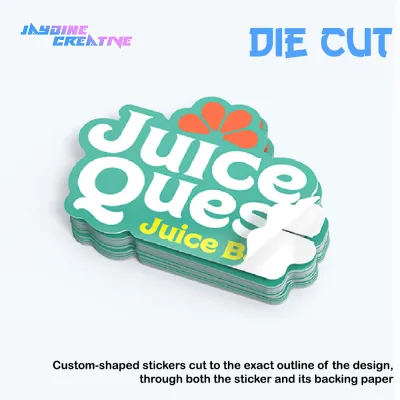
Understanding the structural differences between cutting methods is essential for choosing the right format for your journaling style. Die-cut stickers are sliced completely through both the sticker material and the backing paper. This process results in individual, standalone stickers. Die-cuts are highly tactile and excellent for gifting or trading, but they can be difficult to organize and peel if they are very small or have intricate shapes.
Kiss-cut stickers are sliced only through the top adhesive layer, leaving the backing paper completely intact. This method allows you to create a cohesive sticker sheet containing dozens of small, delicate designs—such as tiny weather icons or individual letters—that remain organized in one place. For bullet journaling, kiss-cut sheets are generally much more convenient because they keep your functional elements neatly filed together, preventing small stickers from getting lost in your pencil case.
Preparing Files for Custom Sticker Printing
Once your designs are complete, preparing your files correctly prevents production delays and printing errors. Export your final designs in high-resolution formats requested by your print provider, such as print-ready PDF, high-quality PNG with transparent backgrounds, or native vector files like AI or EPS. If your design includes any text, you must convert all fonts to “outlines” or “curves” within your software. This process turns your text into vector shapes, preventing the printer’s computer from substituting your custom fonts with generic system fonts if they do not have your specific typeface installed.
Before submitting your files, perform a thorough visual check for potential print issues. Zoom in to ensure that no lines are thinner than the printer’s minimum stroke width, which is typically around 0.5 points; lines thinner than this may blur or disappear entirely during the printing process. Check the contrast of your designs under different lighting simulations. Low-contrast elements, such as light gray text on a pastel background, may look readable on a bright monitor but can become completely illegible once printed on matte paper.
Organizing your design file into clearly labeled layers is the best way to streamline communication with your printing service. Create a base layer named “Artwork” containing only your illustrations, colors, and text. Above that, create a separate layer named “Cut Lines” containing your vector paths. If you are ordering kiss-cut sheets, you can also include a “Backing Art” layer for any designs printed on the sheet background itself. This clean file structure allows the printer’s prepress team to quickly verify your files and send them to production without errors.
Choosing a Printing Service and Placing Your Order
When evaluating custom sticker printing services, compare platforms based on their material offerings, minimum order quantities (MOQs), and proofing options. Some online printing services cater specifically to independent artists and offer low MOQs, allowing you to order as few as one or two custom sheets to test your designs. Other commercial printers require bulk orders of 50 or more sheets but offer a lower cost per unit. Additionally, look for services that provide a digital or physical proof before printing, which allows you to verify the cut alignment before committing to a full order.
Understanding the pricing structure of custom printing helps you optimize your budget. Prices are typically calculated per sheet or per square inch, with standard custom sheets starting around ₱50 to ₱150 each, depending on the material, sheet size, and order volume. While intricate cut lines do not usually increase the price if you provide a clean vector path, choosing specialty finishes will. To get the most value out of your order, maximize the space on your sticker sheets by nesting smaller stickers close together, leaving just enough space (usually 2mm to 3mm) between the cut lines to prevent tearing.
When you are ready to place your order, upload your prepared files to the printer’s platform and select your desired finishing options. Matte lamination provides a soft, non-glare finish that blends beautifully with paper journal pages, while glossy lamination makes colors appear more vibrant and saturated. For a touch of luxury, some printers offer specialty finishes like holographic overlays, spot UV, or metallic foil stamping. After uploading, carefully review the digital proof provided by the printer. Double-check that the magenta cut lines align perfectly with your designs and that no text is cut off before confirming your order.
Testing and Applying Your Custom Stickers
When your custom stickers arrive, establish a quality control checklist to inspect the order before using them in your journal. First, check the print quality for color accuracy; compare the physical stickers to your original digital design under natural light to see if the colors shifted significantly. Next, run your finger over the edges of the stickers to ensure the cuts are smooth and clean, without any jagged tears or adhesive residue. Finally, verify the alignment of the cuts to ensure they are not offset, which can leave uneven borders on one side of your designs.
Because paper types vary wildly across different bullet journal brands, you must test the performance of your custom stickers on an inconspicuous page, such as a test page at the very back of your journal. Apply a small scrap of the sticker material and observe how the adhesive behaves. Check if the sticker can be peeled off and repositioned smoothly, or if it bonds permanently and tears the paper fibers. Write on the sticker using your favorite journaling pens—including gel pens, fountain pens, and fine-liners—to evaluate ink compatibility. Note the drying speed, check for feathering, and rub the ink gently after a few minutes to test for smudging.
Proper storage is crucial for maintaining the quality of your custom stickers, especially in warm, humid tropical climates like the Philippines. High humidity can cause sticker backing paper to warp, curl, or absorb moisture, which degrades the adhesive over time and makes the stickers difficult to peel. Store your sticker sheets completely flat inside a sealed, airtight plastic organizer or a dedicated sticker book with silicone release pages. Keep them in a cool, dry place away from direct sunlight, and consider adding a small packet of silica gel to the storage container to absorb excess moisture and keep your stickers pristine for years.
Frequently Asked Questions (FAQ)
Can I use a home printer instead of a professional printing service?
Yes, you can print custom stickers at home if you have a standard inkjet or laser printer and a digital cutting machine or a steady hand with a craft knife. Home printing is highly convenient for quick, temporary journal layouts and allows you to test designs immediately. However, home-printed stickers generally lack the water resistance, scratch-proof lamination, and precise cutting edges provided by professional custom sticker printing services. If you want durable, smudge-free stickers with intricate shapes that look polished and professional, outsourcing to a dedicated printing service is the superior choice.
What is the best sticker finish for writing with fountain pens or gel pens?
Uncoated matte paper or matte washi paper is the absolute best finish for writing with fountain pens, gel pens, and fine-liners. These porous, paper-based surfaces allow water-based inks to sink into the fibers and dry quickly, minimizing the risk of smudging or bleeding. You should avoid glossy, vinyl, or laminated matte finishes if you plan to write on your stickers. These non-porous plastic coatings prevent water-based inks from drying, causing the ink to pool on the surface, bead up, and smear easily when you close your journal.

Community discussion
Share your experience or ask a question. Comments are reviewed before publication.