
Using mull cloth as a base material for drafting and transferring sewing patterns provides a durable, flexible, and reusable alternative to traditional pattern paper. Unlike delicate tissue paper that tears easily or stiff poster board that resists draping, this open-weave cotton fabric conforms naturally to curves while maintaining its structural integrity over multiple uses. By understanding how to stabilize, mark, and cut this versatile textile, you can create a library of master patterns that withstand the humid conditions of tropical workspaces and survive repeated pinning without falling apart.
Preparing Your Mull Cloth and Workspace
Before starting your drafting project, you must evaluate the specific characteristics of your mull cloth. This material, sometimes referred to as bookbinding mull or open-weave cotton scrim, comes in various densities and starch finishes. A meter of quality mull cloth typically costs around ₱50 to ₱120 at local textile markets, making it a cost-effective alternative to imported pattern papers. Check the stiffness and opacity of your fabric; a heavily starched mull is easier to draw on because it behaves like paper, whereas a softer, unstarched variety offers flexible draping qualities but requires extra care during stabilization. Ensure the weave is tight enough to hold pencil or ink lines without letting the marking tip slip through the gaps.
Testing your marking tools on a small scrap of the fabric is an essential preparatory step. Because mull cloth is highly porous, ink from standard felt-tip pens can bleed along the fibers, distorting your lines and ruining your measurements. Try marking the scrap with a fine-point mechanical pencil, a water-soluble fabric pen, and traditional tailor’s chalk. Observe how easily the tool glides across the textured surface, how sharp the resulting line is, and whether the mark can be erased or washed away without leaving a permanent stain.
Products mentioned in this guide
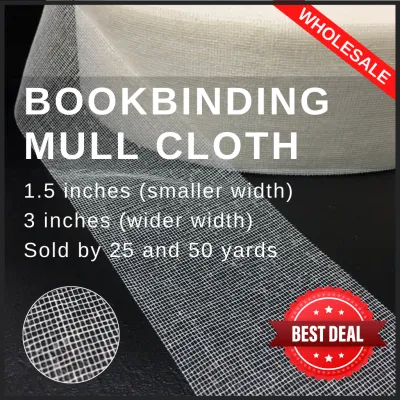
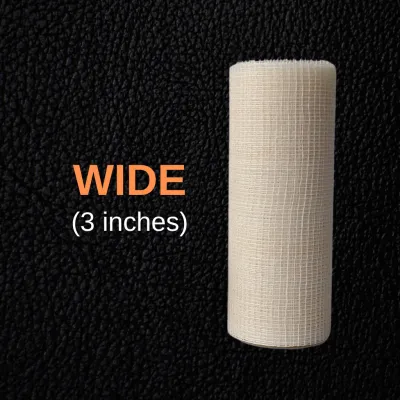
Prices are valid at publication and may change. Please refer to the product page for the latest price.
Setting up a flat, smooth workspace is critical to prevent the fabric from shifting or wrinkling. A large wooden cutting table or a self-healing cutting mat provides a stable foundation. To secure the mull cloth, gather heavy pattern weights, low-tack masking tape, or fine dressmaker’s pins. In humid environments, avoid using adhesives that leave a sticky residue on your work surface or the fabric itself, as moisture can make these residues difficult to clean.
Transferring Existing Patterns onto the Fabric Base
To transfer an existing paper or digital pattern onto your mull cloth, you must first eliminate any creases or folds in the fabric. Even minor wrinkles can distort the dimensions of your final pattern pieces, leading to fit issues during garment assembly. Set your dry iron to the cotton setting and gently press the mull cloth. Avoid using steam if your fabric is heavily starched, as moisture can dissolve the starch stiffener and cause the material to lose its structural rigidity.

Once the fabric is completely flat, lay your original paper pattern on your work surface and place the mull cloth directly over it. Because mull cloth is semi-transparent, you should be able to see the printed lines of the original pattern underneath. Align the grainline of the fabric with the grainline marked on the paper pattern. Secure both layers to the table using pattern weights or low-tack tape along the edges to prevent any shifting while you work.
Using your pre-tested marking tool, carefully trace the lines of the original pattern onto the mull cloth. Keep your hand steady and avoid pulling or stretching the fabric as you draw. Be sure to transfer all critical construction marks, including notches, dart points, buttonhole placements, and alignment dots. Clearly draw the grainline arrow across each piece, as this line is vital for positioning your pattern correctly on your final garment fabric.
Drafting Custom Patterns Directly on Mull Cloth
Drafting custom designs directly onto mull cloth allows you to utilize its textile properties to visualize how a garment will drape. Start by securing a fresh sheet of stabilized mull cloth to your cutting mat. Using a long, clear acrylic ruler and a metal L-square, draw your foundational block lines, such as the center front, center back, bust line, and hip line. These reference lines serve as the structural grid for all your custom measurements.
Once your basic block is established, use a French curve or a hip curve ruler to draw smooth, anatomical lines for armholes, necklines, and side seams. Because you are drafting directly on fabric, you can pin the drafted pieces together and drape them over a dress form to check the proportions in real-time. Add your desired seam allowances and hem allowances progressively, drawing them parallel to your original design lines using a seam gauge for precision.
Before finalizing any lines, verify the symmetry and proportions of your drafted pieces. Fold the pattern along the center lines to check that the left and right sides match accurately, and walk your seams—matching the front and back side seams together—to ensure they are the exact same length. Use an erasable fabric marker for this phase so you can easily correct any drafting errors without cluttering the fabric with confusing, incorrect lines.
Cutting, Labeling, and Finishing the Pattern Pieces
Cutting your completed pattern pieces requires sharp fabric shears. Dull blades can chew through the open weave of the mull cloth, causing the edges to fray and distorting your carefully drafted lines. Cut slowly along the outermost marked lines, keeping the shears flat against the cutting table to minimize lifting. Ensure that the entire seam allowance remains intact, as even a minor deviation can alter the fit of your finished garment.
After cutting, evaluate how the edges of your specific mull cloth behave. Some heavily starched varieties hold a clean, crisp edge and resist fraying, while softer, looser weaves may begin to unravel along the cut lines. If you notice significant fraying, you can apply a thin line of liquid seam sealant along the edges, or use pinking shears to cut the pattern pieces. This step ensures that your reusable templates remain intact through dozens of design sessions.
Organization is key to maintaining a functional pattern library. Use a permanent, fine-tip fabric marker to label each cut piece clearly. Write the pattern name, the specific garment part (such as “Front Bodice” or “Sleeve”), the size, the date, and the required cut quantity (for example, “Cut 1 on Fold” or “Cut 2 Mirror Image”). Draw a bold, double-ended arrow to indicate the grainline direction, ensuring it is highly visible when you lay the pattern on your fashion fabric.
Storing and Maintaining Your Reusable Fabric Patterns
Proper storage is essential to preserve the dimensional accuracy of your mull cloth patterns over time. Avoid folding your finished pattern pieces, as permanent creases can distort the fabric and make it difficult to lay the templates flat during future projects. Instead, roll the pieces together around a cardboard tube or hang them from a pattern rack using pattern hooks. This keeps the fabric smooth, relaxed, and ready for immediate use.
Over time and with frequent handling, the markings on your mull cloth may begin to fade, especially if you used water-soluble or air-erasable pens. Periodically inspect your pattern library and retrace any fading lines or labels using a reliable permanent marker. Pay close attention to critical reference points like notches and dart apexes, which are easily lost if the ink fades.
In tropical climates where humidity levels are consistently high, storing fabric patterns requires extra care. Keep your patterns in a dry, well-ventilated closet or inside sealed plastic storage bins to prevent the cotton fibers from absorbing moisture. Excess moisture can cause the starch in the fabric to soften, making the patterns limp, and can also encourage the growth of mildew, which can ruin your templates and transfer stains to your fashion fabrics.
Troubleshooting Common Drafting and Transfer Issues
Working with a textile-based drafting medium like mull cloth can present unique challenges, but most issues are easily resolved with minor adjustments. If you experience faded or bleeding lines, the culprit is usually an incompatible marking tool. Switch to a harder lead pencil, such as a 2H or 4H pencil, which produces clean, light lines that do not bleed, or try a tailor’s chalk pencil that sits on top of the fabric fibers rather than soaking into them.
If you find that your finished pattern pieces have distorted dimensions when compared to your original measurements, the fabric was likely stretched during the drafting or tracing phase. To prevent this, always allow your mull cloth to relax on a flat surface for a few hours after pressing before you begin drawing. Avoid pulling the fabric taut when pinning or taping it down, and always draw with a light hand to minimize friction.
If the fabric slips or shifts constantly while you are trying to trace or cut, your stabilization method may be insufficient. Increase the number of pattern weights on your workspace, placing them directly along the lines you are tracing rather than just at the corners. Alternatively, you can use a low-tack painter’s tape to secure the edges of the mull cloth directly to your cutting mat, ensuring a stable, slip-free surface for precise drafting.
Community discussion
Share your experience or ask a question. Comments are reviewed before publication.