
A beginner-friendly journaling kit set must provide a balanced foundation of structural, functional, and creative tools to make your entry into scrapbooking smooth and enjoyable. Instead of buying individual supplies blindly, a pre-packaged kit offers a curated starting point. However, not all kits are created equal; some are packed with high-quality, reusable tools, while others rely on cheap, single-use fillers to inflate their piece count. Evaluating a kit requires looking closely at the technical specifications of the core notebook, the chemistry of the writing instruments, the reliability of the adhesives, and the overall utility of the decorative elements.
To get the best value, you must know how to dissect a product description and identify which components will actually support your creative journey. By focusing on material compatibility, paper density, and tool durability, you can select a kit that grows with your skills rather than one that causes immediate frustration.
Core Essentials: The Non-Negotiable Items in a Journaling Kit
The absolute foundation of any journaling kit set is the notebook itself. When evaluating a kit, the notebook should be the very first item you inspect, as a poor-quality journal will ruin the experience of using even the finest pens. Pay close attention to the paper weight, which is measured in GSM (grams per square meter). Standard copy paper is typically around 70 to 80 GSM, which is highly prone to ghosting (where writing is visible on the reverse side) and bleeding (where ink physically leaks through the fibers). For a versatile journaling experience that accommodates gel pens, light markers, and highlighters, look for a notebook with a paper weight of at least 100 GSM to 120 GSM.
Products mentioned in this guide
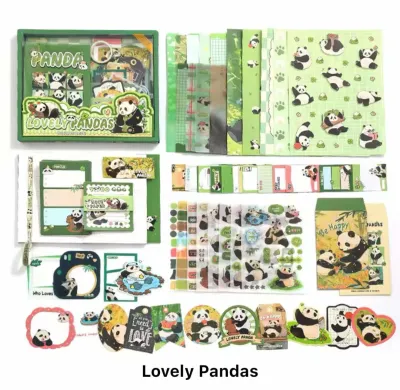
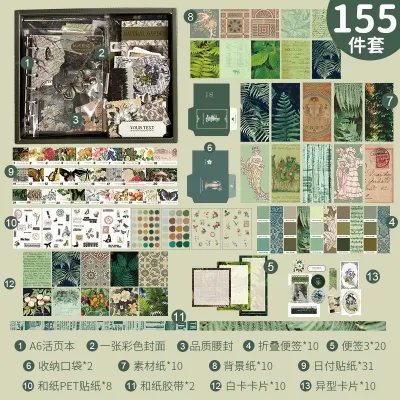
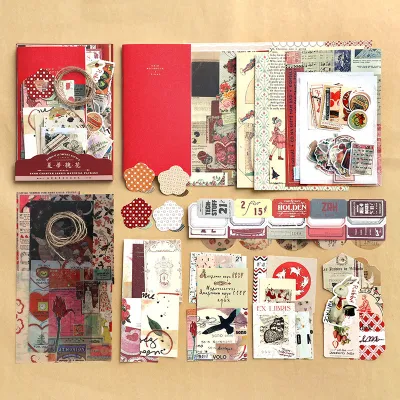
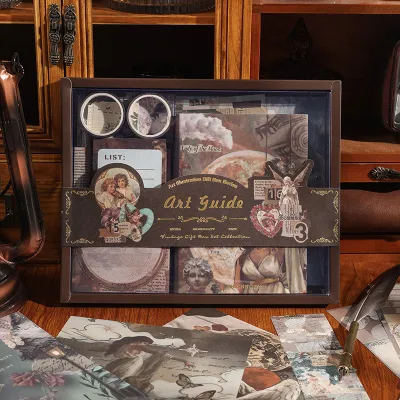
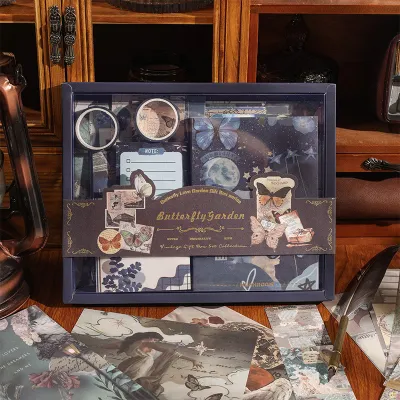
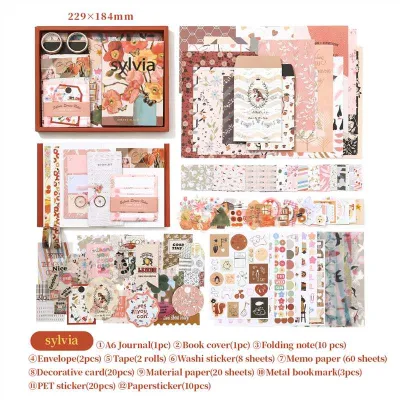
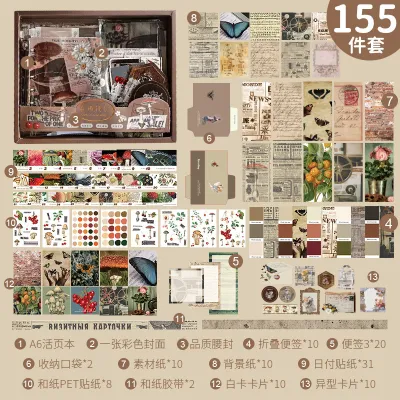
Prices are valid at publication and may change. Please refer to the product page for the latest price.
Size and binding are equally critical structural dimensions. The most common sizes included in beginner kits are A5 (148mm x 210mm) and B6 (125mm x 176mm). A5 offers ample space for detailed layouts, while B6 is more compact and portable. For the binding, thread-bound (Smyth-sewn) books are highly preferred because they allow the journal to lay completely flat on your desk, making it much easier to write and apply stickers near the center margin. Spiral binding is durable and easy to flip, but the metal coil can sometimes obstruct your hand while writing. Avoid cheap glue-bound notebooks in beginner kits, as the adhesive can dry out and crack, causing pages to fall out after only a few weeks of use.
Writing instruments included in starter kits generally consist of gel pens, fineliners, or basic ballpoints. When evaluating these pens, check the product specifications for nib sizes; a fine 0.38mm or 0.5mm nib is ideal for detailed writing, while a 0.7mm or brush tip works well for headers. In warm, humid climates like the Philippines, ink behavior changes significantly. High relative humidity slows down the evaporation rate of water-based inks, meaning standard gel pens can remain wet on the page longer and smudge easily when you turn the page or lay down a ruler. To prevent this, prioritize kits that feature quick-drying gel inks or water-resistant pigment liners, which set rapidly on the paper and resist smearing even in humid conditions.
Basic layout tools round out the core essentials. A reliable ruler is indispensable for drawing grids, habit trackers, and clean borders. Opt for kits that include a rigid, transparent acrylic or aluminum ruler rather than a thin, flexible plastic one. Flexible plastic rulers tend to warp easily over time, which prevents you from drawing straight lines and makes precise measurements difficult. Stencils are also highly useful for beginners, offering pre-cut shapes, banners, and icons that help you create clean layouts without needing advanced drawing skills.
Decorative and Functional Add-ons: Spotting Useful Tools vs. Cheap Fillers
Once the core essentials are established, a journaling kit set should provide the functional tools needed to assemble your pages. Adhesives and cutting tools are the workhorses of scrapbooking. A high-quality kit will often include a double-sided glue tape roller, which applies a clean, dry strip of adhesive instantly. This is far superior to liquid school glue, which introduces moisture to the paper, causing thin journal pages to warp, wrinkle, and buckle. Precision cutting tools, such as a small pair of stainless steel scissors or a pen-style craft knife, are necessary for trimming washi tapes and cutting out custom paper ephemera. When using these sharp tools, always follow the manufacturer’s safety instructions, cut on a protected surface, and store them securely out of reach of children.

Embellishments like washi tapes, stickers, and stamps are what give a journal its personal, creative touch. However, you must assess the quality and variety of these items rather than just their quantity. High-quality washi tape should be made of traditional Japanese paper (washi), which is easy to tear by hand, repositionable, and leaves no sticky residue behind. Look for kits that offer a cohesive color palette and a mix of tape widths, such as a wide pattern tape paired with a narrow solid-color border tape. Stickers should ideally be a mix of matte paper sheets (which you can write on with standard pens) and clear PET (polyethylene terephthalate) stickers, which blend seamlessly into the page background for a printed look.
It is common for online sellers to pad their product listings with cheap filler items to artificially boost the total piece count. A kit advertised as a “150-piece set” might actually contain 120 identical, low-grade plastic paper clips, generic rubber bands, or tiny, repetitive paper scraps that offer no real creative value. These fillers are used to justify a higher price tag while masking the fact that the primary tools—like the notebook and pens—are of subpar quality. When browsing kits, look past the headline number and count the actual unique, reusable tools. A 30-piece kit containing a high-GSM notebook, premium pens, functional adhesives, and curated washi tapes is infinitely more valuable than a 200-piece kit dominated by disposable plastic clutter.
How to Evaluate the True Value of a Pre-Packaged Kit
To determine if a pre-packaged journaling kit set is worth your money, you must evaluate how well the included materials work together. Material compatibility is the ultimate test of a kit’s quality. For example, if a kit includes heavy water-based brush markers or juicy ink stamps, but pairs them with a thin 80 GSM notebook, those markers will bleed through the pages, rendering the reverse sides unusable. Because you cannot test the items physically when shopping online, read customer reviews carefully and look for user-submitted photos of the notebook’s back pages. Check if other buyers report excessive feathering (where ink spreads sideways along the paper fibers) or ghosting. A well-designed kit will always match its writing instruments to a paper weight that can easily handle them.
You can calculate the price-to-utility ratio of a kit by estimating the cost per usable, long-term item. For instance, consider a kit priced at ₱750 on a local online marketplace. If that kit contains a durable 100 GSM A5 notebook (worth approximately ₱300 individually), three reliable quick-drying gel pens (worth ₱150), a glue tape roller (worth ₱80), and several rolls of high-quality washi tape, the bundle offers excellent savings and convenience. Conversely, if a ₱500 kit consists of a flimsy, glue-bound notebook that falls apart and dozens of identical paper cutouts that you will never use, you are essentially paying a premium for trash. Always prioritize kits where the bulk of the cost is concentrated in the reusable tools rather than the disposable decorations.
Storage and organization are final indicators of a thoughtful, high-value kit. Journaling involves many small, easily misplaced items like sticker flakes, stamp pads, and tape rolls. A quality kit set should come packaged in a durable, reusable container, such as a sturdy cardboard drawer box, a compartmentalized plastic organizing case, or a heavy-duty canvas pouch. This packaging does more than just look attractive; it protects your paper supplies from absorbing moisture from the air—a common issue in tropical environments—and keeps your creative space tidy, making it much easier to establish a daily journaling habit.
Beyond the Box: What to Upgrade or Buy Separately
While a beginner journaling kit set is an excellent way to start, it is important to recognize its limitations as your skills and creative preferences evolve. Most starter kits are designed for general writing and light decorating, meaning they usually feature standard 80 to 100 GSM paper. If you find yourself drawn to heavy mixed-media techniques—such as applying watercolor washes, using alcohol-based sketch markers, or layering heavy acrylic paints—you will eventually need to purchase separate notebooks. Watercolor and mixed-media journals require much thicker paper, typically ranging from 160 GSM to 300 GSM, which is specifically treated to resist buckling and liquid saturation.
Similarly, the writing instruments included in beginner kits are usually intended for everyday writing and basic color-coding. As you refine your style, you may want to upgrade to specialized, archival-quality pens. Archival inks are acid-free, lightfast, and water-resistant, ensuring that your journal entries will not fade or discolor over decades. If you develop an interest in brush lettering or modern calligraphy, investing in individual, professional-grade brush pens with flexible nylon tips will yield much better control and smoother ink flow than the generic fiber-tip markers typically found in starter bundles.
Finally, pre-packaged kits are inherently designed to appeal to a broad audience, meaning their aesthetic themes are often generic. Once you discover your personal journaling style—whether it is a clean, structured minimalist layout, a dark academia vintage theme, or a vibrant pastel aesthetic—you should begin sourcing individual decorative elements. Buying specific sticker sheets from local independent artists, custom brass stamps, or premium imported washi tapes allows you to build a highly personalized collection that reflects your unique identity, something a mass-produced starter kit can never fully replicate.
Frequently Asked Questions (FAQ)
Is it cheaper to buy a journaling kit set or individual items?
For absolute beginners, purchasing a pre-packaged journaling kit set is almost always more cost-effective than buying individual items. A complete kit allows you to sample a wide variety of tools—such as different pen types, tape widths, and sticker materials—at a low initial price point, typically ranging from ₱300 to ₱800. Sourcing these items individually would require buying full packs of pens, entire boxes of stickers, and single rolls of tape, which quickly inflates your upfront investment and can leave you with excess supplies you may not enjoy using.
However, once you establish your specific preferences, buying individual items becomes the more economical choice. Purchasing individual supplies allows you to control the exact quality and specifications of your tools, ensuring that every peso is spent on materials you will use completely. For long-term journaling, a hybrid approach works best: start with a well-reviewed beginner kit to discover what you like, then buy individual, high-quality refills and specialty tools as your original supplies run out.
Community discussion
Share your experience or ask a question. Comments are reviewed before publication.