
A truly complete drawing kit for an art class must include a versatile range of graded graphite pencils (from hard 2H to soft 6B), specialized erasers (both kneaded and plastic), sharpening tools, blending stumps, basic measuring instruments, and a high-quality sketchbook with appropriate paper weight (at least 100 to 150 GSM). Simply buying a box labeled as a “drawing kit complete set” does not guarantee it will meet the rigorous demands of a school syllabus.
In the Philippines, students face unique environmental challenges like high humidity, which can cause cheap paper to warp and low-grade graphite to smudge excessively. Evaluating these components individually before purchasing ensures you do not waste money on filler items that will end up unused at the bottom of a school bag. By understanding what makes a kit functional, you can make an informed purchase that supports your artistic development throughout the academic year.
Why "Complete" Doesn't Always Mean "Class-Ready"
A common mistake when purchasing a drawing kit complete set is focusing solely on the piece count. Many budget-friendly sets advertise eighty or one hundred pieces to attract buyers, but these packages often contain low-quality fillers like brittle colored pencils, wax crayons, or microscopic sharpeners that chew through wood. For a structured art class, a high piece count is rarely a sign of utility.
Products mentioned in this guide
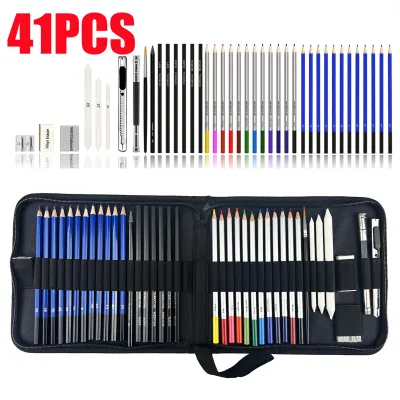
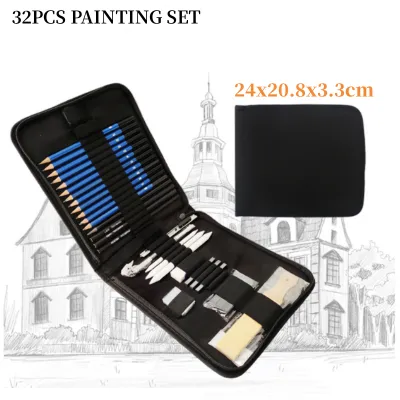
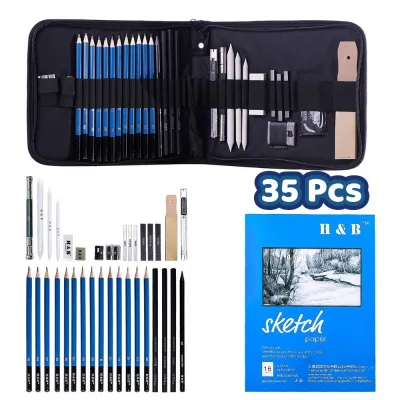
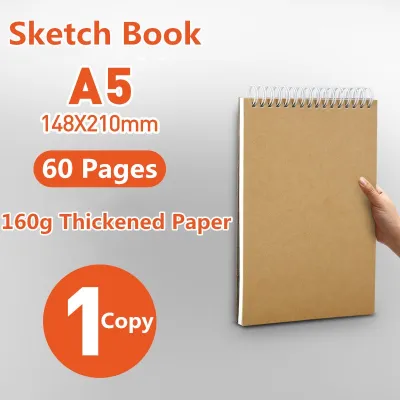
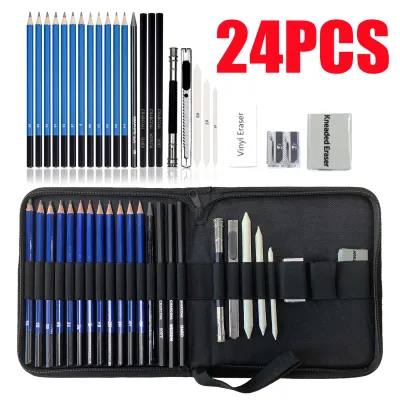
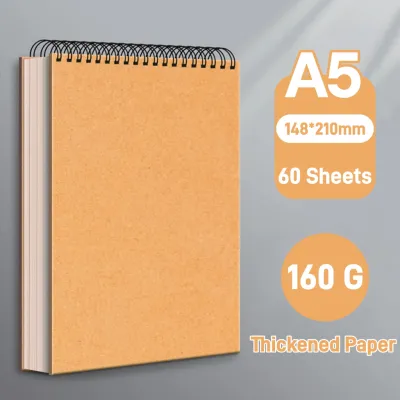
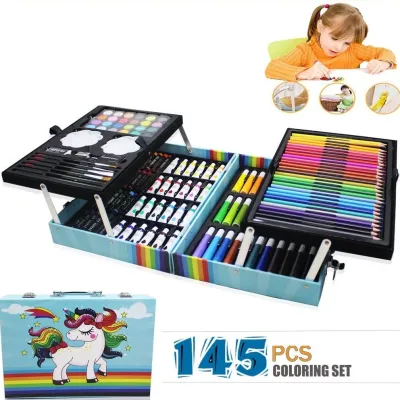
Prices are valid at publication and may change. Please refer to the product page for the latest price.
Poor-quality sets exhibit several clear, observable signs that can frustrate a student during a timed classroom assignment. Unlabeled or poorly graded pencils often write with the same medium darkness regardless of whether they are marked as “H” or “B.” Furthermore, low-grade graphite leads are frequently misaligned inside the wooden casing, causing them to break repeatedly every time they are sharpened.
Cheap erasers in generic kits often contain harsh chemicals or excessive oils that smear graphite across the page instead of lifting it, leaving permanent gray stains on your work. The paper included in these budget bundles is usually thin, resembling standard copy paper, which easily tears under the friction of basic blending or erasing. These structural failures can quickly discourage a beginner who is trying to master foundational techniques.
Before checking out, establish a baseline evaluation of any pre-made set. Prioritize kits that focus strictly on sketching and shading tools rather than those attempting to cover multiple mediums like watercolors and pastels in a single box. A solid twelve-piece set of well-graded graphite pencils accompanied by a single reliable kneaded eraser will always outperform a massive, generic plastic case filled with subpar materials.
Core Pencils and Erasers: The Non-Negotiables
Graphite pencils are the foundation of any drawing class, and a standard school syllabus requires a specific range of hardness levels. The graphite grading scale runs from “H” (hard) to “B” (black/soft), with “HB” sitting directly in the middle as the standard writing pencil. Harder pencils like 2H are essential for laying down light, precise guidelines, grid lines, and perspective structures that can be easily erased later.

As you transition to shading, softer pencils become necessary to achieve depth and contrast. Pencils graded from 2B to 6B contain more graphite and less clay binder, allowing them to lay down deep, rich dark values and soft shadows. A complete kit should offer a smooth gradient of these grades, such as 2H, HB, 2B, 4B, and 6B, allowing you to transition smoothly between values without polishing the paper surface into a shiny, unworkable glaze.
Erasers are not just for correcting mistakes; they are active drawing tools used to manipulate light and texture. A heavy-duty vinyl or plastic eraser is the workhorse for clearing away dark guidelines and creating clean, crisp, high-contrast highlights. It should erase cleanly without leaving colored crumbs or tearing the delicate surface fibers of your drawing paper.
A kneaded eraser, which resembles a gray piece of clay, is an absolute necessity for tonal drawing. You can shape it into a fine point to lift small amounts of graphite from highly detailed areas, or roll it flat across a shaded section to gently lighten a midtone without erasing the structure underneath. Its pliable nature prevents it from wearing down the paper, making it indispensable for delicate blending work.
To maintain these pencils, a reliable sharpening tool is required. While a standard dual-hole metal manual sharpener is highly portable and convenient for quick classroom use, many advanced art classes recommend using a utility craft knife paired with a sandpaper block. This combination allows you to shave away the wood casing to expose a long, tapered lead point, which is perfect for broad shading strokes using the side of the pencil.
When using a utility knife or craft blade for sharpening, safety must be your primary concern. Always carve away from your body, keep your fingers well behind the blade, and check your school’s specific code of conduct regarding carrying utility blades on campus. If blades are restricted, stick to a high-quality dual-hole manual sharpener with sharp, replaceable steel blades to prevent wood splitting.
Blending, Measuring, and Correction Tools
Blending stumps, also known as tortillons, are tightly rolled paper cylinders pointed at both ends. They are used to blend graphite smoothly, creating soft transitions in skin tones, metallic surfaces, or atmospheric backgrounds. A complete drawing kit should include assorted sizes of these stumps to accommodate both broad background areas and tiny, detailed sections like the iris of an eye.
Students should avoid using their fingers to blend graphite, a common habit that can ruin a drawing over time. The natural oils on human skin transfer to the paper fibers, trapping the graphite particles and creating permanent, greasy smudges that cannot be erased. In warm, humid climates, these skin oils can also cause the paper to yellow and degrade prematurely, making paper blending stumps an environmental necessity.
Measuring tools are equally critical for maintaining proportion and accuracy in still-life and perspective assignments. A clear, shatter-resistant 30 cm ruler is a standard requirement for establishing horizon lines, vanishing points, and structural grids. Some kits also include basic protractors or proportional dividers, which help students translate three-dimensional objects accurately onto a two-dimensional sheet.
To protect finished drawings from accidental damage, look for kits that include smudge guards or protective tracing sheets. A simple piece of glassine or tracing paper placed over a completed sketch prevents the graphite from rubbing against the facing page when the sketchbook is closed. This protection is vital when transporting your portfolio in a crowded school backpack, where constant friction can easily blur hours of detailed shading.
Evaluating the Sketchbook and Paper Quality
Paper quality is often the weakest link in pre-packaged drawing kits, yet it dictates the success of almost every drawing technique. The primary metric to evaluate is paper weight, measured in grams per square meter (GSM). Standard printer paper is typically around 70 to 80 GSM, which is far too thin for art class; it buckles under heavy graphite application and tears easily during erasing.
For a standard drawing class, look for a sketchbook containing paper with a weight of at least 100 to 150 GSM. This thickness provides the structural integrity needed to withstand multiple layers of graphite, heavy blending, and repeated corrections. If you plan to use light ink washes or mixed media, you may need to look for heavier options closer to 200 GSM to prevent the paper from warping.
Paper texture, commonly referred to as “tooth,” is another critical factor to verify. Extremely smooth paper lacks the texture required to shave off and hold graphite particles, causing the pencil to slip and create a shiny, uneven surface. A medium-surface paper provides a balanced tooth that grips the graphite, allowing for rich, dark values and smooth, layered shading transitions.
Finally, consider the binding and physical dimensions of the sketchbook. Spiral-bound sketchbooks are highly popular for classroom use because they lay completely flat on a desk, allowing you to draw comfortably across the entire page. However, hardbound sketchbooks offer better long-term protection for your artwork and prevent pages from accidentally tearing out during travel. Standard sizes like A4 or 9×12 inches are typically preferred by art instructors as they offer ample space for expressive arm movements without being too bulky to carry.
Decision Guide: Pre-Made Kit vs. Custom Assembly
Deciding whether to purchase a pre-made drawing kit complete set or assemble your own tools depends largely on your budget, experience level, and the specific requirements of your art class syllabus. Both approaches offer distinct advantages that cater to different student needs.
| Feature/Factor | Pre-Made Complete Kit | Custom Tool Assembly |
|---|---|---|
| Best Suited For | Beginners, general introductory classes, and quick shopping | Advanced students, specific syllabi, and specialized mediums |
| Average Cost Range | ₱300 to ₱800 (Highly cost-effective) | ₱1,000+ (Higher initial investment) |
| Convenience | High; all basic tools are packaged in a single carrying case | Low; requires visiting multiple specialty art stores |
| Quality Control | Variable; paper quality is often lower to keep costs down | High; you select the exact brand and specification for each tool |
| Customization | Low; may include unnecessary filler items | High; tailored precisely to your teacher's required list |
If you choose to purchase a pre-made set, perform a quick inspection before buying. Ensure the brand is reputable and that the kit contains actual graded graphite pencils rather than generic black lead pencils. Check the packaging for explicit mentions of paper weight (GSM) and verify that both a plastic eraser and a kneaded eraser are included in the set.
For those with a highly detailed syllabus, building a custom kit is often the wiser path. This approach allows you to spend more of your budget on high-use items, such as a premium 120 GSM sketchbook and professional-grade 2B and 4B pencils, while skipping unnecessary items like charcoal or pastel tools that your class may not require. It also ensures that when a specific pencil runs out, you can easily purchase an exact, matching replacement from a local stationery store.
Frequently Asked Questions (FAQ)
Do I need charcoal pencils for a basic drawing class?
Introductory drawing classes almost always focus on graphite first because it is cleaner, easier to control, and teaches the fundamentals of value and line work without the mess. Charcoal is typically introduced in advanced modules or specific life-drawing sessions. Because charcoal requires highly textured, heavy paper and a spray fixative to prevent severe smudging—especially in humid environments—it is rarely a mandatory item in a basic starter kit. If your syllabus does not explicitly list charcoal, focus your budget on higher-quality graphite tools instead.
Can I use mechanical pencils instead of wooden pencils for art class?
While mechanical pencils are excellent for fine details, precise technical drawings, and initial light guidelines, they are not suitable as a complete replacement for traditional wooden pencils. The thin lead of a mechanical pencil (usually 0.5mm or 0.7mm) easily tears high-tooth drawing paper when pressed hard and cannot be used on its side for broad, expressive shading. Wooden pencils allow you to vary your line weight dynamically by changing the angle of your hand, which is a fundamental skill taught in almost every art class. Keep a mechanical pencil in your pencil case for fine details, but rely on wooden pencils for your core shading assignments.
Community discussion
Share your experience or ask a question. Comments are reviewed before publication.