
Folding a paper airplane that flies far and straight requires three fundamental elements: selecting the right paper weight, executing perfectly symmetrical creases, and tuning the wings for aerodynamic balance. While many believe a powerful throw is the secret to distance, a poorly balanced plane will simply dive or spiral out of control. By mastering a few precise folding techniques and understanding how to adjust the trailing edges of your wings, you can transform a simple sheet of paper into a high-performance glider that cuts straight through the air.
In tropical environments like the Philippines, paper choice and storage play a surprising role in flight dynamics. High relative humidity can soften paper fibers, making folds limp and reducing the structural integrity needed to withstand high-velocity launches. Understanding how to combat these environmental factors while maintaining absolute symmetry during the folding process is the key to achieving consistent, long-distance flights.
Selecting the Best Paper for Distance and Stability
To build a paper airplane capable of sustained, straight flight, you must first understand the relationship between paper weight, stiffness, and aerodynamic drag. Standard copy paper, often referred to locally as bond paper, typically ranges from 70 gsm (grams per square meter) to 80 gsm. This weight class is the ideal starting point for most distance gliders. It provides enough structural rigidity to hold sharp creases and resist bending under wind pressure, yet remains light enough to generate sufficient lift at lower speeds.
Products mentioned in this guide
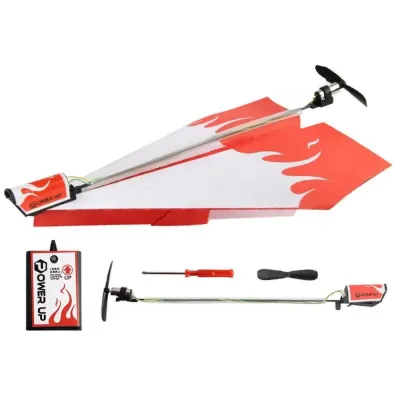
Prices are valid at publication and may change. Please refer to the product page for the latest price.
Heavier options, such as cardstock or construction paper exceeding 120 gsm, are generally unsuitable for standard gliders. While they offer excellent durability, their high mass requires an immense amount of thrust to stay airborne. This forces you to throw the plane incredibly hard, which often destabilizes the launch or causes the plane to dive immediately due to a lack of proportional wing surface area. On the other end of the spectrum, flimsy materials like newspaper, notebook paper, or cheap pad paper lack the stiffness required to maintain their shape. Under the force of a throw, the wings of a flimsy plane will flex and warp, leading to unpredictable flight paths and rapid crashes.
The dimensions of your paper also dictate the plane’s ultimate proportions. Standard A4 (210mm x 297mm) or Letter size (8.5 x 11 inches) sheets are highly recommended. These sizes offer an optimal aspect ratio—the ratio of wingspan to wing chord—which allows for a long, stable fuselage and a balanced wing area. When selecting your paper, ensure it is completely flat and free of pre-existing folds, wrinkles, or moisture damage. In humid conditions, keeping your paper stored in a sealed plastic folder or an airtight container before folding prevents it from absorbing moisture, ensuring your finished plane remains stiff and responsive.
Avoid using glossy photo papers, heavily textured craft papers, or metallic foils. Glossy coatings add dead weight without contributing to structural strength, and they make the paper slippery, which makes holding precise folds difficult. Textured papers disrupt the smooth laminar airflow over the wing surfaces, creating micro-turbulence that increases drag and slows the plane down. For the best results, stick to clean, uncoated matte bond paper.
Mastering Precision Creases and Symmetry
The difference between a paper airplane that flies straight and one that immediately veers into a wall lies in the precision of your creases. Every fold must be sharp, clean, and perfectly symmetrical. If one wing is even a millimeter larger than the other, or if the center crease is slightly diagonal, the plane will experience uneven lift and drag, causing it to roll or spiral out of control.

To achieve perfect bilateral symmetry, always align the outer edges of the paper precisely before pressing down on a fold. Instead of folding from one end to the other in a single sweep, pin the aligned corners down with one hand, slide your other index finger to the center of the fold, and then sweep outward to the edges. This technique prevents the paper from shifting or buckling during the process.
Once the fold is aligned, use a hard, flat tool to lock the crease in place. A plastic ruler, a bone folder, or even the back of your fingernail works perfectly. A sharp crease compresses the paper fibers, ensuring the plane holds its shape under aerodynamic pressure. Soft, rounded folds act like tiny springs, slowly opening up during flight and changing the plane’s geometry mid-air.
The initial center fold is the foundation of the entire build. Take your time to ensure it splits the page exactly in half. If this guide crease is crooked, every subsequent fold aligned to it will be off-center, resulting in an inherently unbalanced aircraft that no amount of tuning can fully fix.
Step-by-Step Instructions for a Classic Distance Glider
This classic dart-style glider is optimized for forward momentum, low drag, and exceptional directional stability. Follow these steps carefully on a clean, hard surface to ensure maximum precision.
First, lay your paper flat in a vertical (portrait) orientation. Fold the paper in half vertically from left to right, aligning the corners perfectly. Crease it sharply along the left edge, then unfold it so you have a vertical crease running down the center of the sheet. This serves as your primary alignment guide.
Second, fold the top left corner down so its top edge aligns perfectly with the center crease. Repeat this with the top right corner. You should now have a clean triangle shape at the top of your paper, resembling a house roof. Press these folds flat with a ruler or your fingernail to ensure they lie completely flush against the back sheet.
Third, to streamline the nose and add crucial forward weight, fold the diagonal edge of the left triangle inward to meet the center crease. Repeat this step on the right side. This creates a much narrower, sharper nose. Ensure the two inner edges meet exactly along the center line without overlapping, which would cause asymmetry.
Fourth, fold the entire plane in half along the original center crease, keeping the folded flaps on the inside. This forms the basic body of your plane. The nose should now be a sharp, reinforced point.
Fifth, to fold the wings, lay the plane on its side. Fold the top layer down. The fold line should run parallel to the bottom edge (the fuselage), about 1 to 1.5 centimeters above it. Flip the plane over and repeat the fold on the other side, matching the wing size and angle exactly to the first wing.
Sixth, open the wings up so they form a flat, horizontal plane relative to the vertical fuselage. The body of the plane should form a tight “Y” shape when viewed from the front. Check that the wings are level and do not sag or twist.
Tuning Your Airplane for Perfectly Straight Flight
Even a perfectly folded paper airplane may require minor adjustments once it meets the air. If your plane dives straight into the ground or climbs rapidly only to stall and fall, you can easily tune its flight path using simple aerodynamic principles.
To correct a diving plane, make tiny upward bends on the trailing edges of both wings. These act as elevators. When air flows over the wings, it pushes down on these raised edges, forcing the tail down and lifting the nose up. Conversely, if your plane climbs too steeply, stalls, and drops, bend the trailing edges slightly downward to push the nose down. Make these adjustments in tiny increments—less than a millimeter at a time—to avoid overcorrecting.
If your plane spirals or rolls to one side, check its dihedral angle. When viewed from the front, the wings should tilt slightly upward, forming a shallow “V” shape rather than sitting perfectly flat or angling downward. This upward tilt provides automatic roll stability. If the plane starts to tilt to the left, the left wing becomes more horizontal, generating more lift and naturally pushing the plane back to a level position.
Nose weight is critical for maintaining forward momentum. If the nose is too light, the plane will stall. If it is too heavy, it will dive. If your glider consistently dives despite upward elevator adjustments, check if the nose folds have slipped or if the paper has absorbed moisture from high local humidity, which adds weight to the front folds. Gently flattening the nose folds can help restore the correct balance.
Throwing Techniques to Maximize Flight Distance
The best aerodynamic design will fail to reach its potential without the proper launch technique. How you hold and release your paper airplane determines its initial velocity and stability.
Hold the airplane at its center of gravity, which is typically located along the bottom of the fuselage, slightly forward of the middle point. Grip the paper firmly but gently with your thumb and index finger at the thickest part of the fold, just behind the nose folds. Holding it too far back will cause the nose to pitch up immediately upon release, while holding it too far forward can cause a premature downward tilt.
The launch angle must match the design of your plane. For a streamlined distance glider like the one folded above, aim for a slightly upward launch angle of about 10 to 15 degrees relative to the horizon. Throwing it too high (above 30 degrees) will cause it to climb rapidly, lose speed, and stall. For heavy, narrow darts, a level or even slightly downward throw with high velocity is more effective at cutting through the air.
Match your throwing force to the structural integrity of the paper. A common mistake is throwing the plane with maximum force. This often causes the wings to flutter or bend backward under the sudden wind resistance, ruining the aerodynamics. Instead, use a smooth, firm, and consistent forward stroke, releasing the plane cleanly from your fingertips without twisting your wrist.
Frequently Asked Questions (FAQ)
Can I use tape or paperclips to improve flight performance?
Yes, but with careful moderation. Adding a small paperclip to the nose of your paper airplane can shift its center of gravity forward, which is highly beneficial if your plane tends to stall and loop backward. A tiny piece of clear tape can also be used to secure the loose folds of the fuselage or hold the wings together at the top, preventing them from spreading apart during high-speed flight. However, avoid using excessive tape or large paperclips. Added weight increases the wing loading, requiring a much faster throw to stay airborne, and bulky tape can create aerodynamic drag that ultimately reduces your total flight distance.
Does the color or brand of paper affect how far it flies?
No, the color, dye, or brand of the paper has no direct impact on how far or straight your airplane flies. Aerodynamics are governed purely by physical properties: weight, stiffness, thickness, and surface texture. Whether you use a premium branded sheet or a generic white bond paper from a local school supply shop, the flight performance will be identical as long as the paper weight (such as 70 or 80 gsm) and dimensions are the same. Focus your attention on precise folding and proper wing tuning rather than searching for specific brands or colors.
Community discussion
Share your experience or ask a question. Comments are reviewed before publication.