
Folding a paper airplane that consistently flies far and straight is a satisfying blend of basic aerodynamics and precise craftsmanship. While anyone can fold a sheet of paper into a rudimentary glider, achieving a long, stable flight path requires careful attention to paper selection, folding symmetry, and post-fold adjustments. In tropical environments like the Philippines, where high relative humidity can quickly soften paper fibers and compromise structural integrity, mastering these techniques is essential to keep your aircraft aloft. By understanding how lift, drag, gravity, and thrust interact with a simple sheet of paper, you can transform a standard piece of stationery into a high-performing glider.
Every crease you make alters the distribution of weight and the aerodynamic profile of the wings. A minor misalignment of even a millimeter can cause the plane to spiral, dive, or stall. This guide will walk you through the optimal preparation, step-by-step folding instructions for a classic distance-optimized dart, and the fine-tuning methods used to correct common flight errors.
Choosing the Right Paper and Workspace
The foundation of a high-performing paper airplane lies in the material you choose and the environment in which you construct it. Standard printer paper, often referred to locally as bond paper, serves as the ideal baseline for most distance designs. Specifically, paper with a weight of 70 gsm to 80 gsm (Substance 20 to 24) provides the optimal balance between structural stiffness and overall weight. This weight class is heavy enough to carry forward momentum through the air while remaining light enough for the wings to generate sufficient lift.
Products mentioned in this guide
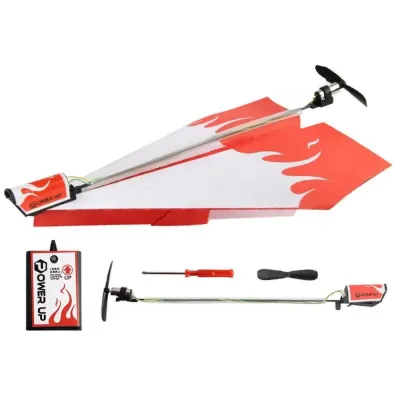
Prices are valid at publication and may change. Please refer to the product page for the latest price.
Using paper that falls outside this optimal range introduces significant flight challenges. Heavier materials, such as cardstock, require high throwing velocities to stay airborne and frequently result in immediate nosedives. Conversely, lighter papers, such as newsprint or thin notebook paper, lack the physical momentum needed to cut through air resistance. Furthermore, thin papers are highly susceptible to absorbing moisture from the air, causing the wings to droop and warp almost immediately in humid tropical climates.
Equally important is the surface on which you fold. A hard, flat, and clean workspace—such as a wooden study desk, a glass dining table, or a sturdy clipboard—is essential for achieving the sharp, precise creases required for aerodynamic symmetry. Folding on soft surfaces like a bed or carpet prevents you from locking the paper fibers into tight creases. This results in rounded edges that lift during flight, creating unwanted drag and causing the plane to lose speed rapidly. For the best results, keep a plastic ruler nearby to press down and solidify every fold.
Step-by-Step Guide to the Classic Dart Design
The classic dart is the quintessential design for achieving maximum distance and a straight flight path. Its narrow profile minimizes drag, while its concentrated nose weight helps maintain forward momentum. To begin, place a standard A4 or letter-sized sheet of printer paper vertically on your flat workspace.

First, fold the paper in half lengthwise, aligning the corners with absolute precision before pressing down. Run your fingernail or a plastic ruler along the crease to make it as sharp as possible. Unfold the paper so that it lies flat again, revealing a clean, perfectly centered vertical crease running down the middle of the sheet.
Second, fold the top left corner downward and inward so that the top edge aligns perfectly with the center crease. Repeat this process with the top right corner. You should now have a neat triangular point at the top of your paper, with the two diagonal edges meeting precisely along the center line without overlapping.
Third, perform the second major fold to narrow the nose. Take the newly formed diagonal edge on the left side and fold it inward toward the center crease. The fold must start exactly at the very tip of the nose and run all the way down. Repeat this step on the right side. This fold creates a sleeker wedge shape, doubling the thickness of the paper near the nose and shifting the center of gravity forward.
Fourth, fold the entire airplane in half along the original center crease. The folded flaps should now be tucked completely inside the body of the plane, leaving a smooth, flat exterior. Press down firmly along the bottom spine of the plane to lock all the internal layers together.
Fifth, fold the first wing down. The fold line should run parallel to the bottom spine, starting about 1 to 1.5 centimeters above the spine at the nose and maintaining that same distance to the tail. Flip the plane over and fold the second wing down, using the first wing as a guide to ensure they are perfectly identical.
Sixth, gently unfold the wings so they stand outward. When viewed from the front, the wings should form a flat plane or a very slight upward angle. Look down the length of the plane from both ends to verify that the left and right sides are perfectly symmetrical before your first test flight.
Fine-Tuning for Distance and Stability
Even a perfectly folded paper airplane may require minor adjustments to account for atmospheric conditions, paper imperfections, or throwing style. Fine-tuning is the process of diagnosing flight errors and making small physical modifications to correct them. The most common flight issues involve pitch (the nose pointing too far up or down) and roll (the plane tilting and spiraling).
If your paper airplane immediately dives toward the ground upon release, it is suffering from a downward pitch issue. To correct this, locate the trailing (back) edges of both wings. Use your thumb and index finger to gently bend the very back edges of the wings upward by a millimeter or two. This modification acts like the elevators on a real aircraft, creating downward aerodynamic force on the tail, which naturally lifts the nose during flight. Conversely, if the plane climbs too steeply, stalls, and then drops like a stone, bend the trailing edges slightly downward to help keep the nose level.
To prevent your plane from rolling over and spiraling into the ground, you must adjust the dihedral angle. When looking at the airplane from the rear, the wings should form a slight “Y” shape relative to the vertical fuselage, rather than a flat “T” or a drooping “V”. This upward angle provides natural roll stability. If the plane begins to tilt to one side during flight, the lower wing automatically becomes more horizontal, generating more lift than the raised wing and naturally pushing the plane back to a level position.
Before every flight, run through a quick symmetry checklist. Ensure that the nose point is perfectly centered and has not been crushed by previous landings. Check that both wings are folded at the exact same height along the fuselage and that the upward bend on the trailing edges is identical on both sides. Asymmetry is the primary cause of spiraling, as it creates uneven lift and drag on one side of the aircraft.
In some cases, particularly when using lighter paper or if the nose folds have become slightly loose, the plane may consistently stall despite wing adjustments. A practical, conditional fix is to slide a small metal paperclip onto the nose of the plane. This adds concentrated weight to the front, shifting the center of gravity forward and helping the plane cut through the air more effectively. However, only use this modification if the plane is stalling; adding too much weight to an already balanced plane will cause it to dive.
Throwing Techniques for Maximum Distance
The way you launch your paper airplane is just as important as how you fold it. Even a perfectly balanced glider will fail to perform if it is thrown incorrectly. To maximize distance, you must master the proper grip, arm motion, and release angle.
Begin with the correct grip. Pinch the vertical fuselage firmly between your thumb and index finger, placing your grip near the plane’s center of gravity. For a classic dart design, this point is typically located in the front third of the bottom spine, just behind the heavy nose folds. Avoid gripping the plane too far back, as this can cause the tail to wobble during release. Never grip the wings themselves, as this can warp the paper and ruin the aerodynamic profile.
When launching the plane, use a smooth, level, and controlled throwing motion. A common mistake is throwing the paper airplane with an aggressive, upward pitching motion. This high-velocity upward arc usually forces the plane into an immediate stall. Instead, keep your shoulder relaxed, bring the plane back near your ear, and push forward in a straight, horizontal line. Focus on a clean release, letting the plane slide smoothly out of your fingers without any sudden wrist snaps.
Finally, adjust your release angle based on your environment. If you are throwing indoors, where the air is completely still, a perfectly level throw at eye height will yield the longest, straightest flight path. If you are testing your plane outdoors, pay close attention to local wind conditions. Throwing directly into a very gentle breeze can provide extra lift, allowing the plane to glide further. However, strong gusts will easily buffet a lightweight paper structure, so it is best to wait for calm conditions or find an open indoor space for optimal distance testing.
Frequently Asked Questions (FAQ)
Why does my paper airplane keep turning to one side?
A persistent turn to one side is almost always caused by physical asymmetry in the plane’s construction. Inspect the nose to ensure it is perfectly centered and not bent to the left or right. Next, check the wings to confirm they are folded at the exact same height and have the same upward angle. If the plane consistently veers to the left, you can correct this yaw by gently bending the trailing edge of the left wing slightly upward, or bending the trailing edge of the right wing slightly downward, which creates counteracting aerodynamic forces to straighten the flight path.
Does the type of paper change how far the airplane flies?
Yes, the weight, thickness, and stiffness of the paper directly dictate the airplane’s flight characteristics. Standard 70 to 80 gsm copy paper provides the ideal balance of weight and fold retention for distance gliders. Heavier cardstock is too dense for standard dart designs to generate sufficient lift, while thin notebook paper lacks the structural rigidity to withstand the force of a strong throw. Additionally, environmental factors like high humidity can soften paper fibers over time, reducing stiffness and causing the wings to warp, which makes using fresh, dry sheets crucial for peak performance.
Community discussion
Share your experience or ask a question. Comments are reviewed before publication.