
Folding paper star strips into three-dimensional lucky stars—often called origami lucky stars—is a delightful and meditative craft that has captivated makers for generations. These tiny, dimensional paper gems are traditionally folded from long, slender strips of paper and stored in glass jars as symbols of good fortune, love, and well-wishes. While the finished stars look intricate and professionally made, the underlying technique relies on a simple, repeatable sequence of geometric folds that anyone can master with a bit of practice. By understanding how the paper behaves under tension and learning how to manipulate the folds, you can easily transform a flat strip of paper into a perfectly plump, symmetrical 3D star.
Preparing Your Paper Star Strips and Workspace
Before folding your first star, selecting the right paper and preparing a comfortable workspace will set you up for success. You can choose between purchasing pre-cut paper star strips or cutting your own from standard sheets of paper. Pre-cut strips are widely available at local stationery shops and bookstores across the Philippines, often sold in vibrant multi-colored packs, metallic finishes, or pastel gradients for under ₱50. These commercial strips are highly recommended for beginners because they are cut to precise, uniform dimensions, ensuring consistent results.
If you decide to cut your own strips, paper weight and dimensions are critical factors to consider. Standard copy paper (around 70 to 80 gsm) works exceptionally well because it is pliable enough to fold easily but sturdy enough to hold its shape when puffed. Avoid using heavy cardstock, which is too stiff to knot without cracking, or extremely thin tissue paper, which will tear during the final shaping phase. A standard beginner-friendly dimension is 1 centimeter wide by 25 to 30 centimeters long. This length-to-width ratio provides enough layers to build a solid core without making the star too thick to pinch.
Products mentioned in this guide
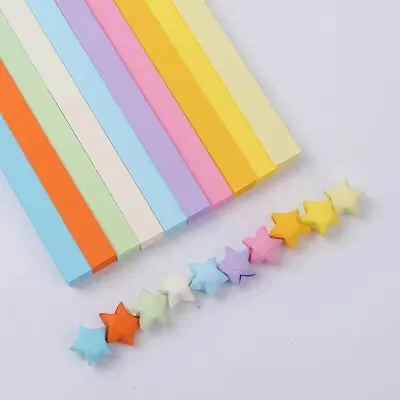
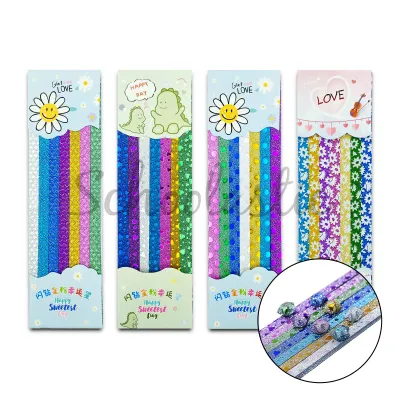
64 Lazada user ratings
Perfect for DIY projects, Relaxing and therapeutic activity, Beautiful finished stars,
Great quality. Fast delivery
Perfect for DIY projects,
Quality:ok salamat
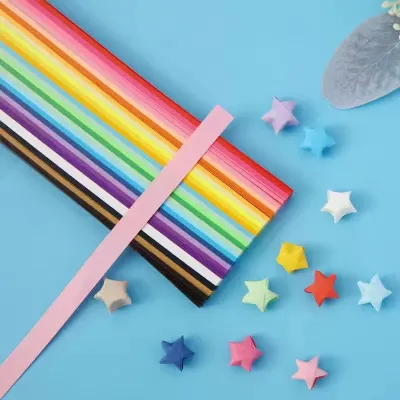
301 Lazada user ratings
Ideal for kids' art and craft activities, High-quality paper strips for durability, Perfect for origami enthusiasts, Great for making lucky …Read full reviewShow less
Ideal for kids' art and craft activities, High-quality paper strips for durability, Perfect for origami enthusiasts, Great for making lucky star decorations,
Great for making lucky star decorations, Endless possibilities for DIY projects, Easy to fold and create unique designs, Perfect for origami…Read full reviewShow less
Great for making lucky star decorations, Endless possibilities for DIY projects, Easy to fold and create unique designs, Perfect for origami enthusiasts,
Unique and eye-catching designs, Vibrant colors for creative crafts, Perfect for origami enthusiasts, Endless possibilities for DIY projects…Read full reviewShow less
Unique and eye-catching designs, Vibrant colors for creative crafts, Perfect for origami enthusiasts, Endless possibilities for DIY projects,
Easy to fold and create unique designs, Fun and colorful addition to any project, Ideal for kids' art and craft activities,
Endless possibilities for DIY projects, Great for making lucky star decorations, Perfect for origami enthusiasts,
2,125 Lazada user ratings
💰Price:low price, the product is very cheap but good ✅Quality:quality is good and vibrant colors 🌈Variety:soo many options, very aesthetic
Salamat seller tnx u po maraming salamat seller salamat po sa uulitin po... very good items im will buy again thank you very much.
bottle is very well secured, ensuring it doesnt break dueing shipping thank u seller for always being considerate 💞
175 Lazada user ratings
Quality:goodGreat for making lucky star gifts, Express your creativity with these paper strips, High-quality paper for durable crafts, Add a…Read full reviewShow less
Quality:goodGreat for making lucky star gifts, Express your creativity with these paper strips, High-quality paper for durable crafts, Add a colorful touch to your decorations,
Add a colorful touch to your decorations,
High-quality paper for durable crafts,
Quality:10 Appearance:10
thank you seller 🥰
241 Lazada user ratings
Easy to fold and shape, Bright colors that pop, Thick and firm finish, Fun and creative activity, Great for hand arts projects,
Quality:Good quality Size:Good Design:Good Price:Affordable Thank you seller super bilis ng delivery will order again! ❤️❤️❤️
Handmade crafting experience, Colorful origami paper strips, Sturdy and not easy to tear, Fun and creative activity,
Colorful origami paper strips, Fun family activity item, Perfect for DIY lucky stars, Colorful and vibrant strips,
Easy to fold and shape, Sturdy and not easy to tear, Perfect for DIY origami stars, Fun family activity item,
388 Lazada user ratings
Quality:Beautiful origami paper!, High-quality paper!, Perfect for crafting!, legit siya and màrami ,ang cute rin love it thank you seller S…Read full reviewShow less
Quality:Beautiful origami paper!, High-quality paper!, Perfect for crafting!, legit siya and màrami ,ang cute rin love it thank you seller Size:Tama lang yung haba perfect for making star Design:Maganda legit and ang cute nang pagkàpink niya Price:super affordable and worth it talaga
Makes beautiful decorations!, High-quality paper!, Price:worth it Design: unique Size:cute Quality:good sa dami kong inorder, ito nalang ang…Read full reviewShow less
Makes beautiful decorations!, High-quality paper!, Price:worth it Design: unique Size:cute Quality:good sa dami kong inorder, ito nalang ang natira. ubos na lahat 😆
Makes beautiful decorations!, Great value for money!, Easy to fold!, Beautiful origami paper!, Perfect for crafting!, Size:cute Design:cute …Read full reviewShow less
Makes beautiful decorations!, Great value for money!, Easy to fold!, Beautiful origami paper!, Perfect for crafting!, Size:cute Design:cute Price:affordable
High-quality paper material, Great for DIY and crafts, High-quality paper material, nice color combination
11 Lazada user ratings
Ideal for DIY projects, Good packaging, Easy to fold, thank you so much seller ang lazada
Prices are valid at publication and may change. Please refer to the product page for the latest price.
Your workspace should be a flat, clean, and dry surface, such as a study desk or dining table. In tropical climates where humidity can be high, paper can absorb moisture from the air, making it limp and difficult to crease cleanly. Working in a dry, well-ventilated room or under a fan helps keep the paper crisp. Additionally, ensure your hands are clean and dry before starting; sweat or natural skin oils can smudge printed patterns or soften the paper fibers, weakening the structural integrity of your star.
Forming the Initial Pentagon Knot
The foundation of every 3D lucky star is the initial pentagon knot. This first step is the most critical part of the entire process, as it establishes the five-sided geometry that guides all subsequent folds. If your initial knot is lopsided or loose, the finished star will be asymmetrical and difficult to puff up.

To begin, hold the paper star strip near one end, leaving a short tail of about 2 to 3 centimeters. Loop the long end of the strip over and under the short end to create a simple, loose overhand knot, much like the first step of tying a shoelace. Gently thread the short tail through the center of the loop you have just created.
Once the tail is threaded, slowly pull both ends of the strip to tighten the knot. Do not pull too quickly or forcefully, as this can easily tear the paper. As the loop shrinks, use your fingertips to guide the paper flat. You will notice the paper naturally aligning itself into a five-sided pentagon shape.
Before pressing the knot completely flat, check that all five sides of the pentagon are equal in length and that there are no gaps or overlapping folds in the center. Once the shape is perfectly aligned, use the pad of your thumb to press the knot flat, creating crisp, clean creases along the edges. The short tail should now be pointing in one direction, while the long tail extends outward from one of the pentagon’s sides. Fold the short tail inward along the edge of the pentagon so it lies flat against the body of the knot. If the tail is too long and extends past the opposite edge, you can trim it slightly with scissors or fold it backward to tuck it neatly inside the structure.
Wrapping the Strip Around the Core
With your flat pentagon base secured, you are ready to begin wrapping the long tail of the paper star strip around the core. This repetitive wrapping process builds up the thickness of the star, creating the structural layers necessary to support the three-dimensional shape.
Hold the pentagon base gently between your fingers. Take the long tail of the strip and fold it over the opposite edge of the pentagon. Because of the pentagonal geometry, the paper will naturally align itself with one of the angled sides. Do not try to force the paper in a different direction; simply let it follow the natural path established by the edges of the knot.
Flip the pentagon over and fold the strip over the next edge. Continue this wrapping pattern, folding the strip over one edge after another. Each fold should cover a different side of the pentagon, gradually building up even layers on all five sides.
As you wrap, pay close attention to the tension of the paper. Maintaining the correct tension is a balancing act that requires a gentle touch. If you wrap the strip too tightly, the layers will compress into a solid, rigid block, leaving no internal space for the star to expand when you try to puff it up. Conversely, if you wrap too loosely, the layers will slide around, causing the star to lose its shape or unravel entirely. The paper should wrap snugly against the edges of the core, resting flat without being pulled taut. Continue wrapping until you have only a short tail of about 1.5 to 2 centimeters remaining.
Securing the Tail and Shaping the 3D Star
Once you reach the end of the strip, you must secure the remaining tail to prevent the star from unraveling before you shape it. Look closely at the face of your wrapped pentagon; you should see a small pocket or flap created by the previous layers of wrapped paper.
Take the end of the short tail and tuck it securely into this pocket. If the tail is slightly too long to fit cleanly inside the pocket without buckling, use a pair of scissors to trim the tip at a slight angle. This angled cut makes it much easier to slide the paper smoothly under the wrapped layers. Once tucked in, press the entire pentagon flat one last time to ensure everything is locked in place. You should now have a neat, completely flat, five-sided paper pentagon.
Now comes the most exciting and satisfying part of the craft: transforming the flat pentagon into a three-dimensional star. Hold the flat pentagon vertically between the thumb and index finger of your non-dominant hand, gripping it gently by its flat faces.
Using the fingernail or the side of your thumb on your dominant hand, press slowly and firmly inward on the center of one of the five flat edges. As you apply pressure, the edge should cave inward, causing the front and back faces of the pentagon to puff outward.
Rotate the star slightly and repeat this pinching motion on the next edge. Work your way around all five sides of the star, applying gentle, even pressure to each edge. It is best to go around the star gradually, making small indentations on each side first, rather than trying to fully puff one side all at once. This gradual approach ensures that the air and paper volume are distributed evenly, resulting in a symmetrical, plump star with sharp, well-defined points.
Troubleshooting Common Folding Mistakes
Even with careful attention, beginners often encounter a few common physical challenges when learning to fold paper stars. Understanding why these mistakes happen makes it much easier to correct your technique on subsequent attempts.
One of the most frequent issues is a star that refuses to puff up, resulting in a crushed or flattened shape when you try to pinch the edges. This is almost always caused by wrapping the paper strip too tightly around the core during the wrapping phase. When the layers are wrapped with too much tension, they bind together tightly, eliminating the internal air pocket needed for expansion. To resolve this, focus on wrapping the paper with a lighter touch, allowing the strip to rest naturally against the edges without pulling it taut.
Another common problem is a lopsided or asymmetrical star, where some points are longer or sharper than others. This is typically caused by an irregular initial pentagon knot. If the first knot is not perfectly symmetrical, every subsequent layer of paper will be misaligned, throwing off the geometry of the final shape. To prevent this, take your time during the very first step to adjust the knot carefully before creasing it flat, ensuring all five sides of the pentagon are of equal length.
Finally, you may experience paper tearing at the crease lines during the shaping phase. This can occur if the paper is too thin, brittle, or damp from high local humidity. It can also happen if you pinch the edges too aggressively with sharp fingernails. To avoid tears, try using a slightly higher quality paper stock with a weight of 80 to 90 gsm, keep your hands dry, and use the flat pad of your finger rather than a sharp nail to push the edges inward.
Frequently Asked Questions (FAQ)
Can I use regular printer paper instead of pre-cut star strips?
Yes, standard printer paper is an excellent alternative to pre-cut strips. To make your own strips, use a sheet of standard A4 or letter-sized paper (typically 80 gsm). Using a metal ruler and a sharp utility knife or paper trimmer, cut strips that are exactly 1 centimeter wide along the length of the paper, which will give you a strip length of approximately 28 to 30 centimeters. Ensure your cuts are perfectly straight and uniform; any variation in width along the strip will make wrapping difficult and result in an uneven star. If you are crafting with children, ensure an adult handles the utility knife or paper trimmer to maintain safety.
How do I store finished paper stars to keep them from crushing?
Because 3D paper stars are hollow, they can easily be crushed if subjected to weight or pressure. To preserve their shape, store them in rigid containers such as clear glass jars, acrylic display boxes, or sturdy tin containers. Avoid storing them in soft plastic bags or cardboard boxes, which can easily bend or compress. In the tropical climate of the Philippines, high humidity can soften paper fibers over time, causing the stars to lose their puffiness. To prevent this, keep your storage containers tightly sealed and place a small packet of silica gel inside to absorb any excess moisture. Keep the containers out of direct sunlight to prevent the paper colors from fading.
What is the best way to string paper stars into a garland?
Stringing paper stars into a garland is a beautiful way to display your finished crafts. To do this without crushing the stars, use a thin, sharp sewing needle and a lightweight thread, such as clear nylon monofilament or fine embroidery thread. Carefully insert the needle through one of the indented valleys of the star and push it straight through to the opposite point, or pass it directly through the center core where the paper layers meet. Push the needle slowly to avoid collapsing the puffed sides. To keep the stars spaced evenly along the garland, tie a small knot in the thread on both sides of each star to lock them in position.

Community discussion
Share your experience or ask a question. Comments are reviewed before publication.