
Elevating a gift presentation from simple to spectacular often comes down to the tactile and visual depth of your finishing touches. Layering ribbons of different widths, textures, and colors creates a structured, multi-dimensional look that immediately signals care and quality. By mastering the balance of visual weight, selecting compatible materials that withstand local environmental factors, and applying clean securing techniques, you can transform any standard gift box into a professional-grade presentation. Whether you are preparing a gift for a special occasion or styling retail packaging, understanding how different textiles interact is key to a flawless finish.
Choosing the Right Ribbon Elements for Layering
To build a successful layered ribbon design, you must first select materials that complement each other in scale, texture, and physical behavior. The foundation of any layered look is the width ratio between your base and accent ribbons. A reliable rule of thumb is to maintain a 2:1 or 3:1 ratio. For example, pairing a wide 38mm base ribbon with a narrow 12mm or 9mm accent ribbon ensures that the base layer remains clearly visible on both sides, creating a beautifully framed border. If the accent ribbon is too wide, it will swallow the base; if it is too narrow, it will look like a thin thread lost on a wide band of fabric.
Texture contrast is equally vital for creating visual depth. Combining a high-shine material like double-faced satin with a heavily ribbed, matte material like grosgrain creates instant sophistication. You can also experiment with transparency by layering a sheer organza ribbon over a solid cotton herringbone or velvet base. The sheer layer softens the bold color of the base while adding a delicate, light-catching quality to the package.
Products mentioned in this guide
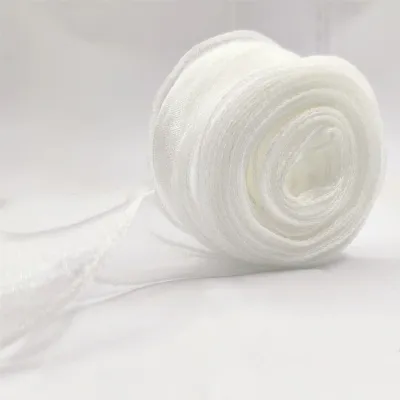
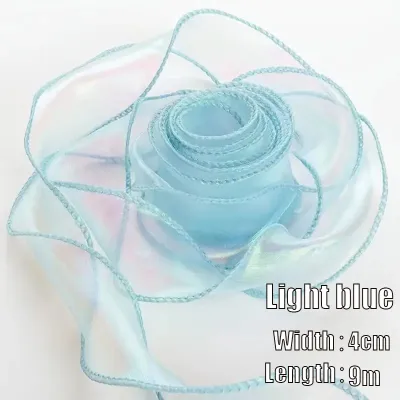
Prices are valid at publication and may change. Please refer to the product page for the latest price.
Finally, consider how your chosen ribbons interact with the wrapping paper and the local climate. In warm, humid tropical environments, certain materials behave differently. Starch-stiffened paper ribbons can lose their crispness and become limp, making synthetic polyester satins, grosgrains, and woven cottons much more reliable choices. Furthermore, glossy wrapping papers offer very little surface friction, causing smooth ribbons to slide out of alignment. Textured papers, such as kraft paper or handmade cotton sheets, provide excellent grip but can be prone to scuffing or tearing if a ribbon is pulled too tightly. Always test your ribbon tension and any temporary adhesives on a scrap piece of wrapping paper first to ensure you do not damage the surface.
Effective Ribbon Layering Combinations
Creating a cohesive look requires a thoughtful approach to color, texture, and the overall theme of the gift. For a classic, elegant presentation, pair a wide, structured grosgrain base in a deep jewel tone—such as emerald green, navy blue, or rich burgundy—with a narrow, metallic gold or silver satin accent ribbon. The sturdy grosgrain provides excellent structural support for large, voluminous bows, while the metallic accent catches the light and adds a festive, premium feel. This combination is highly versatile and works beautifully for formal occasions, weddings, and year-end holidays.

If you prefer a rustic, natural aesthetic, look to organic textures. Combine a wide, woven jute or burlap base with a thin, delicate cotton twine or linen ribbon. This pairing is highly effective when wrapped around simple brown kraft paper or textured matte wrapping sheets. The coarse, earthy texture of the jute contrasts beautifully with the clean, soft lines of the cotton overlay, creating a tactile experience that feels both thoughtful and grounded. You can complete this look by tucking a small sprig of dried lavender or a dried botanical leaf under the accent twine.
For a modern, minimalist approach, focus on subtle texture shifts rather than high color contrast. Tone-on-tone pairings—such as layering a matte paper ribbon over a satin ribbon of the exact same shade—create a sophisticated, architectural look. This technique relies on the way light reflects off different surfaces to define the layers, resulting in a clean, understated presentation that feels incredibly high-end.
Always scale your ribbon choices to the physical dimensions of the gift box and the pattern density of the wrapping paper. A small jewelry box will be completely overwhelmed by a wide 50mm ribbon; instead, scale down to a 15mm base and a 3mm satin cord. Conversely, a large shirt box wrapped in a busy, high-density floral pattern requires a solid, wide ribbon combination to anchor the design and give the eyes a place to rest. If the wrapping paper is highly detailed, keep your ribbons solid and monochromatic to avoid visual chaos.
Step-by-Step Techniques for Layering and Securing Ribbons
Achieving a clean, professional finish requires precise alignment and tension control during the wrapping process. To begin, lay your base ribbon flat on a clean, dry work surface. Measure and cut your accent ribbon to the same length, adding an extra 10 to 15 centimeters if you plan to tie a complex bow. To center the accent ribbon perfectly, fold both ribbons in half to find their midpoints. Align these center marks, and use a tiny dot of low-tack double-sided tape or a fabric-safe adhesive runner to bond the two layers together at the center. This prevents the accent ribbon from shifting or twisting as you wrap the box.
When wrapping the ribbons around the gift box, maintaining consistent tension is crucial. If you are working with a slippery, high-gloss wrapping paper, wrap the base ribbon around the box first and secure it tightly at the bottom with a flat knot or a strip of clear tape. Once the base is anchored, layer the accent ribbon directly over it, pulling it slightly tighter than the base to lock it flat against the fabric. This two-step wrapping method prevents the layers from sliding apart and ensures a crisp, professional fit.
Tying a layered bow can quickly result in a bulky, messy knot, especially when using thicker materials like velvet, heavy grosgrain, or wired ribbons. To manage this bulk and keep the presentation clean, tie the base ribbon into a secure, flat double knot first, leaving the tails long. Next, thread the accent ribbon through the center of that knot before tying the final bow loops. This technique reduces the thickness of the central knot, prevents the ribbons from twisting, and ensures that both layers remain perfectly visible and beautifully aligned in the final bow. Once tied, use sharp fabric shears to cut the ribbon tails at a clean 45-degree angle or a classic V-shape to prevent fraying.
Ribbon Pairing Mistakes and What to Avoid
One of the most common mistakes in ribbon layering is visual clutter. Mixing multiple patterned ribbons, such as a plaid base with a polka-dot accent, creates a chaotic look that distracts from the gift itself. Without a solid, unifying element, the layers compete for attention. To avoid this, stick to a maximum of one patterned ribbon per combination, pairing it with a solid, complementary color that pulls a specific tone from the pattern.
Another frequent error is structural mismatch. Pairing a heavy, stiff wired ribbon on top of a delicate, easily crushed organza or silk base will cause the bottom layer to bunch up, ruin the clean lines, and potentially tear the wrapping paper underneath. The base ribbon must always be structurally equal to or stronger than the accent ribbon. If you want to use a heavy, wired accent ribbon for a dramatic bow, ensure your base ribbon is a sturdy grosgrain or a thick cotton weave that can support the weight without collapsing.
Finally, avoid proportion errors where the accent ribbon is too wide for the base. If your accent ribbon covers more than two-thirds of the base ribbon, the framing effect is lost, and the presentation will look bulky and poorly planned. Always maintain a clear margin of at least 6mm to 12mm of the base ribbon visible on either side of the accent to create a balanced, intentional border.
Frequently Asked Questions (FAQ)
Can I layer ribbons with different care or handling instructions? (FAQ)
Yes, but you must consider how the gift will be handled and whether the ribbons are intended for reuse. If you are combining a delicate silk ribbon with a stiff, synthetic wired ribbon, avoid using permanent fabric glues or heavy adhesives that can stain or dissolve delicate fibers. Always check the manufacturer’s labels or product descriptions for material composition. If you need to secure them, opt for mechanical hold, such as a tight knot, or use low-tack, acid-free adhesive dots that can be peeled away gently without leaving a greasy residue or tearing the fabric.
How do I keep layered ribbons from slipping while tying a bow? (FAQ)
Slippery materials like single-faced satin can be challenging to keep aligned during the tying process. To prevent slipping, you can use temporary, low-tack painter’s tape to hold the ribbon ends flat against the box while you work on the knot. Alternatively, tying a simple surgeon’s knot—looping the ribbon through twice before pulling tight—adds extra friction that holds the tension while you form the loops. If the materials are exceptionally slick, consider swapping one of the layers for a high-friction ribbon like grosgrain or cotton herringbone, which naturally grips other fabrics and prevents sliding.
Community discussion
Share your experience or ask a question. Comments are reviewed before publication.