
Combining sticker labels and washi tape is an art form that transforms a simple journal page into a structured, visually engaging layout. By layering these two versatile stationery items, you can create depth, establish clear focal points, and organize your thoughts beautifully. To achieve a cohesive look, you must balance the bold, defined shapes of sticker labels with the soft, repetitive patterns of washi tape. This guide explores the practical techniques, layout principles, and material considerations needed to master this layering process, ensuring your journal spreads remain both functional and artistic.
Understanding the Roles of Sticker Labels and Washi Tape
Every successful journal spread relies on a clear division of labor between your decorative elements. Understanding how each material functions visually prevents your pages from looking chaotic or cluttered.
A sticker label serves primarily as a focal point, a text anchor, or a thematic centerpiece. Because they often feature distinct borders, solid backgrounds, or specific illustrations, they naturally draw the reader’s eye. You can use them to frame headers, highlight dates, or mark important notes within your daily entries.
Products mentioned in this guide
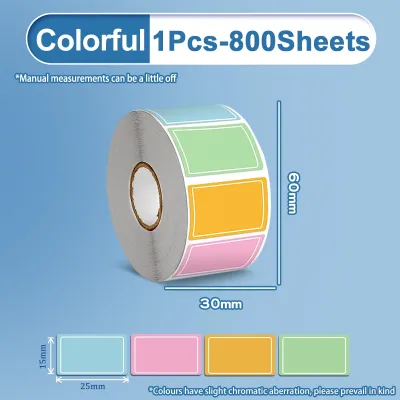
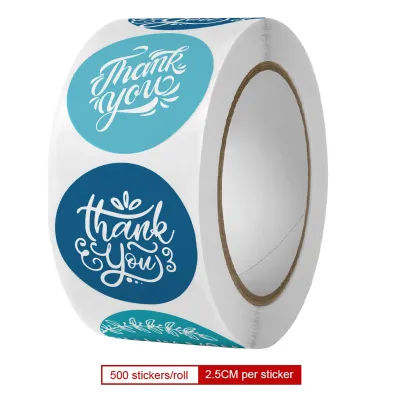
Prices are valid at publication and may change. Please refer to the product page for the latest price.
Washi tape, on the other hand, excels at providing background textures, borders, page dividers, and blocks of color. Its semi-translucent nature allows it to blend softly into the page, making it the perfect foundation for layering. Instead of competing with your writing, it frames and supports the overall structure of the layout.
Before you begin peeling and pasting, it is crucial to check the paper weight of your journal and the adhesive specifications on your stationery packaging. In warm, humid tropical climates like the Philippines, paper can absorb moisture from the air, making it more susceptible to warping or tearing when heavy adhesives are applied. Matching lightweight washi tapes with compatible journal paper ensures your spreads remain flat and pristine over time.
Core Techniques for Pairing and Layering
Layering is more than just stacking stickers on top of tape; it requires a deliberate approach to visual hierarchy and material compatibility. By mastering a few foundational techniques, you can create a sense of physical depth on a flat page.

The first step is deciding which material will serve as your base layer and which will sit on top. Generally, the wider, more translucent washi tape forms the background, while the opaque, highly defined sticker label sits on top to command attention. This arrangement establishes a clear visual hierarchy that guides the eye naturally across the page.
Because adhesives and paper finishes vary widely, always test your combination on a scrap page or an inconspicuous back page of your journal first. This simple test allows you to check for adhesive strength, paper bleed, and ink compatibility without risking your main layout.
Layering Washi Tape Behind Sticker Labels
Using washi tape as a backing or frame is one of the easiest ways to make a simple sticker label stand out. By placing a strip of tape behind a label, you create a contrast barrier that separates the sticker from the journal page.
You can create custom shapes or decorative borders by overlapping multiple strips of tape behind a central sticker label. For instance, crisscrossing two different patterns of tape at slight angles creates a dynamic, textured base that makes a rectangular label pop.
When choosing your backing tape, pay close attention to opacity and pattern density. A highly detailed, dark, or busy tape pattern can easily overpower a delicate sticker design. Opt for pastel tones, simple grids, or solid color blocks when layering beneath detailed labels.
For a clean, professional finish, trim any excess tape using sharp craft scissors or a precision utility knife. If you are using a knife, place a protective cutting mat or a thick piece of cardboard behind the page to prevent slicing through multiple sheets of your journal.
Using Sticker Labels to Anchor Washi Tape Borders
Instead of letting your washi tape lines run off the edge of the page or end abruptly, you can use sticker labels as visual anchors. This technique brings structure to your borders and makes your layout feel intentional.
Placing a sticker label at the corners or intersections of your tape dividers is an excellent way to hide uneven cuts or overlapping seams. A round or floral sticker placed over a harsh 90-degree tape corner softens the transition and adds an elegant touch.
You can also use thematic stickers to transition between different tape patterns or color zones. If you are shifting from a floral-patterned tape on one side of the page to a solid color block on the other, a coordinating botanical sticker label placed at the boundary line bridges the gap seamlessly.
When applying long strips of tape across a page to connect distant sticker anchors, be careful to adjust the tape tension. Pulling the tape too tightly can cause the journal paper to warp or buckle over time, especially in humid environments where paper fibers naturally expand and contract. Keep the tape relaxed as you smooth it down.
Building Cohesive Journal Spread Layouts
Once you have mastered individual layering techniques, the next step is arranging these clusters across a full page or a two-page spread. A balanced layout ensures that your decorative elements enhance your writing rather than distracting from it.
Start by establishing a consistent color palette or theme. You can achieve this by matching the accent colors in your washi tape patterns with the primary motifs of your sticker labels. For example, pairing a warm terracotta tape with cream-colored labels creates a cozy, vintage aesthetic, while cool blues and silver-foiled stickers offer a modern, clean look.
To distribute your sticker-and-tape clusters evenly, try using the rule of thirds or a basic grid system. Instead of placing all your decorations in one corner, position your main clusters diagonally across from each other. This diagonal balance guides the reader’s eye across the entire spread in a natural, flowing path.
One of the most common mistakes in journaling is overcrowding the page. Always leave adequate negative space—the blank areas of the page where no stickers, tape, or heavy writing exist. Negative space allows your combined elements to breathe, ensuring your journal remains highly legible and visually resting.
Before committing your elements permanently to the page, lay them out loosely and step back. Reviewing the overall spread from a distance of a few feet allows you to check the visual weight balance. If one side of the spread feels too heavy, you can easily adjust the placement of your stickers or shorten your tape strips before pressing them down.
Common Mistakes and Pairing Restrictions
While experimenting with stationery is highly encouraged, certain material combinations and layout choices can ruin your hard work. Being aware of these common pitfalls will save you time and preserve your favorite journals.
Avoid visual clutter by limiting the number of competing patterns in a single cluster. If you are using a highly detailed sticker label with intricate illustrations, pair it with a solid or minimally patterned washi tape. Combining a busy floral tape with a busy botanical sticker often results in a messy, illegible blob.
Be mindful of adhesive conflicts between different brands and materials. Some strong tape adhesives can bond permanently to delicate sticker paper, making it impossible to reposition them without tearing. Conversely, some low-tack washi tapes may peel away from glossy vinyl stickers over time.
Paper buckling is another common issue, especially when working with thin journal papers. Avoid excessive layering of thick vinyl stickers over multiple layers of heavy tape. The combined weight and moisture-blocking properties of these materials can cause the underlying paper to wrinkle, warp, or even tear under its own weight.
If you notice that your adhesives are reacting poorly—such as causing the paper to bubble, releasing a strong chemical odor, or causing your writing ink to smudge—stop the application immediately. Consult the manufacturer guidelines for both your journal and your adhesive products to verify compatibility.
Frequently Asked Questions (FAQ)
Can I write on washi tape before applying a sticker label over it?
Yes, but your success depends heavily on the tape material. Traditional paper-based washi tape accepts most inks well, whereas modern PET or plastic-based tapes will cause water-based inks to bead up and smudge.
Always test your pen’s ink drying time and smudge resistance on a scrap piece of tape before writing on your main layout. Gel pens and fountain pen inks require significantly longer to dry on semi-porous surfaces compared to ballpoint pens or permanent markers.
Additionally, ensure that the ink is completely dry before placing a sticker label over it. Any wet ink trapped beneath a sticker can dissolve the adhesive, causing the label to slide or peel off prematurely.
How do I remove layered tape and stickers without tearing my journal pages?
Removing layered stationery requires patience and a gentle touch. If your journal paper is thick enough to tolerate mild heat, you can use a craft heat gun or a hair dryer on its lowest setting to gently warm and soften the adhesives.
When peeling the tape or sticker away, always pull slowly and keep the material at a very low angle, almost flat against the page, rather than pulling straight up. This minimizes the upward tension on the delicate paper fibers beneath.
Keep in mind that very thin journal papers, such as lightweight Tomoe River paper, may tear regardless of the technique used. This makes initial scrap-page testing and the use of low-tack adhesives essential for preserving your pages.
Community discussion
Share your experience or ask a question. Comments are reviewed before publication.